Icebox Cake Recipes That’ll Chill You Out
Icebox Cake Recipes That'll Chill You Out
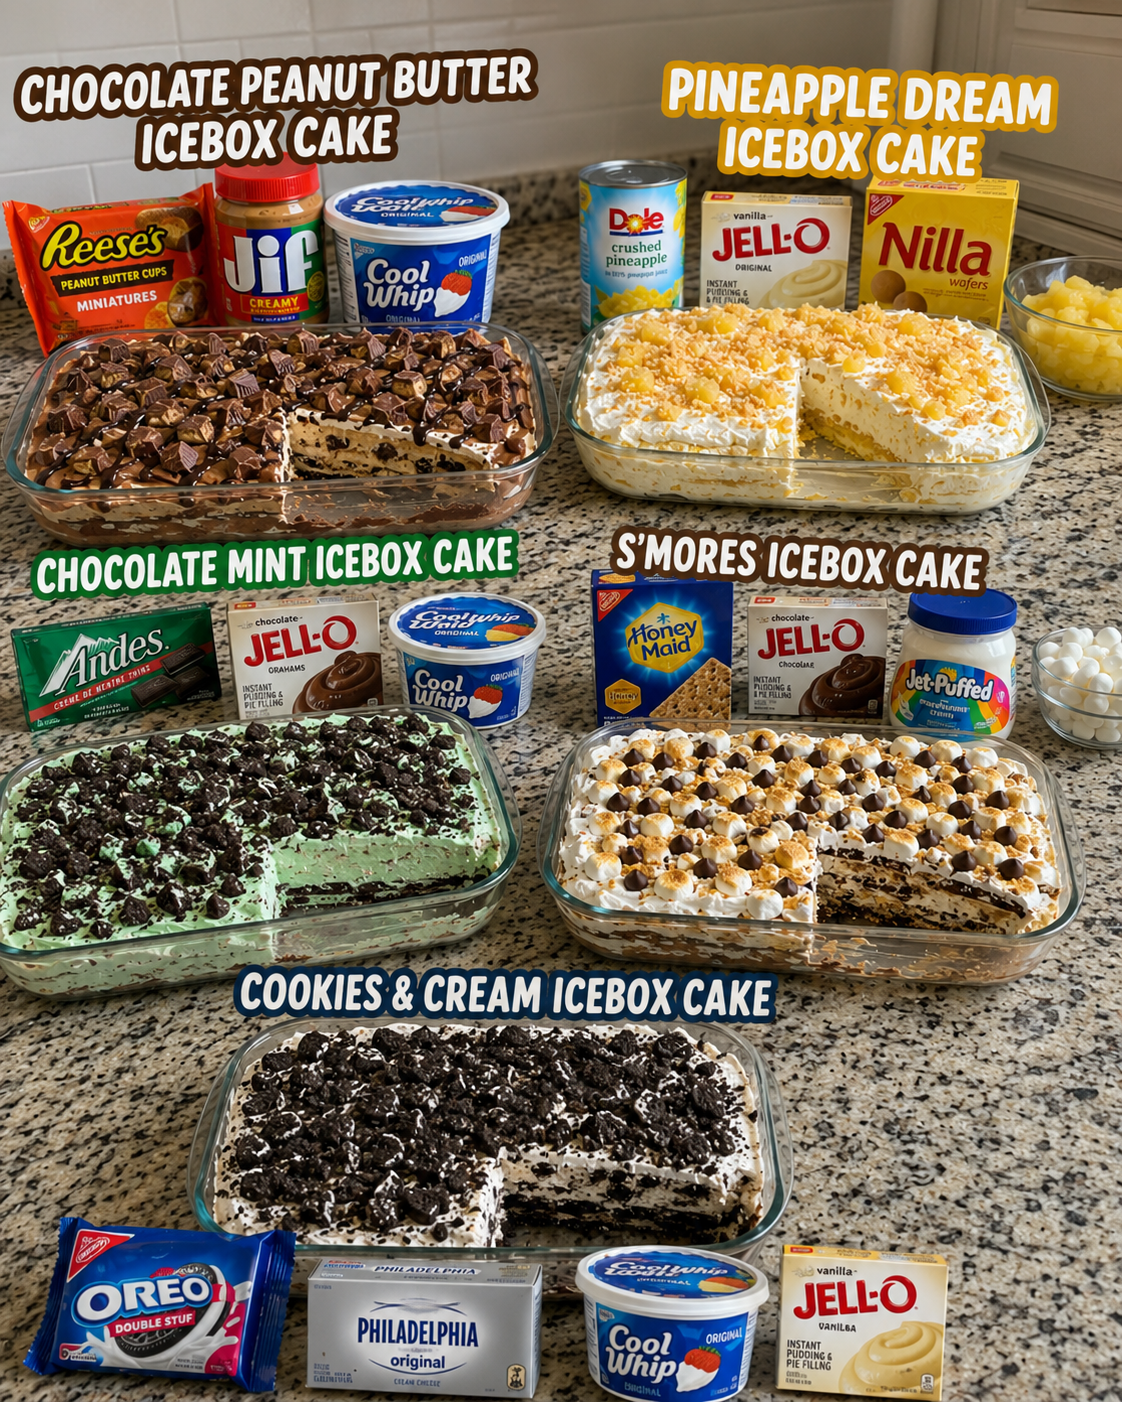
I’m so excited to share my collection of easy icebox cake recipes with you! These no-bake desserts are absolute lifesavers when you want something impressive but don’t have the energy for a complicated baking project. Icebox cakes are one of my favorite go-to treats because they come together in minutes, taste amazing, and actually get better as they chill overnight. Whether you’re planning a dinner party or just craving something sweet, these five recipes will become your new favorites.
What I love most about these icebox cakes is how forgiving they are. You don’t need special skills or fancy equipment—just some simple ingredients, a little patience, and a refrigerator. Each recipe brings something different to the table, from the classic combination of chocolate and peanut butter to tropical vibes with pineapple and cream. I’ve made every single one of these dozens of times, and they never disappoint.
I put together this roundup to help you have a go-to dessert for every mood and occasion. Save these recipes for your next gathering, or bookmark them for those nights when you want something delicious without the fuss. If you love easy, elegant desserts like these, Follow me on HaileeRecipes on Pinterest for more recipes that actually work in real life.
1. Chocolate Peanut Butter Icebox Cake
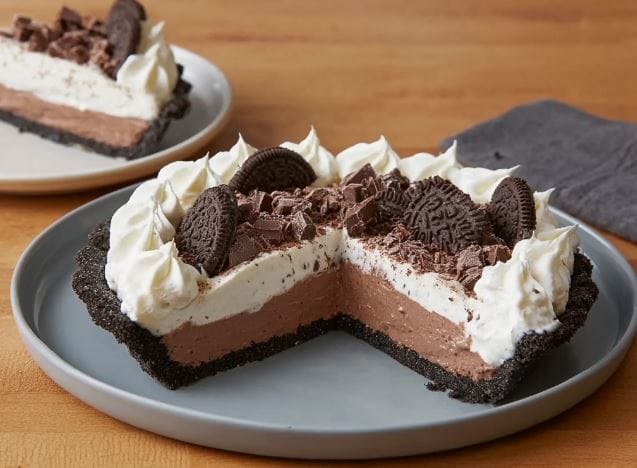
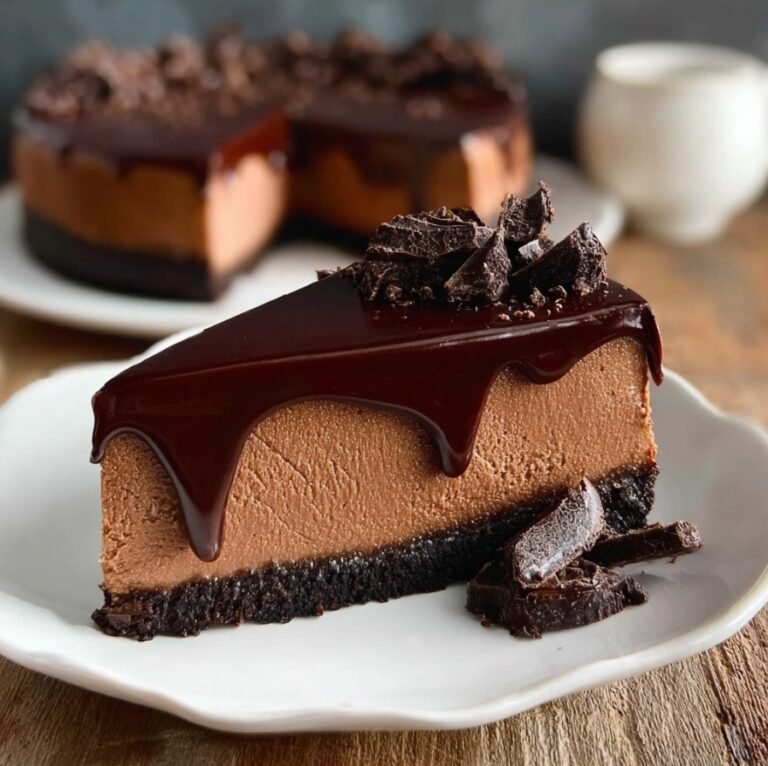
This decadent Chocolate Peanut Butter Icebox Cake combines two beloved flavors in a no-bake dessert that’s surprisingly simple to assemble. Layers of chocolate cookies, creamy peanut butter filling, and rich chocolate ganache create a dessert with incredible depth and texture. The cake firms up in the refrigerator overnight, developing a fudgy, almost brownie-like consistency that’s perfect for chocolate and peanut butter lovers. Serve this elegant treat at dinner parties or special occasions—it looks impressive but requires minimal baking skills, making it ideal for entertaining without stress.
Why You’ll Love It
- No baking required, just simple assembly and refrigeration time.
- The combination of chocolate cookies and peanut butter creates restaurant-quality flavor and texture.
- Can be prepared a full day ahead, making it perfect for entertaining and meal planning.
Ingredients
- 24 chocolate sandwich cookies, such as Oreos
- 4 tablespoons unsalted butter, melted
- 1 cup creamy peanut butter
- 1 cup powdered sugar
- 8 ounces cream cheese, softened
- 1 cup heavy cream
- 8 ounces semi-sweet chocolate, chopped
- 1 cup heavy cream, for ganache
- 2 tablespoons peanut butter, for garnish
How To Make It
- Crush 20 chocolate cookies into fine crumbs and mix with melted butter until resembling wet sand. Press firmly into the bottom of a 9-inch springform pan to create an even crust. Refrigerate while preparing the filling.
- Beat together the creamy peanut butter, powdered sugar, and softened cream cheese until smooth and fluffy, about 2 minutes. Whip the 1 cup heavy cream to stiff peaks in a separate bowl.
- Gently fold the whipped cream into the peanut butter mixture in two additions until no white streaks remain. Spread evenly over the cooled crust.
- Crumble the remaining 4 cookies and sprinkle over the peanut butter layer, pressing gently so they adhere.
- Heat 1 cup heavy cream until steaming, then pour over the chopped semi-sweet chocolate and let sit 1 minute. Stir until smooth and glossy, then cool for 5 minutes.
- Pour the chocolate ganache over the cookie layer, spreading evenly to the edges. Drizzle with melted peanut butter in decorative lines if desired.
- Cover loosely with plastic wrap and refrigerate for at least 8 hours or overnight until the cake is firm and set throughout.
Variations And Substitutions
Swap the chocolate sandwich cookies for vanilla wafers for a different flavor profile, or use a combination of both. Replace semi-sweet chocolate with dark chocolate for deeper richness, or use milk chocolate for a sweeter ganache. For a lighter version, substitute Greek yogurt for half the cream cheese. Add a teaspoon of espresso powder to the ganache to enhance the chocolate flavor, or stir in a tablespoon of peanut butter into the ganache itself for extra peanut butter intensity.
Make-Ahead, Storage, And Serving Tips
This cake is best made 1 to 2 days ahead, allowing flavors to meld and the texture to become perfectly fudgy. Store covered in the refrigerator for up to 4 days. To serve, use a hot, wet knife to cut clean slices, wiping between cuts. The cake can be frozen for up to 1 month; thaw in the refrigerator overnight before serving. If the ganache cracks when slicing, the cake may be too cold—let it sit at room temperature for 10 minutes before cutting.
2. Pineapple Dream Icebox Cake
This tropical-inspired icebox cake brings the flavors of a classic pineapple upside-down cake without any baking required. Layers of buttery graham crackers alternate with whipped cream and crushed pineapple, creating a light, refreshing dessert with delightful texture contrasts. The pineapple juice soaks into the crackers, making them tender and flavorful, while the whipped cream stays pillowy soft. Perfect for summer gatherings, potlucks, or whenever you want an impressive dessert that requires minimal effort. It’s especially wonderful served chilled on hot days.
Why You’ll Love It
- No oven required—perfect for keeping your kitchen cool during warm months.
- Comes together in about 15 minutes of hands-on time before chilling.
- The tropical pineapple flavor is bright, familiar, and crowd-pleasing for all ages.
Ingredients
- 2 cups heavy whipping cream
- 1/4 cup powdered sugar
- 1 teaspoon vanilla extract
- One 20-ounce can crushed pineapple with juice
- 18-20 graham cracker squares
- 2 tablespoons butter, melted
- 1/4 cup reserved pineapple juice (drained from can)
- Maraschino cherries for garnish (optional)
How To Make It
- Whip the heavy cream, powdered sugar, and vanilla extract together until stiff peaks form. Set aside.
- Drain the canned pineapple, reserving 1/4 cup of juice. Fold the crushed pineapple into the whipped cream gently until combined.
- Mix the melted butter with the reserved pineapple juice in a shallow bowl.
- Quickly dip each graham cracker square into the pineapple juice mixture for about one second per side, then arrange a layer in the bottom of an 8×8-inch baking dish.
- Spread one-third of the pineapple whipped cream over the graham cracker layer.
- Repeat layering: dipped crackers, then pineapple cream, then crackers, then cream, ending with a final layer of dipped crackers on top.
- Cover with plastic wrap and refrigerate for at least 4 hours, preferably overnight, so the flavors meld and the crackers soften.
- Garnish with maraschino cherries if desired before serving.
Variations And Substitutions
For a coconut twist, substitute 1/2 cup of the whipped cream with coconut cream and add 1/2 cup toasted coconut flakes to the mixture. Use vanilla wafers or digestive biscuits instead of graham crackers for a different texture. For a boozy version, add 1 tablespoon of rum or coconut liqueur to the whipped cream. If you prefer fresh pineapple, use 2 cups fresh diced pineapple and 1/4 cup pineapple juice from a carton for dipping.
Make-Ahead, Storage, And Serving Tips
This dessert is actually better when made a full day ahead, as the flavors deepen and the texture becomes more cohesive. Store covered in the refrigerator for up to 3 days. For best results, keep it chilled until serving—it softens quickly at room temperature. If the cake becomes too soft before serving, return it to the refrigerator for 30 minutes. You can assemble it in individual mason jars or cups for a portable option. Serve cold with a dollop of extra whipped cream on top if desired.
3. Chocolate Mint Icebox Cake
This elegant Chocolate Mint Icebox Cake combines cool, creamy layers with the refreshing contrast of mint and rich chocolate. The no-bake dessert features a simple chocolate wafer crust topped with whipped cream infused with peppermint extract, creating a sophisticated treat that tastes like a frozen chocolate mint truffle. Perfect for dinner parties or hot summer days, this cake requires minimal effort but delivers restaurant-quality results. The flavors deepen as it chills, making it ideal for preparing ahead of time.
Why You’ll Love It
- No baking required—just assembly and chilling time.
- The mint and chocolate combination is universally appealing and feels fancy.
- Can be made up to two days ahead, reducing day-of stress.
Ingredients
- 20 chocolate wafer cookies, crushed into crumbs
- 4 tablespoons melted butter
- 2 cups heavy whipping cream
- 1/2 cup powdered sugar
- 1 teaspoon peppermint extract
- 1/2 cup chocolate syrup or ganache
- 2 tablespoons cocoa powder for garnish
- Crushed candy canes for topping
How To Make It
- Combine crushed chocolate wafer cookies with melted butter and press firmly into the bottom of a 9-inch springform pan to create an even crust layer.
- In a large bowl, whip heavy cream with powdered sugar and peppermint extract until stiff peaks form, being careful not to overbeat.
- Spread half of the mint whipped cream evenly over the chocolate crust, smoothing the top with a spatula.
- Drizzle chocolate syrup or ganache over the whipped cream layer in a thin, even stream.
- Top with the remaining mint whipped cream, spreading it to the edges of the pan.
- Cover with plastic wrap and refrigerate for at least 6 hours or overnight until the cake is firm and set.
- Just before serving, dust the top with cocoa powder and sprinkle crushed candy canes over the surface.
- Run a warm knife around the edges before releasing the springform and slicing into wedges.
Variations And Substitutions
For a darker chocolate flavor, use chocolate graham crackers instead of wafers for the crust. Substitute peppermint extract with a few drops of mint food coloring and fresh mint puree for a more herbaceous taste. Try swapping the chocolate syrup layer for a thin spread of chocolate mousse or Nutella. For a less intense mint flavor, reduce the extract to half a teaspoon. You can also add crushed Andes mints directly into the whipped cream or layer them between the cream and chocolate.
Make-Ahead, Storage, And Serving Tips
This cake is best made one to two days ahead, allowing the flavors to meld and the texture to become perfectly firm. Store covered in the refrigerator for up to three days. Do not freeze, as the whipped cream texture will become grainy upon thawing. For serving, slice with a hot, dry knife, wiping it clean between cuts for neat pieces. If the cake is too firm straight from the fridge, let it sit at room temperature for five minutes before cutting. Serve chilled with fresh whipped cream on the side or alongside hot coffee for a delightful contrast.
4. S'mores Icebox Cake
This nostalgic S’mores Icebox Cake brings campfire flavors to an elegant no-bake dessert. Layers of chocolate graham crackers, creamy marshmallow filling, and rich chocolate create a treat that’s both indulgent and refreshingly light. The combination of toasted marshmallow, dark chocolate, and buttery graham delivers that beloved s’mores taste in every bite. Perfect for summer gatherings, this cake requires no oven and minimal effort, making it ideal for hot weather entertaining when you want something impressive without heating up the kitchen.
Why You’ll Love It
- Captures authentic s’mores flavors in a sophisticated, layered format.
- Completely no-bake and requires just 15 minutes of active prep time.
- Makes ahead beautifully, becoming even better as flavors meld overnight.
Ingredients
- 2 cups heavy whipping cream
- 1 cup marshmallow fluff
- 4 ounces cream cheese, softened
- 1 teaspoon vanilla extract
- 12 chocolate graham crackers
- 6 ounces semi-sweet chocolate, chopped
- 2 tablespoons butter
- 1 tablespoon honey
How To Make It
- Whip heavy cream to stiff peaks using an electric mixer, then gently fold in marshmallow fluff, softened cream cheese, and vanilla extract until fully combined and fluffy.
- Melt chopped chocolate with butter and honey in a microwave-safe bowl in 30-second intervals, stirring between each, until completely smooth.
- Line a 9-inch square baking dish with parchment paper, leaving overhang on two sides for easy removal.
- Arrange 6 chocolate graham crackers in a single layer on the bottom of the prepared dish.
- Spread half of the marshmallow cream mixture evenly over the graham cracker layer.
- Drizzle half of the melted chocolate over the cream layer, then arrange remaining 6 graham crackers on top.
- Top with remaining marshmallow cream, then finish with remaining melted chocolate drizzled in decorative lines.
- Cover with plastic wrap and refrigerate for at least 6 hours, preferably overnight, until the graham crackers soften slightly and layers set.
Variations And Substitutions
Toast the marshmallow fluff with a kitchen torch before folding in for deeper caramelized flavor. Substitute milk chocolate or white chocolate for the semi-sweet if preferred. Add a pinch of sea salt to the chocolate layer for complexity. Use honey graham crackers instead of chocolate for a different flavor balance. Sprinkle crushed graham crackers on top before chilling for added texture.
Make-Ahead, Storage, And Serving Tips
This cake is best made 1 to 2 days ahead, allowing flavors to develop and the structure to set completely. Store covered in the refrigerator for up to 4 days. Cut into squares using a hot, wet knife wiped clean between cuts for neat slices. Serve cold directly from the refrigerator. If the cake becomes too firm, let it sit at room temperature for 5 minutes before serving for the most pleasant texture.
5. Cookies & Cream Icebox Cake
This Cookies & Cream Icebox Cake combines the nostalgic flavors of a classic cookie pairing with the elegant simplicity of a no-bake dessert. Layers of whipped cream and crushed sandwich cookies create a light, creamy texture that softens slightly as it chills, making each bite irresistibly tender. The cookie pieces add delightful crunch throughout, while the vanilla-forward flavor profile appeals to all ages. Perfect for summer gatherings, potlucks, or whenever you want an impressive dessert without turning on the oven, this cake requires minimal effort but delivers maximum satisfaction.
Why You’ll Love It
- No baking required—just mix, layer, and refrigerate for an effortless dessert.
- Uses simple pantry staples that most households already have on hand.
- Becomes more flavorful as it sits, making it perfect for advance preparation.
Ingredients
- 1 package (14.3 ounces) sandwich cookies, divided
- 3 tablespoons unsalted butter, melted
- 2 cups heavy whipping cream
- 1/4 cup granulated sugar
- 1 teaspoon vanilla extract
- 8 ounces cream cheese, softened
- 1/2 cup powdered sugar
- Additional crushed cookies for topping
How To Make It
- Crush two-thirds of the sandwich cookies into bite-sized pieces, reserving whole cookies for garnish. Crush the remaining whole cookies into fine crumbs and mix with melted butter to create a crust mixture.
- Press the cookie crumb mixture firmly into the bottom of a 9-inch springform pan, creating an even layer.
- In a large bowl, beat the softened cream cheese and powdered sugar together until smooth and fluffy, about 2 minutes.
- In a separate bowl, whip the heavy cream with granulated sugar and vanilla extract until stiff peaks form.
- Gently fold the whipped cream into the cream cheese mixture in two additions, being careful not to deflate the whipped cream.
- Fold the bite-sized cookie pieces into the cream mixture until evenly distributed.
- Spread half of the cream mixture over the crust, then add another layer of crushed cookies, then top with the remaining cream mixture.
- Refrigerate for at least 6 hours or overnight, then top with additional crushed cookies and reserved whole cookies before serving.
Variations And Substitutions
Swap sandwich cookies for other varieties like chocolate wafers, ginger snaps, or brownie thins for different flavor profiles. Replace heavy cream with whipped topping for a lighter option, or use Greek yogurt mixed with whipped cream for a tangier taste. Add a layer of chocolate ganache between the cream layers for extra richness, or incorporate crushed candy pieces like chocolate chips or toffee bits into the filling for added texture and flavor.
Make-Ahead, Storage, And Serving Tips
This cake actually improves with time as the cookies soften and flavors meld together, making it ideal for preparing 1-2 days ahead. Store covered in the refrigerator for up to 4 days. For best results, keep the cake chilled until just before serving, as the cream filling softens at room temperature. If you prefer a firmer texture, freeze for up to 2 weeks and thaw in the refrigerator for 30 minutes before serving. Run a warm knife around the edges before removing the springform pan for clean slices.
Final Thoughts
Icebox cakes are the perfect solution when you want something delicious but don’t have hours to spend in the kitchen. Whether you’re drawn to the classic chocolate version, the fruity freshness of strawberry, or something more adventurous like the cookies and cream variation, there’s an option here for every craving and skill level. These no-bake desserts prove that simple ingredients and a little patience can create something truly special.
Pick one recipe that speaks to you and give it a try this week. You’ll be amazed at how easy it is to pull together a show-stopping dessert that tastes like you spent the whole day baking. Your family and friends will be impressed, and honestly, you might just find yourself making icebox cakes again and again.
Chocolate Peanut Butter Icebox Cake
Ingredients
Method
- In a large bowl, whip heavy cream with powdered sugar and vanilla extract until stiff peaks form.
- In another bowl, whisk together peanut butter and cocoa powder until well combined.
- Gently fold the peanut butter mixture into the whipped cream until no streaks remain.
- Combine milk and chocolate syrup in a shallow dish.
- Quickly dip each chocolate wafer cookie into the milk mixture and arrange in a single layer on the bottom of a 9x13 inch baking dish.
- Spread half of the peanut butter cream mixture over the cookie layer.
- Repeat with another layer of dipped cookies and remaining peanut butter cream.
- Cover and refrigerate for at least 8 hours or overnight before serving.