Fruity Pebbles Milkshake Recipe | Creamy & Colorful
Fruity Pebbles Milkshake Recipe | Creamy & Colorful
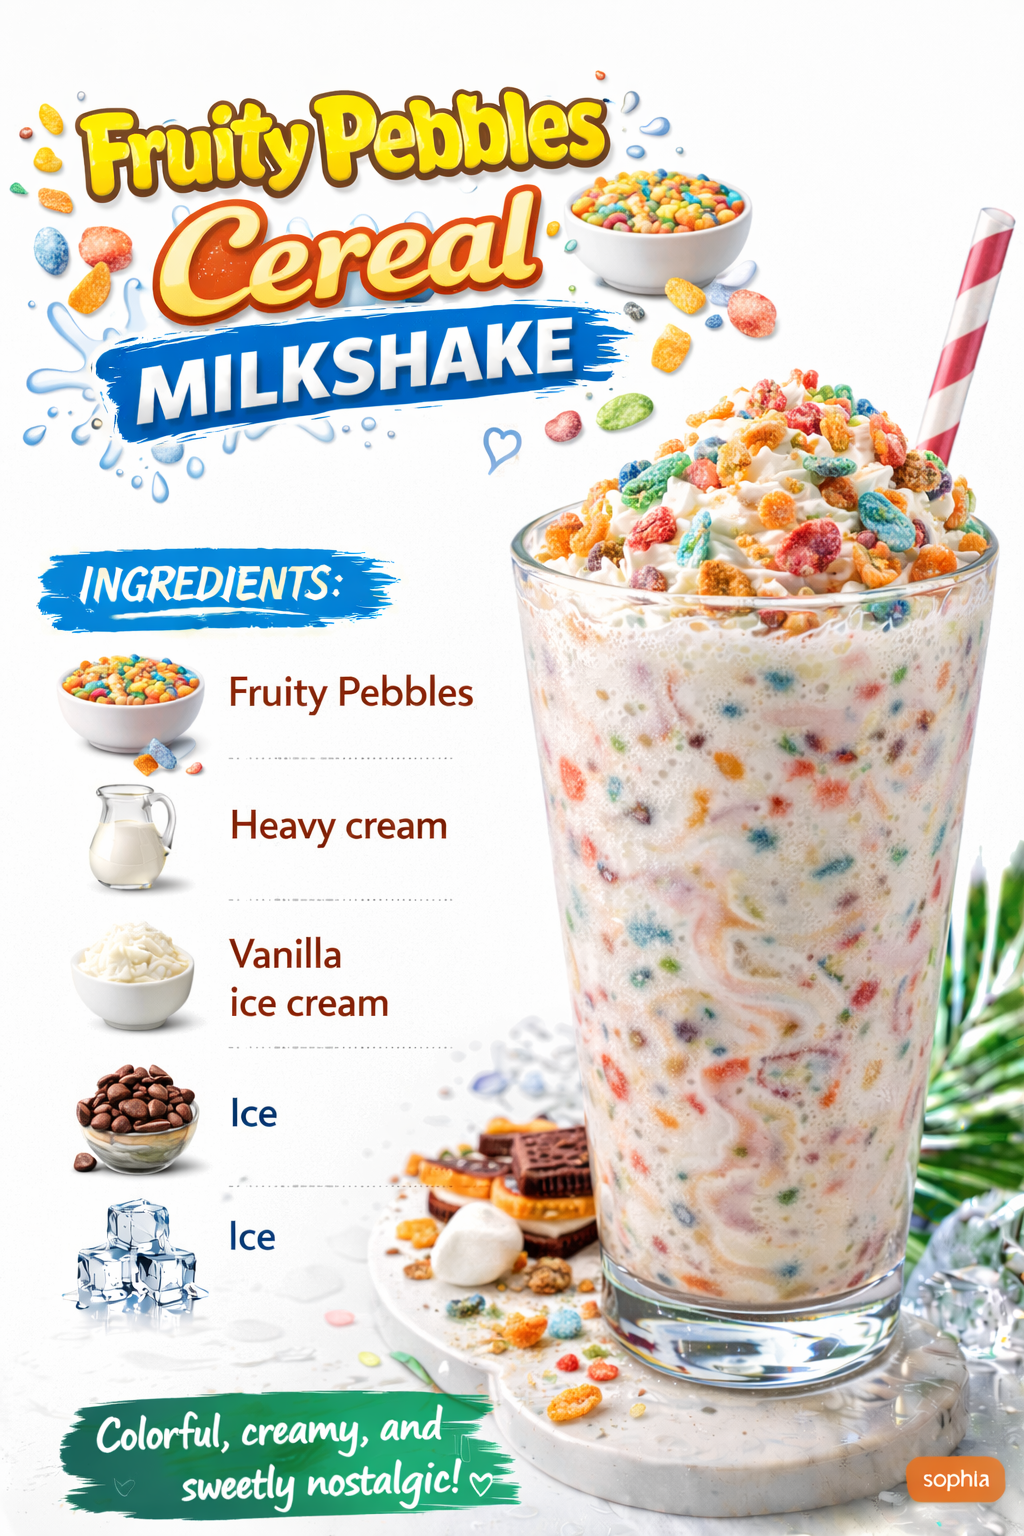
Fruity Pebbles Cereal Milkshake: A Nostalgic Treat That Actually Tastes Amazing
I was twelve years old, sitting at my grandmother’s kitchen counter on a lazy Saturday morning, when she made me a bowl of Fruity Pebbles cereal. I remember the milk turning that gorgeous pastel rainbow color, and how I’d drink it straight from the bowl when I thought she wasn’t looking. That sweet, fruity, slightly artificial flavor was pure childhood joy—the kind of thing you don’t think about for years, and then suddenly you’re craving it at 2 p.m. on a Tuesday.
Fast forward to last summer. I was experimenting with nostalgic desserts for my blog, and I thought: what if I could bottle that exact feeling into a milkshake? What if I could take that cereal milk memory and turn it into something creamy, dreamy, and actually impressive enough to serve to friends?
That’s how the Fruity Pebbles Cereal Milkshake was born. And I’m telling you right now—it’s become one of my go-to recipes when I want something sweet without overthinking it. This isn’t some complicated molecular gastronomy situation. It’s straightforward, fun, and genuinely delicious. Whether you’re making it for yourself on a Friday night, serving it at a summer gathering, or introducing your kids to the magic of cereal milk, this recipe works every single time.
If you’re looking for more cozy, nostalgic recipes like this, follow me on HaileeRecipes on Pinterest for all my food adventures and tested recipes that actually work in real kitchens.
Why You’ll Love This Recipe
Let me be honest: this milkshake tastes like childhood in the best possible way. It’s sweet, fruity, and has this fun, slightly crunchy texture from the cereal bits that float around in there. But beyond the nostalgia factor, there are real reasons this recipe is worth making.
First, it’s ridiculously easy. You don’t need fancy equipment or hard-to-find ingredients. If you have a blender and milk, you’re basically there. Second, it’s customizable. You can make it dairy-free, add protein powder, go heavier on the vanilla, whatever speaks to you. Third, it’s a conversation starter. Seriously. People always ask what makes it taste so good, and then I get to explain the magic of cereal milk, and suddenly we’re all having a better day.
Plus, it comes together in under five minutes. That matters when you’re hungry, when you’re tired, or when you just need a little pick-me-up that feels special.
Ingredients
- 1 cup Fruity Pebbles cereal (the original kind, not the knockoffs—trust me on this)
- 1.5 cups whole milk (or 2% if that’s what you have; I’ve used both)
- 1 cup vanilla ice cream (or 1.5 cups if you like it extra thick)
- 1 tablespoon granulated sugar (optional, but I usually add it)
- 1/2 teaspoon vanilla extract
- Pinch of salt (this sounds weird, but it makes the fruity flavor pop)
- 2-3 tablespoons heavy cream (for topping, optional but really nice)
- Extra Fruity Pebbles cereal for garnish (because we eat with our eyes first)
Hailee’s Tip: Don’t skip the salt. I know it sounds counterintuitive in a sweet drink, but that tiny pinch actually makes the fruity flavors brighter and more interesting. It’s like seasoning in savory cooking—it just works.
Hailee’s Tip: Buy the name-brand Fruity Pebbles if you can. The generic versions taste a bit different, and since this whole recipe is built around that specific cereal flavor, it matters. I’ve tested this, and I’m not being snobbish—it’s just true.
Optional Add-Ins and Variations
This is where you can make the recipe your own. Here’s what I like to play around with:
- Protein powder: Vanilla or unflavored works beautifully. Add one scoop if you want to make this a legit breakfast shake.
- Greek yogurt: A quarter cup makes it creamier and adds protein without the powder taste.
- Whipped cream: Obviously. I’m not judging.
- A splash of almond or oat milk: If you’re going dairy-free or want a lighter texture.
- Honey or maple syrup: If you want it sweeter (though honestly, the cereal brings plenty of sweetness).
- A tiny pinch of cinnamon: Sounds weird, but it adds warmth and complexity.
- Crushed graham crackers on top: For a s’mores-adjacent vibe.
Step-by-Step Method
Step 1: Infuse the milk with cereal flavor. Pour your 1 cup of Fruity Pebbles into a blender. Add the 1.5 cups of milk. Blend on high for about 30 seconds until the cereal breaks down and the milk turns that beautiful rainbow color. This is where the magic happens—you’re essentially making homemade cereal milk, which is the secret ingredient here.
What I messed up: The first time I made this, I blended it for too long and ended up with a gritty texture. Now I do a quick pulse, stop, and check it. You want the cereal broken down but not pulverized into oblivion.
Step 2: Strain if you prefer. This is optional, but I usually pour the mixture through a fine-mesh strainer into a bowl, pushing gently with a spoon to get all the creamy milk through. This gives you a smoother milkshake without the cereal bits. However, if you like those little crunchy bits (and honestly, I do sometimes), skip this step entirely. There’s no wrong answer here.
Step 3: Build the shake. Pour your strained (or unstrained) cereal milk back into the blender. Add the vanilla ice cream, sugar, vanilla extract, and that tiny pinch of salt. Blend on high until everything is smooth and creamy, about 30-45 seconds. Stop and check the consistency. If it’s too thick, add a splash more milk. If it’s too thin, add another scoop of ice cream.
What I messed up: I once added too much milk and ended up with something that tasted amazing but looked like regular milk. Not impressive. Now I start with less milk and build up if needed.
Step 4: Pour and garnish. Pour into a tall glass (or two shorter glasses, depending on how hungry you are). Top with a dollop of whipped cream if you’re feeling fancy, and sprinkle a small handful of Fruity Pebbles on top. A tiny drizzle of the cereal milk over the whipped cream is also beautiful.
Step 5: Drink immediately. This is best fresh, while it’s still cold and creamy. Don’t let it sit around—the ice cream will melt and it’ll lose that perfect texture.
Common Mistakes to Avoid
Using too much cereal. I know it’s tempting, but more cereal doesn’t equal better flavor. It just makes it gritty and overly sweet. Stick with the one cup.
Forgetting the salt. I mentioned this before, but it’s worth repeating. That pinch of salt is not optional if you want the best version of this shake.
Blending for too long. Over-blending creates a weird texture and can make the ice cream separate. Quick, efficient blending is your friend here.
Skipping the vanilla extract. It might seem redundant since there’s vanilla ice cream, but that extra half teaspoon adds depth and makes the whole thing taste more sophisticated (which is funny to say about a cereal milkshake, but it’s true).
Making it too far in advance. This isn’t a make-ahead drink. Blend it, drink it, enjoy it. Trying to prep it an hour early is a recipe for a watery disappointment.
My Tested Substitutions
For dairy-free: Use oat milk or almond milk instead of regular milk, and dairy-free vanilla ice cream. The flavor is slightly different—a little less rich—but it’s still delicious. I actually made this for my lactose-intolerant friend last month, and she said it tasted just as good as the original.
For less sugar: Skip the tablespoon of added sugar entirely. The cereal and ice cream bring plenty of sweetness on their own. You might actually prefer it this way.
For a protein boost: Add one scoop of vanilla protein powder in step 3. It makes the shake thicker and more filling, which I love for a quick breakfast or post-workout snack.
For a lighter version: Use low-fat or skim milk, and swap regular ice cream for frozen yogurt or light ice cream. You’ll lose a tiny bit of creaminess, but it’s still really good.
For a frozen treat: Add an extra half cup of ice in step 3 if you want it more like a frozen drink. It’s perfect on hot days.
How to Customize
The beauty of this recipe is that it’s a starting point, not a rulebook. Here are some fun ways to make it your own:
- Make it a float: Pour the shake into a glass and top with a scoop of vanilla ice cream. Drink it with a spoon. It’s indulgent and amazing.
- Add a cookie: Crush up some vanilla wafers or graham crackers and blend them in for extra texture and flavor.
- Go chocolate: Add a tablespoon of chocolate syrup to the blender. Fruity and chocolatey together is surprisingly good.
- Make it boozy: A splash of vanilla vodka or rum turns this into a grown-up treat. Not that I’m suggesting you need alcohol to enjoy it, but the option is there.
- Use different cereal: Honestly, I’ve tried this with Froot Loops and Trix, and it works with any fruity cereal. The flavor profile changes slightly, but it’s always fun.
Serving Ideas
This milkshake works for so many occasions. Serve it at a summer gathering with a little sign that says what it is—people will be curious and delighted. Make it for your kids on a lazy afternoon. Whip one up for yourself on a Friday night when you want something sweet but don’t want to bake. Serve it at a retro-themed party. Make it for brunch alongside some eggs and toast.
I’ve also served this at small dinner parties as a fun dessert drink, and it always gets compliments. There’s something about the nostalgia factor that makes people happy.
Meal Prep and Storage
Here’s the honest truth: this shake is best made fresh. You can’t really prep it in advance and expect it to stay good.
However, you can make the cereal milk component ahead. Blend the cereal with milk, strain it if you like, and store it in an airtight container in the fridge for up to 2 days. Then when you’re ready for a shake, just blend the cereal milk with ice cream and you’re done. It cuts down on the work when you want the shake.
If you somehow have leftover shake (which would be a first for me), you can store it in the fridge for a few hours, but it will separate and get watery. Not ideal. Better to just make what you’ll drink.
Nutritional Breakdown
This recipe makes about 2 servings, depending on how generous you are. Here’s the approximate breakdown per serving:
- Calories: 320-350
- Protein: 5-6g
- Carbohydrates: 48-52g
- Fat: 12-14g
- Fiber: 0-1g
Keep in mind that this is an estimate based on standard ingredients. If you use different brands or add extras like protein powder, these numbers will shift. If you’re tracking macros closely, I’d recommend plugging the specific brands you use into a nutrition calculator for accuracy.
Final Thoughts
Making a Fruity Pebbles Cereal Milkshake is one of those recipes that reminds me why I love cooking and sharing food. It’s not complicated. It doesn’t require a culinary degree. But it brings genuine joy, and it tastes like comfort and nostalgia in the best way.
I hope you make this soon. I hope it takes you back to Saturday mornings and simpler times. And I hope you enjoy every single sip.
If you try it, come back and let me know what you think. Did you add anything fun? Did you make it dairy-free? I’d love to hear about your version.
Happy blending, friends.
—
Recipe Card
**Fruity Pebbles Cereal Milkshake**
Fruity Pebbles Milkshake Recipe | Creamy & Colorful
Ingredients
Method
- Pour 1 cup Fruity Pebbles cereal and 1.5 cups milk into a blender. Blend on high for 30 seconds until cereal breaks down and milk turns rainbow colored.
- Strain through a fine-mesh strainer if desired, pushing gently with a spoon to extract all the milk. Skip this step if you prefer texture from cereal bits.
- Pour cereal milk back into blender. Add 1 cup vanilla ice cream, 1 tablespoon sugar, 1/2 teaspoon vanilla extract, and a pinch of salt.
- Blend on high for 30-45 seconds until smooth and creamy. Add more milk if too thick, or more ice cream if too thin.
- Pour into glasses. Top with whipped cream and a sprinkle of Fruity Pebbles cereal.
- Serve immediately and enjoy.