No Bake Chocolate Peanut Butter Cookies Recipe
No Bake Chocolate Peanut Butter Cookies Recipe
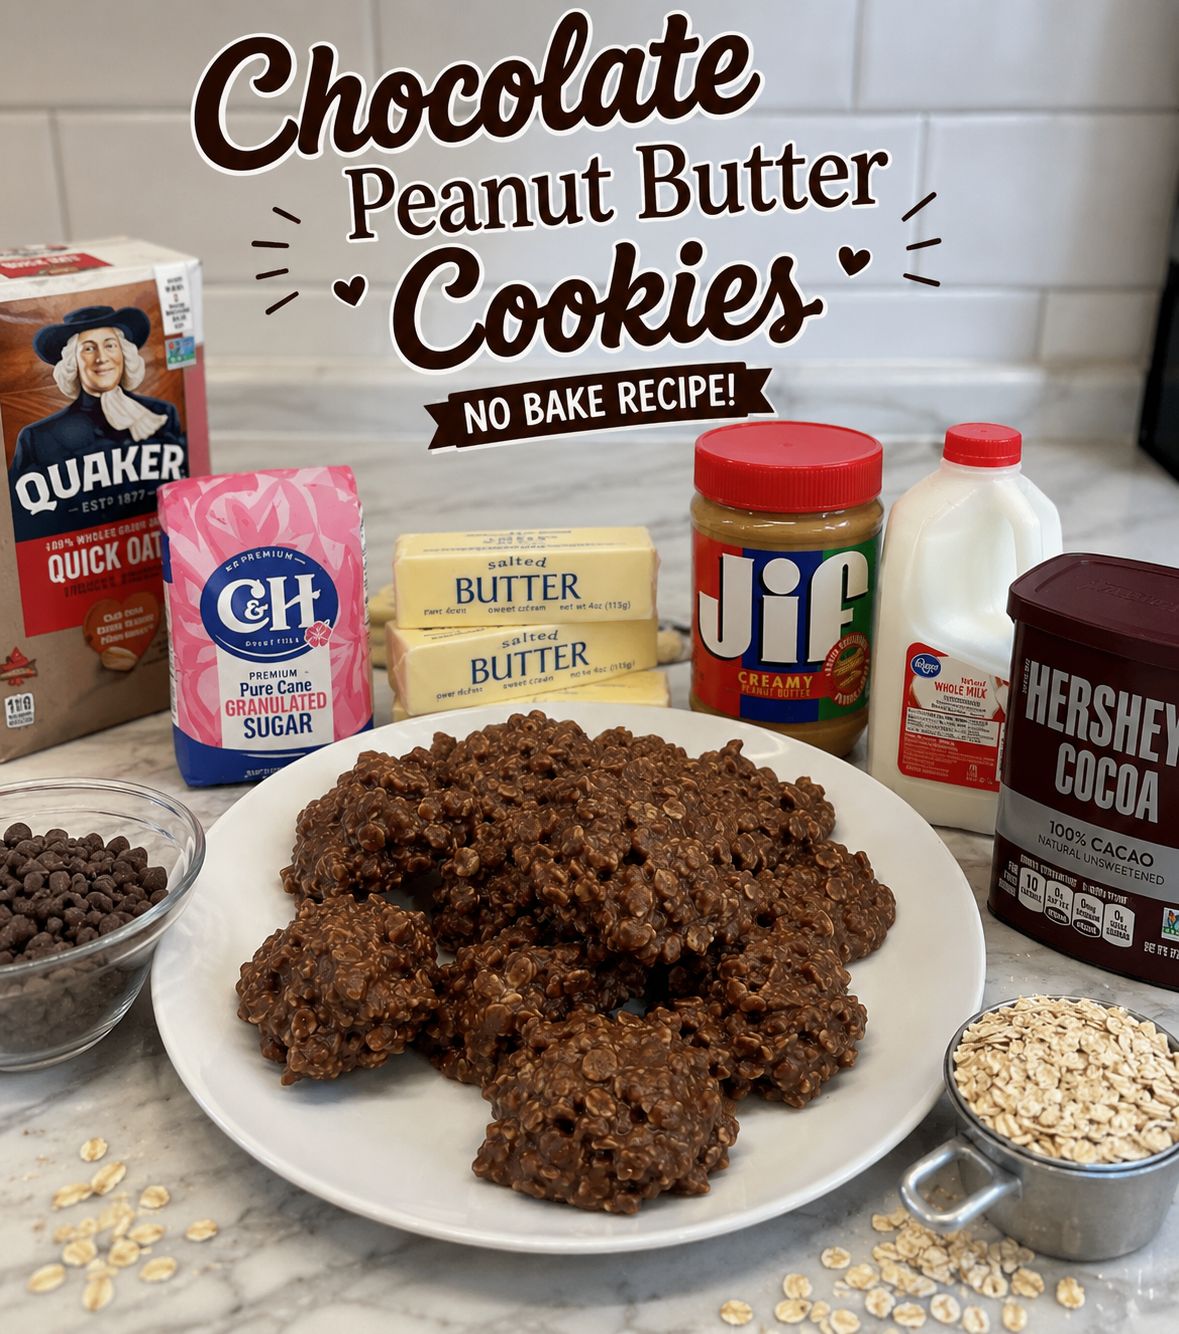
No Bake Chocolate Peanut Butter Cookies: A Recipe for the Cozy Nights
I created these no bake chocolate peanut butter cookies on a Tuesday evening when I was absolutely exhausted. You know that feeling? When you’ve had one of those days where your brain feels like scrambled eggs, and the last thing you want to do is heat up an oven or stand there watching something bake for fifteen minutes?
My partner had been dropping hints all week about wanting something sweet. Not a full dessert situation—just something simple, something we could make together while we watched our favorite show. I opened my pantry, looked at what I had (creamy peanut butter, cocoa powder, powdered sugar, butter), and decided to stop overthinking it.
Twenty minutes later, we had these gorgeous little chocolate peanut butter bites cooling on parchment paper. No oven required. No fancy equipment. Just real ingredients and the kind of simplicity that actually works.
These no bake chocolate peanut butter cookies are exactly what they sound like: fudgy, peanut-buttery little rounds that taste like someone spent hours in the kitchen, except you didn’t. They’re perfect for when you’re craving something indulgent but don’t have the energy or time to bake. They’re also honestly just better than store-bought versions—there’s something about making them yourself that makes them taste a thousand times better.
If you love chocolate and peanut butter, if you’re tired of complicated recipes, or if you just want something you can make on a random Tuesday night, this is your recipe. I make these at least twice a month now, and they’ve become my go-to when I need to bring something to a gathering or when I just need a little joy in my kitchen.
Follow me on HaileeRecipes on Pinterest for more simple, real-life recipes like this one.
Why You’ll Love This Recipe
Let me be honest about why this recipe has stolen a permanent spot in my rotation.
First, there’s the time factor. I’m not a person who enjoys spending three hours in the kitchen on a weeknight. These cookies come together in about twenty to thirty minutes total, including chilling time. That’s genuinely fast.
Second, the flavor is ridiculous. There’s this perfect balance between rich chocolate and creamy peanut butter that somehow tastes even better when it’s not baked. The texture is almost like a fudge truffle—dense, satisfying, and not too sweet. You eat one and you’re actually satisfied, not still hunting for more.
Third, they’re forgiving. You’re not dealing with finicky baking temperatures or worrying about whether they’re done. You mix, you chill, you done. Even if your ratios are slightly off, they still work. I’ve made these with slightly different proportions and they’ve always turned out great.
And honestly? There’s something deeply satisfying about making candy at home. It feels a little bit fancy, but it’s actually so simple that even someone who doesn’t bake regularly can absolutely nail this.
Ingredients for No Bake Chocolate Peanut Butter Cookies
- 1 cup creamy peanut butter – Use the smooth kind here; chunky doesn’t work as well for texture
- 1/2 cup unsalted butter – Softened to room temperature
- 2 cups powdered sugar – Sifted if you have time (no lumps make better cookies)
- 1/2 cup unsweetened cocoa powder – Good quality matters; it’s the star here
- 1/4 teaspoon sea salt – Trust me on this; it balances the sweetness
- 1 teaspoon vanilla extract – Pure vanilla, please
- 2 tablespoons whole milk – Or a splash more if your mixture is too thick
Hailee’s Tip: Room temperature butter and peanut butter mix so much more smoothly than cold ones. I usually leave mine on the counter for about thirty minutes before I start. It makes a real difference in how easily everything combines.
Hailee’s Tip: Don’t skip the cocoa powder sifting step if you have a fine-mesh strainer. Cocoa powder loves to clump, and lumps in your cookies are annoying.
Optional Add-Ins and Variations
Here’s where you can make these completely your own. I usually keep the base recipe the same, but I’ll play around with what I add.
- Espresso powder: Add 1/2 teaspoon to deepen the chocolate flavor. This is my favorite hack when I want them to taste a little more sophisticated.
- Sea salt on top: A tiny sprinkle of fleur de sel on each cookie before they set is chef’s kiss.
- Crushed pretzels: Mix in 1/4 cup for a sweet and salty crunch. This changes the whole vibe.
- Mini chocolate chips: Fold in 1/2 cup for extra chocolate moments throughout.
- Almond butter: Swap half the peanut butter for almond butter if you want something slightly different.
- A pinch of cayenne: Just a tiny bit (1/8 teaspoon) adds an interesting warmth. My mom thought I was weird until she tried it.
Step-by-Step Method
Okay, let’s make these. I’m going to walk you through exactly what I do, including the moments where I’ve messed up so you don’t have to.
Step 1: Combine your fats
In a medium bowl, add your softened peanut butter and butter. Using an electric mixer (or a wooden spoon and some elbow grease), beat them together until they’re completely combined and smooth. This should take about two minutes with a mixer. You’re looking for a uniform, creamy mixture with no streaks of either ingredient visible.
What I messed up: I used cold peanut butter once and spent ten minutes trying to get it smooth. Cold ingredients are stubborn. Don’t be like me.
Step 2: Add your dry ingredients
Sift your powdered sugar and cocoa powder together into a separate bowl (this prevents lumps). Add the salt too. Then, gradually add this mixture to your peanut butter mixture while stirring. Don’t dump it all in at once—add it in three parts, mixing well between each addition. This prevents the dry ingredients from flying everywhere and ensures even distribution.
Step 3: Add vanilla and milk
Pour in your vanilla extract and milk. Mix until everything is fully incorporated. The mixture should be thick but spreadable—kind of like brownie batter. If it’s too thick and crumbly, add another tablespoon of milk. If it’s too soft, add a bit more powdered sugar.
What I messed up: I once forgot the milk entirely and ended up with a dry, crumbly mixture that wouldn’t hold together. The milk is important; it helps everything bind and creates that fudgy texture.
Step 4: Scoop and shape
Using a small cookie scoop (or a tablespoon), drop rounded portions onto a parchment-lined baking sheet. I usually space them about two inches apart, though they don’t expand so you don’t need tons of room. You should get about twenty to twenty-four cookies from this batch.
If you want them perfectly round, you can gently press each one with the bottom of a glass, but honestly, I like them a little rustic-looking. They taste the same either way.
Step 5: Chill
Pop the baking sheet into the refrigerator for at least thirty minutes. I usually do an hour because I like them really firm. You want them solid enough to handle without falling apart but not rock-hard.
Step 6: Optional chocolate coating
If you want to go fancy (and I sometimes do), melt about six ounces of chocolate and dip the top of each cookie. Let the excess drip off and set them back on parchment to set. This is completely optional but makes them look bakery-worthy.
Common Mistakes to Avoid
I’ve made these so many times now that I’ve learned what actually matters and what doesn’t.
Using cold ingredients: This is the number one issue. Cold butter and peanut butter don’t mix smoothly, and you end up with a grainy texture. Let everything come to room temperature first.
Skipping the salt: I know it sounds weird to add salt to a sweet treat, but it genuinely makes the chocolate and peanut butter flavors pop. Don’t skip it.
Not chilling long enough: If you skip the refrigerator step or only chill for five minutes, they’ll be too soft to handle. Patience here actually matters.
Using low-quality cocoa powder: This is where you really taste the difference. Cheap cocoa powder tastes bitter and flat. Spend a couple extra dollars on good cocoa. Your cookies will thank you.
Overmixing after adding dry ingredients: Mix just until combined. Overmixing can make them dense and tough, which is not what we’re going for.
My Tested Substitutions
I’ve played around with this recipe enough to know what actually works as a swap and what doesn’t.
Peanut butter alternatives: Almond butter, cashew butter, and sunflower seed butter all work beautifully. Use the same amount. The flavor changes slightly, but the texture is always good. I actually made these with sunflower seed butter last month for a friend with a peanut allergy, and they were fantastic.
Powdered sugar: You can use confectioners’ sugar (it’s the same thing) or even make your own by blending regular sugar in a food processor. I wouldn’t substitute with regular sugar because it won’t dissolve properly and you’ll get a grainy texture.
Cocoa powder: Dutch-processed cocoa is slightly smoother and less bitter than natural cocoa. Both work, but they taste a little different. I prefer Dutch-processed, but use what you have.
Butter: I’ve used coconut oil here before when I was out of butter. Use refined coconut oil (not virgin) so it doesn’t taste like coconuts. Use the same amount. The texture is slightly different—a bit softer—but still delicious.
Milk: Any milk works. Whole milk, almond milk, oat milk, whatever you have. It’s just there to help bind everything together.
How to Customize
The beauty of this recipe is that it’s genuinely flexible. Here are some directions you can take it.
Make them richer: Add a tablespoon of melted chocolate or increase the cocoa powder to 3/4 cup. These become almost like little chocolate truffles.
Make them less sweet: Reduce the powdered sugar to 1 3/4 cups and add a pinch of espresso powder. This version is more sophisticated and less candy-like.
Make them crunchier: Add crushed pretzels, chopped nuts, or even crispy cereal. This adds texture and makes them more interesting to eat.
Make them fancy: Dip them in chocolate, sprinkle with sea salt, or drizzle with white chocolate. Suddenly they look like something you bought at a fancy candy shop.
Make them smaller: Use a smaller scoop to make bite-sized versions. These are perfect for parties or for portion control (though let’s be honest, you’ll probably eat more of them).
Serving Ideas
These are honestly good on their own, but here’s how I like to serve them.
With coffee: One cookie with my morning coffee is my favorite way to start the day. The chocolate and peanut butter pair perfectly with coffee.
As a gift: I arrange them in a little box with parchment between layers and give them to friends. They always seem impressed that I made them myself.
At parties: I put them on a little plate with other sweets. They disappear fast because people assume they’re complicated, and they’re always surprised when I tell them they’re no bake.
With milk: This is a classic combo. Dunking a no bake chocolate peanut butter cookie into cold milk is genuinely one of life’s small pleasures.
After dinner: Instead of having a big dessert, I’ll have one of these with tea. It satisfies the sweet craving without being too heavy.
Meal Prep and Storage
One of my favorite things about this recipe is how well they keep. I often make a double batch on Sunday and have them all week.
Room temperature: These last about three to four days in an airtight container at room temperature. They’ll soften slightly, which honestly isn’t a bad thing.
Refrigerator: Store them in an airtight container in the fridge for up to two weeks. They stay firmer this way, which I actually prefer. Just let them come to room temperature for a minute before eating if you want them to be less hard.
Freezer: These freeze beautifully for up to three months. I layer them between parchment in a freezer-safe container. Thaw them at room temperature for about thirty minutes before eating.
Make ahead: You can make the mixture up to three days in advance and store it in the fridge. Then scoop and chill when you’re ready to serve. This is great if you want fresh cookies without the full prep time.
Nutritional Breakdown
Here’s what’s in each cookie (based on about twenty-two cookies per batch):
- Calories: approximately 120
- Protein: 3g
- Carbohydrates: 14g
- Fat: 6g
- Fiber: 1g
These are treats, not health food, but they’re not terrible for you either. The peanut butter provides protein and healthy fats, and the cocoa has antioxidants. I’m not saying you should eat a dozen of them, but one or two as part of a balanced diet? Absolutely fine.
Final Thoughts
I genuinely love this recipe. It’s become part of my regular cooking rotation, and I make it when I want something special without the effort. There’s something really satisfying about making candy at home—it feels indulgent and fancy, but it’s so simple that anyone can do it.
The first time you make no bake chocolate peanut butter cookies, you might be surprised at how easy they are. You might even wonder if you did something wrong because it seems too simple. But then you taste one, and you’ll understand why I make these so often.
These cookies have shown up at dinner parties, in gift boxes, in lunchboxes, and on my kitchen counter on random Tuesdays when I just needed something good. They’re reliable, they’re delicious, and they’re genuinely foolproof.
I hope you make these soon. I hope you enjoy them as much as I do. And if you do make them, I’d love to know what you think. Come find me on Pinterest and let me know how they turned out.
—
Recipe Card
No Bake Chocolate Peanut Butter Cookies Recipe
Ingredients
Method
- In a medium bowl, beat softened peanut butter and butter together until smooth and fully combined, about 2 minutes.
- In a separate bowl, sift together powdered sugar, cocoa powder, and sea salt.
- Gradually add the dry mixture to the peanut butter mixture in three parts, stirring well between each addition.
- Add vanilla extract and milk, mixing until the mixture is thick but spreadable.
- Using a small cookie scoop or tablespoon, drop rounded portions onto a parchment-lined baking sheet.
- Refrigerate for at least 30 minutes until firm.
- Optional: Melt chocolate and dip the top of each cookie for a fancy finish.
- Store in an airtight container.