Crispy Baked Zucchini Rounds
Crispy Baked Zucchini Rounds
Crispy Baked Zucchini Rounds: A Recipe That Finally Gets It Right
I discovered my love for crispy baked zucchini rounds on a random Tuesday night when I had half a garden’s worth of zucchini sitting on my counter and absolutely zero motivation to cook anything complicated. My partner was working late, I’d already stress-eaten half a bag of chips, and I needed something that felt indulgent but wouldn’t make me feel guilty afterward. So I grabbed a zucchini, sliced it up, threw some panko and parmesan on it, and baked the whole thing.
Twenty minutes later, I pulled out the most gloriously golden, crispy-on-the-outside, tender-on-the-inside rounds I’ve ever made. And here’s the thing: they were so good that I made them three more times that week. My mom asked for the recipe. My best friend requested them at her dinner party. Suddenly, this random Tuesday-night solution became my go-to appetizer, side dish, and honestly, my favorite snack.
The beauty of crispy baked zucchini rounds is that they’re genuinely foolproof once you understand the core technique. You’re not deep-frying anything, so there’s no oil splattering everywhere. You’re not dealing with soggy vegetables because we’re baking them at a high enough temperature to get real crispness. And the flavor? It’s subtle, nutty, and completely customizable to whatever you’re craving that day.
This recipe is for anyone who wants a healthier side dish that doesn’t taste like punishment. It’s for the person who has too much zucchini and needs creative ways to use it. It’s for the appetizer-loving host who wants something that looks fancy but takes fifteen minutes of actual work. And it’s definitely for anyone who’s ever had soggy, disappointing breaded vegetables and thought there had to be a better way. There is. This is it.
If you love easy, reliable recipes that actually taste amazing, follow me on HaileeRecipes on Pinterest for more cozy, real-life cooking that won’t stress you out.
Why You’ll Love This Recipe
Let me be honest: there are a lot of zucchini recipes out there. But this one is special, and I’ll tell you exactly why.
It’s actually crispy. Not soggy, not rubbery, not sad. The combination of a light egg wash, panko breadcrumbs, and a hot oven creates this incredible texture that rivals anything you’d get from a fryer. The outside crunches, the inside is tender, and it stays that way for a good ten minutes after it comes out of the oven.
It’s genuinely quick. Fifteen minutes of prep, twenty minutes in the oven. You can have this on the table faster than you can order takeout, and it tastes infinitely better.
It’s flexible beyond belief. Change the seasonings, swap the cheese, add different herbs. This recipe is a template that works with whatever you have in your kitchen or whatever you’re craving.
It works for literally any occasion. Serve it as an appetizer at a dinner party, pack it for lunch, use it as a side dish for grilled chicken or fish, or honestly, just eat a few straight from the cooling rack because they’re that good.
It’s actually healthy-ish. Baked, not fried. Zucchini is mostly water, so you’re getting vegetables and a little bit of protein from the egg and cheese. It’s not a salad, but it’s not junk food either. It’s the perfect middle ground.
Ingredients
- 3 medium zucchini (about 1.5 pounds total)
- 1 large egg
- 1 cup panko breadcrumbs
- 1/2 cup grated Parmesan cheese
- 1 teaspoon garlic powder
- 1 teaspoon Italian seasoning
- 1/2 teaspoon salt
- 1/4 teaspoon black pepper
- 1/4 teaspoon cayenne pepper (optional, but I always use it)
- Cooking spray or a light brush of olive oil
Hailee’s Tip: Pick zucchini that are medium-sized and firm. The giant ones tend to have more seeds and water content, which can make your rounds wetter. You want zucchini that feel substantial when you hold them.
Hailee’s Tip: Don’t skip the egg wash. I know it seems like an extra step, but it’s what makes the breadcrumbs stick properly and creates that beautiful golden color. Trust me on this.
Hailee’s Tip: Use panko, not regular breadcrumbs. Regular breadcrumbs will give you a dense, heavy coating. Panko is fluffier and creates actual crispness. It’s a non-negotiable swap.
Optional Add-Ins and Variations
Here’s where you can make this recipe completely your own. I’ve tested all of these, and they all work beautifully.
- Spicy version: Add 1/2 teaspoon of smoked paprika and increase the cayenne to 1/2 teaspoon. Serve with sriracha mayo for dipping.
- Mediterranean style: Mix dried oregano and thyme into your breadcrumb mixture, and add some lemon zest. Serve with tzatziki.
- Ranch lover: Replace the Italian seasoning with 1 teaspoon of ranch seasoning powder. Your family will lose their minds.
- Everything bagel energy: Mix everything bagel seasoning into your panko mixture. It’s weird, it’s wonderful, and it works.
- Parmesan-forward: Increase the Parmesan to 3/4 cup and add a tablespoon of grated Pecorino Romano for extra sharpness.
- Herb-loaded: Mix fresh minced parsley, basil, or dill into your panko mixture. Use about 2 tablespoons of fresh herbs.
Step-by-Step Method
Step 1: Prep your zucchini
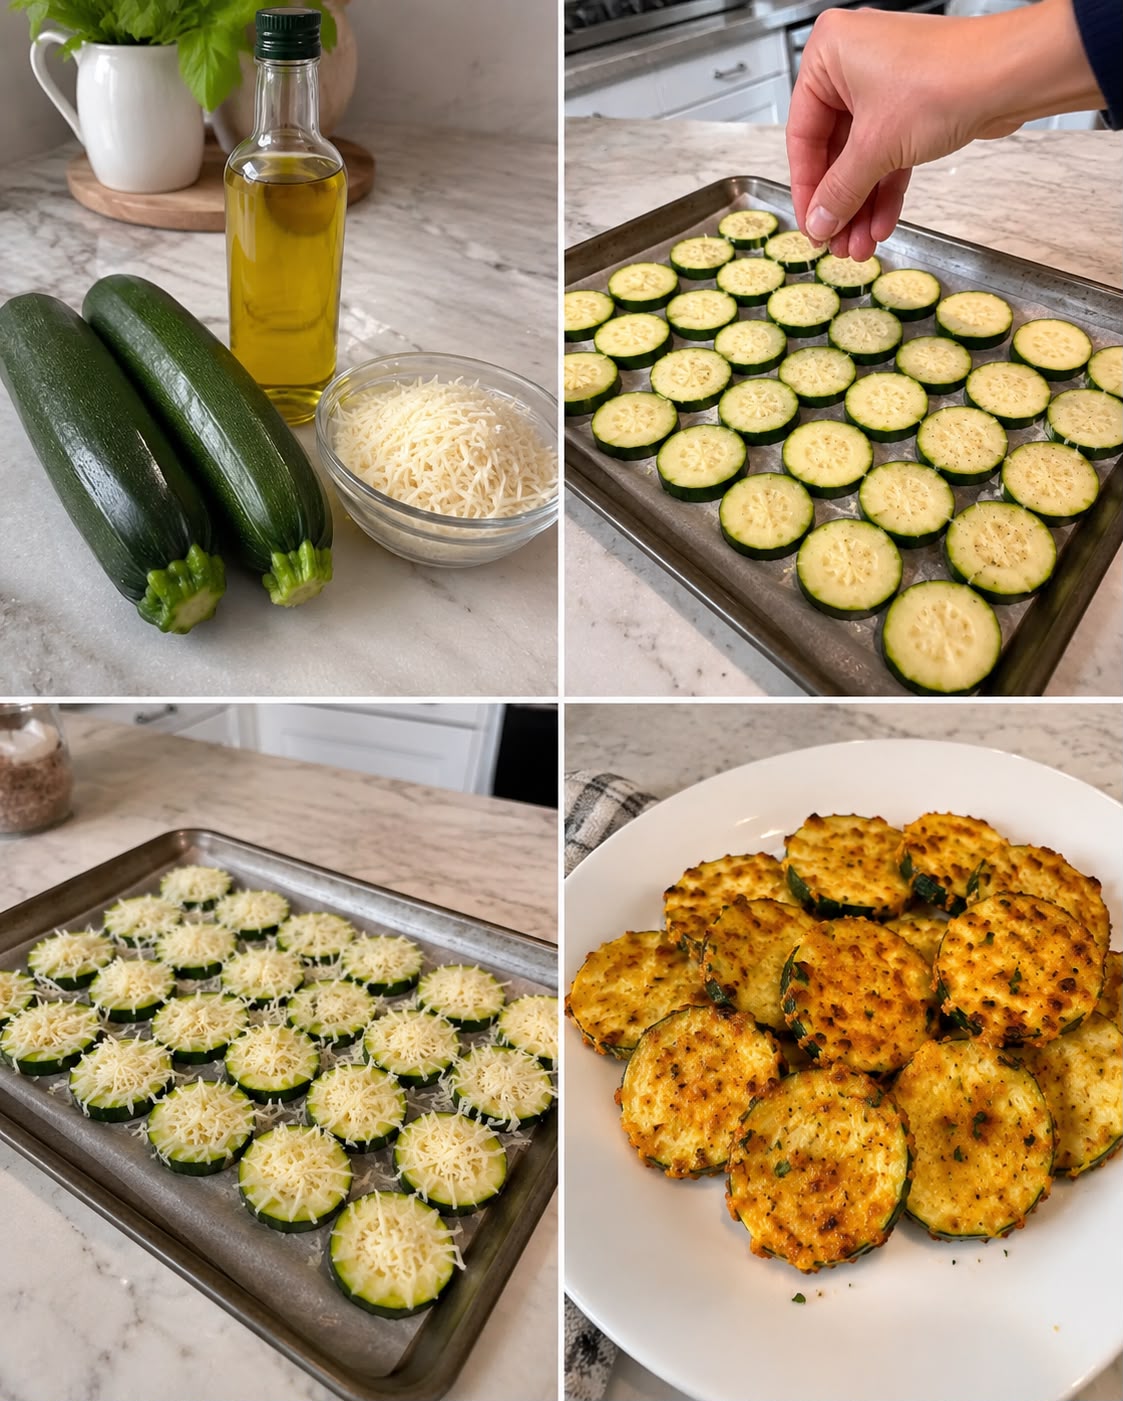
Wash your zucchini and pat them completely dry with paper towels. This is important because any excess moisture will steam your rounds instead of crisping them. Trim the ends off, then slice your zucchini into rounds about 1/4 inch thick. I use my chef’s knife and just eyeball it, but if you want uniform rounds, grab a mandoline or use the slicing blade on your food processor. Just be careful with your fingers.
What I messed up: The first time I made these, I didn’t pat the zucchini dry. They came out soggy and disappointing. I learned my lesson hard.
Step 2: Set up your breading station
Get three shallow bowls or plates. In the first one, beat your egg with a fork until it’s well combined. In the second bowl, mix together your panko, Parmesan, garlic powder, Italian seasoning, salt, black pepper, and cayenne. The third bowl can just be for your clean hands or a fork for dipping.
Hailee’s Tip: If you want to make this even easier, use a pie dish for your egg and a shallow baking dish for your panko mixture. They’re wider and make dipping easier.
Step 3: Bread your rounds
Working with one zucchini round at a time, dip it into the egg, making sure both sides are coated. Let any excess egg drip off, then place it in your panko mixture and press gently so the breadcrumbs stick to both sides. Don’t be timid here. You want a good coating. Place each breaded round on a plate or cutting board as you go.
What I messed up: I used to try to bread all of them at once and then bake them. The ones I breaded first got soggy by the time the last ones were ready. Now I bread them as I go, and it’s much better.
Step 4: Prepare your baking sheet
Line a baking sheet with parchment paper. This makes cleanup infinitely easier and prevents sticking. Lightly spray the parchment with cooking spray, or brush it with olive oil. You want just a light coating to help with browning and crispness.
Step 5: Arrange and spray
Arrange your breaded zucchini rounds on the prepared baking sheet in a single layer. They can be close together but shouldn’t be touching. Lightly spray the tops of each round with cooking spray. This is what creates the crispness. Don’t skip this step or try to brush oil instead. The spray distributes more evenly and uses less oil.
Step 6: Bake
Pop them into a preheated 400-degree Fahrenheit oven for 20 to 25 minutes. You’re looking for the tops to be golden brown and the edges to look crispy. Halfway through baking, I flip each round so both sides get equally crispy and golden. This takes two minutes and makes a huge difference.
What I messed up: I didn’t flip them the first few times, and the bottoms were pale while the tops were perfect. Flipping is your friend.
Step 7: Cool and serve
Let them cool on the baking sheet for about five minutes. This gives them time to firm up and get even crispier. After five minutes, you can transfer them to a serving plate. They’ll stay crispy for about ten to fifteen minutes, though honestly, they’re usually gone before then.
Common Mistakes to Avoid
Wet zucchini: This is the number one culprit for soggy rounds. Pat them dry before slicing, and make sure you pat the slices dry too if they’re sitting around for a bit.
Skipping the spray: You need that light coating of cooking spray on top to get real crispness. Oil brushed on doesn’t distribute evenly, and no oil at all means they’ll be dry and tough.
Oven too low: If you bake these at 350 degrees, they’ll steam instead of crisp. You need the heat at 400 degrees or higher.
Rounds too thick: If you slice your zucchini thicker than 1/4 inch, the inside won’t cook properly before the outside burns. Stick with 1/4 inch.
Not flipping them: One side will be crispy and golden, and the other will be pale and less crispy. Flip them halfway through for even results.
Overcrowding the pan: If your zucchini rounds are touching, they’ll steam instead of bake. Give them space.
My Tested Substitutions
Different cheeses: Cheddar, Asiago, Gruyere, or even a sharp white cheddar all work beautifully. Use the same amount. Skip the cheese entirely if you’re dairy-free, but the results won’t be quite as flavorful.
Gluten-free breadcrumbs: They work great. Just make sure you’re using panko-style gluten-free breadcrumbs, not regular gluten-free breadcrumbs.
Almond flour: I’ve tried this as a lower-carb option. It doesn’t get quite as crispy as panko, but it still works. Use the same amount.
Different eggs: I’ve used duck eggs, and they work. I’ve used aquafaba if I’m cooking vegan, and it works too, though the coating is slightly less sturdy.
Oil instead of cooking spray: If you don’t have cooking spray, brush your rounds lightly with olive oil. You’ll use more oil this way, but it still works.
How to Customize
The beauty of this recipe is that it’s genuinely flexible. Here are some ways to make it exactly what you want.
Make it spicier: Add cayenne, smoked paprika, or red pepper flakes to your breadcrumb mixture. Serve with hot sauce or sriracha mayo.
Make it herbier: Add fresh or dried herbs to your panko mixture. Basil, oregano, thyme, parsley, and dill all work beautifully.
Make it cheesier: Increase the Parmesan, or mix in a second cheese like Asiago or Gruyere.
Make it lighter: Use half panko and half grated Pecorino Romano for a thinner, crispier coating. Reduce the Parmesan to 1/4 cup.
Make it more savory: Add a pinch of umami by mixing in a teaspoon of nutritional yeast or a tablespoon of grated Pecorino Romano.
Serving Ideas
These crispy baked zucchini rounds are endlessly versatile. Here’s how I actually use them.
As an appetizer: Serve them warm on a platter with marinara sauce, ranch dip, or tzatziki for dipping. They disappear immediately.
As a side dish: Pair them with grilled chicken, baked salmon, or pasta. They’re light enough to not overpower the main dish but substantial enough to feel satisfying.
As a lunch: Pack them in a container with hummus or your favorite dip. They’re great cold or at room temperature.
As a snack: Honestly, I just eat them straight from the cooling rack. They’re that good.
In a salad: Chop them up and toss them into a green salad with some vinaigrette. The crispness adds great texture.
On a sandwich: Layer them on a roll with some fresh mozzarella, tomato, and basil for a vegetarian sandwich that actually tastes amazing.
Meal Prep and Storage
These are genuinely great for meal prep, which is one of my favorite things about them.
Make ahead: You can bread your zucchini rounds several hours in advance. Keep them in the fridge on a plate or baking sheet covered with plastic wrap. Bake them when you’re ready to eat.
Refrigerator storage: Leftover baked rounds will keep in an airtight container in the fridge for up to three days. They’ll soften slightly, but they’re still delicious.
Reheating: Pop them back in a 350-degree oven for about five minutes to re-crisp them. Don’t use the microwave unless you enjoy sad, soggy vegetables.
Freezing: You can freeze breaded rounds before baking for up to a month. Bake them straight from frozen, adding about five extra minutes to the baking time. They come out great.
Freezing baked rounds: You can freeze baked rounds too, though they lose some of their crispness when thawed. Still delicious, just slightly softer. Reheat in the oven.
Nutritional Breakdown
Per serving (about 4 rounds), here’s what you’re looking at:
- Calories: 95
- Protein: 5g
- Carbohydrates: 12g
- Fat: 3g
- Fiber: 2g
- Sodium: 280mg
These numbers are approximate and will vary based on your exact portion size and how much cooking spray you use. The recipe makes about 12 to 14 rounds, depending on your zucchini size and how thick you slice them.
Final Thoughts
Honestly, crispy baked zucchini rounds have become one of my kitchen staples. They’re the kind of recipe that works when you’re cooking for yourself on a Tuesday night, when you’re hosting a dinner party, when you need a quick lunch, or when you just want something delicious that doesn’t involve a ton of work.
I love that this recipe is reliable. I’ve made it dozens of times, and it works the same way every single time. I love that it’s flexible enough to fit whatever I’m craving or whatever I have in my kitchen. And I love that it tastes genuinely good, not like healthy food that you have to choke down.
Give this recipe a try, and I promise you’ll understand why I’ve made it so many times. And if you do make it, I’d love to hear about it. Cooking is better when we share what we’re making, and I genuinely love hearing from people who try my recipes.
Happy cooking, and enjoy those crispy, golden, absolutely delicious zuc