Classic Baked Mac and Cheese
Classic Baked Mac and Cheese
Classic Baked Mac and Cheese: The Comfort Food That Never Lets You Down
I’m going to be honest with you—there are nights when nothing else will do. Not a salad. Not a stir-fry. Not even pizza. On those nights, I need mac and cheese. That creamy, golden, bubbly kind that tastes like a warm hug tastes like home.
I grew up watching my grandmother make this dish on Sunday afternoons. She’d stand at the stove with her wooden spoon, tasting the sauce about a thousand times, adjusting the salt, melting the cheese slowly so it would be silky instead of grainy. She never used a recipe—just her hands and her instincts. But here’s the thing: I’m not my grandmother. I need a recipe. And I’m betting you do too.
That’s why I’ve spent years perfecting my version of Classic Baked Mac and Cheese. This isn’t some fancy, over-complicated version with truffle oil or whatever’s trendy right now. This is the real deal. It’s the recipe I make when my family’s coming over, when I’m feeling nostalgic, or when I’ve had a terrible day and need something to make it better. It’s the recipe that works every single time, and I’m so excited to share it with you.
This Classic Baked Mac and Cheese is for anyone who loves comfort food, whether you’re a beginner cook or someone who’s been in the kitchen for decades. It’s forgiving, it’s flexible, and it delivers that creamy, cheesy goodness you’re craving. If you want more recipes like this one, follow me on HaileeRecipes on Pinterest where I share all my cozy kitchen favorites.
Why You’ll Love This Recipe
Let me break down what makes this version special, because I know there are a lot of mac and cheese recipes out there.
It’s actually creamy. Too many versions end up dry or gluey. Mine uses a proper cheese sauce—a béchamel base with real cheese melted into it—so you get that silky, luxurious texture in every bite.
The cheese flavor is real. I’m using a combination of sharp cheddar and gruyere, which means you taste the cheese, not just salt and fat. The sharp cheddar brings that classic tang, and the gruyere adds depth and helps the sauce stay smooth.
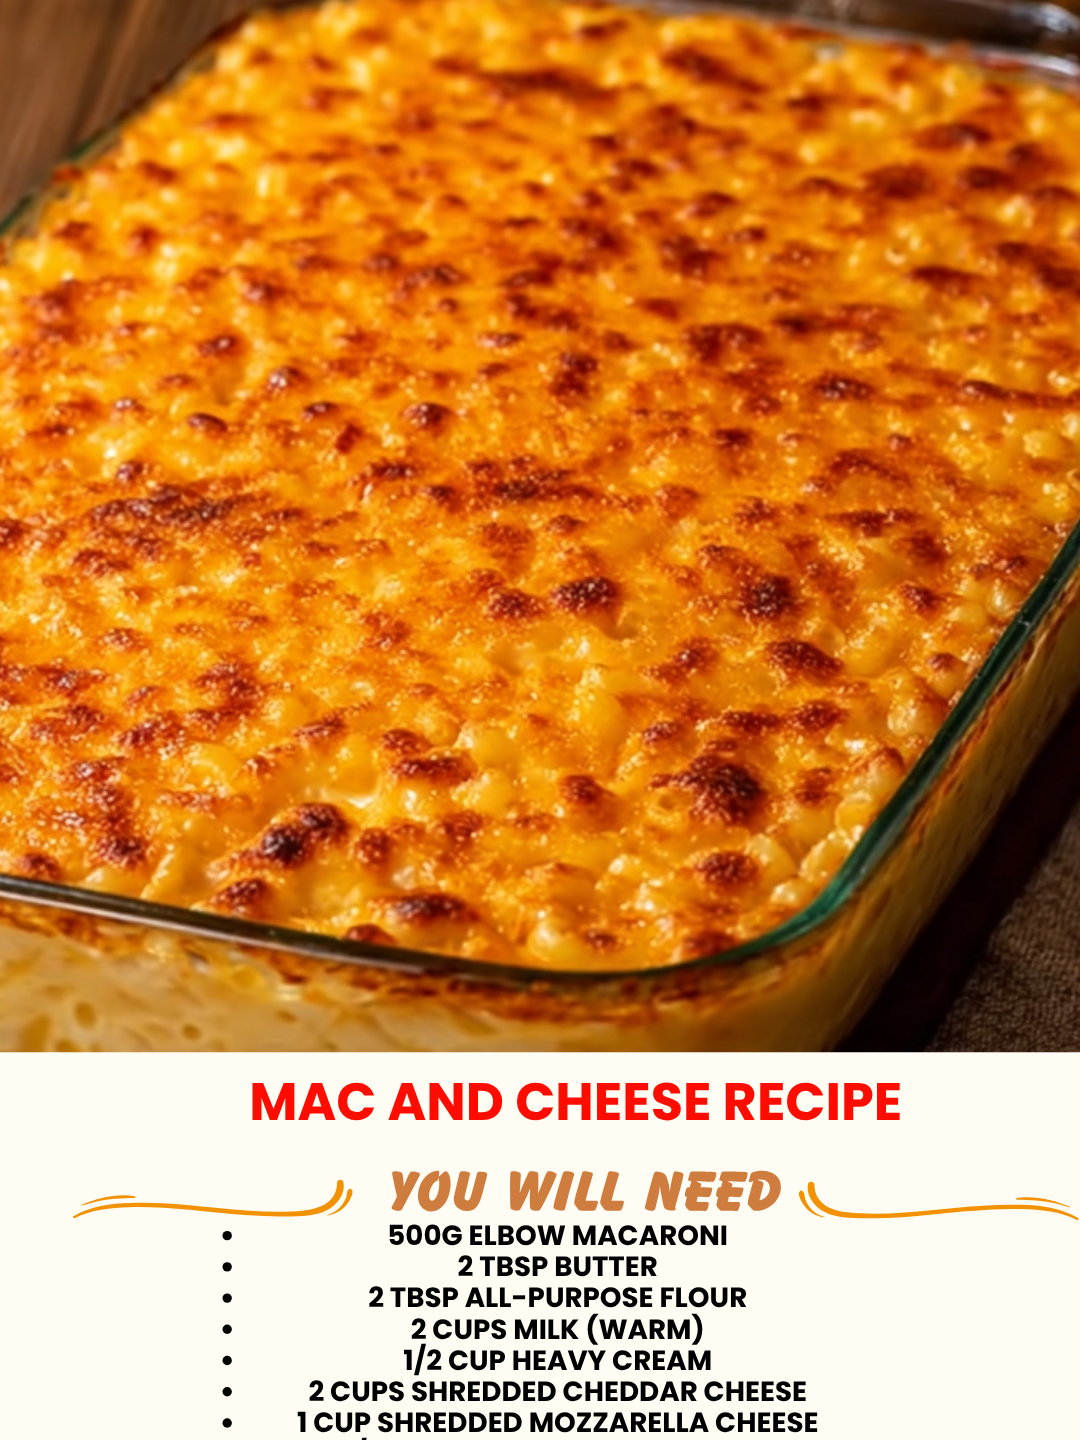
The topping actually matters. That golden, crispy layer on top? It comes from panko breadcrumbs mixed with butter and a little more cheese. It’s not just decoration—it’s textural contrast that makes every forkful better.
It’s customizable without being fussy. Want to add bacon? Go for it. Jalapeños? Sure. Truffle oil if you’re feeling fancy? I won’t judge. This recipe is a solid foundation that welcomes your additions.
It actually tastes better the next day. The flavors meld, the texture stays creamy, and you can reheat it without it turning into a brick. This is meal-prep gold.
Ingredients
- 1 pound elbow pasta
- 4 tablespoons unsalted butter
- 3 tablespoons all-purpose flour
- 3 cups whole milk, warmed
- 2 cups sharp cheddar cheese, shredded (about 8 ounces)
- 1 cup gruyere cheese, shredded (about 4 ounces)
- 1 teaspoon Dijon mustard
- ½ teaspoon garlic powder
- ¼ teaspoon cayenne pepper (optional, but I use it)
- Salt and black pepper to taste
- ½ cup panko breadcrumbs
- 2 tablespoons melted butter (for topping)
- ¼ cup grated Parmesan cheese (for topping)
Hailee’s Tip: Buy your cheese from the block and shred it yourself. Pre-shredded cheese has anti-caking agents that can make your sauce grainy. I know it takes an extra two minutes, but trust me on this one.
Hailee’s Tip: Warm your milk before adding it to the roux. Cold milk can cause lumps. I microwave mine for about 90 seconds, and it makes a real difference.
Hailee’s Tip: The Dijon mustard isn’t about making it taste like mustard—it’s a secret ingredient that deepens the cheese flavor. You won’t taste it, but you’ll taste that something is really good.
Optional Add-Ins and Variations
This is where you can make it yours. Here are my favorite additions, and how much to use:
- Crispy bacon: 6 slices, cooked and crumbled. Add it to the pasta before mixing with the sauce.
- Fresh jalapeños: 2-3, sliced thin and seeded if you want less heat. Stir them into the sauce.
- Caramelized onions: About ¾ cup. Make them ahead and fold them in with the sauce.
- Fresh thyme: 1 tablespoon, chopped. Add it when you’re seasoning the sauce.
- Smoked paprika: ½ teaspoon, for a subtle smoky note.
- Truffle oil: A light drizzle on top before baking. Use sparingly—it’s potent.
- Breadcrumb upgrade: Mix panko with crushed potato chips, crushed pretzels, or even crushed crackers for extra crunch.
Step-by-Step Method
Step 1: Start your pasta water. Fill a large pot with salted water and bring it to a rolling boil. This is your baseline for flavor. Don’t skimp on the salt—the pasta should taste like the sea (but not aggressively so).
Step 2: Cook the pasta. Add your elbow pasta and cook it until it’s just shy of al dente. You want a little resistance when you bite it, because it’s going to cook a bit more in the oven. Drain it and set it aside. Don’t rinse it—the starch helps the sauce cling to the noodles.
What I messed up: I used to cook the pasta all the way to al dente, and then it would get mushy in the oven. Now I pull it out about a minute early. Game changer.
Step 3: Make your roux. In a large saucepan over medium heat, melt the 4 tablespoons of butter. Once it’s foamy, add the flour and whisk constantly for about 2 minutes. You’re cooking out the raw flour taste. It should smell a little nutty, not floury. This is your roux, and it’s the foundation of your sauce.
Step 4: Add the milk slowly. This is where patience pays off. Whisk in the warm milk a little bit at a time, making sure there are no lumps. If you dump it all in at once, you’ll end up with a lumpy sauce, and nobody wants that. Take your time. This should take about 3-4 minutes of whisking.
Step 5: Cook the sauce until it thickens. Keep the heat at medium and stir frequently. You’re looking for the sauce to coat the back of a spoon. When you run your finger across the spoon, it should leave a trail. This usually takes about 5-7 minutes. Don’t rush this—the sauce will continue to thicken slightly as it cools.
Step 6: Add the cheese and seasonings. Remove the pan from heat. Add the Dijon mustard, garlic powder, cayenne, and a good pinch of salt and pepper. Now add your shredded cheeses in handfuls, stirring after each addition until it’s completely melted and smooth. Taste it. Adjust the seasoning. This is your moment to make sure it tastes exactly how you want it.
What I messed up: I used to add the cheese while the pan was still on high heat, and it would break and get grainy. Now I always remove it from the heat first. The residual warmth is enough to melt the cheese perfectly.
Step 7: Combine pasta and sauce. Pour the cooked pasta into the cheese sauce and stir until every noodle is coated. Transfer this to a buttered 9×13 baking dish. Spread it out evenly.
Step 8: Make the topping. In a small bowl, mix the panko breadcrumbs with the melted butter and grated Parmesan. Sprinkle this evenly over the top of your mac and cheese.
Step 9: Bake. Preheat your oven to 350°F. Bake the mac and cheese for 25-30 minutes, until the top is golden brown and the edges are bubbling. If your topping isn’t browning enough, you can run it under the broiler for the last minute or two, but watch it carefully so it doesn’t burn.
Step 10: Rest and serve. Let it sit for about 5 minutes before serving. This helps it set up a bit and makes it easier to portion. Plus, it’s less likely to burn your mouth.
Common Mistakes to Avoid
Using cold milk. This causes lumps. Warm it first. I promise it’s worth the extra step.
Cooking the pasta too far. If it’s already soft when it goes into the oven, it’ll be mushy when it comes out. Aim for just under al dente.
Not seasoning the sauce enough. The sauce should taste good on its own before you add the pasta. Don’t be shy with the salt and pepper.
Skipping the resting time. Five minutes might not seem like much, but it makes a real difference in texture and temperature.
Opening the oven door constantly. I get it—you want to check on it. But every time you open the door, you’re letting heat escape. Trust the process and check it once at the 20-minute mark.
My Tested Substitutions
If you don’t have gruyere: Use extra sharp cheddar or a combination of cheddar and fontina. You want something with flavor and a good melting point.
If you don’t have panko: Regular breadcrumbs work, but they’ll be denser. You can also use crushed crackers or even crushed cereal (yes, really—Chex works surprisingly well).
If you only have one type of cheese: You can absolutely use all sharp cheddar. The sauce won’t be quite as complex, but it’ll still be delicious.
If you want to use half-and-half instead of milk: Go for it, but use only 2½ cups because it’s richer. Your sauce will be extra creamy.
If you want to make it lighter: Use 2% milk instead of whole milk, and reduce the butter to 3 tablespoons. It won’t be quite as luxurious, but it’s still really good.
How to Customize
The beauty of this recipe is that it’s a template. You can build on it.
For a protein boost: Add cooked bacon, diced ham, or even ground beef that’s been browned and drained. Fold it in with the pasta.
For vegetables: Roast broccoli, cauliflower, or peas beforehand and mix them in. I usually add about 1½ cups of roasted veggies.
For a spicy kick: Increase the cayenne to ½ teaspoon, or add a diced jalapeño or two.
For a gourmet touch: Add crispy fried onions to the breadcrumb topping, or stir in some fresh thyme and a splash of white wine to the sauce.
For a kid-friendly version: Skip the cayenne and any spicy add-ins. Stick with the classic cheese flavor. Kids love this, and you can always make a spicy batch for yourself another time.
Serving Ideas
Mac and cheese is pretty perfect on its own, but here’s how I like to serve it:
- With a simple green salad: The acidity cuts through the richness beautifully. A vinaigrette with lemon juice is my go-to.
- Alongside roasted vegetables: Roasted Brussels sprouts or green beans add nutrition and texture contrast.
- With crusty bread: For soaking up every last bit of sauce. No shame in that game.
- As a side dish: It’s perfect next to grilled chicken or a simple roasted fish.
- On its own: Sometimes you just want a big bowl of mac and cheese for dinner, and that’s completely valid.
Meal Prep and Storage
Refrigerator: Leftovers keep for about 4 days in an airtight container. It actually tastes better the next day because the flavors have time to meld.
Reheating: I reheat in a 325°F oven for about 15-20 minutes, covered with foil. This keeps it creamy. You can also microwave individual portions, but add a splash of milk first to keep the sauce from drying out.
Freezing: You can freeze the unbaked mac and cheese for up to 3 months. Thaw it overnight in the fridge, then bake as directed, adding about 10 extra minutes to the baking time.
Make-ahead option: Assemble the dish the night before, cover it, and refrigerate. Bake it straight from the fridge, adding about 5-10 minutes to the baking time.
Nutritional Breakdown
Here’s what you’re getting in each serving (based on 6 servings):
- Calories: 680
- Protein: 28g
- Carbohydrates: 62g
- Fat: 32g
- Fiber: 2g
- Sodium: 890mg
This is a rich dish, which is exactly the point. It’s meant to be comforting and satisfying, not light. One serving is plenty, and it pairs beautifully with vegetables and a salad to balance out the meal.
Final Thoughts
I love this recipe because it’s honest. It doesn’t pretend to be something it’s not. It’s not trying to be trendy or complicated. It’s just really good mac and cheese—the kind that makes you feel taken care of, the kind that brings people together, the kind that tastes like home.
I hope you make this soon. I hope it becomes your go-to recipe for those nights when you need comfort. And I hope you’ll make it your own, whether that means adding your favorite additions or just making it exactly as written. Either way, I know it’s going to be delicious.
If you make this, I’d love to know how it turns out. Drop by my Pinterest and let me know what you thought, or tell me about any fun variations you tried. That’s what makes cooking so much fun—sharing these moments with each other.
Happy cooking, friend.
Recipe Card
**Classic Baked Mac and Cheese**
Classic Baked Mac and Cheese
Ingredients
Method
- Preheat oven to 350°F. Bring a large pot of salted water to a boil and cook elbow pasta until just