Strawberry Shortcake Cheesecake Roll
Strawberry Shortcake Cheesecake Roll
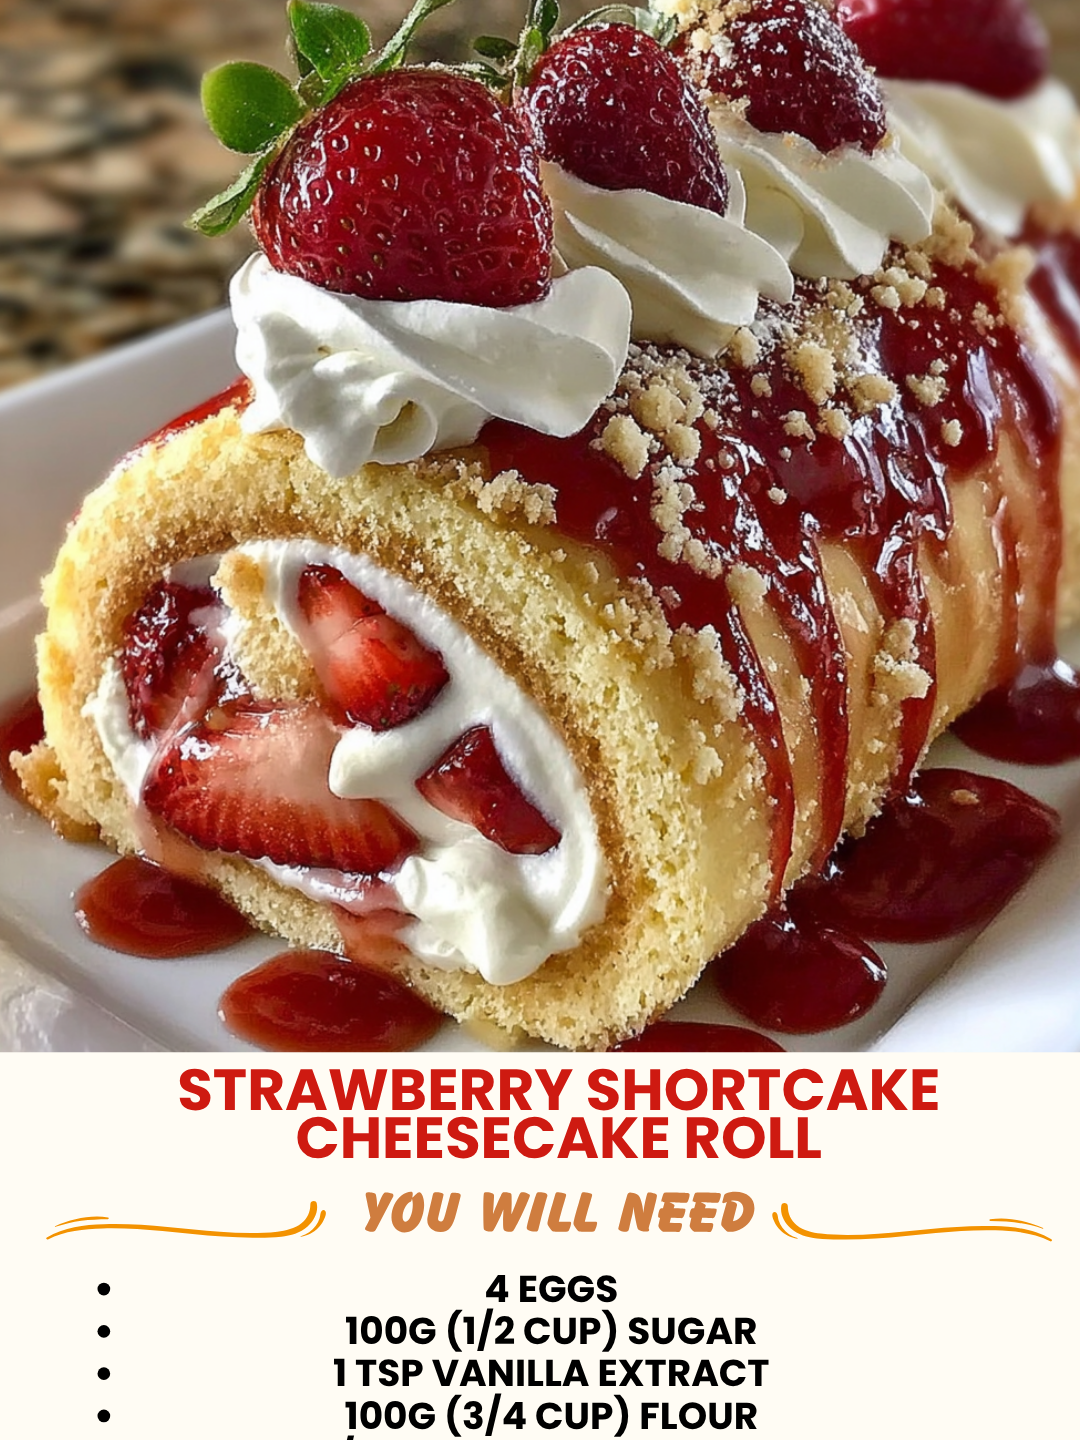
Strawberry Shortcake Cheesecake Roll: A Dessert That Feels Like a Hug
I created this Strawberry Shortcake Cheesecake Roll on a Tuesday night when I was craving three completely different desserts at once. You know that feeling, right? I wanted the light, fluffy sweetness of classic strawberry shortcake, the rich indulgence of cheesecake, and something I could actually slice and serve to people without it falling apart. So I did what I always do: I locked myself in my kitchen and started experimenting.
What came out of that evening was honestly one of my favorite creations. This roll combines everything I love about both desserts into one gorgeous, surprisingly manageable package. It’s got a tender vanilla sponge cake rolled around a smooth cheesecake filling, topped with fresh strawberries and a cloud of whipped cream. The first time my mom tried it, she literally closed her eyes and didn’t say anything for a solid ten seconds. Then she asked for the recipe. That’s when I knew I was onto something special.
Here’s what makes this recipe work: the sponge is light enough to roll without cracking (I’ll show you my trick for that), the cheesecake filling is creamy but stable, and the whole thing actually holds together when you slice it. This isn’t some fussy restaurant dessert that requires a culinary degree. It’s genuinely doable for anyone who’s made a basic cake before. I’ve tested this with home bakers of all skill levels, and everyone’s gotten great results.
This dessert is perfect for dinner parties, holiday gatherings, or those nights when you want something special but don’t want to stress yourself out. It’s also absolutely beautiful—the kind of thing that makes people take photos before they eat it. And if you’re looking for more inspiration like this, follow me on HaileeRecipes on Pinterest for more cozy, real-life recipes that actually work.
Why You’ll Love This Recipe
Beyond the obvious fact that it tastes incredible, there are some really practical reasons I keep coming back to this roll. First, it’s surprisingly elegant without being pretentious. You can make it a day or two ahead, which means less stress on the day you’re serving it. The flavors are classic and comforting—nobody’s going to be confused or put off by strawberry, vanilla, and cheesecake together.
I also love that it’s flexible. If you don’t have fresh strawberries, you can use frozen ones. If someone at your table needs a dairy-free option, I’ve got substitutions for you. The roll itself doesn’t require any special equipment beyond what most home bakers already have.
And honestly? It’s just fun to make. There’s something satisfying about rolling that cake, spreading the filling, and then slicing into it to reveal those perfect spirals. It feels like you’ve accomplished something, even though it’s not actually that complicated.
Ingredients
For the Sponge Cake:
- 4 large eggs, separated into yolks and whites
- 1/2 cup granulated sugar, divided
- 1/4 cup vegetable oil
- 1/4 cup whole milk, room temperature
- 1 teaspoon vanilla extract
- 3/4 cup all-purpose flour
- 1 1/2 teaspoons baking powder
- 1/4 teaspoon salt
- Powdered sugar for dusting
For the Cheesecake Filling:
- 8 ounces cream cheese, softened to room temperature
- 1/4 cup granulated sugar
- 1/2 teaspoon vanilla extract
- 1 cup heavy whipping cream, cold
- 2 tablespoons powdered sugar
For the Topping:
- 1 pound fresh strawberries, hulled and halved
- 2 tablespoons granulated sugar
- 1 cup heavy whipping cream
- 2 tablespoons powdered sugar
- 1/2 teaspoon vanilla extract
Hailee’s Tip: Make sure your cream cheese is genuinely soft. I leave mine on the counter for about an hour. Cold cream cheese will create lumps in your filling, and nobody wants that. Same goes for your eggs—room temperature eggs incorporate better into both the sponge and the filling.
Hailee’s Tip: Don’t skip separating your eggs for the sponge cake. I know it seems like an extra step, but whipped egg whites are what give this cake its fluffy, rollable texture. It’s actually the secret ingredient here.
Optional Add-Ins and Variations
This recipe is a beautiful canvas for your own creativity. Here are some directions I’ve taken it:
- Lemon version: Add 1 tablespoon of fresh lemon zest to the cheesecake filling and 1/2 teaspoon of lemon extract to the sponge cake. Use raspberries instead of strawberries on top. It’s bright and summery.
- Chocolate lover’s twist: Mix 2 tablespoons of cocoa powder into the sponge cake batter. Keep the strawberry filling—the contrast is gorgeous.
- Extra indulgent: Brush the sponge cake with a simple strawberry syrup (just 1/4 cup strawberry jam mixed with 1 tablespoon water) before rolling. It adds moisture and extra flavor.
- Boozy version: Add 1 tablespoon of strawberry liqueur or champagne to the cheesecake filling. This is definitely for the adults-only dinner party.
Step-by-Step Method
Step 1: Prepare Your Pan and Preheat
Preheat your oven to 350 degrees Fahrenheit. Line a 15×10-inch jelly roll pan with parchment paper, making sure it goes up the sides a bit. I like to spray it lightly with cooking spray first so the parchment doesn’t slip around. This is honestly the most important setup step—a stable parchment paper is your friend.
Step 2: Make the Sponge Cake Batter
Separate your eggs carefully. I use the shell method—crack the egg and pass the yolk back and forth between the shell halves while the white falls into a bowl. Put the yolks in one bowl and the whites in another (make sure there’s absolutely no yolk in the whites, or they won’t whip properly).
In the bowl with egg yolks, whisk together 1/4 cup of the granulated sugar, the oil, milk, and vanilla until it’s smooth and pale. In a separate bowl, whisk together the flour, baking powder, and salt. Gently fold the dry ingredients into the wet ingredients until just combined. Don’t overmix—you want it barely combined.
Now for the magic: in the egg white bowl, use an electric mixer to beat the whites until they’re foamy. Gradually add the remaining 1/4 cup sugar while beating, until stiff peaks form. This takes about 3 to 4 minutes. The whites should look glossy and hold their shape when you lift the beaters.
Gently fold about a third of the egg whites into the yolk mixture to loosen it up. Then fold in the remaining whites in two additions, being careful not to deflate all that air you just created. The batter should be light and fluffy.
What I Messed Up: The first time I made this, I folded the whites too aggressively and ended up with a dense cake that wouldn’t roll without cracking. Now I fold slowly and deliberately, using a spatula and turning the bowl as I go. It takes an extra minute, but it’s worth it.
Step 3: Bake the Sponge Cake
Pour the batter into your prepared pan and smooth the top gently. Bake for 12 to 15 minutes, until the top is golden and springs back when you touch it lightly. It should feel like a cloud. Don’t overbake—you want it just set but still tender.
While it’s baking, dust a clean kitchen towel with powdered sugar. This is going to be your rolling surface.
Step 4: Roll the Warm Cake
As soon as the cake comes out of the oven, run a thin knife around the edges to loosen it. Immediately turn it out onto your powdered-sugar-dusted towel. Peel off the parchment paper carefully. Starting from the short end, roll the cake up tightly in the towel (yes, the towel stays with it). Let it cool completely like this—the towel helps it hold its shape. This takes about an hour at room temperature, or you can refrigerate it for 30 minutes.
What I Messed Up: I once waited for the cake to cool before rolling it, and it cracked like crazy. The warmth is what makes it pliable. Roll it while it’s still warm, even though it feels scary.
Step 5: Make the Cheesecake Filling
While the cake cools, beat the softened cream cheese until it’s completely smooth—no lumps. Add 1/4 cup granulated sugar and 1/2 teaspoon vanilla, and beat until fluffy, about 2 minutes. In a separate bowl, whip the cold heavy cream with 2 tablespoons powdered sugar until stiff peaks form. Gently fold the whipped cream into the cream cheese mixture until no streaks remain. This filling is light, creamy, and stable enough to hold the roll together.
Step 6: Unroll and Fill
Once the cake is completely cool, carefully unroll it from the towel. Spread the cheesecake filling evenly over the entire surface, leaving about 1/2 inch bare at the far short edge (this prevents filling from squishing out when you roll). Roll it back up tightly, using the towel to help guide it. Wrap the whole thing in plastic wrap and refrigerate for at least 2 hours before serving. Overnight is even better.
Step 7: Prepare the Strawberries and Topping
About an hour before serving, toss the halved strawberries with 2 tablespoons granulated sugar and let them macerate. This brings out their juices and sweetness. In a separate bowl, whip the final cup of heavy cream with 2 tablespoons powdered sugar and 1/2 teaspoon vanilla until stiff peaks form.
Step 8: Slice and Serve
Using a sharp, thin-bladed knife (I dip mine in hot water and wipe it between cuts), slice the roll into 1-inch thick pieces. Arrange on serving plates, top with the macerated strawberries and their juices, and add a generous dollop of fresh whipped cream. Serve immediately and enjoy the compliments.
Common Mistakes to Avoid
Over-whipping the egg whites: This sounds counterintuitive, but if you beat them too long, they become grainy and don’t fold in smoothly. Stop when you have stiff, glossy peaks.
Using cold cream cheese: I mentioned this before, but it’s worth repeating. Cold cream cheese won’t blend smoothly and you’ll end up with a lumpy filling. Let it sit out for at least an hour.
Rolling the cake when it’s too cool: The cake needs to still be warm enough to be pliable. If it’s completely cool, it will crack. You’ve got a window of about 5 minutes after it comes out of the oven.
Not refrigerating long enough: The roll needs time to set so it slices cleanly. Two hours is the minimum, but overnight is genuinely better. I almost always make this the day before I serve it.
Skipping the towel method: I’ve tried just letting the cake cool flat, and it never holds together as well when you try to roll it later. The towel method really does make a difference.
My Tested Substitutions
All-purpose flour alternatives: You can use cake flour in a 1:1 ratio for an even lighter cake. I don’t recommend whole wheat or almond flour here—the structure just doesn’t work the same way.
Dairy-free version: Use dairy-free cream cheese and coconut cream (the thick part from a can of coconut milk) instead of heavy cream. The texture is slightly different but still delicious. Use the same amounts.
Sugar substitutes: For the cake, you can use a 1:1 baking sugar substitute like Erythritol. For the filling, I’d stick with regular sugar—the texture of the whipped cream filling doesn’t work quite as well with substitutes, in my experience.
Fresh berries: If strawberries aren’t available, raspberries, blackberries, or a mix work beautifully. Adjust the sugar on top based on how sweet your berries are.
Vanilla extract: Almond extract is lovely in this too—use 1/2 teaspoon instead of 1 teaspoon since it’s more potent. Or try a tiny bit of rum extract for something different.
How to Customize
The beauty of this roll is how adaptable it is. Want to make it for someone with a nut allergy? This recipe is naturally nut-free. Want to make individual rolls instead of one large one? Divide the batter between two 9×13-inch pans, bake for 10 to 12 minutes, and roll each one separately.
You can also play with the presentation. Instead of slicing it, you could serve it whole and let people cut their own pieces. Or slice it and arrange the pieces standing up on a platter for a more dramatic presentation.
If you’re making this for someone who prefers less sweetness, reduce the sugar in the filling by a tablespoon or two. The strawberries will still provide plenty of sweetness.
Serving Ideas
This roll is stunning on its own, but here are some ways I like to serve it:
- Classic style: Slice, top with macerated strawberries and whipped cream. Simple and perfect.
- Fancy plating: Arrange the slice on the plate, drizzle a little strawberry syrup around it, add a quenelle of whipped cream, and garnish with a fresh mint leaf.
- Dessert board: Slice it, arrange it on a wooden board with fresh strawberries, some shortbread cookies, and a small bowl of whipped cream. Let people build their own.
- Afternoon tea: Slice it thinner, serve with a cup of tea and a small side salad of fresh berries.
- Ice cream companion: Serve a slice with a scoop of vanilla ice cream instead of whipped cream. The cold ice cream melts into the warm cake beautifully.
Meal Prep and Storage
This is one of those desserts that actually improves with a day or two of rest. The flavors meld together, and the texture becomes even better.
Make-ahead: You can prepare the entire roll up to 3 days in advance. Wrap it tightly in plastic wrap and keep it in the refrigerator. Don’t add the fresh strawberry topping until a few hours before serving, or it’ll get soggy.
Freezing: The unsliced roll freezes beautifully for up to 2 weeks. Wrap it well in plastic wrap and then foil. Thaw it in the refrigerator overnight before serving. Don’t freeze it after you’ve added the fresh strawberry topping.
Sliced storage: If you have leftover slices (which is rare in my house), keep them covered in the refrigerator for up to 2 days. The texture stays nice and the flavors are still great.
Room temperature: This roll is best served cold or at cool room temperature. If you leave it out for more than an hour, the filling will soften too much.
Nutritional Breakdown
Each slice contains approximately:
- Calories: 285
- Protein: 4g
- Carbohydrates: 32g
- Fat: 15g
- Fiber: 1g
- Sugar: 24g
These numbers are estimates based on standard ingredients and a roll sliced into 10 pieces. The actual nutritional content will vary based on your specific ingredients and portion sizes.
Final Thoughts
I genuinely hope you make this Strawberry Shortcake Cheesecake Roll. It’s the kind of dessert that feels fancy and special but