Strawberry Banana Pudding Dream
Strawberry Banana Pudding Dream
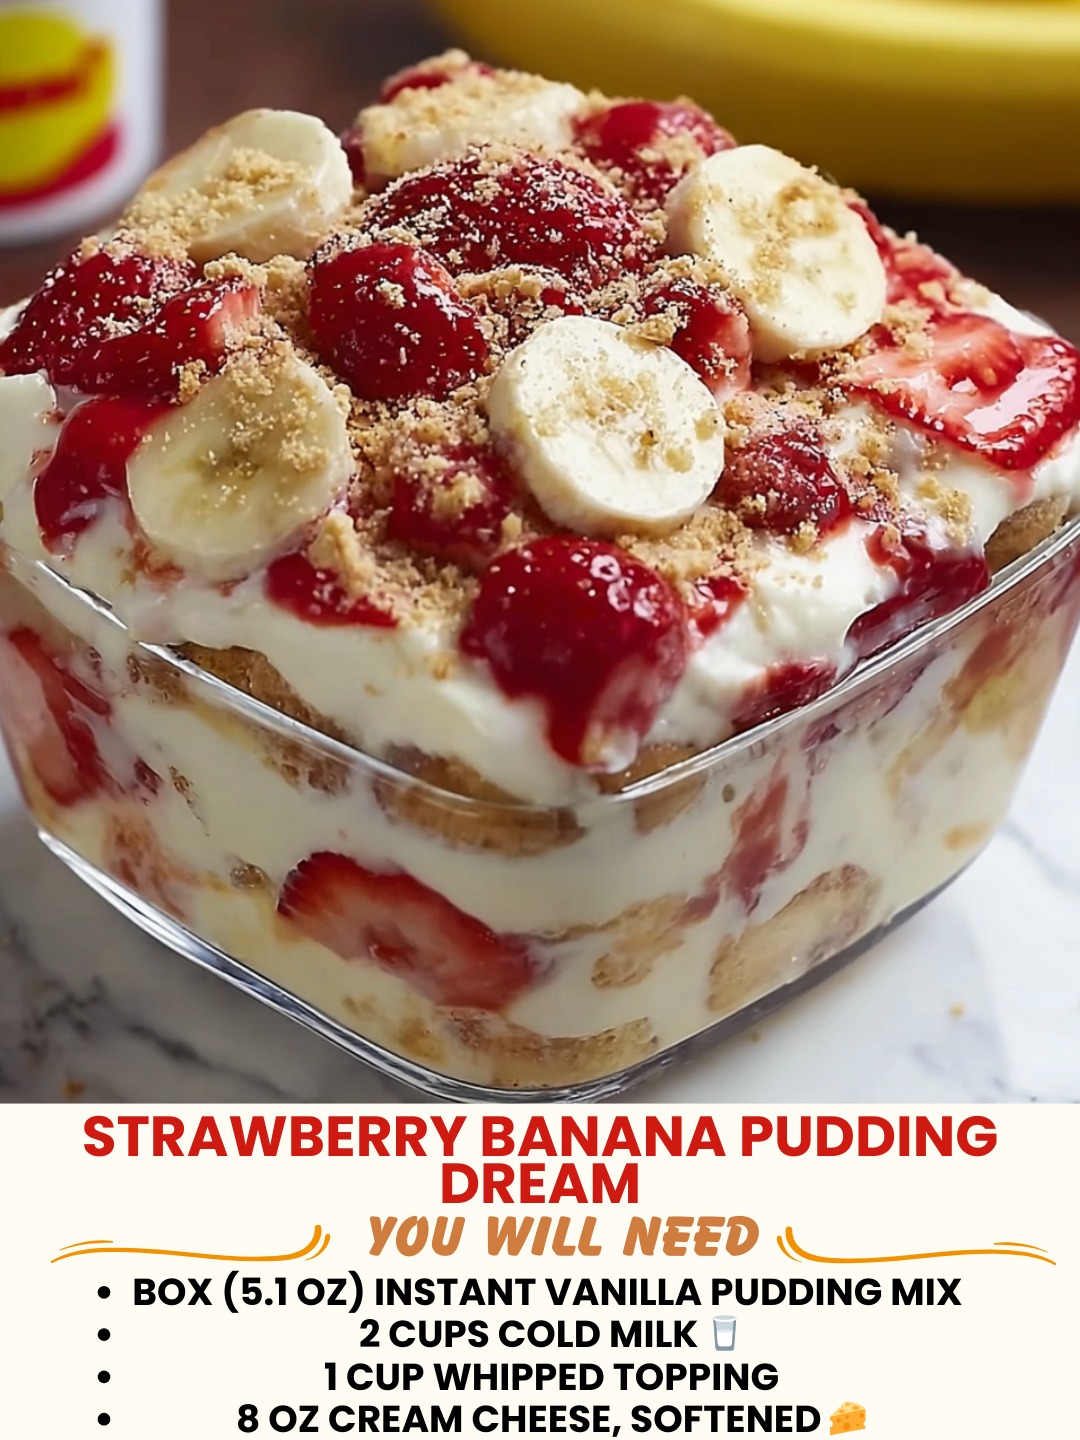
Strawberry Banana Pudding Dream: A Cozy Dessert That Feels Like a Hug
I created this Strawberry Banana Pudding Dream on a rainy Tuesday night when I was craving something that tasted like summer but felt deeply comforting. You know that feeling? When you want dessert that’s a little fancy but still feels like home? That’s exactly what this is.
I’d just gotten back from the farmer’s market with the most beautiful strawberries I’d seen all season, and I had some bananas getting a little too ripe on my counter. Instead of tossing them, I thought: what if I layered them into something creamy and dreamy? So I started playing around in my kitchen, and honestly, this recipe came together so naturally that I knew I had to share it with you all.
The Strawberry Banana Pudding Dream is basically layers of fluffy vanilla pudding, fresh fruit, and a buttery vanilla wafer crust that gets just soft enough to be luxurious but still holds its texture. It’s the kind of dessert that looks impressive when you bring it to a dinner party, but it’s genuinely simple enough to make on a Tuesday night for yourself. No fancy equipment needed, no stressful techniques—just good ingredients and a little patience while it chills.
This recipe is for anyone who loves classic pudding desserts but wants something that feels a little more intentional. It’s perfect for potlucks, family dinners, or those nights when you just want something sweet that makes you feel taken care of. I’ve made it for my mom’s book club, for my own quiet nights in, and even for my friend Sarah’s birthday brunch. It never disappoints.
If you’re looking for more cozy dessert inspiration, follow me on HaileeRecipes on Pinterest where I’m always sharing recipes that feel like home.
Why You’ll Love This Recipe
Here’s the thing about the Strawberry Banana Pudding Dream: it tastes like you spent hours on it, but you really didn’t. The flavor combination of fresh strawberries and bananas with creamy vanilla pudding is classic for a reason—it just works. There’s something about that natural sweetness from the fruit paired with the smooth richness of the pudding that makes your brain go, “Yes, this is exactly what I needed.”
Beyond the taste, I love that this dessert is flexible. You can make it ahead, which takes the stress out of entertaining. You can customize it based on what fruit you have on hand. You can even adjust the sweetness level if you’re watching your sugar intake. It’s also naturally gluten-free if you use gluten-free vanilla wafers, which I appreciate.
And maybe the best part? It looks beautiful. There’s something about those layers of red strawberries and yellow bananas visible through the side of your serving dish that just makes people smile before they even take a bite. It feels fancy without being pretentious.
Ingredients
- Vanilla wafers: 1 box (about 40 wafers), crushed into crumbs with some slightly larger pieces
- Melted butter: 4 tablespoons (unsalted is my preference)
- Instant vanilla pudding mix: 2 boxes (3.4 ounces each)
- Cold whole milk: 3 cups
- Heavy cream: 1 cup
- Powdered sugar: 2 tablespoons
- Fresh strawberries: 1 pound, hulled and sliced
- Ripe bananas: 3 medium, sliced
- Vanilla extract: 1 teaspoon (optional but recommended)
- Fresh lemon juice: 1 tablespoon (keeps fruit from browning)
- Salt: A tiny pinch
Hailee’s Tip: Don’t skip the lemon juice. I learned this the hard way when I made this for a party and the bananas turned brown within an hour. A little acid keeps everything looking fresh and vibrant.
Hailee’s Tip: Buy your strawberries and bananas the day you plan to make this. Fruit quality really matters here since it’s the star of the show. Look for strawberries that are bright red all the way through, and bananas that are yellow with just a hint of green—not brown.
Hailee’s Tip: I always use instant pudding rather than cooking pudding from scratch for this recipe. It’s faster, more reliable, and honestly, no one can tell the difference once it’s layered with all the fresh fruit.
Optional Add-Ins and Variations
While I love the Strawberry Banana Pudding Dream exactly as written, I also love playing around with it. Here are some tweaks I’ve tried:
- Whipped cream layer: I sometimes add a layer of homemade whipped cream between the pudding and the fruit for extra richness. Just whip 1 cup of heavy cream with 2 tablespoons of powdered sugar and 1/2 teaspoon vanilla.
- Coconut flakes: A sprinkle of toasted coconut on top adds tropical vibes.
- Raspberry swap: Use raspberries instead of strawberries, or do a mix of both.
- Almond extract: Add 1/4 teaspoon almond extract to the pudding mix for a subtle nod to classic banana pudding.
- Honey drizzle: A light honey drizzle over the fruit adds floral sweetness without being heavy.
Step-by-Step Method
Step 1: Make the crust
Crush your vanilla wafers into a mix of fine crumbs and slightly larger pieces—you want some texture, not a powder. I do this by putting them in a zip-top bag and going at it with a rolling pin for about two minutes. It’s honestly therapeutic. Toss the crumbs with melted butter and a tiny pinch of salt. Press this mixture into the bottom of a 9-by-13-inch dish. I use my hands, pressing firmly but not aggressively. You want an even layer. Pop it in the fridge for 10 minutes while you prep everything else.
What I Messed Up: The first time I made this, I didn’t let the crust set, and it got all mushy when I added the pudding layer. Now I always give it at least 10 minutes in the fridge. It makes a difference.
Step 2: Whip the cream
Pour 1 cup of heavy cream into a bowl with 2 tablespoons of powdered sugar and 1 teaspoon of vanilla extract. Using an electric mixer or a whisk (your arm will get a workout, but it’s doable), whip until soft peaks form. This takes about 3 to 5 minutes with a mixer. Set this aside.
Step 3: Make the pudding
In a large bowl, whisk together the two boxes of instant pudding mix with 3 cups of cold milk. Whisk for about 2 minutes until it thickens. It should look smooth and creamy. Gently fold in about two-thirds of the whipped cream into the pudding mixture. This creates a mousse-like texture that’s lighter and fluffier than straight pudding. Reserve the remaining whipped cream for topping.
Step 4: Prep your fruit
Slice your strawberries into 1/4-inch slices. Slice your bananas into 1/4-inch rounds. Put both in a bowl and toss gently with the lemon juice and a tiny pinch of salt. The salt actually enhances the sweetness of the fruit—trust me on this one.
What I Messed Up: I used to prep the bananas way too early, and they’d get brown and mushy. Now I slice them right before assembling. If you’re making this ahead of time, slice the bananas just 30 minutes before you assemble.
Step 5: Layer it all together
Take your chilled crust out of the fridge. Spread half of your pudding mixture over the crust in an even layer. Then layer half of your strawberry slices over the pudding. Then layer half of your banana slices. Repeat: remaining pudding, remaining strawberries, remaining bananas. Top with the reserved whipped cream and maybe a few extra strawberry slices for looks.
Step 6: Chill and serve
Cover with plastic wrap and refrigerate for at least 4 hours, but honestly, overnight is better. This gives all the layers time to meld together and makes serving so much easier.
Common Mistakes to Avoid
Using fruit that’s not fresh: I know I keep saying this, but it’s the most important thing. Mushy or flavorless fruit will make the whole dessert feel sad. Your fruit is the star here.
Not chilling the crust: If you skip this step, your crust will dissolve into the pudding layer. It’s not a disaster, but it does affect the texture.
Skipping the lemon juice: Your bananas will brown, and it won’t look as pretty. Plus, the lemon juice actually brightens the flavor.
Making it too far in advance: I wouldn’t make this more than 24 hours ahead. The wafers eventually get too soft, and the bananas can get a little brown around the edges even with lemon juice.
Using warm pudding: Always use cold milk when making instant pudding. If your pudding is warm, it’ll melt the whipped cream and the texture gets weird.
My Tested Substitutions
For the vanilla wafers: Graham crackers work beautifully here. Use about 1 cup of crushed graham cracker crumbs. You can also use digestive biscuits if you’re in a country where those are easier to find. Honestly, even crushed shortbread cookies would be delicious.
For instant pudding: You can make pudding from scratch if you prefer. Whisk together 2 tablespoons of cornstarch, 1/4 cup of sugar, and 1/4 teaspoon of salt in a saucepan. Add 2 cups of milk and cook over medium heat, stirring constantly, until it thickens (about 5 minutes). Remove from heat, stir in 2 tablespoons of butter and 2 teaspoons of vanilla extract. Cool completely before using.
For heavy cream: Greek yogurt mixed with a little honey creates a tangier whipped topping. Use 1 cup Greek yogurt mixed with 1 tablespoon honey. It won’t whip the same way, but it’s delicious and a bit lighter.
For powdered sugar: Coconut sugar, regular granulated sugar, or even honey work fine. Adjust to taste.
How to Customize
Want to make this recipe your own? Here’s how:
Different fruits: Use raspberries, blueberries, peaches, or a combination. Just keep the total amount of fruit around 1 pound and slice or chop accordingly.
Different pudding flavors: Butterscotch pudding with bananas and strawberries is incredible. Chocolate pudding would be gorgeous too, though it changes the vibe entirely.
Boozy version: Add 2 tablespoons of rum or Chambord to the pudding mixture. It’s sophisticated and delicious.
Dairy-free version: Use coconut milk instead of regular milk for the pudding, and make your own dairy-free whipped cream from canned coconut milk. The flavor will be slightly different but still lovely.
Serving Ideas
This dessert is stunning in a large dish where you can see all the layers, but you can also serve it in individual cups or glasses. I love layering it in wine glasses for a fancy presentation.
Serve it cold, straight from the fridge. It’s perfect after a heavy meal because it’s refreshing and not overly rich. I also love serving it alongside a cup of herbal tea on quiet afternoons.
If you’re taking it to a potluck, I recommend serving it in the baking dish with a large spoon. It’s easier than trying to portion it onto individual plates, and honestly, it looks more impressive that way.
Meal Prep and Storage
The Strawberry Banana Pudding Dream keeps well in the refrigerator for up to 3 days, covered with plastic wrap. The wafer crust will soften over time, but that’s not necessarily a bad thing—some people actually prefer it that way.
I don’t recommend freezing this dessert because the texture of the pudding and whipped cream changes significantly when thawed, and the fruit gets mushy.
If you’re making this ahead for an event, I’d suggest making it the morning of, or the night before at the latest. This ensures the wafers still have some structure and the fruit looks fresh.
You can prep components ahead: make the crust and store it in an airtight container for up to 2 days. Prep your fruit and store it in an airtight container for up to 8 hours. The pudding is best made fresh, but you can make it up to 4 hours ahead and keep it covered in the fridge.
Nutritional Breakdown
This recipe makes about 12 servings. Here’s what you’re looking at per serving:
- Calories: approximately 280
- Protein: 3 grams
- Carbohydrates: 38 grams
- Fat: 13 grams
- Fiber: 1 gram
This is definitely a treat dessert, not an everyday thing, but it’s portion-controlled enough that you can enjoy it without guilt. The fruit adds fiber and vitamins, which I always appreciate.
Final Thoughts
I hope you make this Strawberry Banana Pudding Dream soon, and I hope it brings you as much joy as it’s brought me. There’s something really special about a dessert that tastes like summer, feels luxurious, and is actually pretty simple to make. It’s the kind of recipe that reminds me why I love cooking in the first place.
If you do make it, I’d love to hear about it. Did you add any fun variations? Did your family ask for seconds? These are the things that make my day. You can find me on Pinterest or just come back here anytime you need a recipe that feels like a warm hug.
Until next time, keep cooking things that make you happy.
Warmly,
Hailee
Strawberry Banana Pudding Dream
Ingredients
Method
- Crush vanilla wafers into a mix of fine crumbs and slightly larger pieces. Toss with melted butter and a pinch of salt. Press into the bottom of a 9-by-13-inch dish. Chill for 10 minutes. Pour heavy cream into a bowl with powdered sugar and vanilla extract. Whip until soft peaks form using an electric mixer or whisk. In a large bowl, whisk instant pudding mix with cold milk for 2 minutes until thickened. Gently fold in two-thirds of the whipped cream. Reserve remaining whipped cream for topping. Slice strawberries and bananas. Toss gently with lemon juice and a pinch of salt. Spread half of the pudding