No-Bake Cherry Cheesecake
No-Bake Cherry Cheesecake
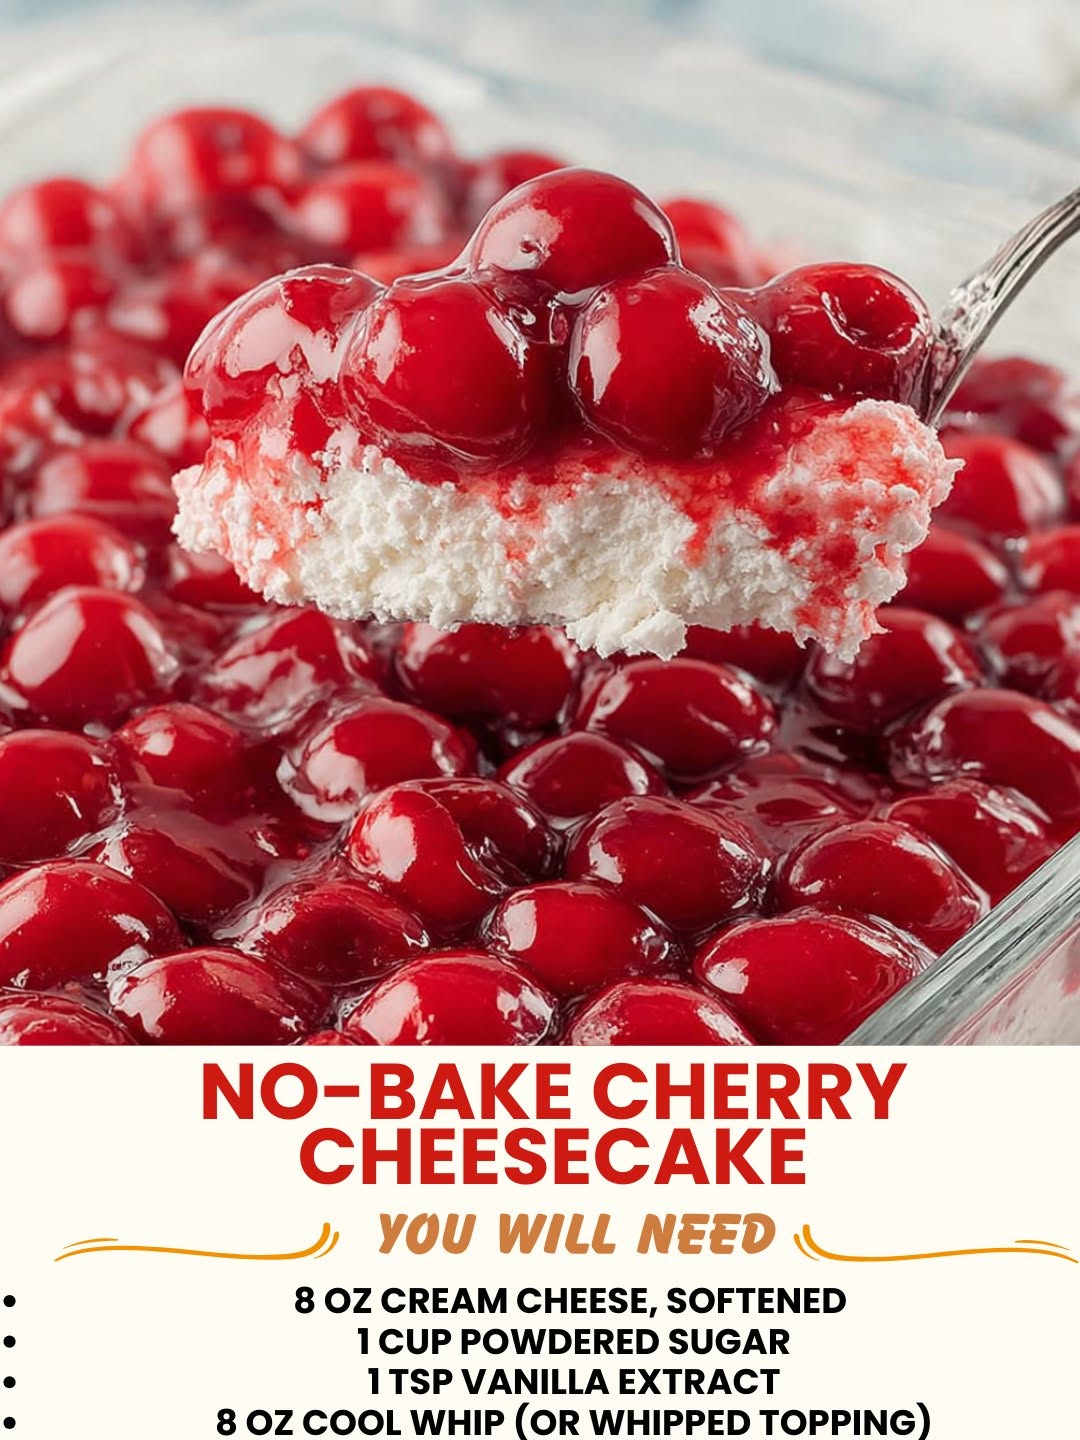
No-Bake Cherry Cheesecake: The Dessert That Saved My Summer
I’m going to be honest with you—last July, my oven broke right in the middle of a heat wave. I’m talking sweltering, sticky, the-kitchen-is-basically-a-sauna kind of heat. My family was still expecting dessert for our Fourth of July gathering, and I was standing in my kitchen feeling pretty sorry for myself. That’s when my mom called and casually mentioned her old no-bake cheesecake trick, and I thought, “Why have I never made this before?”
Three hours later, I pulled this stunning no-bake cherry cheesecake out of my fridge, and honestly? It was better than anything I’d baked that summer. It was creamy, it was elegant, and my kitchen stayed cool. Now, two years later, I make this dessert constantly—not just when my oven is broken, but because it’s genuinely one of the easiest, most impressive things I can pull together.
This no-bake cherry cheesecake is exactly what it sounds like: a buttery graham cracker crust, a cloud-like cream cheese filling, and a gorgeous cherry topping, all without turning on your oven. It’s perfect for people who are intimidated by baking, folks dealing with a broken oven, or anyone who just doesn’t want to heat up their kitchen. The best part? You can make it ahead, and it actually gets better as it sits in the fridge.
If you’re looking for more easy desserts like this, follow me on HaileeRecipes on Pinterest for more no-fuss recipes that actually taste like you tried.
Why You’ll Love This Recipe
Let me walk you through why this recipe has become my go-to.
- No oven required. Seriously, your oven can stay off. This means your kitchen stays cool, and you’re not stressing about baking times or temperatures.
- Minimal active time. You’re probably looking at 20 minutes of actual hands-on work. The rest is just waiting, which I can do while I sit on my couch with iced coffee.
- Looks fancy, tastes fancy, feels easy. When you bring this to a potluck or set it on your dessert table, people assume you spent hours on it. You didn’t. You’re welcome.
- Make-ahead friendly. You can build this the day before, and it’ll actually be better. The flavors meld, the texture sets up perfectly, and you’re not stressed the morning of.
- Naturally impressive. There’s something about a cherry topping that just feels elevated. It’s not just vanilla cheesecake—it’s intentional.
- Works for different occasions. Summer barbecues, dinner parties, holiday gatherings, or just a Tuesday night when you want something sweet—this fits everywhere.
Ingredients for No-Bake Cherry Cheesecake
For the Crust:
- 2 cups graham cracker crumbs (about 14-16 crackers)
- 6 tablespoons melted butter
- 2 tablespoons sugar
- Pinch of salt
For the Filling:
- 16 ounces cream cheese, softened to room temperature
- 1/2 cup powdered sugar
- 1 teaspoon vanilla extract
- 1 cup heavy whipping cream
- 2 tablespoons granulated sugar (for the whipped cream)
For the Topping:
- 1 can (21 ounces) cherry pie filling, or homemade if you’re feeling ambitious
- Optional: 1 tablespoon cornstarch mixed with 1 tablespoon water if your filling seems too runny
Hailee’s Tip: Make sure your cream cheese is truly soft before you start. I leave mine on the counter for about an hour. Cold cream cheese will give you lumps, and lumps are not our friend here. Trust me on this one.
Hailee’s Tip: Don’t skip the salt in the crust. I know it sounds small, but it makes the graham cracker flavor pop without tasting salty. It’s the secret ingredient nobody talks about.
Hailee’s Tip: If you can’t find good cherry pie filling, canned cherries in heavy syrup work too. Just drain them and toss with a tablespoon of sugar and a pinch of lemon juice. Honestly? Sometimes better than the pie filling.
Optional Add-Ins and Variations
This recipe is a great base for playing around. Here are some directions I’ve taken it:
- Almond crust: Replace half the graham crackers with crushed almonds. It’s nuttier and honestly kind of addictive.
- Lemon cheesecake with cherry topping: Add 1 tablespoon of lemon zest and 1 tablespoon of lemon juice to the filling. The brightness is incredible.
- Chocolate drizzle: Melt some dark chocolate and drizzle it over the top before the cherry topping. Fancy and delicious.
- Sour cream layer: Mix 1/2 cup sour cream with 2 tablespoons sugar and 1/2 teaspoon vanilla, and spread it over the cheesecake before adding the cherries. It adds a subtle tang that’s really nice.
- Berry medley topping: Mix the cherries with fresh raspberries or blueberries. It looks stunning and tastes even better.
Step-by-Step Method
Step 1: Prep Your Pan
Grab a 9-inch springform pan (or an 8-inch if you want it extra thick). Line the bottom with parchment paper. This makes getting it out later so much easier. I learned this the hard way after my first attempt basically glued itself to the pan.
Step 2: Make the Crust
Combine your graham cracker crumbs, melted butter, sugar, and salt in a bowl. Mix it until it looks like wet sand—you want everything evenly coated. Press this mixture firmly into the bottom of your pan. I use the bottom of a measuring cup to get it really compact. You want a solid base that won’t crumble when you cut into it later. Pop this in the fridge while you work on the filling.
What I Messed Up: The first time I made this, I didn’t press the crust down firmly enough. When I cut into the cheesecake, the crust basically fell apart. Now I really lean into it, and it’s perfect.
Step 3: Soften and Beat the Cream Cheese
Using an electric mixer (or a whisk if you’re feeling strong), beat your softened cream cheese for about 2 minutes until it’s smooth and creamy. You’re looking for no lumps. Seriously, take your time here. Then add your powdered sugar and vanilla extract, and beat for another minute.
Step 4: Whip the Cream
In a separate bowl, whip your heavy cream with the granulated sugar until you get stiff peaks. This is important—you want actual whipped cream, not just barely whipped cream. It should hold its shape when you lift the beaters.
Step 5: Fold It All Together
Here’s where the magic happens. Gently fold your whipped cream into the cream cheese mixture in two additions. Use a rubber spatula and fold slowly—you’re trying to keep all those air bubbles that make this filling so fluffy. Don’t overmix. This should take about a minute total.
Step 6: Fill the Pan
Pour your filling onto the crust and smooth the top with an offset spatula or the back of a spoon. Make it as smooth or as rustic as you like. Refrigerate for at least 4 hours, but honestly, overnight is better.
What I Messed Up: I once tried to add the cherry topping after only 2 hours in the fridge, and the filling was still too soft. It all kind of slumped together. Now I’m patient, and it pays off.
Step 7: Top It Off
Right before serving, spoon your cherry pie filling over the top. If you want to add it earlier, that’s fine too—it’ll just soften the surface slightly, which some people actually prefer. Do what feels right to you.
Common Mistakes to Avoid
Using cold cream cheese: This is the number one culprit for a lumpy filling. Leave it out for an hour. Your patience will be rewarded.
Not chilling the crust: If you skip this step, your crust will mix with the filling, and you’ll end up with a weird muddy layer. Not terrible, but not ideal.
Overmixing the filling: Once you fold in that whipped cream, you’re done. Overmixing deflates all the air and makes the filling dense and heavy instead of fluffy.
Not giving it enough time to set: I know you’re excited. I get it. But 4 hours minimum. It needs that time to firm up properly.
Adding warm cherry topping: If your pie filling is warm or room temperature, it’ll soften the cheesecake surface. Either chill the filling first or add it just before serving.
My Tested Substitutions
Can’t find graham crackers? Digestive biscuits, vanilla wafers, or even gingersnaps work beautifully. I’ve used all three, and they’re all delicious.
Don’t have heavy cream? You can use half-and-half, but you’ll need to add 1 tablespoon of cornstarch to help it whip. Or honestly, just use more cream cheese and skip the whipped cream layer—it’ll be denser but still good.
Hate cherries? Use blueberry pie filling, strawberry, or even a simple raspberry compote. The method stays exactly the same.
Can’t do dairy? This is trickier, but I’ve had decent results with dairy-free cream cheese and coconut whipped cream. It won’t be exactly the same, but it’s pretty close.
Want to reduce sugar? Cut the powdered sugar in the filling to 1/3 cup and the granulated sugar in the whipped cream to 1 tablespoon. You’ll lose a bit of sweetness, but the cherries will make up for it.
How to Customize
Here’s the thing about this recipe—it’s super flexible. Want to make it in a 9×13 pan instead? Go for it; you’ll just have a thinner cheesecake, and you might need to reduce the chilling time slightly. Making mini versions in mason jars? Absolutely. Cut the recipe in half and layer it up.
Want to make it more decadent? Add a layer of chocolate ganache between the crust and the filling. Want it lighter? Use Greek yogurt mixed with a little cream cheese instead of all cream cheese. Want it more tart? Add a tablespoon of lemon juice to the filling.
The point is, this is your cheesecake. Make it the way you want to eat it.
Serving Ideas
Serve this with a dollop of fresh whipped cream on the side if you want to get fancy. A small scoop of vanilla ice cream melting into the warm cherries is honestly incredible. A drizzle of cherry juice from the can over the plate looks pretty and tastes delicious.
I like to serve it cold straight from the fridge, but some people prefer it slightly chilled rather than ice-cold. Both work. Pair it with a cup of coffee, a glass of sweet dessert wine, or honestly just eat it standing up in your kitchen at 10 p.m. I won’t judge.
Meal Prep and Storage
This is where the no-bake cherry cheesecake really shines. Make it up to 2 days ahead of time. Store it covered in the fridge—I use plastic wrap or a cake dome. The flavors actually deepen as it sits, so day two is often better than day one.
You can also freeze it for up to a month. Just wrap the whole thing (in the pan) tightly in plastic wrap and then foil. Thaw it in the fridge overnight before serving. The texture stays pretty much perfect.
Individual slices keep for about 3 days in an airtight container in the fridge. I’ve never had leftovers last longer than that, but I also don’t have much self-control around cheesecake.
Nutritional Breakdown
This recipe makes 10 servings. Here’s what you’re looking at per slice (with the cherry topping included):
- Calories: approximately 385
- Protein: 5g
- Carbohydrates: 38g
- Fat: 23g
- Fiber: 0g
Keep in mind these are estimates and can vary based on your specific ingredients. If you use a different pie filling or add extras like chocolate drizzle, the numbers will shift. This is a dessert, so it’s meant to be indulgent—just enjoy it in reasonable portions.
Final Thoughts
I genuinely love this recipe. It’s taught me that sometimes the easiest path is the best one, and that you don’t need a fancy oven or complicated techniques to make something that tastes like you spent all day in the kitchen. It’s perfect for summer, but honestly, I make it year-round.
The best part? Watching people’s faces when they realize there’s no baked component. It’s like you’ve unlocked some secret dessert hack, and in a way, you have. You’ve made something that looks impressive, tastes incredible, and required basically zero stress on your part.
I’d love to hear how yours turns out. If you make it, enjoy every single bite. You’ve earned it.
—
No-Bake Cherry Cheesecake
Ingredients
Method
- Line a 9-inch springform pan with parchment paper on the bottom.
- Mix graham cracker crumbs, melted butter, sugar, and salt in a bowl until it resembles wet sand. Press firmly into the bottom of the pan. Refrigerate while preparing the filling.
- Beat softened cream cheese with an electric mixer for 2 minutes until smooth. Add powdered sugar and vanilla extract, and beat for another minute.
- In a separate bowl, whip heavy cream with granulated sugar until stiff peaks form.
- Gently fold the whipped cream into the cream cheese mixture in two additions using a rubber spatula. Do not overmix.
- Pour the filling onto the crust and smooth the top. Refrigerate for at least 4 hours, or preferably overnight.
- Just before serving, spoon cherry pie filling over the top of the cheesecake.
- Slice with a hot, wet knife for clean cuts. Serve cold.