Strawberry Cheesecake Bites
Strawberry Cheesecake Bites
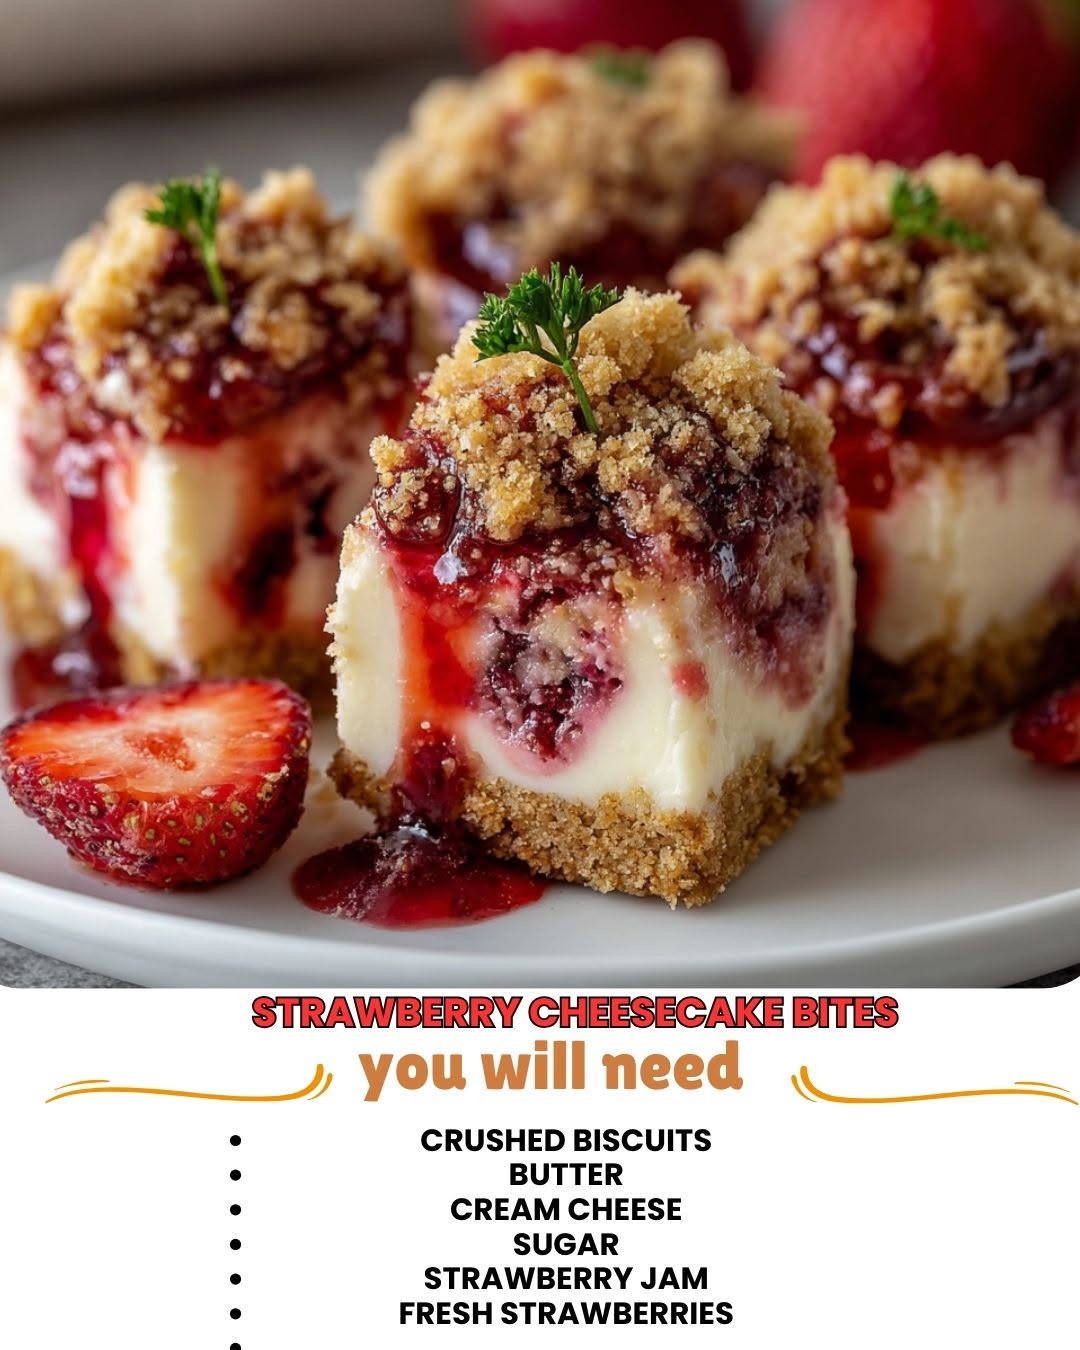
Strawberry Cheesecake Bites: A Recipe That Feels Like a Hug
I created these Strawberry Cheesecake Bites on a Tuesday night when I was craving something sweet but didn’t want to spend three hours in the kitchen. My partner had just gotten home from work looking completely wiped out, and I knew what we both needed: something indulgent, easy to share, and the kind of treat that makes you feel like you’re treating yourself without the guilt of a full-sized dessert.
Here’s the thing about these bites—they’re basically the best parts of a classic cheesecake condensed into these perfect little mouthfuls. You get that creamy, tangy filling, the buttery graham cracker crust, and bright, fresh strawberries all in one bite. No springform pan drama. No waiting hours for it to chill. No wondering if you baked it long enough. Just straightforward, foolproof, genuinely delicious cheesecake that comes together in about 30 minutes of actual hands-on time.
I’ve made these for dinner parties, potlucks, and lazy Sunday afternoons. They’re impressive enough to serve to guests but casual enough to eat straight from the fridge while you’re scrolling through your phone at midnight. They’re for anyone who loves cheesecake but wants something a little more approachable, a little less fussy, and honestly, a lot more fun to eat.
If you’re looking for more recipes like this, follow me on HaileeRecipes on Pinterest where I share all my favorite easy-to-make desserts and comfort food favorites.
Why You’ll Love This Recipe
They’re ridiculously easy to make. Seriously. If you can mix cream cheese and press a crust into a muffin tin, you can make these. There’s no baking involved, which means no oven temperature anxiety or overbaking worries.
They taste like cheesecake without the fuss. You get all the creamy, dreamy filling you love, but in a fraction of the time and with way less cleanup. I’m talking no springform pan, no water bath, no cracking issues.
They’re portion-controlled (kind of). Look, I’m not going to pretend you can eat just one. But the bite-sized format does make it easier to enjoy them without demolishing an entire 9-inch cake in one sitting. Maybe.
You can make them ahead. These are perfect for meal prep or making a day or two in advance. They actually taste better after they’ve had time to set in the fridge.
They’re endlessly customizable. Want to swap the strawberries for blueberries? Go for it. Want to add a little lemon zest? Absolutely. Want to make a chocolate version? I’ve got you covered later in this article.
Ingredients
- 1 cup graham cracker crumbs (about 8 full crackers) — I use regular honey graham crackers, but you could use cinnamon or chocolate if you want to get creative
- 4 tablespoons melted butter — this is what holds the crust together and makes it taste like actual dessert
- 2 tablespoons sugar — for the crust layer
- 16 ounces cream cheese, softened to room temperature — this is non-negotiable. Cold cream cheese will give you lumps, and nobody wants that
- 1/2 cup powdered sugar — makes the filling smooth and sweet
- 1/2 cup heavy whipping cream — this is what makes the filling light and fluffy instead of dense
- 1 teaspoon vanilla extract — pure vanilla tastes so much better than imitation, trust me
- 1/4 teaspoon lemon zest (optional but honestly recommended) — brings out the strawberry flavor beautifully
- 1 pound fresh strawberries — ripe but still firm, not mushy
- 2 tablespoons strawberry jam or preserves — this acts as a glaze and keeps the berries from sliding off
- 1 tablespoon water — to thin out the jam slightly
Hailee’s Tips
On the cream cheese: Let it sit on your counter for at least 30 minutes before you start. I know it feels like you’re wasting time, but soft cream cheese is the difference between silky filling and grainy filling. No shortcuts here.
On the graham crackers: If you don’t have a food processor, put them in a zip-top bag and crush them with a rolling pin or the bottom of a measuring cup. It’s honestly kind of therapeutic.
On the heavy cream: Make sure it’s actually heavy whipping cream (36% fat) and not heavy cream or half-and-half. The fat content matters for whipping. And yes, you can use a hand mixer or even a whisk if you don’t have an electric mixer.
Optional Add-Ins and Variations
These bites are a blank canvas, and I love that about them. Here are some of my favorite ways to play around with the base recipe:
- Almond extract: Use 1/2 teaspoon instead of vanilla for a more sophisticated flavor
- Mini chocolate chips: Mix a handful into the filling for chocolate-strawberry vibes
- Coconut flakes: Toast them lightly and sprinkle on top before the jam sets
- Balsamic reduction: Drizzle a tiny bit on top for a fancy, grown-up twist
- Cheesecake pudding mix: Add a 1-ounce packet to the filling for extra flavor depth
Step-by-Step Method
Prepare Your Pan
Step 1: Preheat your oven to 350°F. Line a standard 12-cup muffin tin with paper liners or silicone muffin cups. This is important because it makes removal so much easier, and honestly, it looks nicer when you serve them.
Make the Crust
Step 2: In a small bowl, combine your graham cracker crumbs, melted butter, and sugar. Mix it together until it looks like wet sand. It should hold together when you squeeze it but still feel a little crumbly.
Step 3: Divide the mixture evenly among your 12 muffin cups—about 1 tablespoon in each. Use the bottom of a measuring cup or your fingers to press it down firmly into the bottom of each cup. You want a solid, compact layer. This is where I sometimes get impatient and don’t press hard enough, which results in a crust that falls apart when you bite into it. Learn from my mistakes.
Step 4: Bake for 5 to 7 minutes, just until the crust is lightly golden and smells amazing. You’re not trying to brown it—just set it. Remove from the oven and let it cool while you make the filling.
Make the Filling
Step 5: In a large bowl, beat your softened cream cheese for about 2 minutes until it’s smooth and creamy. Scrape down the sides of the bowl with a spatula because there’s always some cream cheese hiding in the corners.
Step 6: Add your powdered sugar and beat for another minute until well combined. The mixture should look light and fluffy.
Step 7: In a separate bowl, whip your heavy cream until stiff peaks form. This takes about 3 to 4 minutes with an electric mixer on medium-high speed. If you’re using a whisk, your arm is about to get a workout, but it’s doable.
Step 8: Add your vanilla extract and lemon zest (if using) to the cream cheese mixture and stir gently. Then fold in the whipped cream in two additions, being careful not to deflate all those beautiful air bubbles. Fold, don’t stir—this is important for keeping the filling light and fluffy.
Assemble the Bites
Step 9: Spoon the filling into each muffin cup, filling them about three-quarters of the way full. You want enough room for the strawberry on top. I use a small ice cream scoop for this, which makes it easy to get even portions.
Step 10: Refrigerate for at least 2 hours, though overnight is even better. This is when the magic happens—the filling sets up, the flavors meld, and everything gets perfectly creamy.
Top with Strawberries
Step 11: While the cheesecake chills, prepare your strawberries. Wash them, pat them dry, and slice them in half lengthwise. Make sure they’re completely dry—any excess moisture will make the jam slide around.
Step 12: In a small saucepan or microwave-safe bowl, warm your strawberry jam with 1 tablespoon of water until it’s pourable but still thick. If you microwave it, do 20-second intervals and stir between each one so it doesn’t explode everywhere. I learned that the hard way.
Step 13: Remove the cheesecake bites from the fridge. Brush or spoon a tiny bit of the jam onto the top of each filling, then gently press a strawberry half on top, cut-side down. The jam acts as glue and keeps everything in place.
Step 14: Refrigerate for at least 30 more minutes before serving. This helps the jam set and the strawberry stay put. You can make these up to 2 days ahead and keep them covered in the fridge.
Common Mistakes to Avoid
Using cold cream cheese: I mentioned this before, but it’s worth saying again. Cold cream cheese will not mix smoothly, and you’ll end up with lumps in your filling. Let it sit on the counter. Be patient. Your future self will thank you.
Over-whipping the cream: There’s a fine line between stiff peaks and grainy butter. Once you see stiff peaks form, stop. If you keep going, you’ll have a grainy mess on your hands.
Not pressing the crust down hard enough: A loose crust will crumble and fall apart when you bite into it. Press it down firmly. Really commit to it.
Skipping the baking step for the crust: I know it seems unnecessary, but baking the crust helps it hold together and gives it a better texture. Don’t skip it.
Using wet strawberries: Moisture is the enemy here. Dry your strawberries thoroughly before topping the bites, or the jam won’t stick and everything gets messy.
Not chilling long enough: I get it—you want to eat them immediately. But these really do need at least 2 hours to set properly. If you try to eat them too soon, the filling will be soft and might slide around. Patience is a virtue, my friend.
My Tested Substitutions
For the crust: You can use crushed digestive biscuits, vanilla wafers, or even crushed pretzels for a salty-sweet vibe. Adjust the sugar slightly depending on what you use—pretzels don’t need any extra sugar, for example.
For the filling: If you can’t find heavy whipping cream, you can use all cream cheese (it’ll be denser, but still delicious) or use Greek yogurt for a tangier version. Just whip the Greek yogurt first to make it fluffy.
For the strawberries: Blueberries, raspberries, blackberries, or a mix of berries all work beautifully. You could also do a thin layer of fruit compote instead of fresh berries if you prefer.
For the jam: Any jam or preserves works here—raspberry, blueberry, even apricot. Or skip the jam entirely and just use a drizzle of melted chocolate or a dusting of powdered sugar.
For the vanilla extract: Almond extract, coconut extract, or even a splash of rum or Kahlua if you want something boozy.
How to Customize
Want to make these your own? Here are some fun directions you can take them:
Chocolate Strawberry Version: Add 2 tablespoons of cocoa powder to the filling and reduce the powdered sugar to 1/4 cup. It’s like chocolate-covered strawberries in bite form.
Lemon Strawberry Version: Add 1 tablespoon of fresh lemon juice and 1/2 teaspoon of lemon extract to the filling. It’s bright, tangy, and absolutely delicious.
Cheesecake Factory Copycat Version: Add 1/2 teaspoon of sour cream to the filling for extra tang, and use a thicker graham cracker crust. It’s closer to the restaurant version.
Mini Strawberry Shortcake Version: Use a vanilla wafer or shortbread cookie as the base instead of graham cracker crust. It’s more cake-like and still amazing.
No-Bake Version: Skip baking the crust entirely and just press it into the cups. It’ll be a little crumbly, but it still tastes good and saves you 5 minutes.
Serving Ideas
These are perfect as they are, but here are some fun ways to serve them:
- Straight from the fridge as a simple dessert after dinner
- On a dessert platter at a party, arranged in a circle
- With a small dollop of whipped cream on the side
- Dusted with a tiny bit of powdered sugar for elegance
- Drizzled with chocolate sauce or caramel sauce
- Paired with sparkling wine or champagne for a fancy brunch
- As a make-ahead dessert for a picnic or potluck
- In a dessert box as a homemade gift
Meal Prep and Storage
In the refrigerator: These keep beautifully for up to 3 days covered in an airtight container. The filling stays creamy, and the flavors actually get better as they sit. I often make these on a Sunday and enjoy them throughout the week.
In the freezer: You can freeze them for up to 2 weeks. Freeze them without the jam and strawberries first, then add the topping after they thaw. Or freeze them fully assembled—they’ll be fine, just let them thaw in the fridge for about an hour before eating.
Make-ahead tip: You can make the filling and crust up to a day ahead. Keep them separate and assemble everything the morning of or the night before you want to serve them.
Transport tip: If you’re taking these somewhere, keep them in their muffin liners and store them in a sturdy container with parchment paper between layers. The liners make them easy to grab and eat without your hands getting messy.
Nutritional Breakdown
Here’s what you’re looking at per bite (based on 12 servings):
- Calories: 185
- Protein: 3g
- Carbohydrates: 16g
- Fat: 12g
- Fiber: 0.5g
- Sugar: 14g
These are definitely a treat, not an everyday snack, but they’re portion-controlled enough that you can enjoy one or two without feeling like you’ve derailed your whole day.
Final Thoughts
I genuinely love these Strawberry Cheesecake Bites. They’re the kind of recipe I come back to again and again because they’re easy, they’re delicious, and they make people happy. There’s something special about handing someone a little bite of creamy cheesecake with a fresh strawberry on top—it feels like you’re giving them a little moment of joy.
The best part? You don’t need any fancy equipment or professional baking skills. You just need a muffin tin, a bowl, and about 30 minutes of your time. Everything else is just showing up and being willing to try.
I hope you make these soon and that they become a favorite in your kitchen like they are in mine. And if you do make them, I’d love to know how they turn out. Come find me on Pinterest or just make a batch and enjoy them with someone you love. That’s really all