Cute Teddy Bear Butter Cookies Recipe

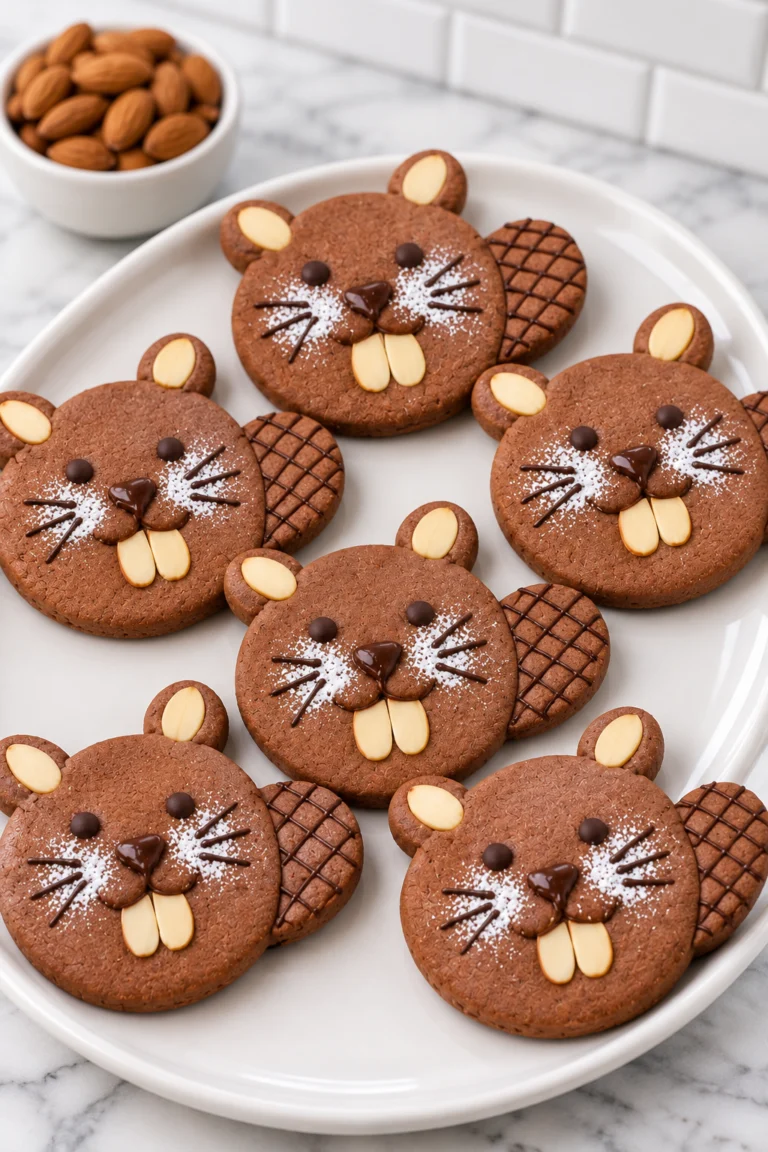
These cute teddy bear butter cookies are soft, buttery, and simple enough to shape with your hands. The dough is mild and vanilla-scented, and the chocolate chip noses and melted chocolate eyes make them a fun bake for a cookie tray or a kids’ baking afternoon.
Ingredients
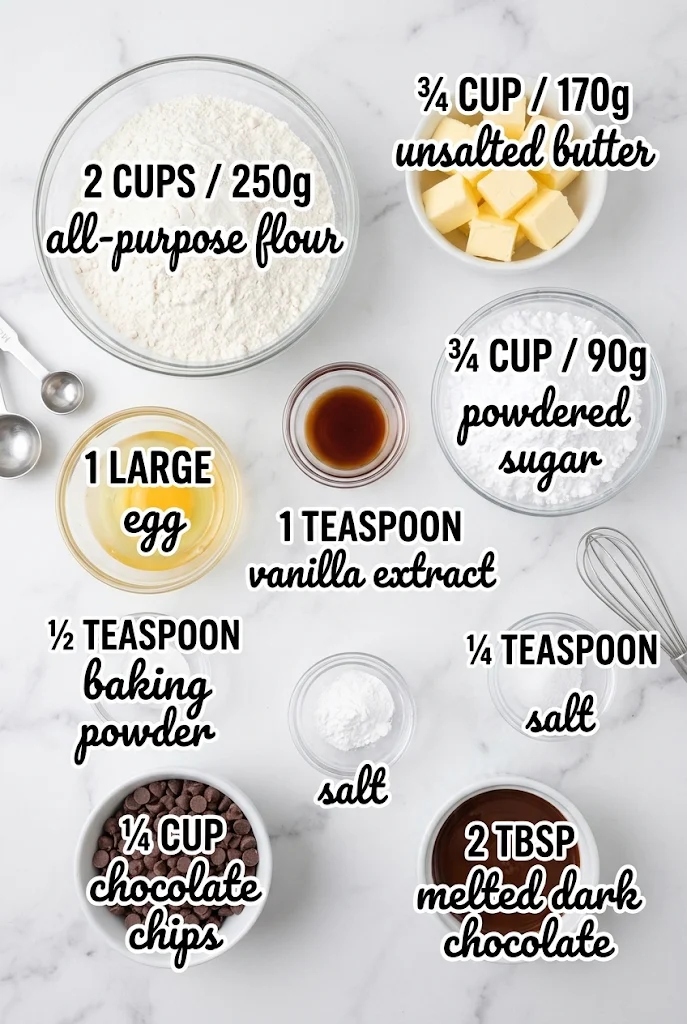
- 2 cups / 250g all-purpose flour — The base of the dough. Spoon it into your measuring cup and level it off instead of scooping straight from the bag, since packed flour can make the cookies dry.
- 3/4 cup / 170g unsalted butter, softened — Unsalted butter lets you control the salt. Soft enough to dent with a finger but not greasy or melted is the goal.
- 3/4 cup / 90g powdered sugar — Gives the cookies a fine, tender texture. Sift it if it has lumps so it blends smoothly into the butter.
- 1 large egg — Binds the dough and adds richness. Use it at room temperature so it blends in without curdling the butter.
- 1 tsp vanilla extract — Adds warm, familiar flavor. Pure vanilla extract gives the cleanest taste.
- 1/2 tsp baking powder — Gives the cookies a light lift so they bake up tender rather than dense.
- 1/4 tsp salt — Balances the sweetness and brings out the butter flavor.
- 1/4 cup chocolate chips — Used for the noses. Any small chocolate chips work well.
- 2 tbsp melted dark chocolate — Used to dot the eyes. Melt it gently so it stays thick enough to hold a small dot.
How To Make Cute Teddy Bear Butter Cookies Recipe
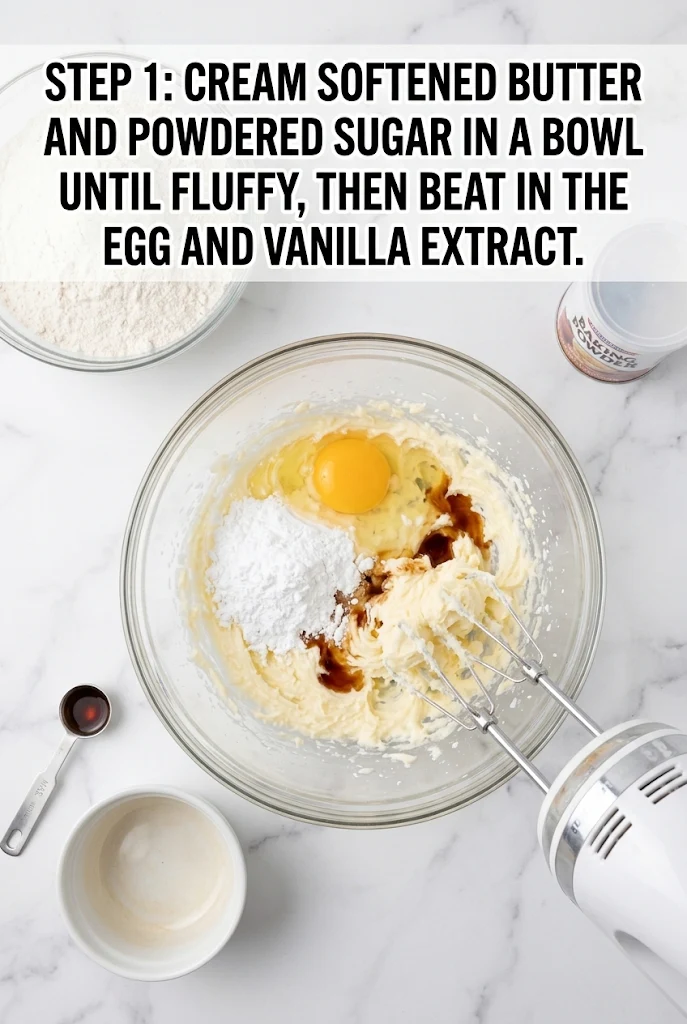
- Cream the butter and powdered sugar. Place the softened butter and powdered sugar in a bowl and beat until light and fluffy, about 2 to 3 minutes with a mixer. Beat in the large egg and vanilla extract until fully combined. Pro Tip: If the mixture looks curdled after adding the egg, keep beating; it will smooth out as you go.
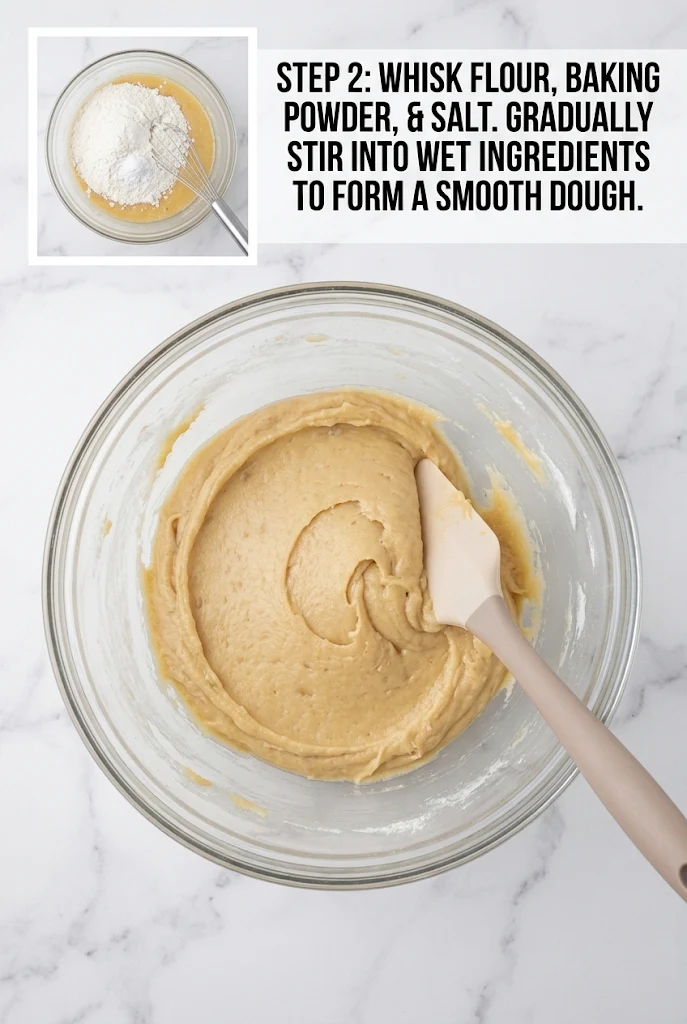
- Mix the dry ingredients into the dough. Whisk the flour, baking powder, and salt together in a separate bowl so they are evenly distributed. Gradually stir the dry mixture into the wet ingredients until a smooth dough forms. Stop mixing as soon as no dry flour shows, because overmixing makes the cookies tough. The dough should feel soft and slightly tacky, which is normal.
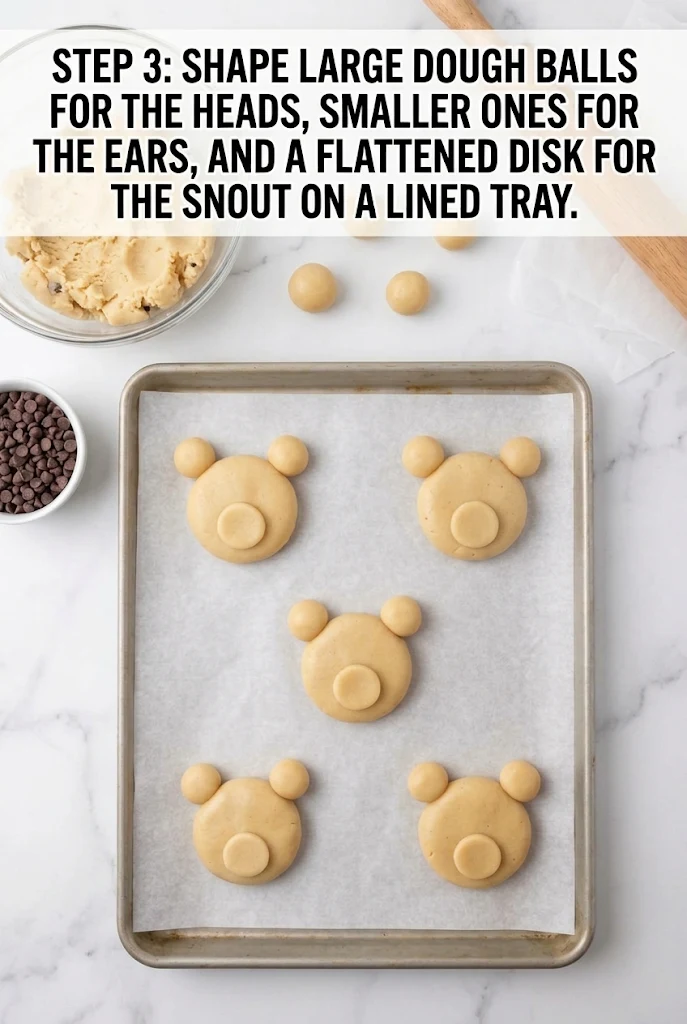
- Shape the bear pieces. Line a baking tray with parchment paper. Shape large dough balls for the heads, smaller balls for the ears, and a flattened disk for the snout. Set the pieces on the lined tray, pressing the ears gently against the heads so they stick. Leave a little space between each bear so they do not merge while baking.
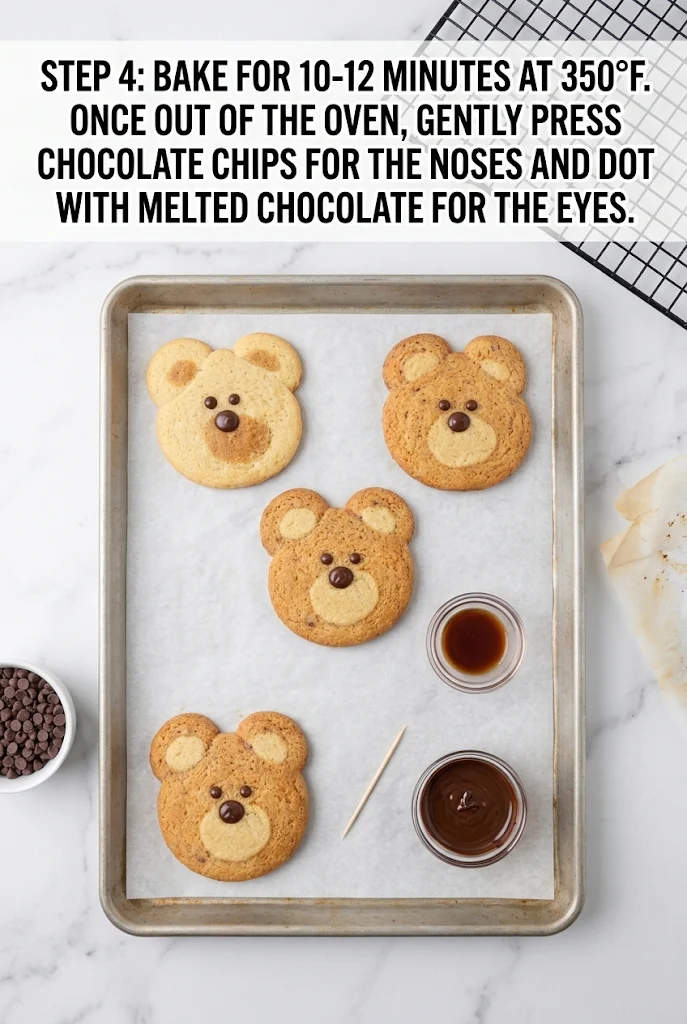
- Bake the cookies. Bake for 10 to 12 minutes at 350°F, until the edges are just set and the bottoms are lightly golden. Pro Tip: Watch the bottoms closely, since the edges brown faster than the centers. Add the noses and eyes. Once out of the oven, gently press chocolate chips into the snouts for the noses while the cookies are still warm. Dot the eyes with melted dark chocolate using the tip of a toothpick or small spoon. Let the cookies cool on the tray for a few minutes, then move them to a cooling rack so the chocolate sets.
What To Expect While They Bake
Before baking, the dough should feel soft and slightly sticky, like cookie dough, and hold its shape when pressed. If it feels greasy or runny, the butter was likely too warm; chill the shaped pieces for 10 minutes before baking. In the oven, the cookies will puff slightly and then settle as they set. They are done when the edges look dry and the bottoms are a light golden color. Right out of the oven they will look soft and a bit pale on top, and that is normal. They firm up as they cool.
Where This Recipe Can Go Wrong
Overmixing the dough. Once the flour goes in, too much stirring develops gluten and makes the cookies tough. Stop as soon as no dry flour shows.
Shaping warm dough. If the dough warms up, the bears will spread and lose their ears. Chill the pieces briefly if they start to slump.
Adding chocolate too early. Placing the chips or melted chocolate before baking can cause them to spread or burn. Add them right after the cookies come out of the oven.
Why This Recipe Works
Creaming softened butter with powdered sugar creates a fine, tender crumb that holds the bear shapes well. The egg adds structure and richness, while the small amount of baking powder keeps the cookies from becoming dense. Adding the chocolate after baking keeps the noses and eyes crisp and sharp in appearance. Powdered sugar also dissolves easily, so the dough stays smooth.
Easy Ways To Switch It Up
Milk chocolate noses. Milk chocolate chips give a sweeter, softer look. They melt a little more when warm, so press them in quickly.
Almond extract. Swap half the vanilla extract for almond extract for a slightly nutty flavor. Use a light hand, since almond is strong.
Sprinkle ears. Roll the ear pieces in colored sugar before baking for a playful touch. This does not change the bake time.
Serving Suggestions

Serve these cookies with a tall glass of cold milk or a mug of hot cocoa. They also look charming on a dessert platter for a birthday party or a cookie exchange. Arrange them on a plate lined with parchment for easy grabbing.
Storage And Make-Ahead
Store the cooled cookies in an airtight container at room temperature for up to 4 days. For longer storage, keep them in the refrigerator for up to 1 week. To freeze, layer the cooled cookies between parchment in a sealed container for up to 3 months. Thaw them at room temperature for about 30 minutes before serving. You can also make the dough ahead, wrap it tightly, and refrigerate it for up to 3 days before shaping and baking.
Frequently Asked Questions
Can I make these cookies ahead of time?
Yes, you can make the dough up to 3 days ahead and keep it refrigerated. Let it soften slightly before shaping so it is easy to work with. Baked cookies also keep well for several days in an airtight container.
Do I need to chill the dough before shaping?
Only if it feels too soft or sticky to hold its shape. A short 10-minute chill in the refrigerator will firm it up. Chilling is optional if your kitchen is cool.
Can I use a different chocolate for the eyes?
Yes, milk or white chocolate works too. Melt it gently and use a toothpick for small dots. Dark chocolate gives the most contrast against the golden cookies.
What if my cookies spread too much?
This usually means the dough was too warm or the butter was too soft. Chill the shaped pieces for 10 minutes before baking. Next time, also check that your butter is softened but not melted.
For more kid-friendly bakes and fun shapes, Follow Hailee Recipes on Pinterest for new ideas. Happy baking, and enjoy shaping your own little bears.
Follow Hailee Recipes on Pinterest

Cute Teddy Bear Butter Cookies Recipe
Ingredients
Method
- Cream the butter and powdered sugar in a bowl until fluffy, then beat in the egg and vanilla extract.
- Whisk the flour, baking powder, and salt, then gradually stir into the wet ingredients to form a smooth dough.
- Shape large dough balls for the heads, smaller ones for the ears, and a flattened disk for the snout on a lined tray.
- Bake for 10-12 minutes at 350°F. Once out of the oven, gently press chocolate chips for the noses and dot with melted chocolate for the eyes.