Assorted Halloween Sugar Cookies with Royal Icing

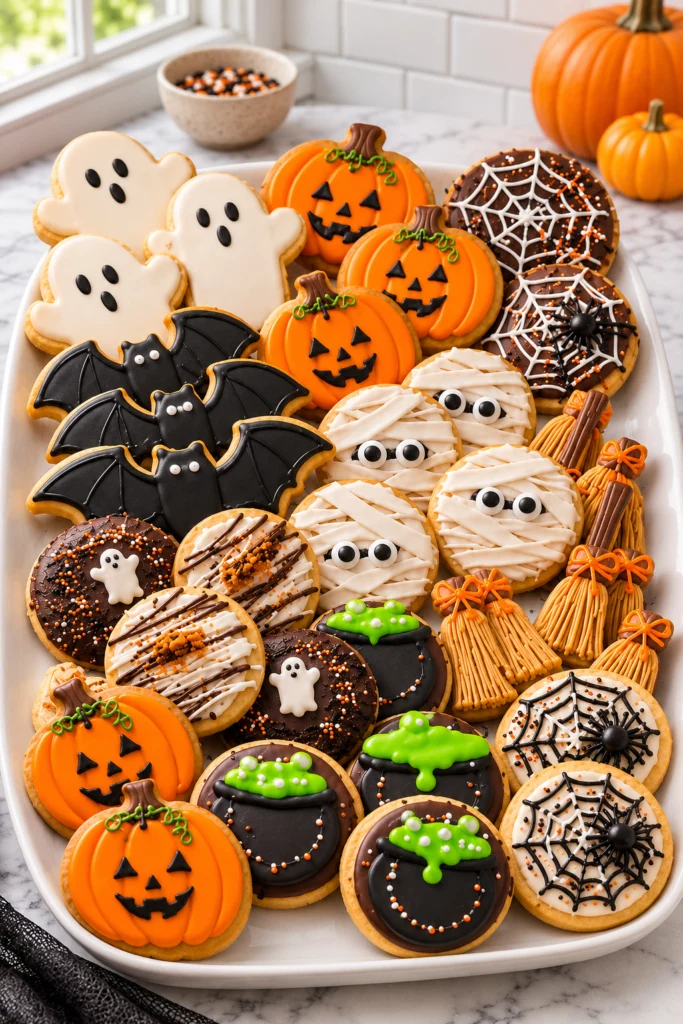
These Halloween sugar cookies are buttery, tender, and sturdy enough to decorate without falling apart. A crisp royal icing shell gives them a classic bakery finish, and ghosts, pumpkins, bats, and mummies make them a hit at any party.
Yield: 24 cookies | Prep: 30 min | Chill: 1 hr | Bake: 8-12 min per batch | Dry: at least 8 hr
Ingredients
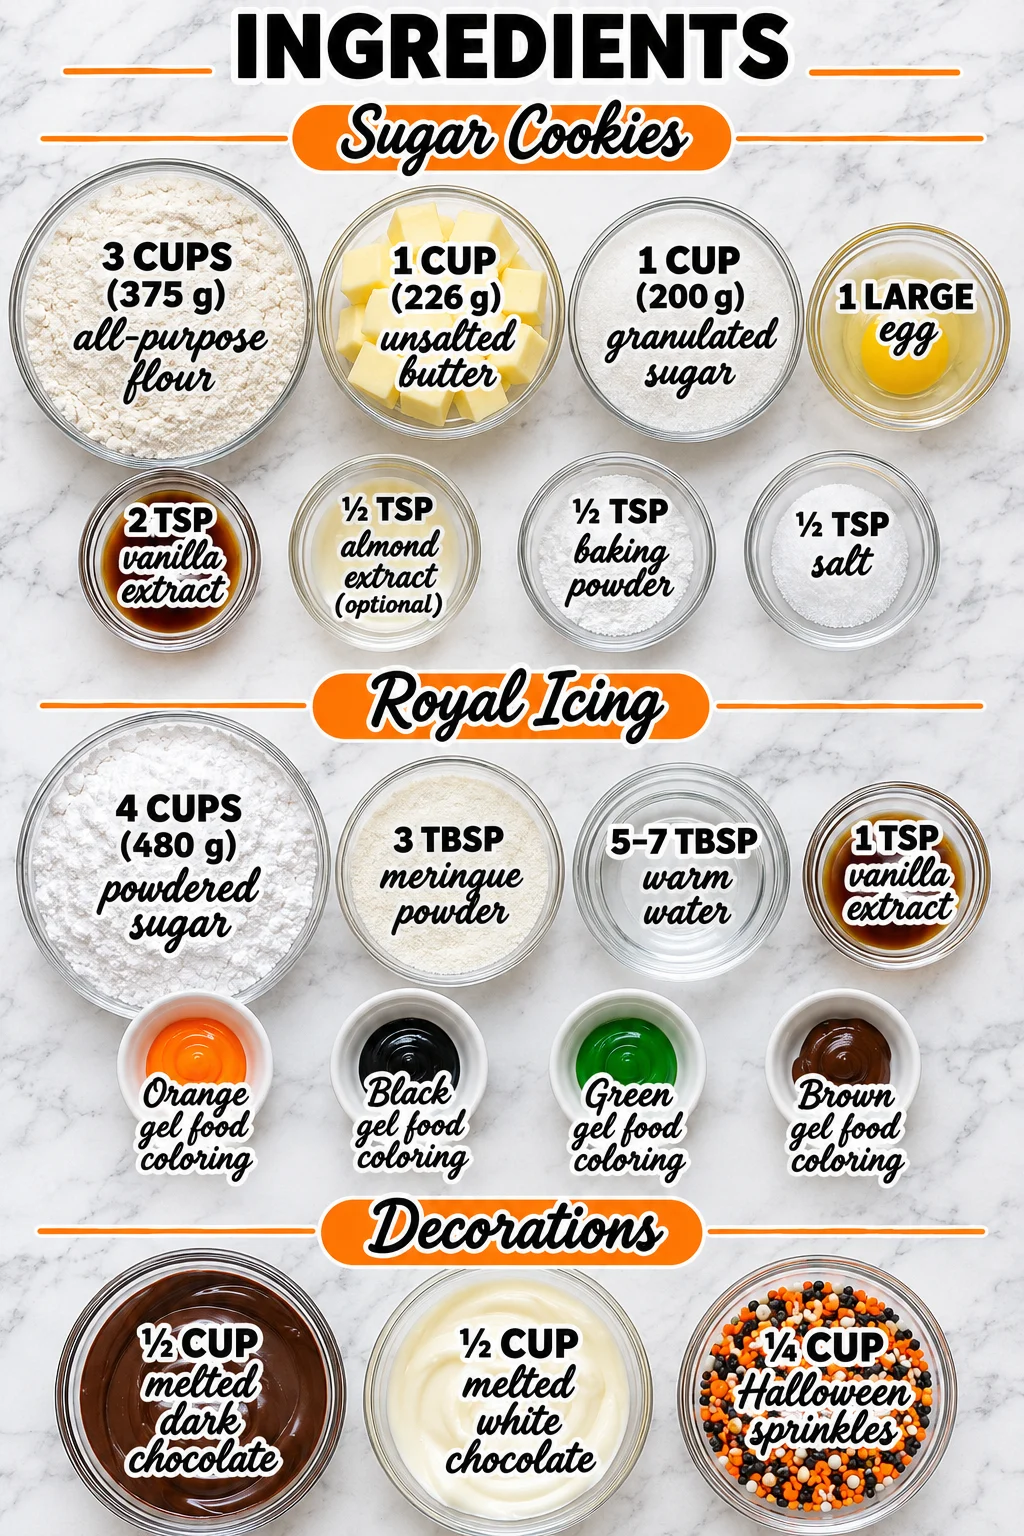
- 3 cups all-purpose flour (375 g) — Spoon the flour into your measuring cup and level it off, or weigh it for the most reliable result. Too much flour is the usual reason sugar cookies turn out dry.
- 1 cup unsalted butter (226 g) — Use it softened, not melted, so the dough creams properly. Unsalted lets you control the salt in the dough.
- 1 cup granulated sugar (200 g) — This sweetens the dough and helps the butter whip up light.
- 1 large egg — Bring it to room temperature so it blends in smoothly instead of seizing the butter.
- 2 tsp vanilla extract — This is the main flavor in the dough, so use a good-quality extract.
- ½ tsp almond extract (optional) — It adds a bakery-style warmth. Skip it if you don’t have it; the cookies are still delicious with vanilla alone.
- ½ tsp baking powder — A small amount gives the cookies just enough lift to stay tender rather than dense.
- ½ tsp salt — Salt balances the sweetness and makes the butter taste richer.
- 4 cups powdered sugar (480 g) — This is the base of the royal icing. Sift it first if it has lumps.
- 3 tbsp meringue powder — This stabilizes the icing so it dries hard and holds fine details. Regular egg whites are not a safe swap for royal icing.
- 5-7 tbsp warm water — Add it gradually. The exact amount depends on your humidity and how thick you want the icing.
- 1 tsp vanilla extract — A small splash in the icing adds flavor that complements the cookies.
- Orange gel food coloring, as needed — Use gel, not liquid, so the icing stays thick and the colors stay vivid.
- Black gel food coloring, as needed — A little goes a long way, so add it one drop at a time.
- Green gel food coloring, as needed — Perfect for stems, witches, and Frankenstein-style faces.
- Brown gel food coloring, as needed — Use it for pumpkin stems, cauldrons, and broom handles.
- ½ cup melted dark chocolate — Melt it gently so it stays smooth and easy to pipe. It works well for accents and details.
- ½ cup melted white chocolate — Use it for mummy bandages and ghost details. Melt it slowly so it doesn’t seize.
- ¼ cup Halloween sprinkles — Add these while the icing is still wet so they stick.
How To Make Assorted Halloween Sugar Cookies with Royal Icing
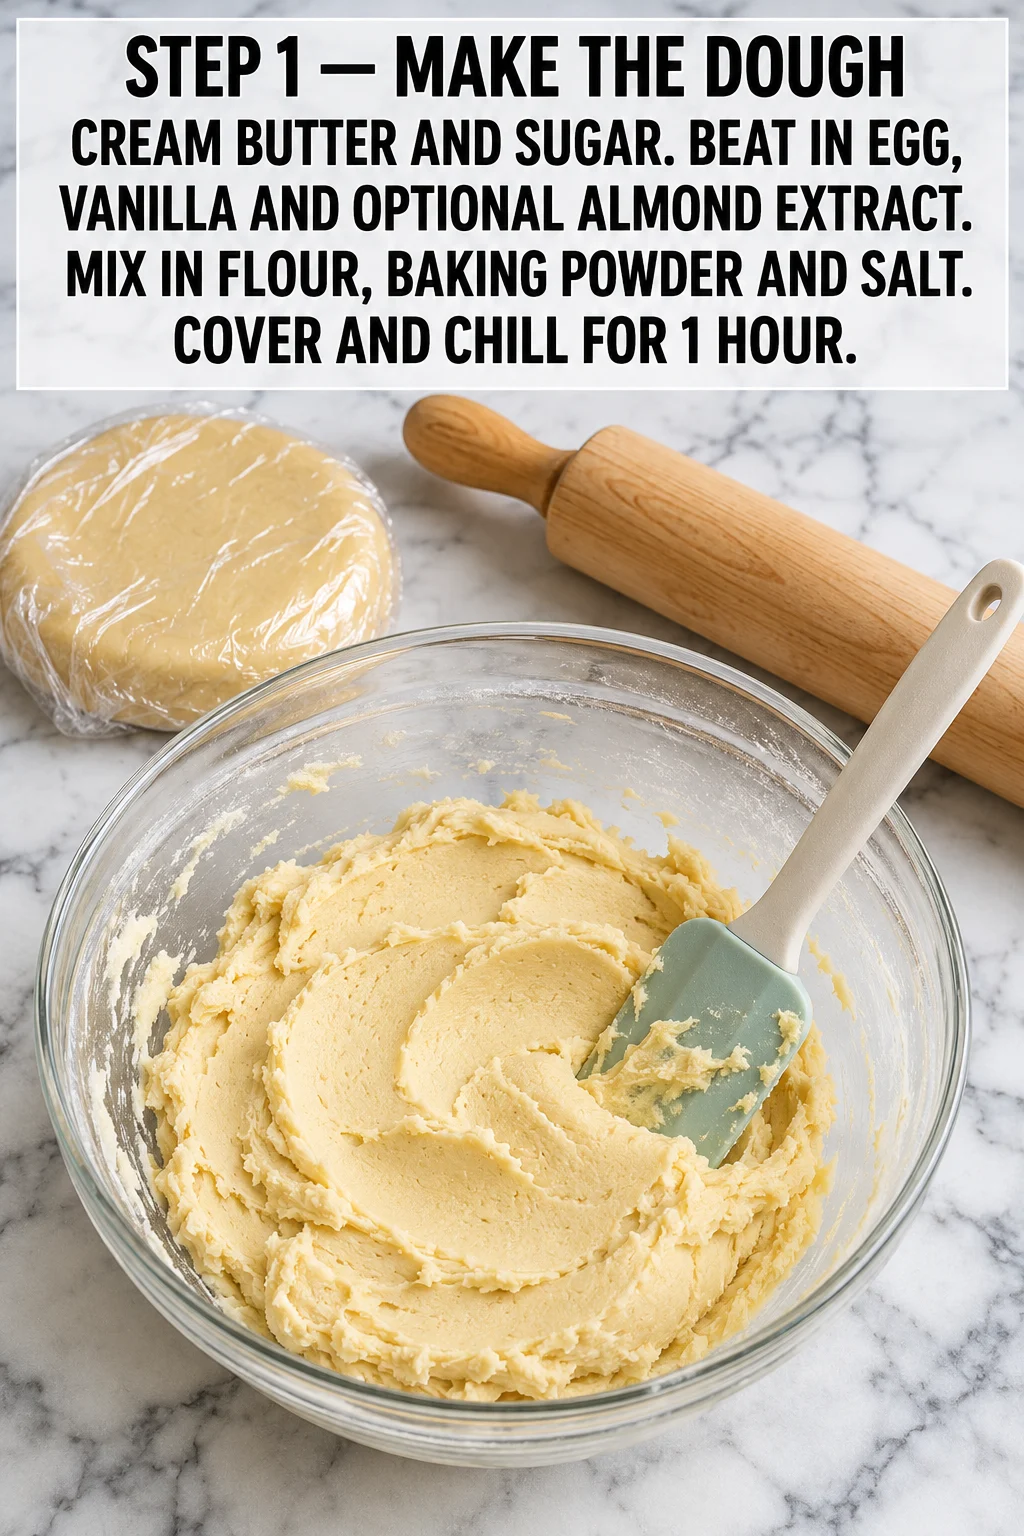
- Make the dough. Cream the butter and sugar in a large bowl until light and fluffy, about 2 minutes with an electric mixer. Beat in the egg, vanilla, and almond extract if using. In a separate bowl, whisk the flour, baking powder, and salt, then mix it into the wet ingredients until a soft dough forms. Cover and chill for 1 hour. Pro Tip: Stop mixing as soon as no dry flour shows. Overmixing develops gluten and makes the cookies tough.
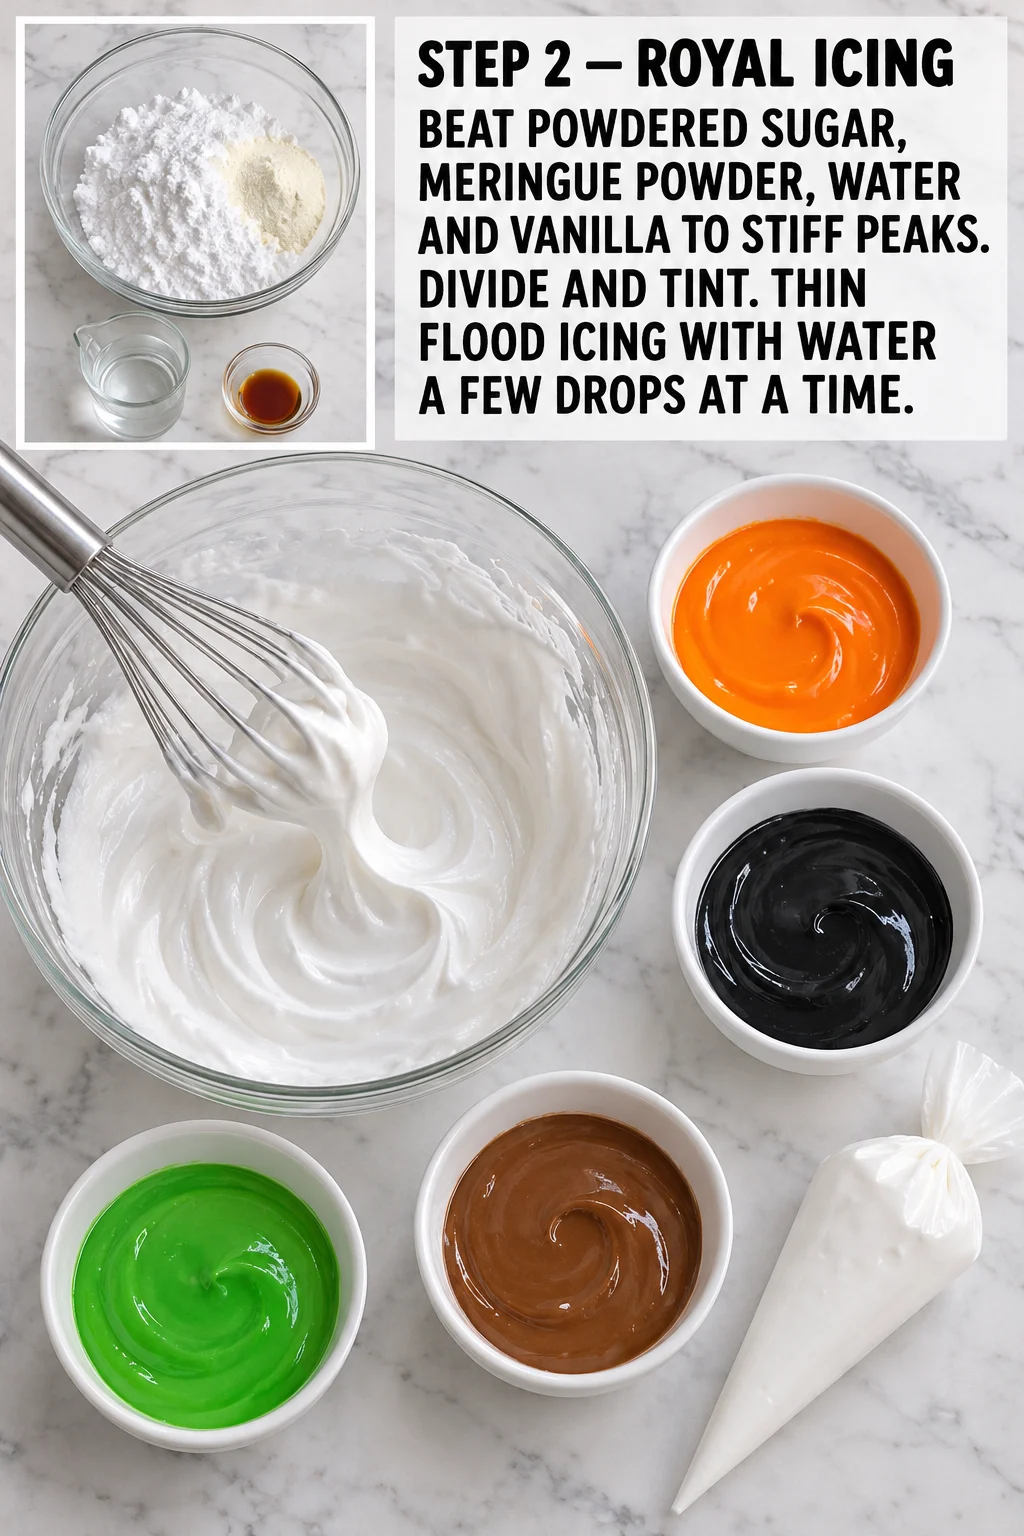
- Make the royal icing. Beat the powdered sugar, meringue powder, warm water, and vanilla on low speed to combine, then increase to high and beat until the icing forms stiff peaks, about 4-5 minutes. Divide it into small bowls and tint each portion with gel coloring. Keep some icing thick for outlining. To thin flood icing, stir in water a few drops at a time until it runs smoothly off a spoon and smooths out in about 10 seconds. Pro Tip: Cover the bowls with a damp towel or plastic wrap so the icing doesn’t crust over while you work.
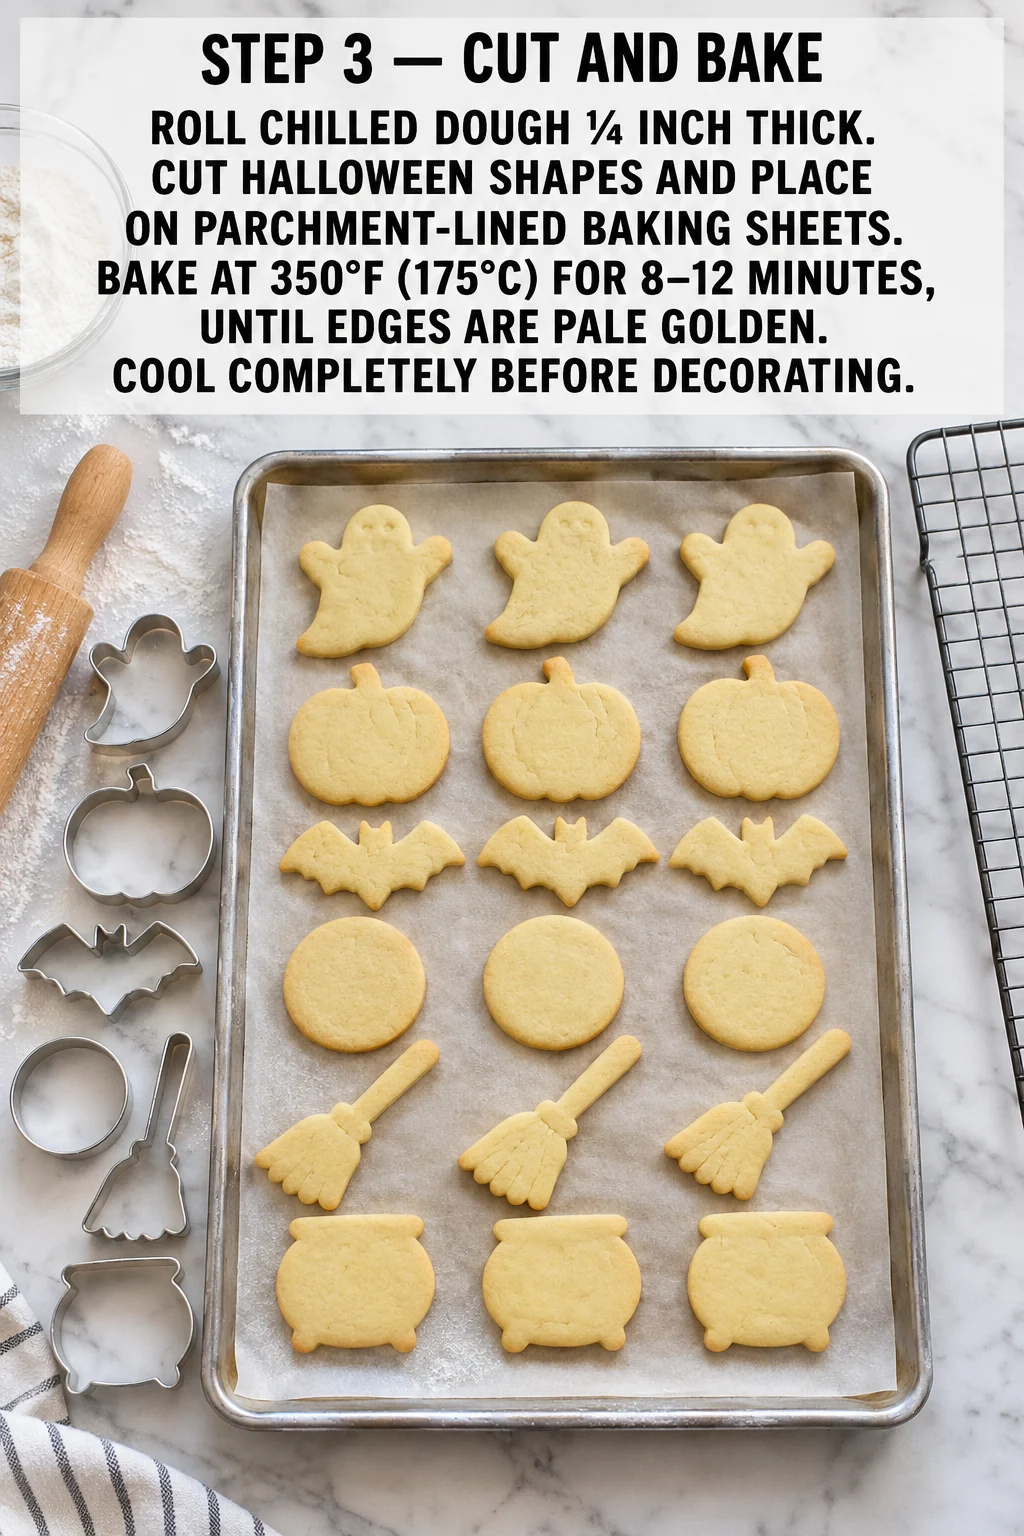
- Cut and bake. Preheat the oven to 350°F (175°C) and line baking sheets with parchment. Roll the chilled dough ¼ inch thick on a lightly floured surface. Cut Halloween shapes with cutters and place them on the prepared sheets about 1 inch apart. Chill the cut shapes for 10 minutes on the sheet before baking so they hold their edges. Bake for 8-12 minutes, until the edges are pale golden. Cool the cookies on the sheet for 2 minutes, then move them to a rack and cool completely before decorating. Pro Tip: Re-chill the scraps if the dough gets soft, since warm dough spreads and loses its shape.
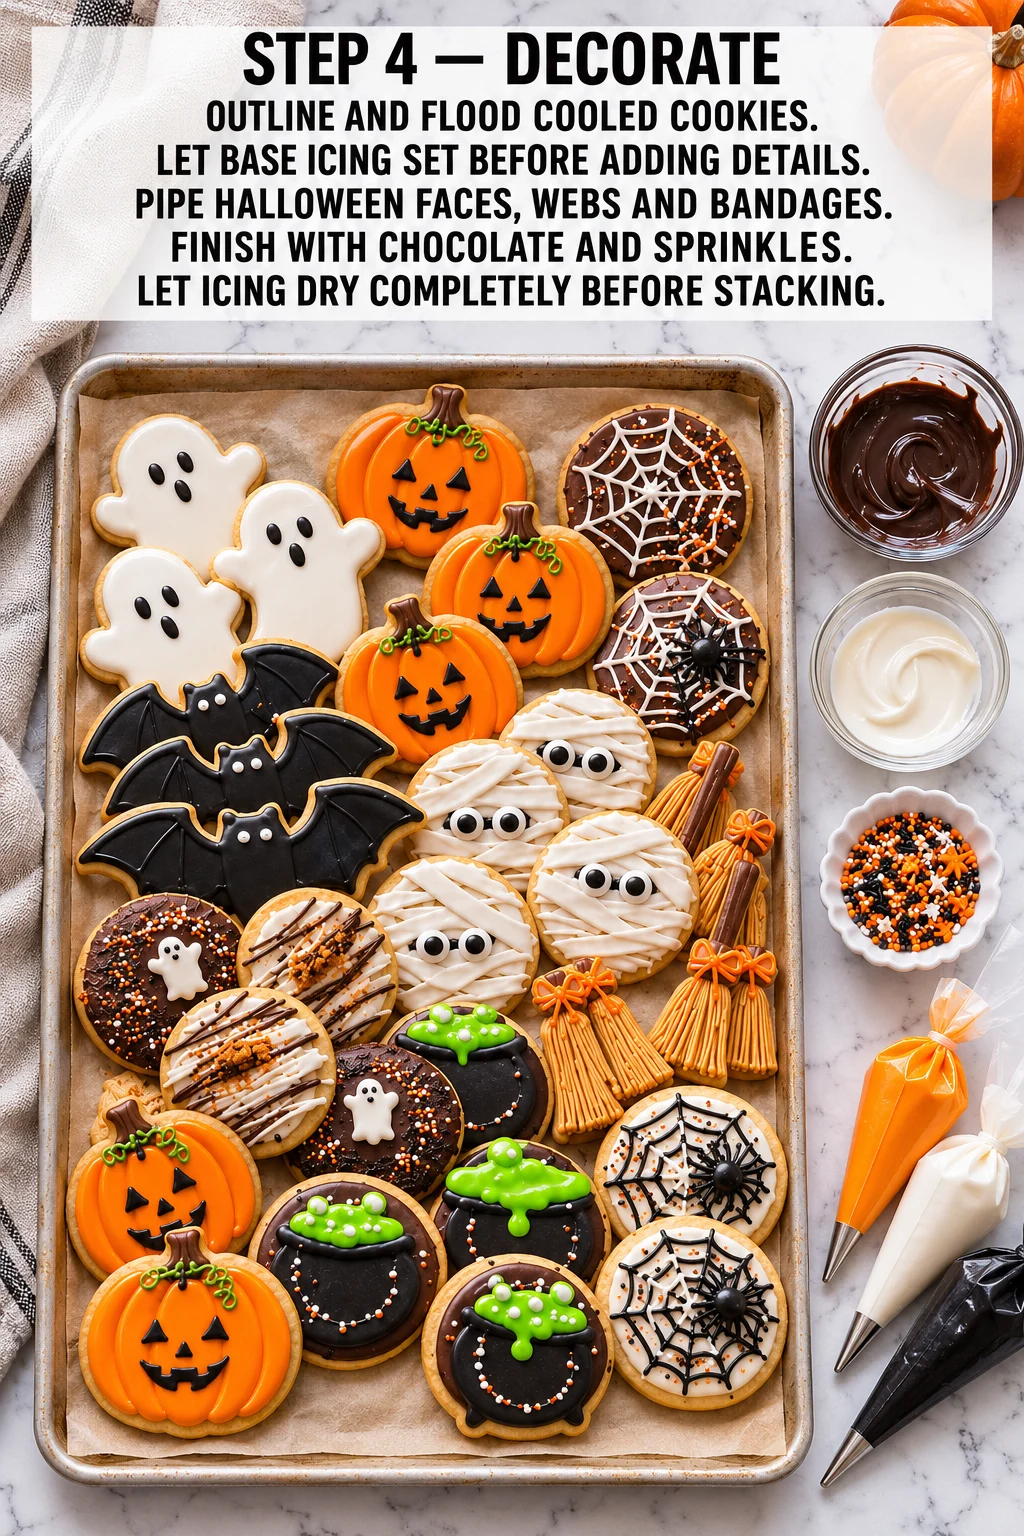
- Decorate. Outline each cooled cookie with thick icing, then flood the center with thinner icing and let the base set for about 1 hour. Once the base is firm, pipe on faces, webs, and bandages with the colored icing. Add the melted dark and white chocolate details, then press on sprinkles while the icing is still wet. Let the icing dry completely, at least 8 hours or overnight, before stacking the cookies.
What To Expect While They Bake
The chilled dough should feel firm and cool, and it should roll out without tearing. When the cookies come out of the oven, the edges should look pale golden while the centers look set but still soft. They firm up as they cool, so don’t worry if they feel slightly soft at first.
The flood icing should look glossy and smooth, and it should settle into a flat, even surface after a few seconds. If you see small bubbles, gently tap the cookie on the counter to release them. Dried royal icing feels hard and matte, which tells you it’s ready to stack.
Where This Recipe Can Go Wrong
Spreading cookies. This usually happens when the dough is too warm or the butter was too soft to begin with. Chill the cut shapes for 10 minutes on the sheet before baking, as the method describes, if they look soft.
Runny or streaky icing. Too much water makes the icing thin and hard to control. Add powdered sugar a spoonful at a time to thicken it, and test flood consistency before you start.
Icing that won’t dry. Stacking or wrapping cookies too soon traps moisture and leaves dents. Give them at least 8 hours at room temperature, uncovered, before you move them.
Why This Recipe Works
Creaming softened butter with sugar traps air in the dough, which keeps the cookies tender. Baking powder adds a small lift so they aren’t dense. Chilling the dough firms up the butter so the shapes hold their outlines in the oven.
Meringue powder gives royal icing its structure. It lets the icing dry hard enough to stack and pipe fine details without the food-safety concerns of raw egg whites.
Easy Ways To Switch It Up
- Lemon sugar cookies. Replace the almond extract with lemon zest for a bright, fresh flavor. The cookies will taste lighter and pair well with the sweet icing.
- Chocolate dough. Swap some of the flour for cocoa powder to make chocolate cookies. Check the dough texture, since cocoa can make it slightly drier.
- Simpler decorating. Skip the chocolate and sprinkles, and use only flood icing in orange and black. The cookies still look festive and take less time.
Serving Suggestions
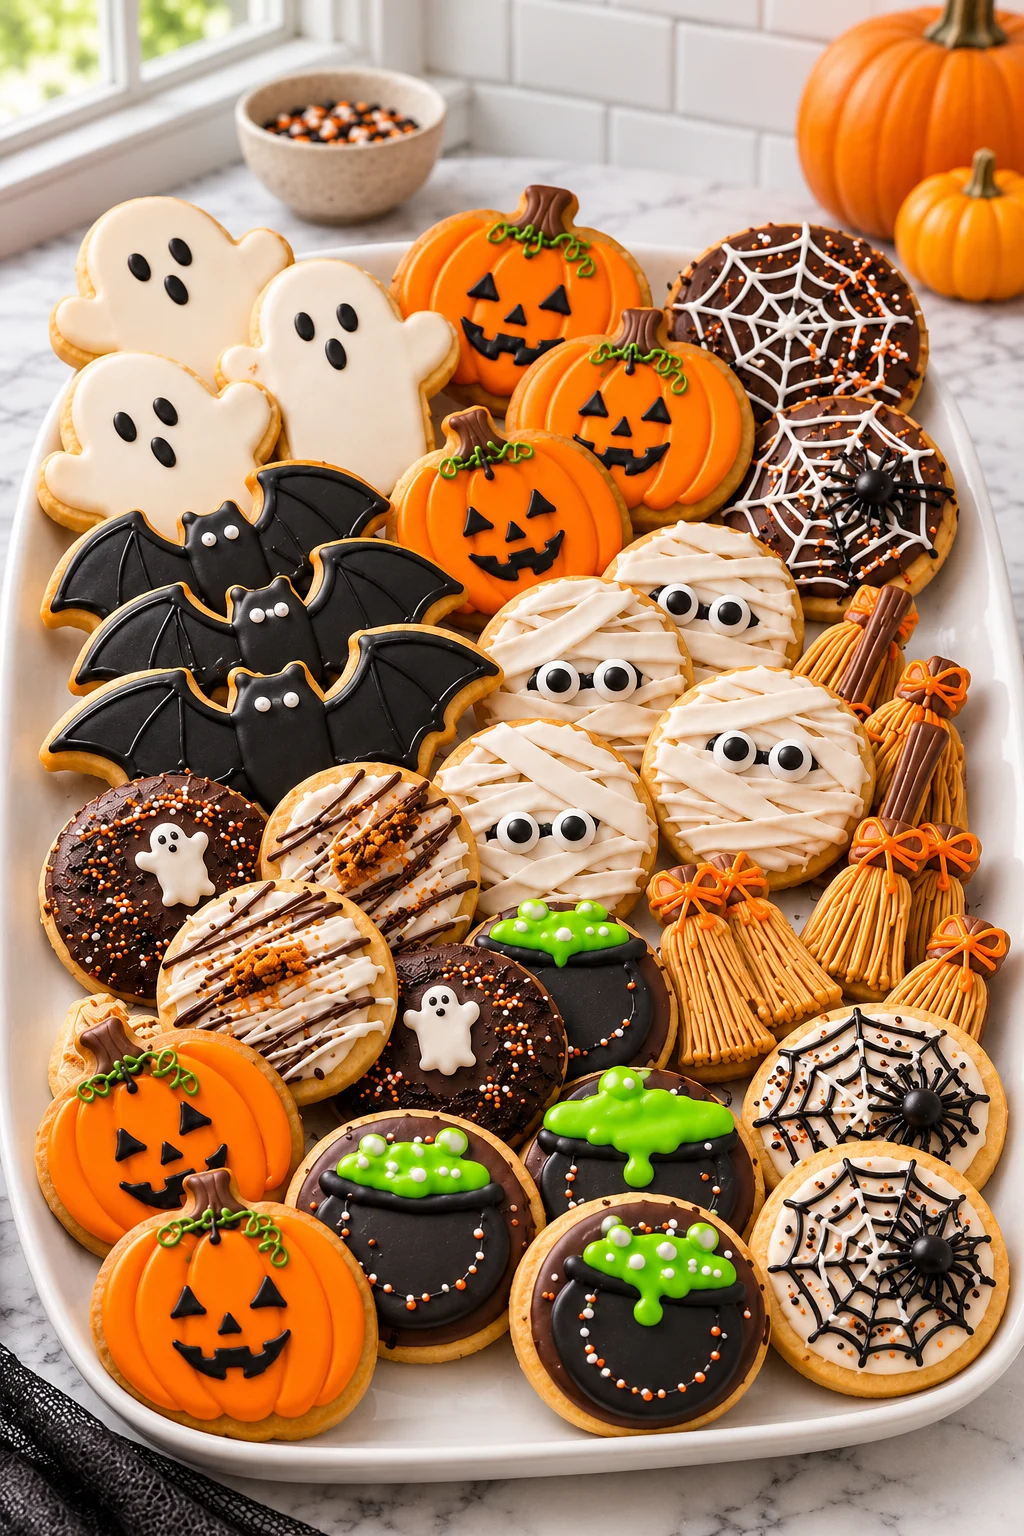
Arrange the cookies on a platter by theme, with ghosts together and pumpkins together, for an eye-catching display. Pair them with hot cider or cold milk. They also make a fun favor when packed in clear bags tied with ribbon.
Storage And Make-Ahead
Store fully dried cookies in an airtight container at room temperature for up to 1 week. Layer them with parchment so the icing doesn’t scratch. Baked, undecorated cookies keep well in the freezer for up to 3 months; thaw them in their container at room temperature before icing. The dough can be refrigerated for up to 2 days or frozen for up to 1 month, then thawed in the fridge overnight.
Frequently Asked Questions
Can I make the dough ahead?
Yes, you can make the dough up to 2 days ahead and keep it refrigerated. Let it soften slightly at room temperature until it rolls easily.
Can I use regular egg whites instead of meringue powder?
No, that’s not a safe swap for this royal icing. Meringue powder is pasteurized and gives the icing stability for piping and stacking.
Why did my cookies lose their shape?
The dough was likely too warm, or the cut shapes went into the oven without the 10-minute chill on the sheet. Chill the cut shapes before baking next time.
How do I know when the icing is the right consistency?
For outlining, it should hold a stiff peak. For flooding, it should run smooth off a spoon and settle in about 10 seconds.
Make a batch on a quiet afternoon and you’ll have a tray of spooky treats ready for the whole week. For more seasonal recipes, Follow Hailee Recipes on Pinterest.

Assorted Halloween Sugar Cookies with Royal Icing
Ingredients
Method
- Make the dough: Cream the butter and sugar in a large bowl until light and fluffy, about 2 minutes with an electric mixer; beat in the egg, vanilla, and almond extract if using; whisk the flour, baking powder, and salt in a separate bowl and mix into the wet ingredients until a soft dough forms; cover and chill for 1 hour.
- Make the royal icing: Beat the powdered sugar, meringue powder, warm water, and vanilla on low speed to combine, then increase to high and beat until stiff peaks form, about 4-5 minutes; divide into small bowls and tint each portion with gel coloring; keep some icing thick for outlining and thin the flood icing with water a few drops at a time until it runs smoothly off a spoon and smooths out in about 10 seconds; cover the bowls with a damp towel or plastic wrap.
- Cut and bake: Preheat the oven to 350°F (175°C) and line baking sheets with parchment; roll the chilled dough ¼ inch thick on a lightly floured surface; cut Halloween shapes and place them about 1 inch apart on the prepared sheets; chill the cut shapes for 10 minutes on the sheet; bake for 8-12 minutes until the edges are pale golden; cool on the sheet for 2 minutes, then move to a rack and cool completely before decorating.
- Decorate: Outline each cooled cookie with thick icing, then flood the center with thinner icing and let the base set for about 1 hour; once firm, pipe on faces, webs, and bandages with the colored icing; add the melted dark and white chocolate details; press on sprinkles while the icing is still wet; let the icing dry completely, at least 8 hours or overnight, before stacking.