
Chocolate Beaver Cookies

These Chocolate Beaver Cookies are a cozy cocoa shortbread with a crisp edge and a tender, crumbly bite. Once cooled, sliced almond ears and teeth turn each round cookie into a little beaver.
Yield: About 24 cookies, depending on cutter size. Time: 20 min prep, 30–60 min chilling, 15 min bake, plus cooling.
Ingredients
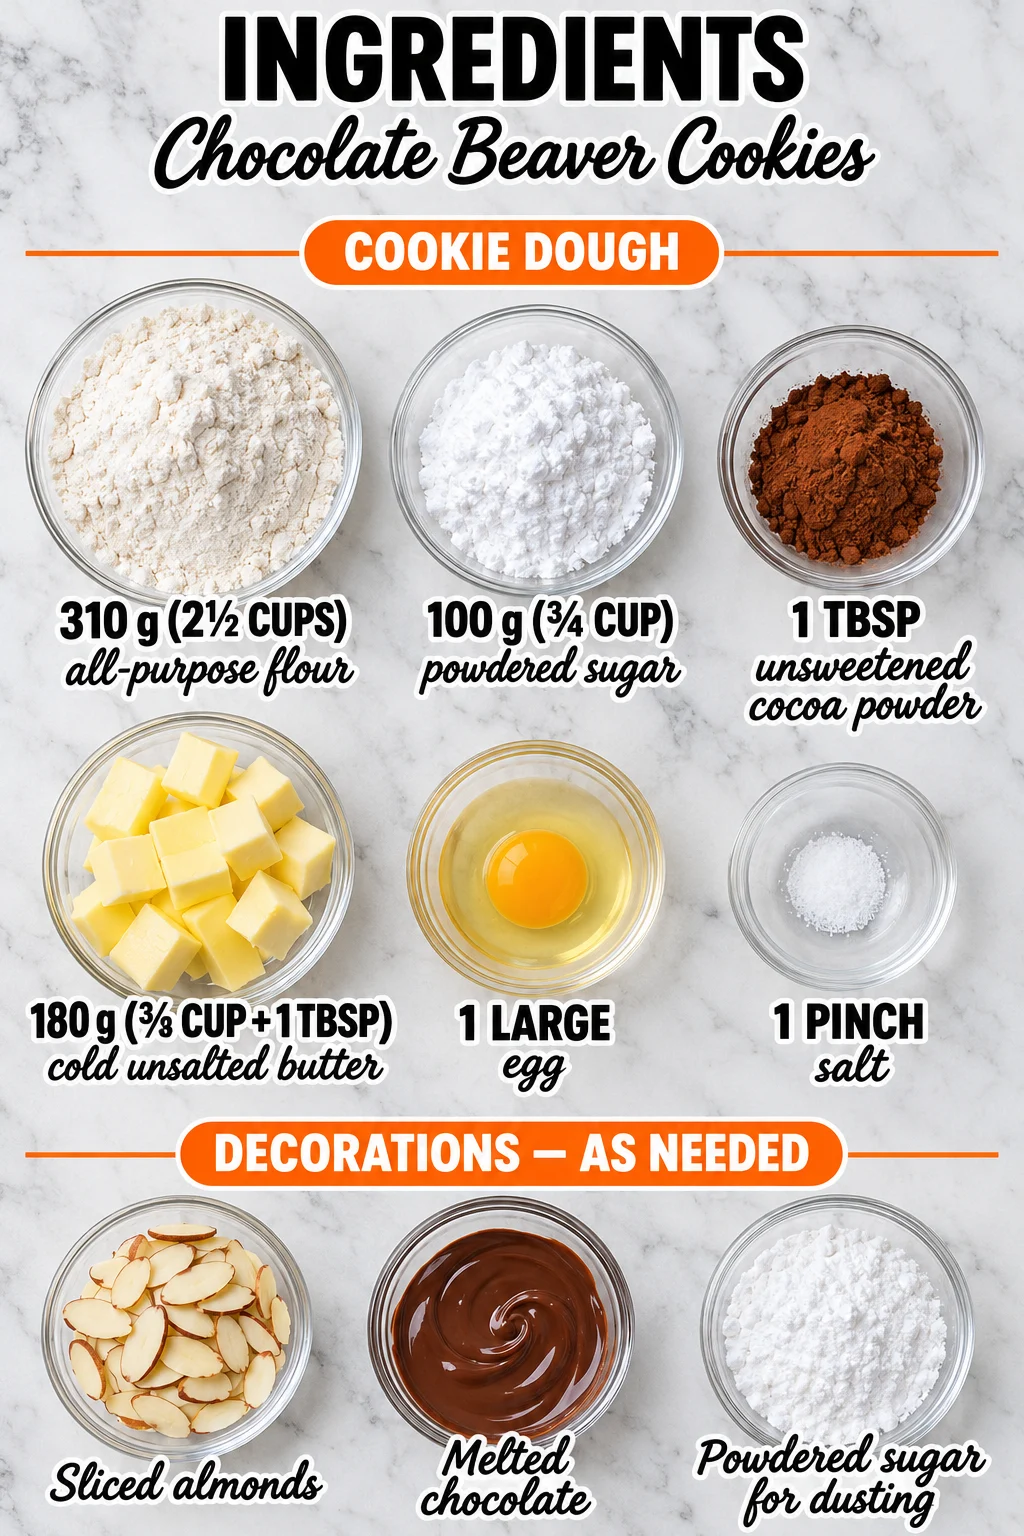
- 310 g (2½ cups) all-purpose flour — Forms the structure of the dough. Spoon it into the cup and level it off so you don’t pack in extra flour.
- 100 g (¾ cup) powdered sugar — Sweetens the dough and keeps the crumb fine and tender. Sift it first if it is clumpy.
- 1 tbsp unsweetened cocoa powder — Provides the chocolate flavor and color. Use plain unsweetened cocoa, not a sweetened hot cocoa mix.
- 180 g (⅔ cup + 1 tbsp) cold unsalted butter — Cold butter keeps the cookies short and crumbly. Cut it into cubes straight from the refrigerator.
- 1 large egg — Binds the dough together. Use it cold or at room temperature.
- 1 pinch salt — Sharpens the chocolate flavor and balances the sweetness.
- Sliced almonds, as needed — Used as the ears and teeth. Choose thin, whole slices so they look neat on the cookie.
- Melted chocolate, as needed — Attaches the almonds and serves as the piping medium for the eyes, nose, and whiskers. Melt it gently so it stays smooth.
- Powdered sugar for dusting, as needed — A light dusting on the cheeks gives a soft, fluffy look.
How To Make Chocolate Beaver Cookies
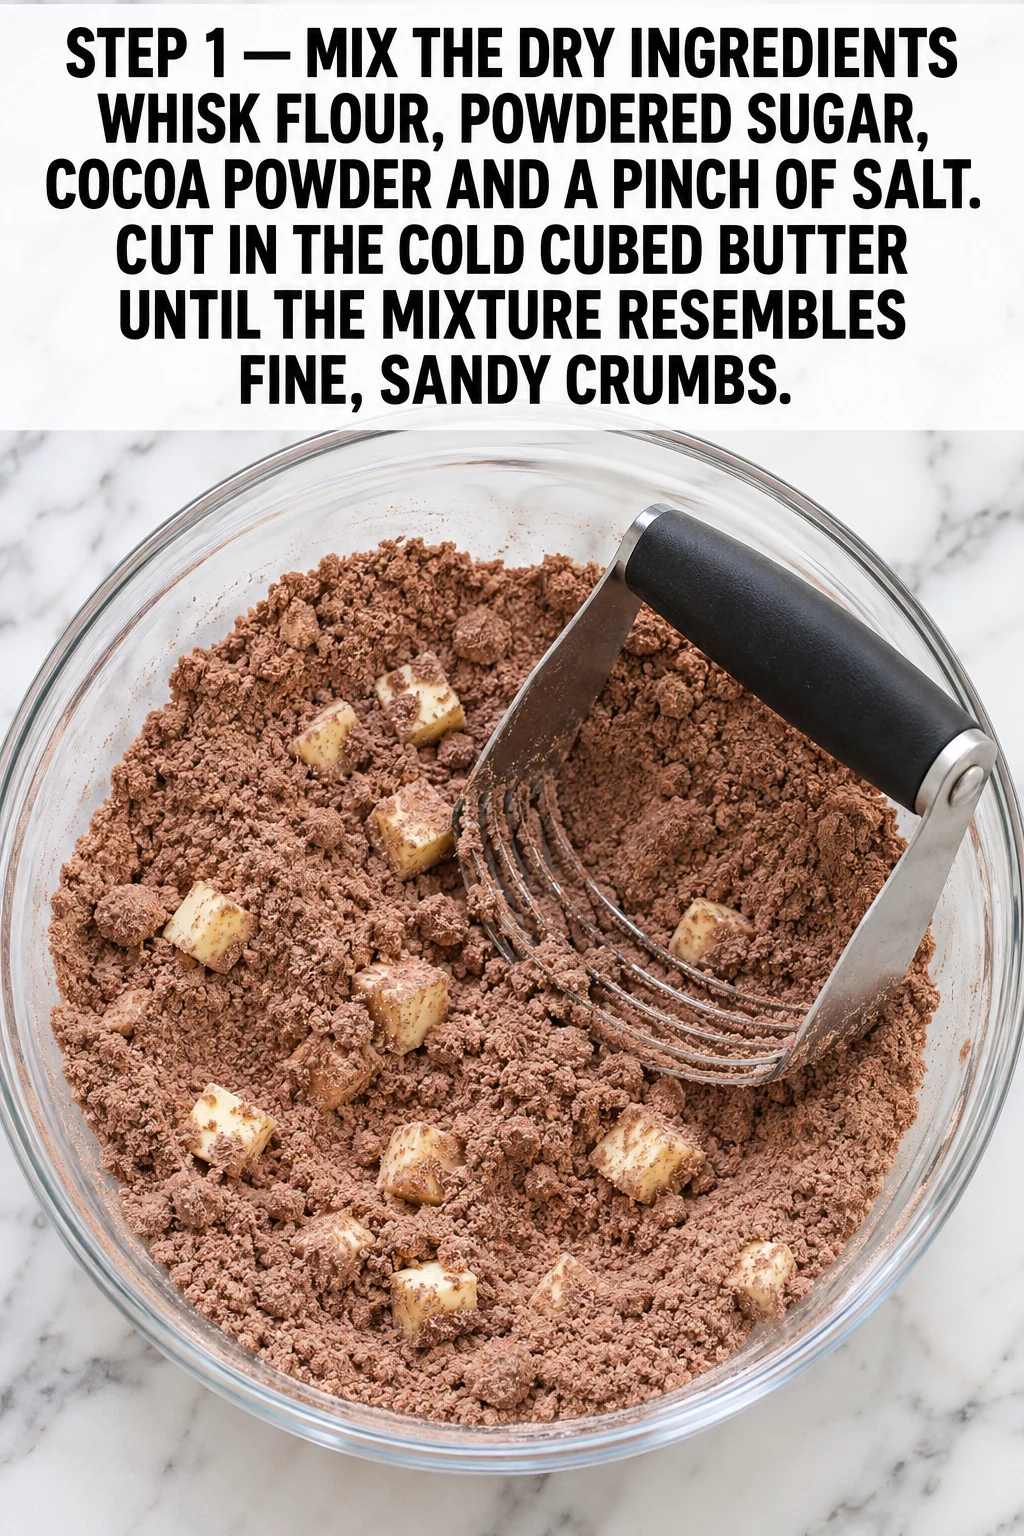
- Mix the dry ingredients. In a large bowl, whisk the flour, powdered sugar, cocoa powder, and salt until evenly combined and no cocoa streaks remain. Add the cold cubed butter and cut it in with a pastry blender or your fingertips until the mixture looks like fine, sandy crumbs. Work quickly so the butter stays cold; warm butter makes greasy, flat cookies.
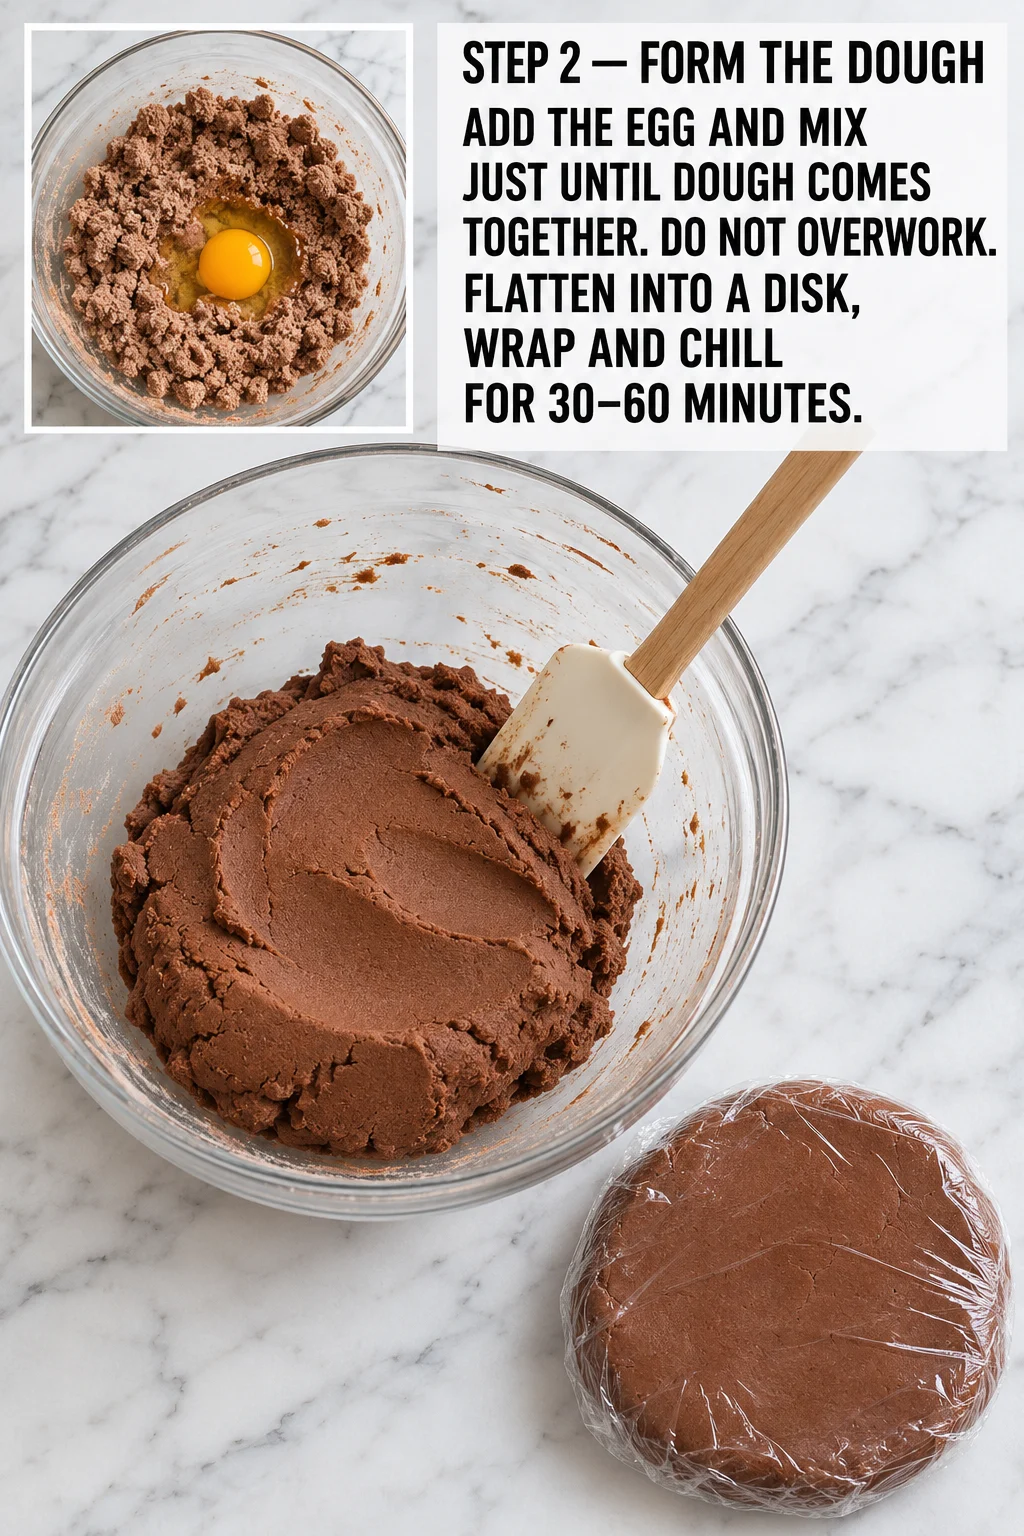
- Form the dough. Add the egg and mix just until the dough comes together into a shaggy ball. Stop as soon as no dry flour shows, since overworked dough bakes up tough. Flatten it into a disk, wrap it in plastic, and chill for 30–60 minutes until firm enough to roll without sticking.
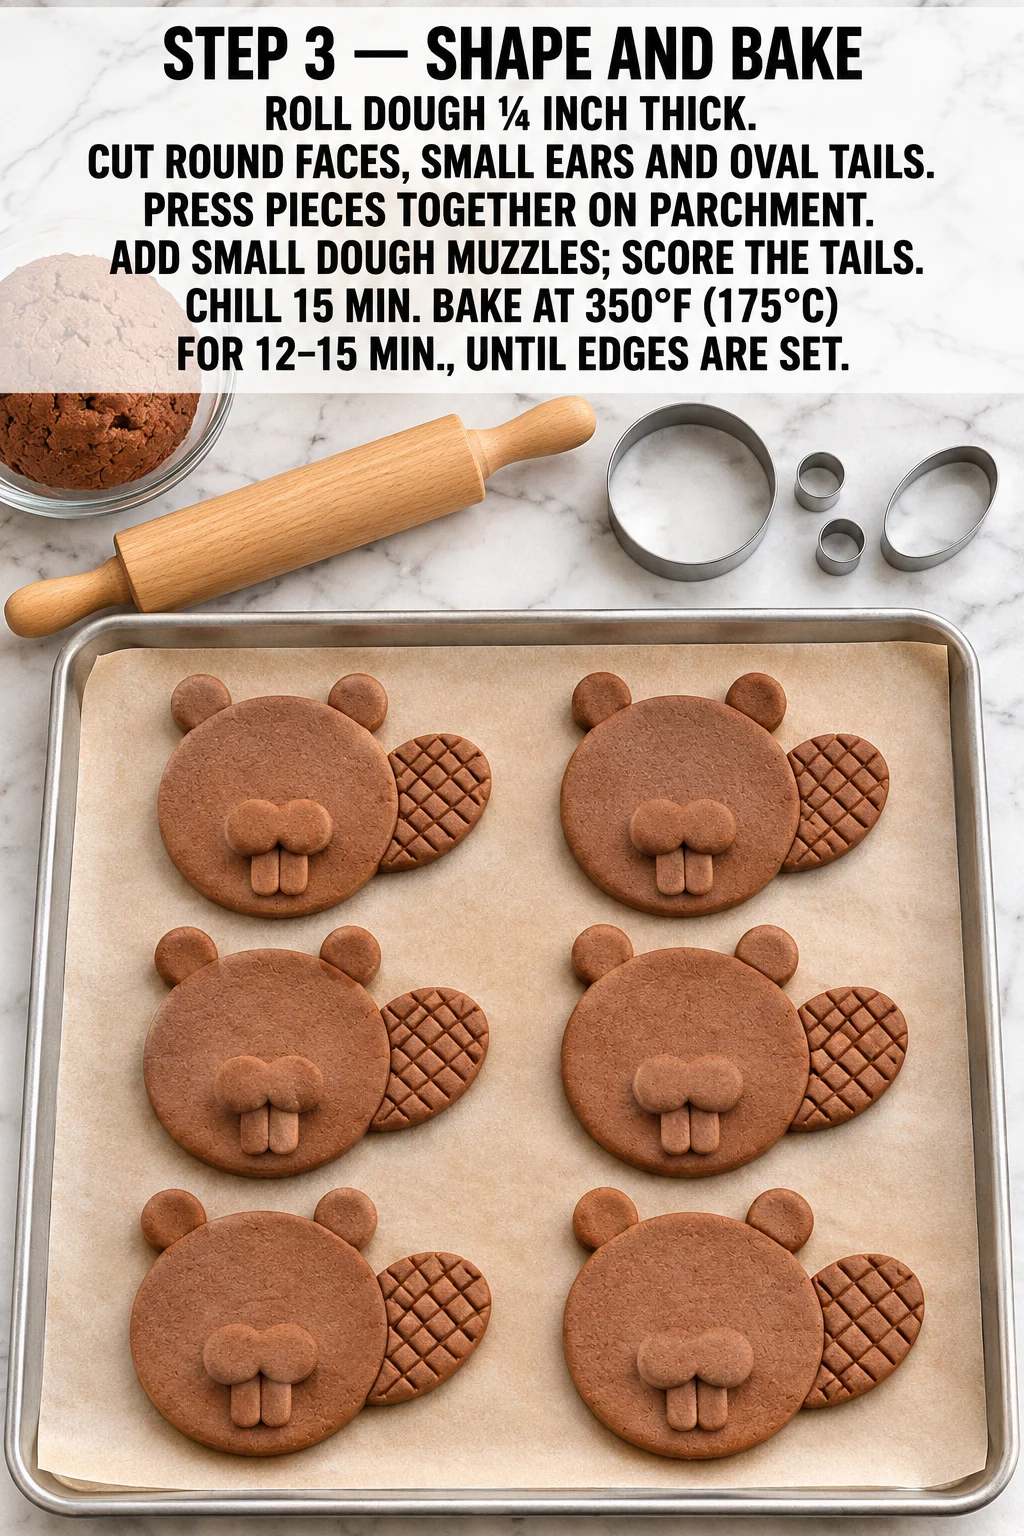
- Roll and shape. Roll the dough to ¼ inch thick between two sheets of parchment. Cut out round faces, small ears, and oval tails with cookie cutters or a knife. Press the pieces together on a parchment-lined baking sheet, then add small dough muzzles and score the tails lightly with a knife for texture. If the dough softens while you work, return the tray to the refrigerator. Chill the shapes. Refrigerate the shaped cookies for 15 minutes. Chilling keeps the pieces from spreading and losing their form in the oven. Bake. Heat the oven to 350°F (175°C) and bake for 12–15 minutes, until the edges are set and the cookies feel just firm to the touch. They will look soft on top and firm up as they cool. If the edges brown before the centers set, move the pan to a lower rack for the last minute.
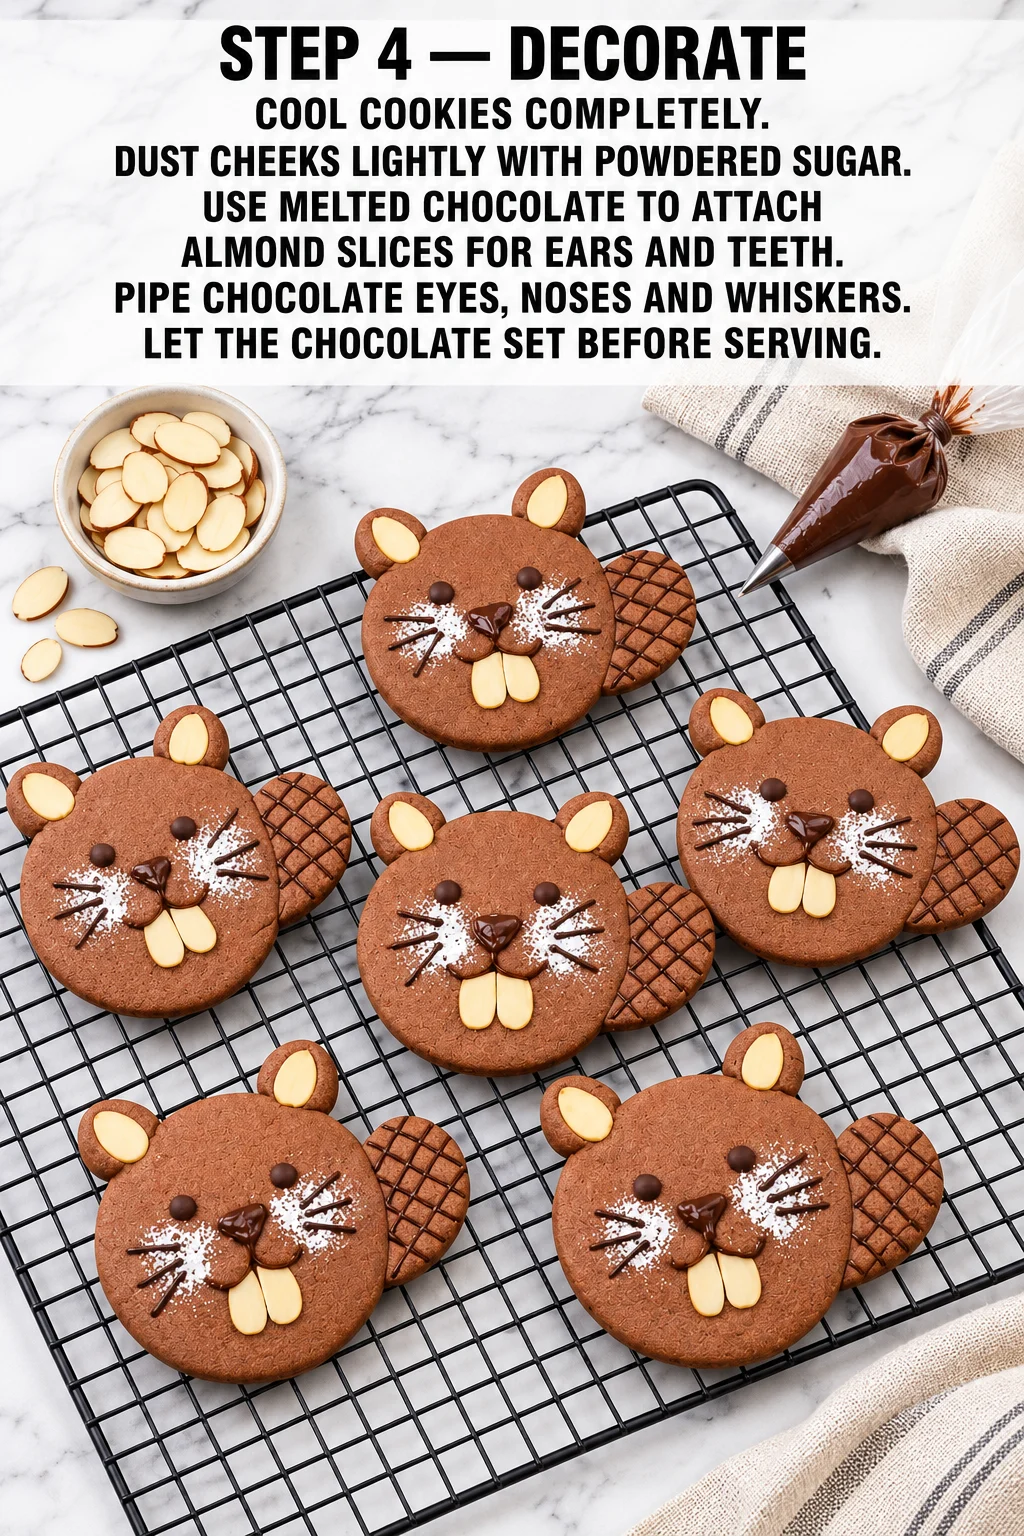
- Cool completely. Let the cookies rest on the pan for a few minutes, then move them to a rack to cool fully. Warm cookies will melt the chocolate and cause the almonds to slide off. Decorate. Dust the cheeks lightly with powdered sugar. Use a small dab of melted chocolate to attach the almond slices as ears and teeth. Pipe chocolate eyes, nose, and whiskers, then let the chocolate set at room temperature before serving.
What To Expect While They Bake
The dough will feel crumbly at first, then come together into a soft, slightly tacky ball. This is normal, and it firms up as it chills. In the oven, the cookies puff slightly and then settle, and the edges turn matte while the tops still look soft.
Where This Recipe Can Go Wrong
The most common problem is overworked dough. Mixing after the flour disappears develops gluten and makes the cookies tough, so stop as soon as the dough holds together. Warm butter is another issue. If the dough turns greasy or sticky, chill it again before rolling and keep the cut shapes cold until they go into the oven. Finally, do not decorate warm cookies; wait until they are fully cool.
Why This Recipe Works
Cold butter cut into the dry ingredients creates a short, crumbly texture. Powdered sugar dissolves easily into the dough for a fine, tender crumb. Cocoa powder adds chocolate flavor without extra liquid, so the dough stays easy to handle. The chilling steps firm the butter so the shapes keep their details in the oven.
Easy Ways To Switch It Up
- Dark chocolate for decorating: Melted dark chocolate gives a less sweet look for the piping and works in the same way.
- Other nut slivers: If you cannot find sliced almonds, thin slivers of another nut work. The appearance will change slightly, but the flavor stays nutty.
- Extra cocoa: Do not add more cocoa to the dough without adjusting the flour, or the dough can turn dry and crumbly.
Serving Suggestions
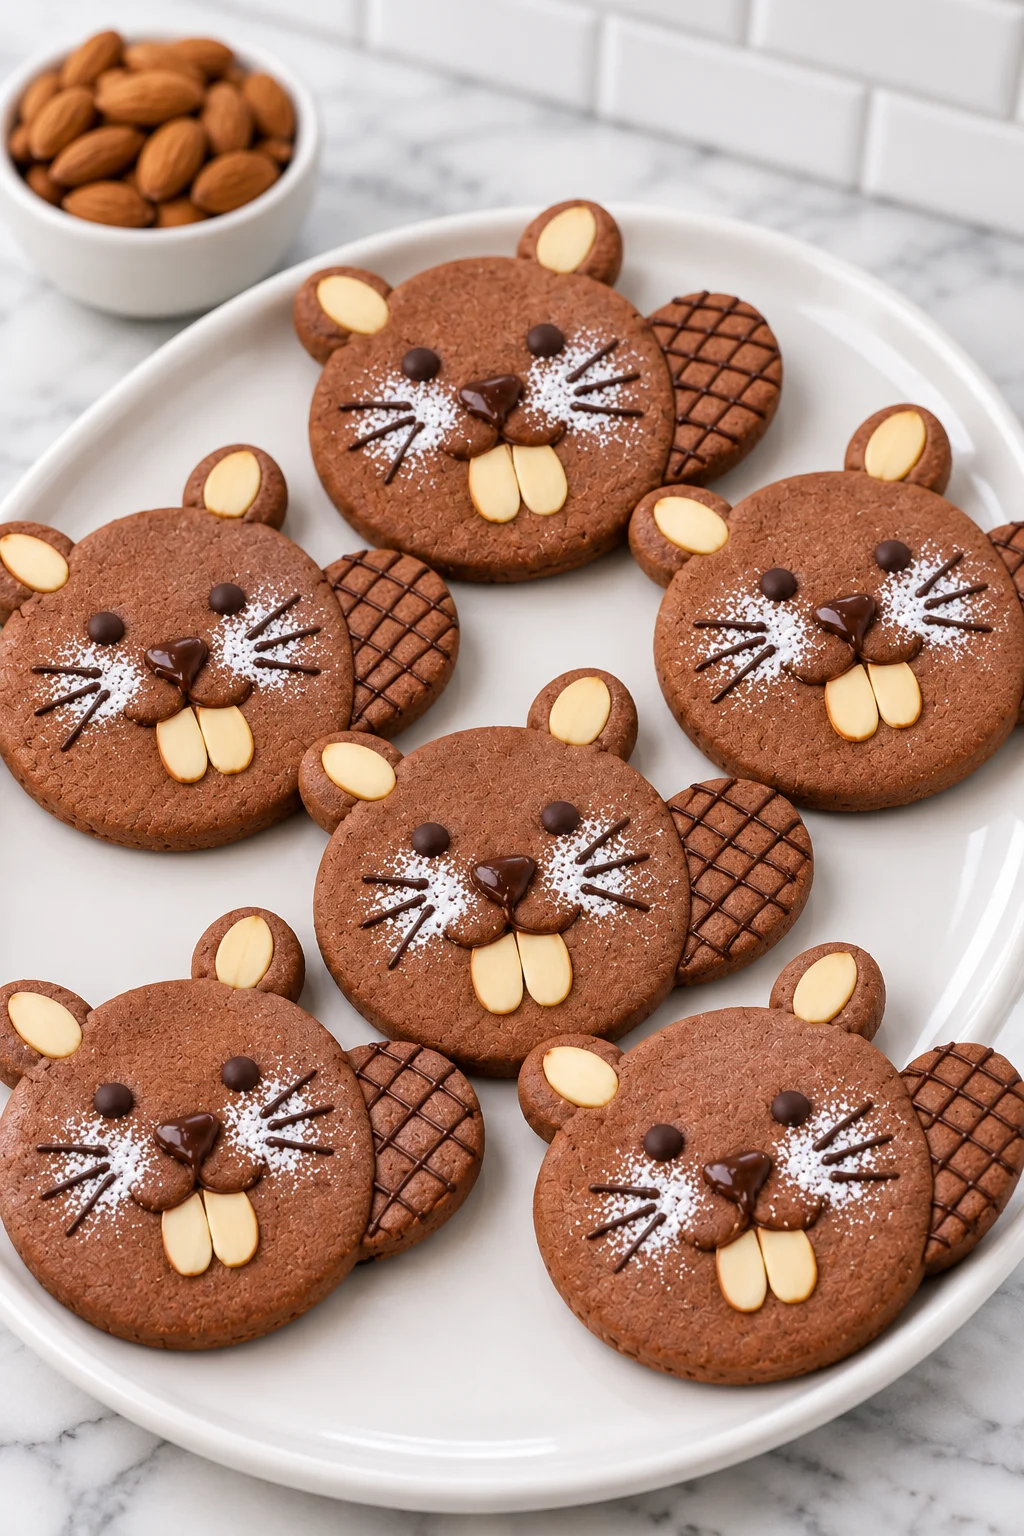
These cookies pair well with coffee, hot cocoa, or cold milk. Arrange them on a platter with a light dusting of powdered sugar for a cheerful presentation, or add them to a kids’ party table or holiday cookie tray.
Storage And Make-Ahead
Store fully cooled, decorated cookies in an airtight container at room temperature for up to 5 days. For longer storage, refrigerate them for up to 2 weeks, layered between sheets of parchment. The dough can be wrapped and refrigerated for up to 2 days before rolling. Undecorated baked cookies can be frozen for up to 3 months and thawed at room temperature before adding the chocolate and almonds.
Frequently Asked Questions
Can I skip the chilling time?
No. The dough needs time to firm up so it rolls cleanly, and the shaped cookies need a short rest so they keep their shape in the oven.
Can I use hot cocoa mix instead of cocoa powder?
No. Hot cocoa mix contains sugar and other ingredients that change the dough. Use unsweetened cocoa powder.
Why did my cookies spread?
This usually happens when the butter got too warm or the shapes were not chilled long enough. Keep the butter cold and chill the dough and shaped cookies before baking.
How do I know when the cookies are done?
Bake until the edges are set and the cookies feel just firm to the touch, usually 12–15 minutes at 350°F (175°C). They firm more as they cool.

Chocolate Beaver Cookies
Ingredients
Method
- Mix the dry ingredients: In a large bowl, whisk the flour, powdered sugar, cocoa powder, and salt until evenly combined and no cocoa streaks remain; add the cold cubed butter and cut it in with a pastry blender or fingertips until the mixture looks like fine, sandy crumbs; work quickly so the butter stays cold.
- Form the dough: Add the egg and mix just until the dough comes together into a shaggy ball; stop as soon as no dry flour shows; flatten into a disk, wrap in plastic, and chill for 30–60 minutes until firm enough to roll without sticking.
- Roll and shape: Roll the dough to ¼ inch thick between two sheets of parchment; cut out round faces, small ears, and oval tails with cookie cutters or a knife; press the pieces together on a parchment-lined baking sheet, add small dough muzzles, and score the tails lightly; if the dough softens, return it to the refrigerator. Chill the shapes: Refrigerate the shaped cookies for 15 minutes so they keep their form in the oven. Bake: Heat the oven to 350°F (175°C) and bake for 12–15 minutes, until the edges are set and the cookies feel just firm to the touch; if edges brown before centers set, move the pan to a lower rack for the last minute.
- Cool completely: Let the cookies rest on the pan a few minutes, then move them to a rack to cool fully before decorating, since warm cookies will melt the chocolate and cause the almonds to slide off. Decorate: Dust the cheeks lightly with powdered sugar; use a small dab of melted chocolate to attach the almond slices as ears and teeth; pipe chocolate eyes, nose, and whiskers; let the chocolate set at room temperature before serving.