
These Christmas Oreo Ornament Cookies are a fun no-bake treat that comes together with just a few dips and a handful of toppings. Each Oreo gets a red or green candy melt coating, a mini Reese’s cup cap, and a festive finish of sprinkles, mini M&M’s, and gold stars. You get a crisp chocolate shell, a soft creamy cookie inside, and a sweet peanut butter bite on top, which makes them a cheerful addition to any holiday cookie tray.
Christmas Oreo Ornament Cookies Ingredients
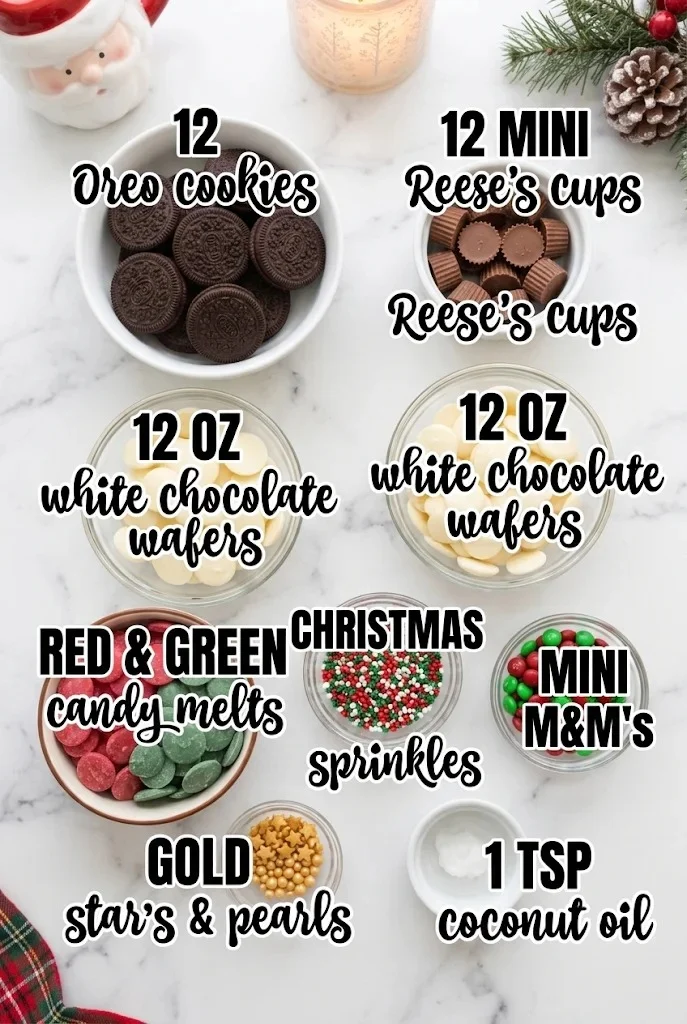
- 12 Oreo cookies — These are the base of the ornament, so pick full-size, unbroken cookies that lie flat on the bottom for a stable dip.
- 12 mini Reese’s cups — These form the ornament cap. Press them onto the top edge of each dipped cookie while the coating is still soft so they stick.
- 12 oz white chocolate wafers — Use these melted with coconut oil to make a smooth white coating base. Wafers melt more evenly than chopped bars.
- Red and green candy melts, as needed — These give the cookies their Christmas color. Melt them in separate bowls so the colors stay distinct.
- 1 tsp coconut oil — This thins the melted coating so it flows smoothly and sets with a glossy finish.
- Christmas sprinkles, as needed — Add these while the coating is wet so they stick to the surface.
- Mini M&M’s, as needed — Use these as festive accents on the coating; press them in gently.
- Gold stars and pearls, as needed — These add a finishing sparkle. Place them right after the M&M’s while the coating is still tacky.
Substitutions And Additions
White Chocolate Wafers
If you can’t find wafers, use good-quality white melting chocolate or white chocolate chips, melted the same way. Chips can thicken more quickly, so keep the heat low and stir often.
Reese’s Cups
Mini peanut butter cups from another brand work well as a stand-in. Choose a similar size so the cap sits neatly on the top edge of the cookie.
Candy Melts
Any red and green candy melts will work. Avoid melting them with water, since even a small amount can make the coating seize.
How To Make This Christmas Oreo Ornament Cookies Recipe
- Melt the coatings. Melt the white chocolate wafers with the coconut oil in one bowl, and melt the red and green candy melts with coconut oil in separate bowls, until each is smooth. Work in short bursts in the microwave, stirring well between each one, so the coatings don’t scorch. The white coating should flow like thin cream.
Pro Tip: Keep the candy melts in separate bowls so the red and green don’t blend into a muddy color.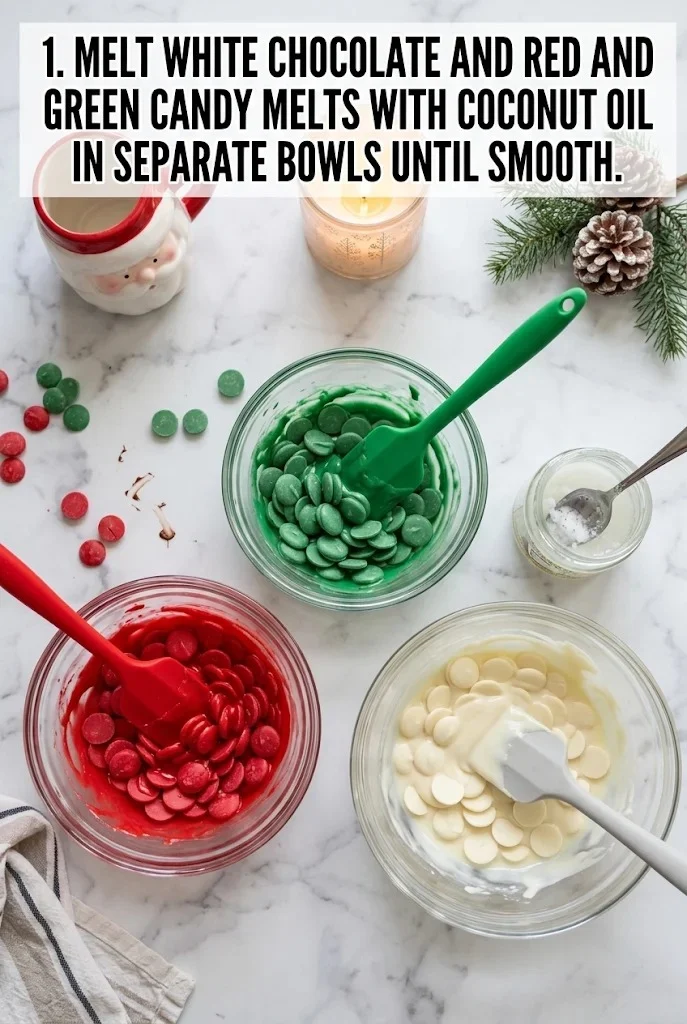
- Dip the Oreos. Dip each Oreo into the melted red or green candy melts, letting the excess drip off, then place it on parchment paper. Let the coating set until it looks glossy and firm to the touch. Work with one color at a time so the coating stays fluid.
Pro Tip: Tap the cookie gently against the bowl edge to remove extra coating so the ornament looks neat.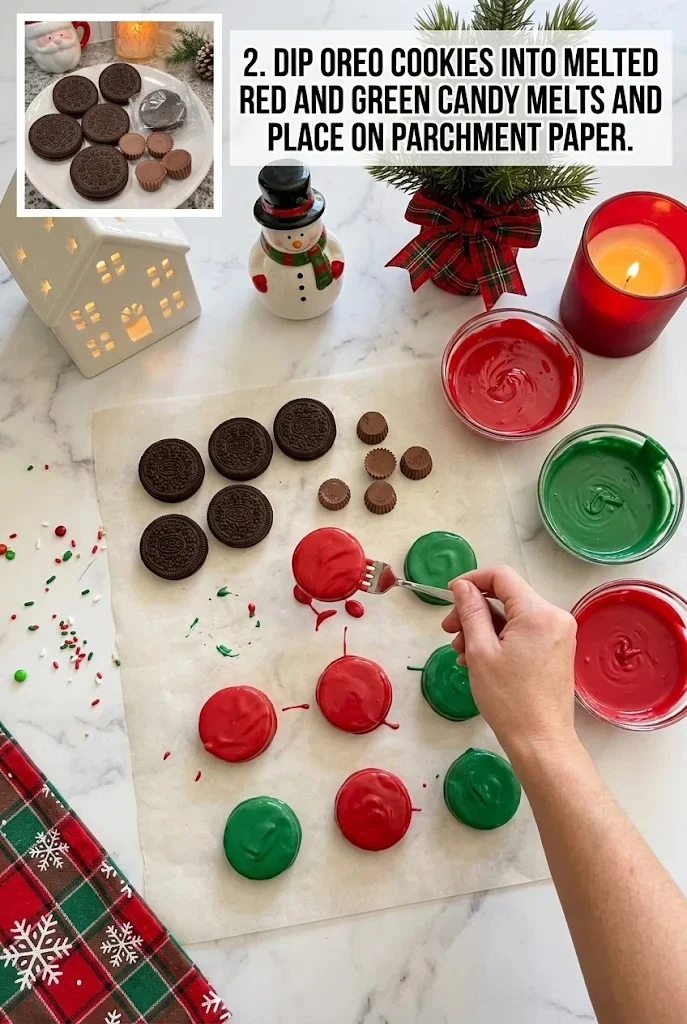
- Add the mini Reese’s cup cap. While the coating is still soft, press a mini Reese’s cup onto the top edge of each dipped Oreo to form the ornament cap. Hold it in place for a few seconds so it sticks. The cap should look like it’s hanging from the top.
Pro Tip: If the coating has already set, dab a little melted white chocolate on the back of the cup to hold it.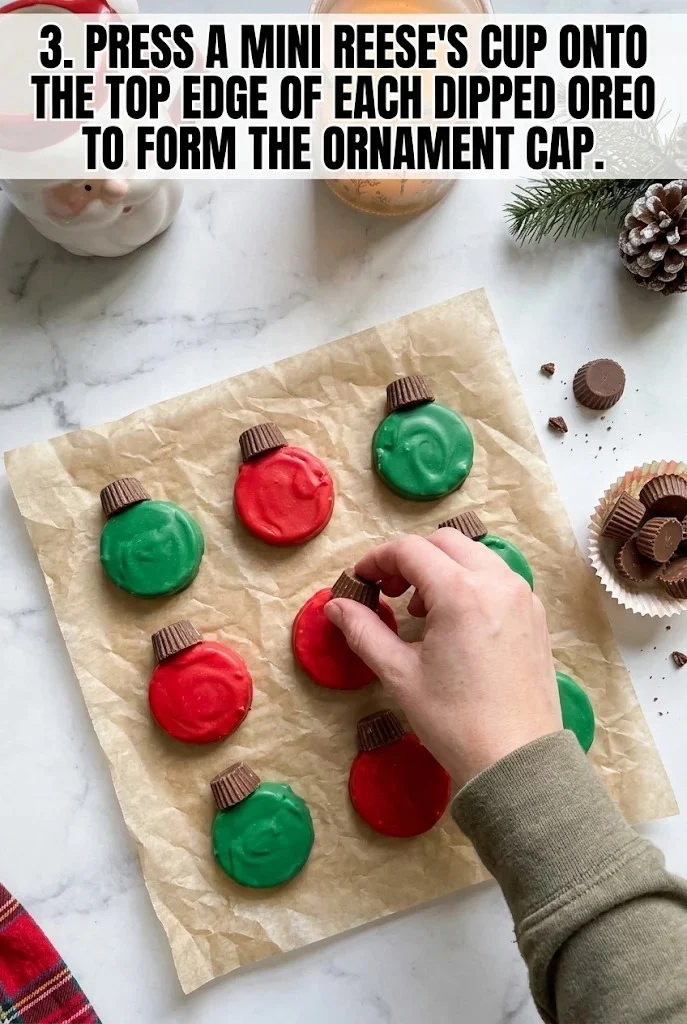
- Decorate and let set. Decorate with candy melt stripes using the white coating, then add mini M&M’s, gold stars and pearls, and Christmas sprinkles while the coating is still wet. Let the cookies set at room temperature until the coating is firm and no longer tacky. Once set, the candy shell should snap cleanly when bitten.
Pro Tip: Add the sprinkles and M&M’s right away, since they won’t stick once the coating firms up.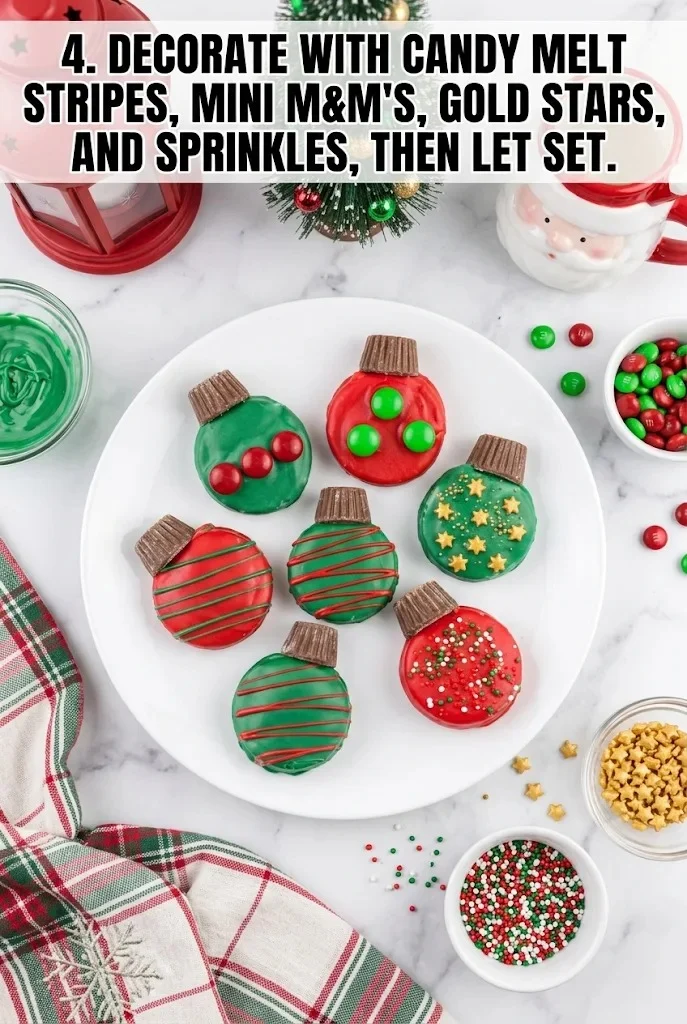

How To Serve And Store

Arrange these on a platter for a holiday dessert table, or pack them in a gift tin for neighbors and coworkers. They pair well with hot cocoa or a cup of coffee.
In The Fridge
Store the cookies in an airtight container in the refrigerator for up to 1 week. Keep them in a single layer, or separate layers with parchment, so the caps don’t get crushed.
In The Freezer
These can be frozen in an airtight container for up to 2 months. Thaw them in the refrigerator for a few hours so the coating doesn’t sweat.
Frequently Asked Questions
Can you make these ahead?
Make them a day or two in advance and keep them stored in a cool spot until you are ready to serve. Store them in an airtight container at a cool room temperature away from heat.
Why did my coating look dull?
Dull coating usually means it cooled too quickly or was overheated. Rewarm it gently and stir until smooth before dipping the next cookie.
Can I use a different cookie?
Yes, but choose a sandwich cookie with a flat surface so the dip holds. Thicker or softer cookies may crack under the coating.
More Recipes You’ll Love
- Christmas Tree Cheese Bites
- Christmas Tree Sugar Cookies
- Basil Pesto & Cheese Puff Pastry Christmas Trees
- Christmas Hot Cocoa Mug Cookies
Enjoy these with your holiday guests, and feel free to share your favorite ornament designs. Follow Hailee Recipes on Pinterest for more festive ideas.

Christmas Oreo Ornament Cookies
Ingredients
Method
- Melt the white chocolate wafers with the coconut oil in one bowl, and melt the red and green candy melts with coconut oil in separate bowls, until each is smooth; work in short microwave bursts, stirring well between each, so the coatings don't scorch.
- Dip each Oreo into the melted red or green candy melts, letting the excess drip off, then place it on parchment paper; let the coating set until glossy and firm to the touch.
- While the coating is still soft, press a mini Reese's cup onto the top edge of each dipped Oreo to form the ornament cap, holding it in place for a few seconds so it sticks.
- Decorate with candy melt stripes using the white coating, then add mini M&M's, gold stars and pearls, and Christmas sprinkles while the coating is still wet; let set at room temperature until firm and no longer tacky.