4 Delicious Homemade Pop Tart Recipes to Try
4 Delicious Homemade Pop Tart Recipes to Try
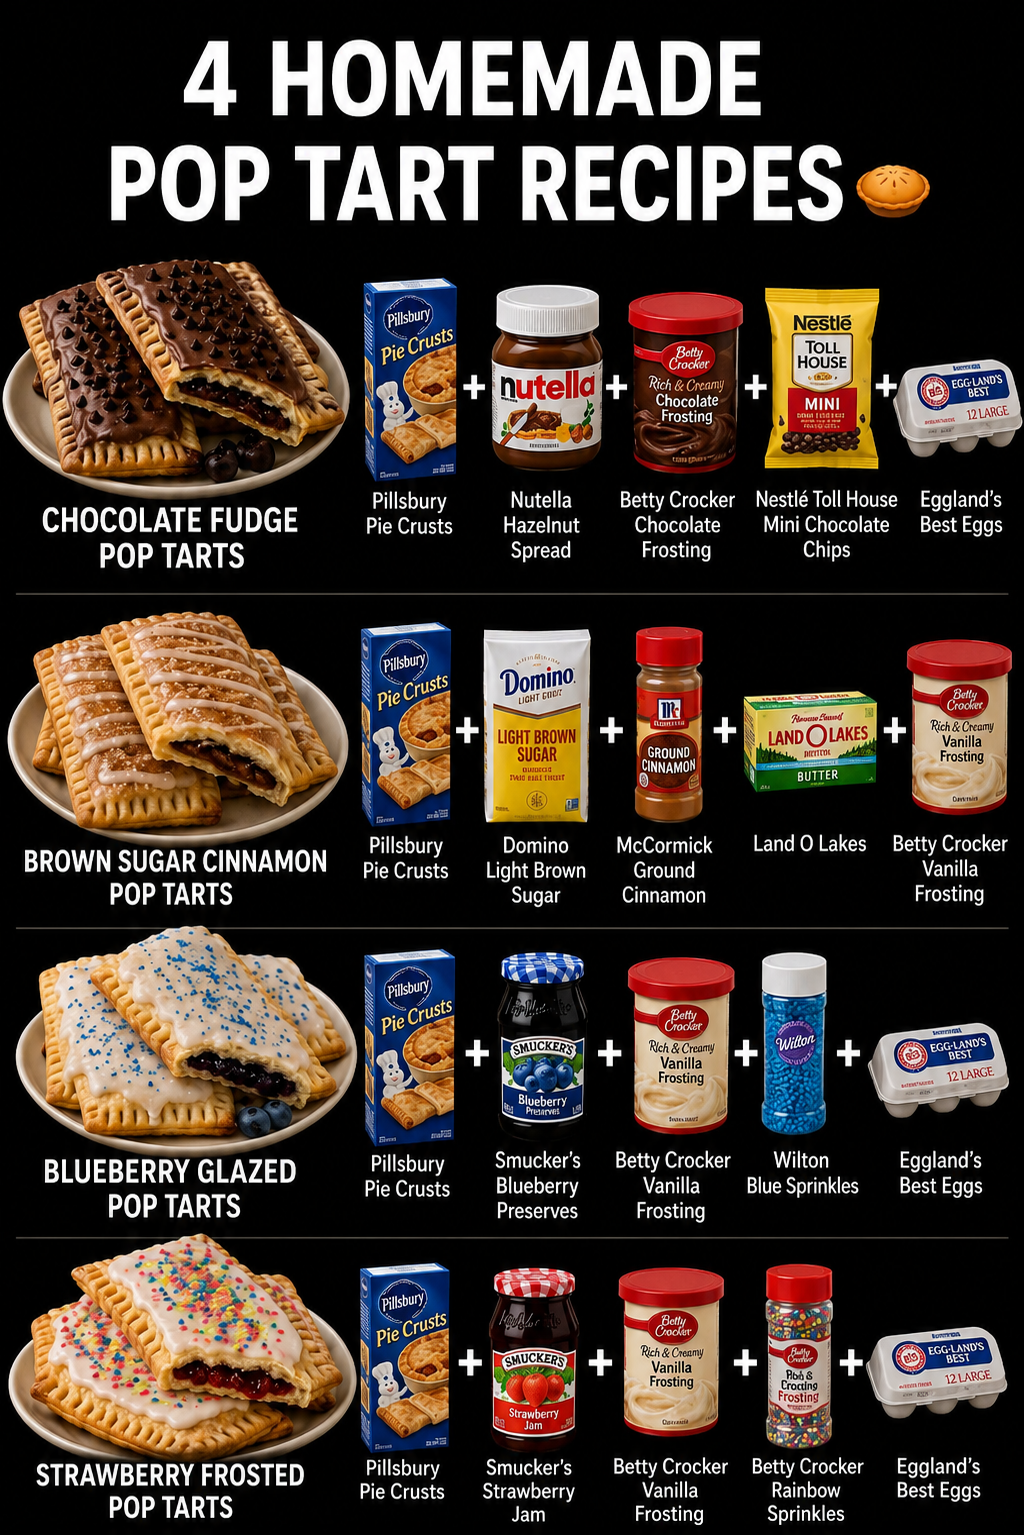
There’s something magical about biting into a warm, homemade pop tart that takes me right back to childhood mornings. But here’s the thing—store-bought versions don’t even come close to what you can make in your own kitchen. I’ve put together 4 delicious homemade pop tart recipes that are so much better than anything you’ll find in a box, and they’re easier to make than you might think. Whether you’re looking for a weekend baking project or want to meal prep breakfast for the week, these recipes will become your new go-to.
What I love most about making pop tarts at home is that you control every single ingredient. You can use real fruit, quality chocolate, and butter instead of mystery fillings and artificial flavors. Plus, your kitchen will smell absolutely incredible while they’re baking. These four recipes—Chocolate Fudge, Brown Sugar Cinnamon, Blueberry Glazed, and Strawberry Frosted—cover all the classics, and each one is worth saving to your collection.
I’m sharing these recipes because I genuinely believe homemade is the way to go once you taste the difference. If you love easy breakfast ideas and fun baking projects, Follow me on HaileeRecipes on Pinterest where I’m constantly sharing recipes like these. Now let’s get into these pop tarts—your taste buds are going to thank you.
1. Chocolate Fudge Pop Tarts
These homemade Chocolate Fudge Pop Tarts deliver the nostalgic breakfast treat you crave with a rich, decadent twist. Featuring buttery, flaky pastry crusts filled with smooth chocolate fudge that stays gooey in the center, these tarts strike the perfect balance between crispy exterior and indulgent filling. The chocolate flavor is deep and satisfying without being overly sweet, making them ideal for weekend breakfasts, lunchbox surprises, or afternoon snacks. Homemade versions let you control the quality of chocolate and avoid artificial ingredients, resulting in a genuinely better-tasting pop tart that rivals any store-bought option.
Why You’ll Love It
- Simple enough for beginner bakers but impressive enough to serve to guests.
- Uses basic pantry ingredients that most home cooks already have on hand.
- Freezer-friendly, so you can make a batch and enjoy them throughout the week.
Ingredients
- 2 cups all-purpose flour
- 1/2 teaspoon salt
- 1 tablespoon sugar
- 1 cup cold unsalted butter, cubed
- 6 to 8 tablespoons ice water
- 1 cup chocolate fudge sauce or melted chocolate ganache
- 1 egg, beaten with 1 tablespoon water for egg wash
- Coarse sugar for topping (optional)
How To Make It
- Make the pastry dough by combining flour, salt, and sugar in a large bowl. Cut in cold butter cubes until the mixture resembles coarse breadcrumbs with pea-sized pieces remaining.
- Add ice water one tablespoon at a time, stirring gently until the dough just comes together. Form into a disk, wrap in plastic, and refrigerate for at least 30 minutes.
- Preheat your oven to 375 degrees Fahrenheit. Roll out the chilled dough between two sheets of parchment paper to about 1/8-inch thickness, then cut into rectangles approximately 3 by 4 inches.
- Place a tablespoon of chocolate fudge sauce in the center of half the rectangles, leaving a half-inch border. Brush the borders with egg wash.
- Top each filled rectangle with a plain rectangle, pressing the edges firmly to seal. Use a fork to crimp the edges for a decorative finish and to ensure they stay sealed during baking.
- Brush the tops of all pop tarts with egg wash and sprinkle with coarse sugar if desired. Prick the top of each tart with a fork to allow steam to escape.
- Bake for 15 to 18 minutes until the pastry is golden brown and crispy. Cool on a wire rack for at least 5 minutes before serving.
Variations And Substitutions
Swap the chocolate fudge for chocolate ganache, Nutella, or a homemade chocolate filling made with cocoa powder and butter. Add a pinch of espresso powder to the fudge for deeper chocolate flavor, or mix in a teaspoon of vanilla extract. For a salted chocolate version, sprinkle fleur de sel on top before baking. You can also create a chocolate-raspberry combination by layering a thin spread of raspberry jam under the fudge filling.
Make-Ahead, Storage, And Serving Tips
Assemble unbaked pop tarts up to two days ahead and store them in an airtight container in the refrigerator, then bake fresh when ready. Baked pop tarts keep in an airtight container at room temperature for up to four days, or freeze for up to three months. Reheat frozen pop tarts directly in a 350-degree oven for about 8 minutes to restore crispness. If the filling leaks during baking, your seal wasn’t tight enough; press edges more firmly next time. Serve warm or at room temperature with a glass of milk or hot chocolate.
2. Brown Sugar Cinnamon Pop Tarts
Brown Sugar Cinnamon Pop Tarts deliver the ultimate comfort breakfast with their buttery pastry crust, gooey brown sugar filling, and warm cinnamon spice. These homemade versions capture that nostalgic flavor you remember from childhood while tasting infinitely better than the store-bought alternative. The tender, flaky pastry contrasts beautifully with the sweet, caramel-like filling, making them perfect for lazy weekend mornings or quick weekday breakfasts. They’re equally delicious served warm from the toaster or enjoyed at room temperature, and they make an excellent grab-and-go treat for busy families.
Why You’ll Love It
- Homemade pastry tastes richer and more satisfying than commercial versions.
- The brown sugar filling has genuine caramel notes that feel indulgent yet simple.
- Makes 8 pop tarts, providing plenty for the week or to share with family.
Ingredients
- 2 cups all-purpose flour
- 1 tablespoon sugar
- 1 teaspoon salt
- 1 cup cold unsalted butter, cubed
- 6 to 8 tablespoons ice water
- 1 cup packed brown sugar
- 2 teaspoons ground cinnamon
- 2 tablespoons cornstarch
- 1 egg, beaten
How To Make It
- Mix flour, sugar, and salt in a large bowl. Cut in cold butter until the mixture resembles coarse crumbs with some pea-sized pieces remaining.
- Add ice water one tablespoon at a time, stirring gently until the dough just comes together. Form into a disk, wrap in plastic, and refrigerate for at least 30 minutes.
- Combine brown sugar, cinnamon, and cornstarch in a small bowl to create the filling mixture.
- Roll out the chilled dough between two pieces of parchment paper to about 1/8-inch thickness. Cut into 16 rectangles roughly 4 by 3 inches.
- Place one tablespoon of filling on one half of each rectangle, leaving a half-inch border. Brush the edges with beaten egg, fold in half, and press firmly to seal.
- Use a fork to crimp the edges decoratively and poke small holes in the top of each pastry.
- Place pop tarts on a parchment-lined baking sheet and bake at 375 degrees Fahrenheit for 15 to 18 minutes until golden brown.
- Cool on the baking sheet for 5 minutes before transferring to a wire rack.
Variations And Substitutions
For extra sweetness, dust the warm pop tarts with a cinnamon-sugar mixture right after baking. You can also add a thin layer of cream cheese frosting on top once cooled. If you prefer less filling, reduce the brown sugar mixture to three-quarters cup. For a maple twist, substitute half the brown sugar with maple sugar and add a pinch of nutmeg to the filling.
Make-Ahead, Storage, And Serving Tips
Store cooled pop tarts in an airtight container at room temperature for up to 5 days. You can prepare the dough up to 2 days ahead and assemble the pop tarts the morning you plan to bake them. For best results, reheat in a toaster or 350-degree oven for 2 to 3 minutes to restore crispness. These freeze beautifully for up to 3 months before baking, so you can bake them straight from frozen, adding just 2 to 3 extra minutes to the baking time.
3. Blueberry Glazed Pop Tarts
These Blueberry Glazed Pop Tarts deliver a burst of tart-sweet berry flavor wrapped in a buttery, flaky pastry crust. The homemade blueberry filling is made from fresh or frozen berries, creating a jammy center that stays perfectly contained during baking. A simple glaze drizzled on top adds shine and extra sweetness. These are perfect for breakfast, brunch, or an afternoon snack, and they taste infinitely better than store-bought versions because you control the sugar level and fruit quality. The combination of crispy edges and tender filling makes them irresistible straight from the oven or toasted the next day.
Why You’ll Love It
- Made with real blueberries and no artificial flavors or preservatives.
- Crispy, buttery pastry exterior contrasts beautifully with the soft, jammy filling.
- Perfect make-ahead option that tastes great fresh or reheated for busy mornings.
Ingredients
- 2 cups all-purpose flour
- 1 teaspoon salt
- 1 tablespoon sugar
- 1 cup cold unsalted butter, cubed
- 6 to 8 tablespoons ice water
- 2 cups fresh or frozen blueberries
- 1/4 cup granulated sugar
- 2 tablespoons cornstarch
- 1 tablespoon lemon juice
- 1 cup powdered sugar, plus 2 to 3 tablespoons milk for glaze
How To Make It
- Make the pastry dough by combining flour, salt, and sugar in a large bowl. Cut in cold butter until the mixture resembles coarse crumbs. Add ice water one tablespoon at a time, stirring gently until the dough just comes together. Form into a disk, wrap in plastic, and refrigerate for at least 30 minutes.
- Prepare the blueberry filling by combining blueberries, granulated sugar, cornstarch, and lemon juice in a saucepan. Cook over medium heat for 5 to 7 minutes, stirring occasionally, until the mixture thickens and the berries break down slightly. Let cool completely.
- Preheat your oven to 375 degrees Fahrenheit. Line baking sheets with parchment paper.
- Roll out the chilled dough between two sheets of parchment paper to about 1/8-inch thickness. Cut into rectangles approximately 3 by 5 inches. Place half the rectangles on the prepared baking sheets.
- Spoon about 2 tablespoons of blueberry filling onto the center of each rectangle on the baking sheets, leaving a half-inch border. Top with remaining pastry rectangles and press the edges firmly with a fork to seal.
- Bake for 18 to 22 minutes, until the pastry is golden brown and crispy. Remove from the oven and let cool on the baking sheet for 5 minutes.
- While the pop tarts cool slightly, whisk together powdered sugar and milk to create a smooth glaze. Drizzle over the cooled pop tarts.
Variations And Substitutions
Swap blueberries for blackberries, raspberries, or a mixed berry combination for different flavor profiles. Add a teaspoon of vanilla extract or almond extract to the glaze for extra depth. For a spiced version, mix cinnamon and nutmeg into the filling. If you prefer a thicker crust, use all-butter pie dough or add an egg wash before baking for extra shine and browning.
Make-Ahead, Storage, And Serving Tips
Baked pop tarts keep in an airtight container at room temperature for up to 3 days, or frozen for up to 1 month. Reheat in a toaster or 350-degree oven for 5 minutes to restore crispness. You can also prepare unbaked pop tarts, freeze them on a baking sheet, then bake directly from frozen, adding 2 to 3 extra minutes to the baking time. If the filling leaks during baking, pat the pastry dry and apply glaze to seal any cracks.
4. Strawberry Frosted Pop Tarts
These Strawberry Frosted Pop Tarts deliver a delightful combination of buttery pastry, sweet strawberry filling, and smooth vanilla frosting with colorful sprinkles. The homemade version surpasses store-bought alternatives with its tender, flaky crust and real fruit flavor. Perfect for breakfast, brunch, or an afternoon snack, these treats work wonderfully for meal prep and are sure to impress family and friends with their bakery-quality appearance and authentic taste.
Why You’ll Love It
- Homemade pastry tastes infinitely better than commercial versions with a genuinely flaky texture.
- Real strawberry jam filling provides authentic fruit flavor without artificial ingredients.
- Beautiful frosted and sprinkled top makes them Instagram-worthy and fun to customize.
Ingredients
- 2 cups all-purpose flour
- 1 teaspoon salt
- 1 tablespoon sugar
- 1 cup cold butter, cubed
- 6 to 8 tablespoons ice water
- 1 cup strawberry jam
- 1 cup powdered sugar
- 3 tablespoons milk
- 1 teaspoon vanilla extract
- Colorful sprinkles for topping
How To Make It
- Mix flour, salt, and sugar in a large bowl, then cut in cold butter until the mixture resembles coarse crumbs.
- Add ice water one tablespoon at a time, stirring gently until the dough just comes together without overworking it.
- Divide dough in half, wrap in plastic wrap, and refrigerate for at least 30 minutes until firm.
- Roll out one portion of dough between parchment paper to about 1/8-inch thickness, then cut into rectangles approximately 3 by 4 inches.
- Place a tablespoon of strawberry jam on half of each rectangle, leaving a small border, then fold over and seal edges with a fork.
- Place pop tarts on a baking sheet lined with parchment paper and bake at 375 degrees Fahrenheit for 12 to 15 minutes until golden brown.
- While cooling, whisk together powdered sugar, milk, and vanilla extract to create the frosting, then spread generously over each cooled pop tart.
- Top with colorful sprinkles immediately before the frosting sets completely.
Variations And Substitutions
Experiment with different jam flavors like raspberry, blueberry, or cherry for variety. For a more decadent version, add a thin layer of chocolate spread under the jam. Try substituting the vanilla frosting with cream cheese frosting for tanginess, or use brown sugar cinnamon filling for a classic flavor combination. Those preferring less sweetness can reduce the frosting amount or use a simple glaze instead.
Make-Ahead, Storage, And Serving Tips
Prepare the dough up to two days ahead and store it wrapped in the refrigerator, or freeze for up to three months. Baked unfrosted pop tarts keep in an airtight container for five days and can be refreshed in a 300-degree oven for five minutes. Frosted pop tarts are best enjoyed within two days of assembly. For convenient grab-and-go breakfasts, freeze unfrosted baked pop tarts and toast them briefly before frosting and serving warm.
Final Thoughts
Making homemade pop tarts is easier than you might think, and the results are so much more delicious than anything you can buy at the store. Whether you’re craving the classic strawberry flavor, want to experiment with cinnamon brown sugar, or are ready to try something completely unique like s’mores or blueberry lemon, there’s a recipe here for everyone. The best part is that you can customize the fillings and glazes to match your personal taste preferences perfectly.
We encourage you to pick one recipe to try this weekend. Start with whichever flavor sounds most appealing to you—there’s no wrong choice. Once you’ve mastered one batch, you’ll feel confident tackling the others. Your family will love the homemade treats, and you might just find that making pop tarts from scratch becomes a new favorite weekend baking tradition.
4 Delicious Homemade Pop Tart Recipes to Try
Ingredients
Method
- Chocolate Fudge Pop Tarts: Mix flour, butter, cocoa powder, and sugar to form dough. Roll out and cut into rectangles.
- Chocolate Fudge Pop Tarts: Fill with chocolate fudge, seal edges, brush with egg wash, and bake at 375°F for 12-15 minutes until golden.
- Brown Sugar Cinnamon Pop Tarts: Combine flour, butter, brown sugar, and cinnamon into dough. Roll out and cut into rectangles.
- Brown Sugar Cinnamon Pop Tarts: Seal with cinnamon-sugar filling, brush with egg wash, and bake at 375°F for 12-15 minutes.
- Blueberry Glazed Pop Tarts: Prepare dough with flour and butter. Fill with blueberry filling and seal edges.
- Blueberry Glazed Pop Tarts: Bake at 375°F for 12-15 minutes, then brush with powdered sugar glaze while warm.
- Strawberry Frosted Pop Tarts: Make dough base and fill with strawberry filling. Seal and crimp edges.
- Strawberry Frosted Pop Tarts: Bake at 375°F for 12-15 minutes, cool slightly, then top with strawberry frosting.
Notes
Brown Sugar Cinnamon Pop Tarts Tips: Make dough ahead and refrigerate overnight for easier handling.
Blueberry Glazed Pop Tarts Tips: Use fresh or frozen blueberries. Glaze sets best when applied to warm pastries.
Strawberry Frosted Pop Tarts Tips: Freeze unbaked tarts for up to 3 months. Bake from frozen, adding 2-3 extra minutes to cook time.