Homemade Pudding Cups: 4 Delicious Recipes
Homemade Pudding Cups: 4 Delicious Recipes
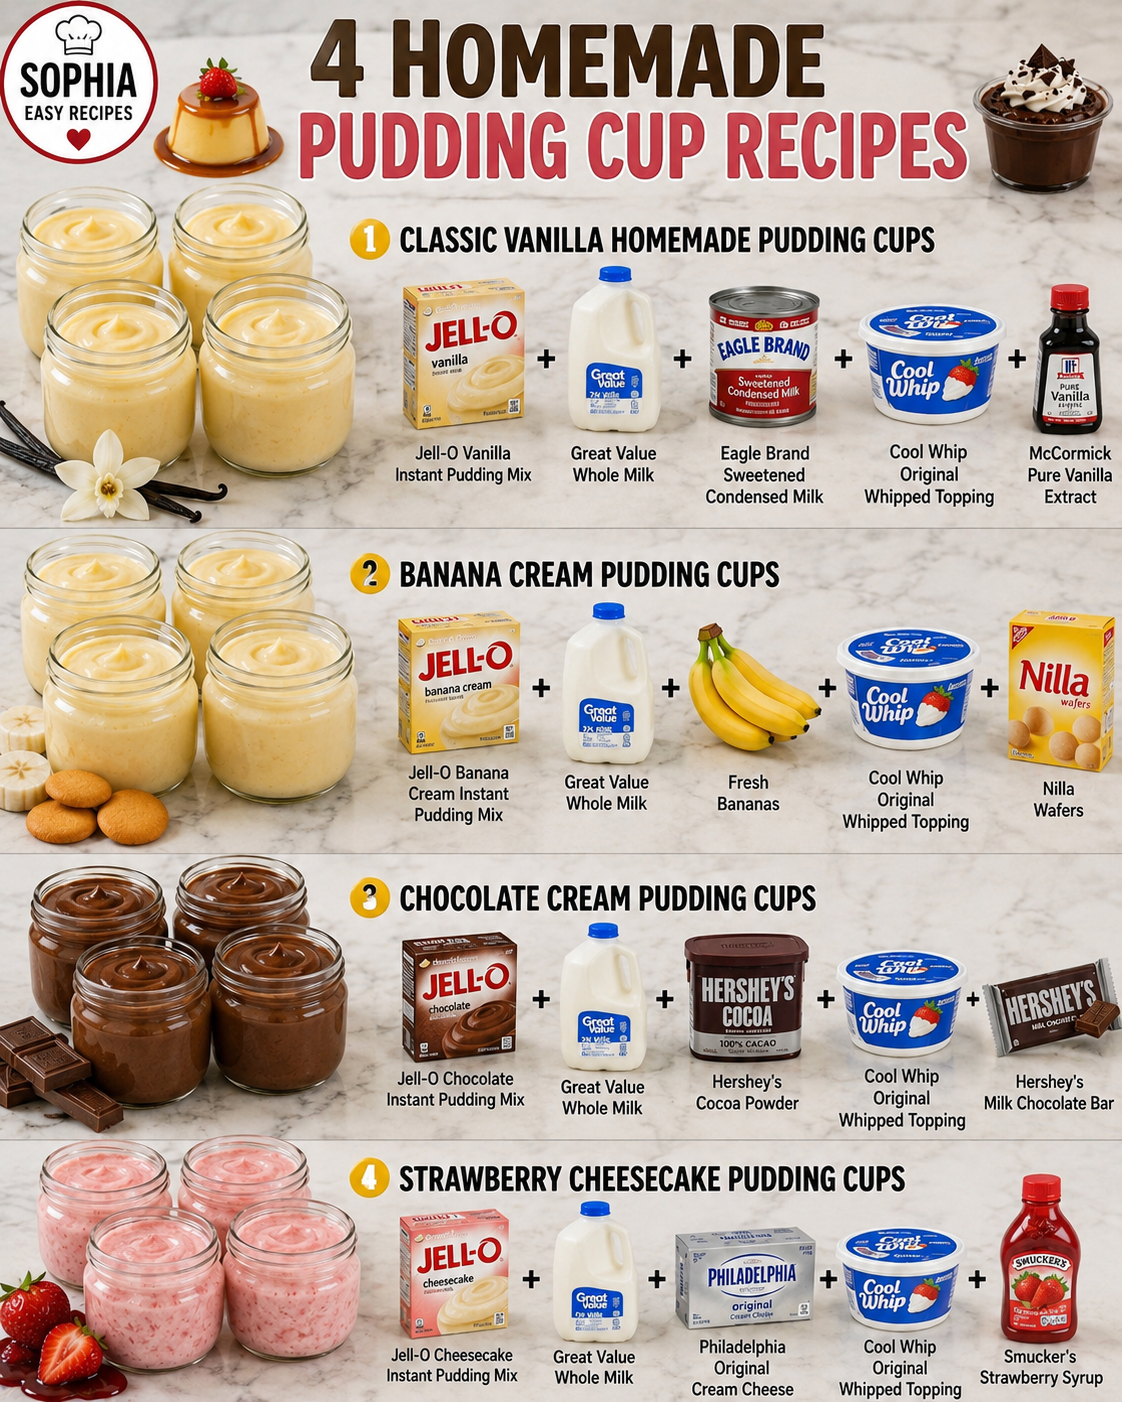
I’m so excited to share my favorite homemade pudding cup recipes with you today! There’s something magical about making pudding from scratch instead of reaching for those instant packets. These four recipes—Classic Vanilla, Banana Cream, Chocolate Cream, and Strawberry Cheesecake—are the ones I come back to again and again because they taste like real dessert, not artificial anything. Whether you’re meal prepping for the week or looking for a simple treat to impress guests, these recipes deliver every single time.
What I love most about these pudding cups is how versatile and forgiving they are. You can make them ahead, store them in the fridge, and grab one whenever you need a moment of comfort. The best part? They’re actually easier than you might think, and they use ingredients you probably already have at home. Once you taste homemade pudding, you’ll understand why it’s worth those few extra minutes in the kitchen.
I’ve tested these recipes countless times, tweaking them until they’re absolutely perfect, and I’m thrilled to finally share them with you here. If you love easy desserts and want more recipe ideas delivered straight to your feed, Follow me on HaileeRecipes on Pinterest. Now let’s dive into these four delicious pudding cups that are about to become your new favorites!
1. Classic Vanilla Homemade Pudding Cups
This classic vanilla pudding cup is pure comfort in a glass—silky smooth, rich, and deeply satisfying with genuine vanilla flavor. Made from scratch with simple pantry staples, it delivers a homemade taste that far surpasses instant mixes. The custard-like texture comes from slow cooking and careful whisking, creating a luxurious dessert perfect for weeknight indulgence, special occasions, or when you want to impress without fussy techniques. Serve chilled on its own or topped with whipped cream, fresh berries, or chocolate shavings for an elegant finish.
Why You’ll Love It
- Uses only five basic ingredients you likely have on hand right now.
- Ready in under 20 minutes with minimal hands-on time and no complicated techniques.
- Tastes authentically homemade with real vanilla flavor, nothing artificial or overly sweet.
Ingredients
- 2 cups whole milk
- 3 tablespoons cornstarch
- 1/4 cup granulated sugar
- 1/4 teaspoon salt
- 2 tablespoons unsalted butter
- 1 1/2 teaspoons vanilla extract
- Pinch of nutmeg (optional)
How To Make It
- In a medium saucepan, whisk together cornstarch, sugar, and salt until combined with no lumps.
- Slowly pour in the milk while whisking constantly to prevent lumps from forming in the mixture.
- Place the saucepan over medium heat and cook, stirring frequently, until the mixture thickens and comes to a gentle simmer, about 8 to 10 minutes.
- Remove from heat and stir in the butter and vanilla extract until fully incorporated and smooth.
- Pour the pudding into serving cups or glasses, dividing evenly.
- Press plastic wrap directly onto the surface of each pudding to prevent a skin from forming, then refrigerate for at least 30 minutes until chilled and set.
Variations And Substitutions
Swap vanilla extract for almond extract or add a tablespoon of cocoa powder for chocolate pudding. Use half-and-half instead of milk for extra richness, or substitute 1/2 cup of the milk with coconut milk for tropical flavor. A teaspoon of instant espresso powder enhances vanilla without making it taste like coffee. For dairy-free versions, use any plant-based milk you prefer, though oat milk works best for creaminess.
Make-Ahead, Storage, And Serving Tips
Make pudding up to three days ahead and store covered in the refrigerator. Top with whipped cream, fresh berries, crushed cookies, or chocolate shavings just before serving. If pudding seems too thick after chilling, whisk in a splash of milk to reach desired consistency. Serve cold directly from the refrigerator for best texture and flavor. These puddings also work beautifully layered in parfait glasses with granola, fruit, or cake crumbles for a more elegant presentation.
2. Banana Cream Pudding Cups
Banana cream pudding cups deliver a classic dessert experience with layers of creamy vanilla pudding, fresh banana slices, and buttery vanilla wafer crumbles. This no-bake treat combines smooth, custard-like pudding with the natural sweetness of ripe bananas and a satisfying crunch from the wafers. The combination of textures and flavors makes these cups perfect for summer gatherings, dinner parties, or whenever you want an elegant dessert that feels indulgent but comes together quickly. They’re ideal for individual servings that look impressive without requiring advanced baking skills.
Why You’ll Love It
- No baking required—just mix, layer, and chill for an effortless dessert.
- Naturally sweetened with fresh bananas, so you control the sugar content.
- Individual portions look restaurant-quality and are easy to serve at gatherings.
Ingredients
- 2 cups whole milk
- 1 package instant vanilla pudding mix (3.4 ounces)
- 3 ripe but firm bananas, sliced
- 1 cup heavy whipping cream
- 2 tablespoons powdered sugar
- 1 teaspoon vanilla extract
- 1 cup vanilla wafer cookies, crushed
- 2 tablespoons butter, melted
How To Make It
- Whisk together the milk and instant vanilla pudding mix in a large bowl for about 2 minutes until thickened. Set aside to rest for 5 minutes.
- In a separate bowl, whip the heavy cream with powdered sugar and vanilla extract until stiff peaks form.
- Gently fold the whipped cream into the pudding until no white streaks remain, creating a light and fluffy mousse.
- Toss the crushed vanilla wafers with melted butter in a small bowl until evenly coated.
- Divide half of the pudding mixture among four to six serving cups or glasses.
- Layer banana slices on top of the pudding, then sprinkle with some of the buttered wafer crumbles.
- Top with the remaining pudding mixture, then finish with a final layer of banana slices and wafer crumbles.
- Chill for at least 2 hours before serving.
Variations And Substitutions
For a chocolate twist, layer in chocolate pudding instead of vanilla or drizzle chocolate syrup between layers. Substitute the vanilla wafers with graham cracker crumbs for a different texture. If you prefer a lighter version, use whipped topping instead of fresh whipped cream. For a caramel banana version, drizzle dulce de leche between the layers. You can also add a splash of banana liqueur or rum to the pudding for an adult version.
Make-Ahead, Storage, And Serving Tips
These pudding cups are best assembled 2 to 4 hours before serving to allow flavors to meld while keeping the wafers crispy. Store covered in the refrigerator for up to 24 hours, though the wafers will gradually soften over time. If preparing more than a few hours ahead, layer the wafers separately and add them just before serving for maximum crunch. Keep the sliced bananas tossed with a little lemon juice to prevent browning. Serve chilled directly from the refrigerator for the best texture and flavor.
3. Chocolate Cream Pudding Cups
Indulgent yet surprisingly simple, these chocolate cream pudding cups deliver rich, velvety chocolate flavor with a luxurious creamy texture that melts on your tongue. The combination of dark chocolate and smooth pudding creates a sophisticated dessert that feels fancy enough for dinner parties but easy enough for weeknight cravings. Serve these chilled cups as an elegant finale to any meal, or enjoy them as a satisfying afternoon treat. They work beautifully because the pudding base is foolproof, requiring just a few quality ingredients to achieve restaurant-quality results.
Why You’ll Love It
- Ready in under 15 minutes with minimal hands-on time and no baking required.
- Uses simple pantry staples that most home cooks already have on hand.
- Naturally gluten-free and easily customizable for dietary preferences and restrictions.
Ingredients
- 2 cups whole milk
- 4 ounces semi-sweet or dark chocolate, chopped
- 3 tablespoons unsweetened cocoa powder
- 1/4 cup granulated sugar
- 2 tablespoons cornstarch
- 1/4 teaspoon salt
- 1 teaspoon vanilla extract
- 2 tablespoons butter
- Whipped cream for topping (optional)
How To Make It
- Combine milk, cocoa powder, sugar, cornstarch, and salt in a medium saucepan, whisking until cornstarch lumps dissolve completely.
- Place the saucepan over medium heat and stir constantly for 5-7 minutes until the mixture thickens and reaches a gentle simmer.
- Remove from heat and add the chopped chocolate and butter, letting them sit for one minute to soften, then stir until completely smooth and melted.
- Stir in the vanilla extract and taste, adjusting sweetness or cocoa intensity as desired.
- Pour the chocolate pudding into serving cups or small mason jars, filling them about three-quarters full.
- Allow pudding to cool to room temperature, then cover and refrigerate for at least 2 hours until completely chilled and set.
- Top with whipped cream and chocolate shavings or cocoa powder just before serving if desired.
Variations And Substitutions
Swap milk for almond, oat, or coconut milk for a dairy-free version. Use white chocolate instead of dark chocolate for a sweeter variation, or add a pinch of cayenne pepper for subtle heat. Layer the pudding with crushed cookies, brownie pieces, or fresh berries for added texture and flavor. Substitute rum or espresso powder for vanilla to create adult-friendly versions with deeper complexity.
Make-Ahead, Storage, And Serving Tips
Prepare these pudding cups up to three days ahead and store covered in the refrigerator, making them perfect for meal prep. The pudding thickens slightly as it chills, which is normal and desirable. If the pudding becomes too thick, gently whisk in a splash of milk before serving. For best flavor, remove from refrigeration 10 minutes before serving. Top with fresh whipped cream just before eating to prevent sogginess.
4. Strawberry Cheesecake Pudding Cups
Strawberry cheesecake pudding cups combine the best of both desserts into one elegant, no-bake treat. Creamy cheesecake pudding layers with fresh strawberry compote and graham cracker crumble create a perfect balance of tangy, sweet, and crunchy textures. These individual cups are ideal for dinner parties, potlucks, or a make-ahead dessert that impresses without requiring baking skills. The combination of smooth pudding and vibrant fruit makes this dessert feel indulgent while remaining surprisingly simple to assemble.
Why You’ll Love It
- No baking required—ready in 15 minutes with minimal effort.
- Naturally portioned in individual cups for easy serving and portion control.
- Can be prepared up to two days ahead, making it perfect for entertaining.
Ingredients
- 2 cups whole milk
- One 3.4-ounce package instant cheesecake pudding mix
- 8 ounces cream cheese, softened
- 1 cup fresh strawberries, diced
- 3 tablespoons sugar
- 1 cup graham cracker crumbs
- 4 tablespoons melted butter
- Whipped cream for topping
How To Make It
- In a small saucepan, combine diced strawberries with sugar over medium heat. Cook for 3 to 5 minutes, stirring occasionally, until the berries release their juices and the mixture becomes syrupy. Remove from heat and let cool completely.
- In a medium bowl, combine graham cracker crumbs with melted butter, stirring until the mixture resembles wet sand. Divide evenly among six to eight clear cups or glasses, pressing gently to form a thin base layer.
- In a large bowl, beat softened cream cheese with an electric mixer until smooth and creamy, about 2 minutes.
- Whisk together milk and instant pudding mix according to package directions until thickened, approximately 2 minutes.
- Gently fold the pudding mixture into the cream cheese until fully combined and no lumps remain.
- Spoon half of the cheesecake pudding mixture over the graham cracker base in each cup.
- Top with a layer of cooled strawberry compote, reserving some berries for garnish.
- Finish with remaining pudding mixture, then refrigerate for at least 30 minutes before serving. Top with whipped cream and reserved strawberries just before serving.
Variations And Substitutions
Swap fresh strawberries for frozen berries, thawed and drained. Replace cheesecake pudding with vanilla pudding and add one tablespoon of lemon zest to the cream cheese for a lighter flavor. Use crushed vanilla wafers or digestive biscuits instead of graham crackers. For a chocolate twist, layer chocolate pudding between the cheesecake and strawberry layers. You can also substitute the strawberries with raspberries, blackberries, or a mixed berry compote.
Make-Ahead, Storage, And Serving Tips
These pudding cups can be assembled up to two days in advance and stored covered in the refrigerator. Add whipped cream and fresh berries just before serving to prevent sogginess. If the pudding seems too thick, whisk in a tablespoon of milk to reach desired consistency. For best results, allow the strawberry compote to cool completely before layering to prevent the pudding from becoming warm and runny. Serve chilled directly from the refrigerator for optimal texture and flavor.
Final Thoughts
These four homemade pudding cup recipes prove that creating restaurant-quality desserts at home is easier than you might think. With just a few simple ingredients and minimal prep time, you can have delicious, personalized pudding cups ready whenever a craving strikes. Whether you prefer rich chocolate, fruity flavors, or something creamy and classic, there’s a recipe here that will become your new favorite.
We encourage you to pick whichever recipe speaks to you first and give it a try this week. Start with what sounds most appealing, then work your way through the others. Your family and friends will be impressed by your homemade desserts, and you’ll love knowing exactly what goes into every spoonful. Happy pudding making!
Classic Vanilla Homemade Pudding Cups
Ingredients
Method
- In a medium saucepan, whisk together sugar, cornstarch, and salt.
- Gradually add milk and heavy cream to the dry mixture, whisking constantly to avoid lumps.
- Place the saucepan over medium heat and cook, stirring frequently, until the mixture thickens and comes to a gentle boil, about 8 minutes.
- Remove from heat and stir in butter and vanilla extract until smooth.
- Divide the pudding evenly among four serving cups or bowls.
- Sprinkle lightly with nutmeg if desired.
- Cover cups and refrigerate for at least 2 hours until chilled and set.