Walking Bag Snack Recipes: Fuel Your Adventure
Walking Bag Snack Recipes: Fuel Your Adventure
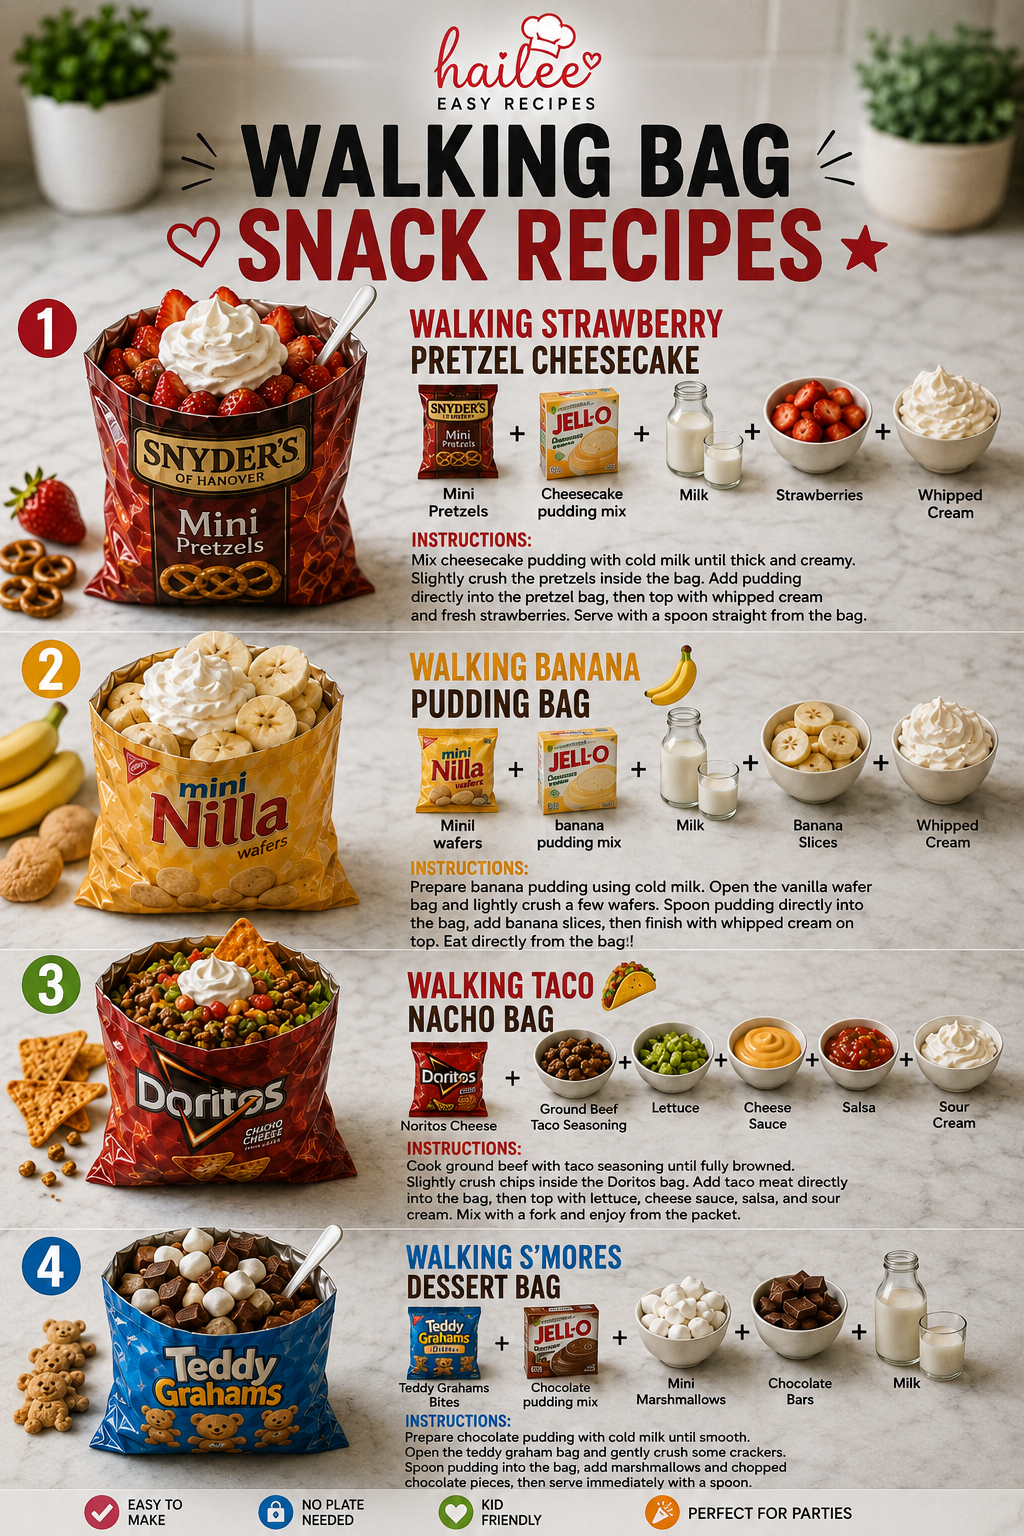
I’m so excited to share these walking bag snack recipes with you because let’s be honest, sometimes you need a treat that travels as well as you do. Whether you’re heading to the farmers market, taking a road trip, or just want something fun to munch on during your day, these portable recipes are total game-changers. I’ve tested each one to make sure they hold up beautifully in a bag without falling apart or making a mess, so you can actually enjoy them on the go.
What I love most about these recipes is how they transform classic desserts and snacks into handheld versions that don’t sacrifice flavor for convenience. From a strawberry pretzel cheesecake that stays perfectly layered to a banana pudding bag that tastes like the real deal, these are the kinds of recipes worth saving and making again and again. They’re also surprisingly easy to whip up, which means you can prep them ahead for busy days or make them fresh whenever the craving hits.
I’ve included four of my absolute favorite walking bag creations here, and I genuinely think you’ll find yourself making them regularly once you taste them. If you love easy, delicious recipes like these, Follow me on HaileeRecipes on Pinterest where I share tons of other creative ideas for snacking and entertaining.
1. Walking Strawberry Pretzel Cheesecake
Walking Strawberry Pretzel Cheesecake combines the irresistible trio of sweet strawberries, creamy cheesecake, and crunchy pretzels in portable bites perfect for hiking, commuting, or outdoor adventures. These no-bake bars deliver rich, dessert-like satisfaction with a delightful textural contrast between the buttery pretzel crust, smooth cheesecake filling, and fresh fruit topping. The compact, hand-held format makes them ideal for snacking on the go without messy crumbles or melting concerns, while the balanced sweetness keeps energy levels steady throughout your day.
Why You’ll Love It
- No-bake recipe that requires minimal effort and no special equipment, perfect for busy days.
- Naturally portion-controlled bars that won’t crumble in your backpack or bag.
- Combines three beloved flavors and textures in one satisfying, dessert-like snack.
Ingredients
- 1.5 cups crushed pretzels
- 6 tablespoons melted butter
- 8 ounces cream cheese, softened
- 1/4 cup powdered sugar
- 1/2 cup heavy whipping cream
- 1 cup fresh strawberries, diced
- 2 tablespoons strawberry jam
- 1 tablespoon lemon juice
How To Make It
- Line an 8×8-inch baking pan with parchment paper, leaving overhang on two sides for easy removal.
- Mix crushed pretzels with melted butter until evenly coated, then press firmly into the bottom of the prepared pan as an even layer.
- Beat softened cream cheese and powdered sugar together until smooth and fluffy, about 2 minutes.
- In a separate bowl, whip heavy cream to stiff peaks, then gently fold into the cream cheese mixture until combined.
- Spread the cheesecake mixture evenly over the pretzel crust, smoothing the top with a spatula.
- Toss diced strawberries with strawberry jam and lemon juice, then scatter over the cheesecake layer.
- Refrigerate for at least 4 hours or overnight until firm.
- Use the parchment overhang to lift the entire dessert from the pan, then cut into 12 to 16 bars with a sharp knife, wiping between cuts for clean edges.
Variations And Substitutions
Swap fresh strawberries for raspberries, blueberries, or a mixed berry combination for different flavor profiles. Replace strawberry jam with raspberry or cherry jam to match your fruit choice. For a saltier edge, use salted pretzel pieces instead of unsalted. If you prefer a firmer texture, substitute Greek yogurt for half the heavy cream, or add a thin layer of melted white chocolate between the crust and cheesecake filling.
Make-Ahead, Storage, And Serving Tips
These bars are best made one day ahead, allowing the flavors to meld and the texture to set completely. Store in an airtight container in the refrigerator for up to 4 days. For walking snacks, wrap individual bars in parchment paper and pack in an insulated lunch bag with an ice pack to keep them cool during your outing. Remove from the refrigerator 10 minutes before eating if you prefer a softer, more indulgent texture. These bars do not freeze well due to the fresh fruit and whipped cream topping.
2. Walking Banana Pudding Bag
This Walking Banana Pudding Bag delivers creamy, comforting pudding flavors in a portable, mess-free format perfect for hiking, commuting, or outdoor adventures. Layers of crushed vanilla wafers, sliced bananas, and smooth pudding create a delightful texture contrast that tastes like traditional banana pudding without the bowl and spoon. The individual bag format keeps everything contained and fresh, making it an ideal snack for when you need something satisfying and slightly indulgent on the go. The combination of fruit, vanilla, and creamy pudding provides sustained energy while tasting more like a treat than a typical walking snack.
Why You’ll Love It
- Completely portable and requires no utensils, dishes, or cleanup during your walk.
- Tastes like a beloved dessert while providing real nutrition from fruit and dairy.
- Naturally sweet and satisfying, making it perfect for afternoon energy slumps or post-activity recovery.
Ingredients
- 1 cup instant vanilla pudding mix
- 2 cups cold milk
- 3 ripe but firm bananas
- 1 cup vanilla wafer cookies, crushed
- 2 tablespoons honey or maple syrup
- 1 teaspoon vanilla extract
- Pinch of cinnamon
- 4 to 6 resealable plastic bags or small containers
How To Make It
- Prepare the pudding by whisking together the instant vanilla pudding mix and cold milk in a bowl for about two minutes until it reaches a thick, spoonable consistency.
- Stir in the vanilla extract and honey, mixing until fully combined and smooth.
- Peel and slice the bananas into thin coins, then gently toss them with a pinch of cinnamon to prevent browning and add extra flavor.
- Crush the vanilla wafer cookies into bite-sized pieces, keeping some slightly larger for better texture contrast.
- Layer the ingredients into each resealable bag by starting with a spoonful of pudding at the bottom, followed by a layer of crushed wafers, then banana slices, and repeating until the bag is nearly full.
- Top each bag with a final layer of crushed wafers to keep the bananas from oxidizing and browning.
- Seal the bags securely, removing as much air as possible to maintain freshness and prevent the wafers from becoming soggy.
Variations And Substitutions
Swap vanilla pudding for butterscotch or chocolate for different flavor profiles. Use gluten-free vanilla cookies if needed, or substitute with crushed graham crackers or gingersnaps for a spiced twist. Add a tablespoon of peanut butter or almond butter to the pudding layer for extra protein and richness. Experiment with different fruits like sliced strawberries or blueberries mixed with the bananas for added tartness and nutrition.
Make-Ahead, Storage, And Serving Tips
Prepare these bags up to 24 hours in advance and refrigerate until you’re ready to walk. For longer storage, prepare the pudding and wafer layers the day before, then add fresh banana slices on the morning of your walk to prevent browning. Keep the bags chilled in a cooler or insulated bag during your outing, as the pudding stays best when cold. If wafers soften too much, use fewer of them or add them just before eating. These bags are best consumed within 24 hours for optimal texture and flavor.
3. Walking Taco Nacho Bag
This portable twist on classic nachos transforms a humble bag of tortilla chips into a complete walking meal. Layered with seasoned ground beef, melted cheese, jalapeños, and cool sour cream, it delivers all the satisfying crunch, savory depth, and creamy richness of nachos without needing a plate. The beauty of eating straight from the bag means less cleanup on the trail or during your commute, while the flavors meld together as you walk, creating an even more delicious snack by the time you reach the bottom. Perfect for hiking, road trips, or anyone who wants handheld nacho indulgence.
Why You’ll Love It
- Requires no utensils or plates—eat directly from the bag for ultimate convenience.
- Warm and cold components stay perfectly balanced, with cheese staying melty and sour cream staying cool.
- Highly customizable to your spice and topping preferences, making it adaptable for any palate.
Ingredients
- 1 large bag tortilla chips (about 10 ounces)
- 1 pound ground beef
- 2 tablespoons taco seasoning mix
- 1 cup shredded cheddar cheese
- 1/2 cup sour cream
- 1/4 cup diced jalapeños
- 1/3 cup diced tomatoes
- 1/4 cup chopped fresh cilantro
- Lime wedges for serving
How To Make It
- Brown the ground beef in a skillet over medium-high heat, breaking it apart as it cooks, until no pink remains (about 5-7 minutes).
- Drain excess fat from the beef, then stir in the taco seasoning and 1/4 cup water; simmer for 2 minutes until the sauce thickens.
- Open your bag of tortilla chips and carefully pour the warm seasoned beef over the chips inside the bag.
- Sprinkle the shredded cheddar cheese over the beef while it’s still warm so it melts slightly from the heat.
- Add the diced jalapeños, tomatoes, and cilantro on top of the cheese layer.
- Drizzle the sour cream over everything, using a spoon to distribute it evenly.
- Fold the top of the bag down and give it a gentle shake to combine all ingredients without crushing the chips too much.
- Squeeze a lime wedge over the mixture just before eating for a bright, fresh finish.
Variations And Substitutions
Swap ground beef for seasoned ground turkey or shredded rotisserie chicken for a lighter option. Replace cheddar with pepper jack cheese for extra heat, or use a Mexican blend for more complexity. Add black beans or corn for extra texture and nutrition. If you prefer it vegetarian, skip the meat and layer in seasoned black beans instead. For a spicier kick, mix hot sauce into the sour cream before drizzling, or add crispy bacon bits for smoky depth.
Make-Ahead, Storage, And Serving Tips
Brown and season the beef up to 2 days ahead and store it in an airtight container in the refrigerator; reheat gently before adding to the bag. Pack the chips in a sturdy bag to prevent crushing during transport. Assemble the walking taco just before you head out so the chips stay crispy and the cheese stays warm. If making it several hours ahead, keep the sour cream and fresh toppings separate and add them right before eating to maintain texture and prevent sogginess. The longer it sits after assembly, the more the flavors blend together, which some people prefer—experiment to find your ideal timing.
4. Walking S'mores Dessert Bag
This no-bake dessert bag transforms classic campfire s’mores into a portable, mess-free walking snack. Combining rich chocolate, toasted marshmallows, and crunchy graham crackers in individual bags, this treat delivers all the nostalgic flavor of traditional s’mores without requiring a campfire. The layers create a satisfying contrast of textures, and because everything is sealed in bags, you can snack while exploring trails, visiting outdoor markets, or enjoying a leisurely neighborhood stroll. Perfect for summer adventures, picnics, or whenever you crave something sweet on the go.
Why You’ll Love It
- Completely no-bake and requires minimal prep time, making it ideal for busy schedules.
- Individual portions in sealed bags prevent mess and make sharing easy with friends and family.
- Customizable with different chocolate types and marshmallow sizes to suit your preferences.
Ingredients
- 8 full-size graham cracker sheets, broken into quarters
- 2 cups milk chocolate chips or chunks
- 1.5 cups mini marshmallows
- 2 tablespoons coconut oil
- 1 teaspoon vanilla extract
- Pinch of sea salt
- 4 small resealable plastic bags or parchment paper bags
How To Make It
- Melt the chocolate chips and coconut oil together in a microwave-safe bowl, stirring in 30-second intervals until smooth. Stir in vanilla extract and sea salt.
- Divide the graham cracker pieces evenly among the four bags, placing about one-quarter of the broken crackers in each.
- Drizzle approximately 2 tablespoons of melted chocolate over the graham crackers in each bag, using a spoon to distribute evenly.
- Divide the mini marshmallows equally among the bags, sprinkling them over the chocolate layer.
- Add another layer of graham cracker pieces on top of the marshmallows in each bag.
- Drizzle the remaining melted chocolate over the top layer, ensuring all ingredients are coated.
- Allow the bags to cool at room temperature for 30 minutes until the chocolate sets, then seal tightly.
Variations And Substitutions
Swap milk chocolate for dark chocolate or white chocolate to match your taste preferences. Add crushed pretzels or toasted nuts for extra crunch and flavor depth. For a more gourmet version, use specialty marshmallows like salted caramel or strawberry flavored. You can also substitute honey-flavored graham crackers for a sweeter base, or include a thin layer of peanut butter between the chocolate and marshmallows for added richness.
Make-Ahead, Storage, And Serving Tips
Prepare these bags up to three days in advance and store them in an airtight container at room temperature, away from direct sunlight and heat. The chocolate will remain set and the marshmallows will stay soft. Pack them in your backpack or bag for easy access during walks. If the chocolate becomes too warm and sticky during transport, refrigerate the bags for 15 minutes before eating. For best texture, consume within two days of making, as the graham crackers will gradually soften from the moisture of the marshmallows over time.
Final Thoughts
Walking bag snacks are the perfect solution for anyone who wants to enjoy delicious, homemade food while staying active and on the go. Whether you’re heading to the office, the gym, or out for an adventure, these recipes prove that portable eating doesn’t have to mean sacrificing flavor or nutrition. The best part is that most of these options come together in just minutes, so you can prep them whenever inspiration strikes.
We encourage you to pick one recipe that sounds most appealing to you and give it a try this week. Start with whichever combination of flavors makes your mouth water, whether that’s sweet, savory, or something in between. Once you’ve mastered your first walking bag snack, you’ll likely find yourself experimenting with the others, building a rotation of go-to options that keep you fueled and satisfied throughout your day.
Walking Strawberry Pretzel Cheesecake
Ingredients
Method
- Mix crushed pretzels, melted butter, and sugar in a bowl until combined.
- Divide pretzel mixture equally among 8 clear cups, pressing gently to form a base layer.
- Beat softened cream cheese and powdered sugar together until smooth and creamy.
- Fold whipped topping into the cream cheese mixture until well combined.
- Divide half the cheesecake mixture among the cups, layering over the pretzel base.
- Mix diced strawberries with strawberry jam and divide among cups.
- Top with remaining cheesecake mixture and drizzle with strawberry syrup.
- Chill until ready to serve or enjoy immediately.