Creative Cheesecake Recipes | Delicious Homemade Ideas
Creative Cheesecake Recipes | Delicious Homemade Ideas
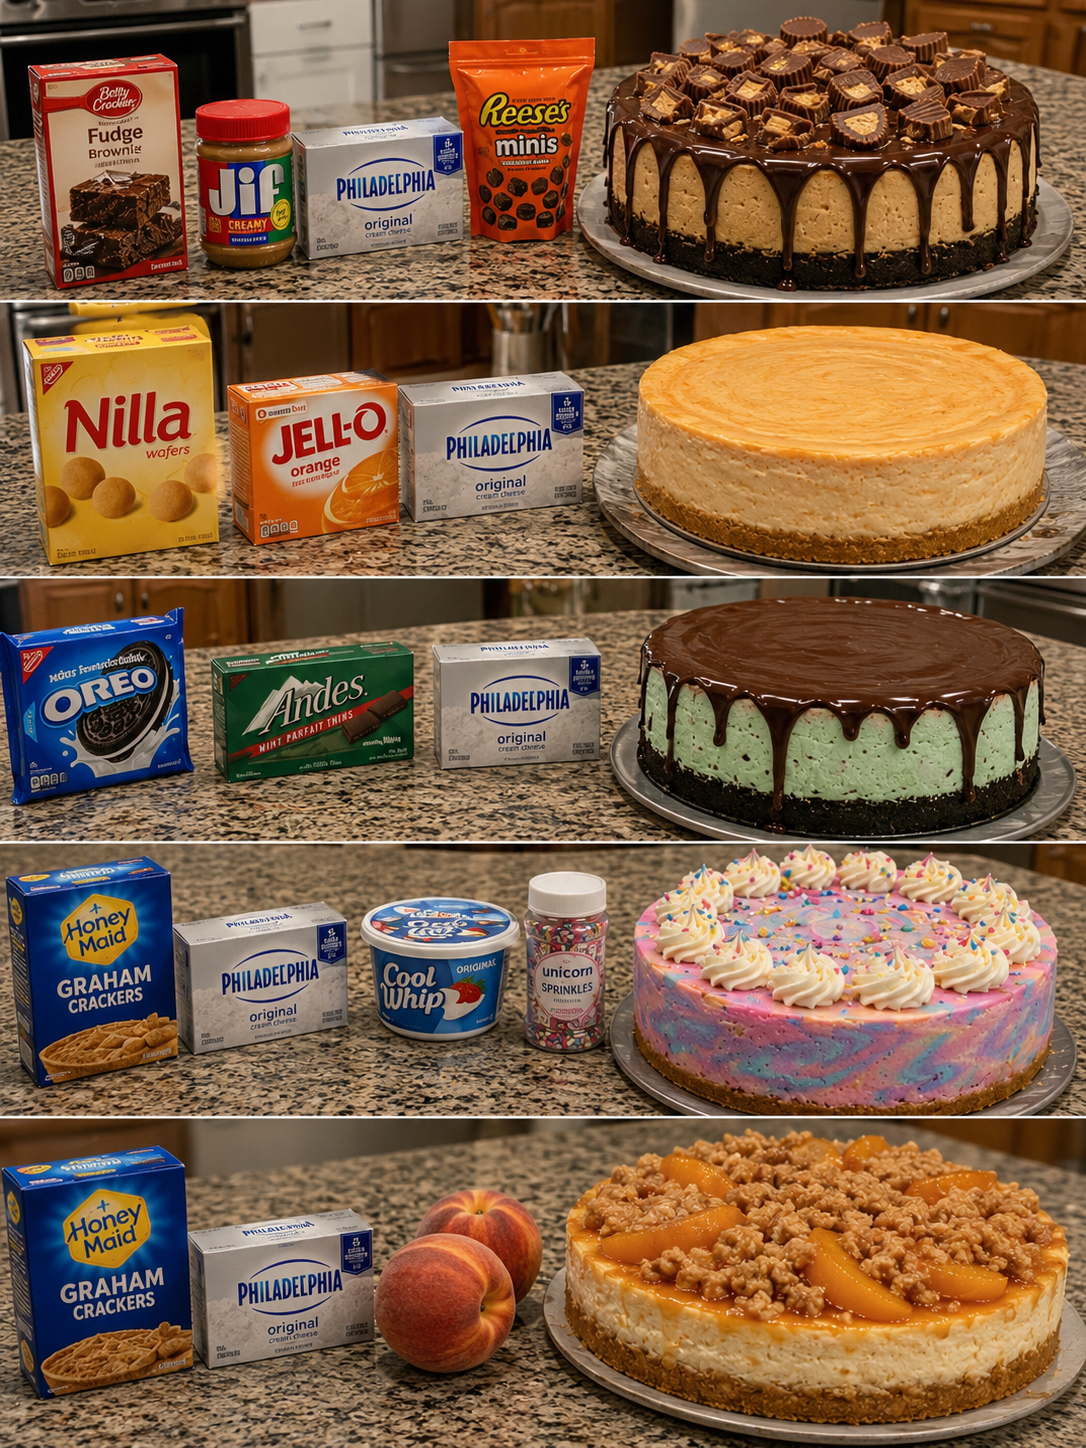
I’m so excited to share my collection of creative cheesecake recipes with you today! Whether you’re planning a special dinner, need a show-stopping dessert for a party, or just want to treat yourself to something absolutely delicious, these five cheesecake creations are total game-changers. From classic flavor combinations to fun, unexpected twists, each one brings something unique to the table.
What I love most about these recipes is that they’re all incredibly craveable but still feel manageable to make at home. I’ve tested and refined each one so you can skip the guesswork and go straight to the good stuff. Whether you’re team peanut butter, team citrus, team mint, or team over-the-top fun, there’s definitely a cheesecake here that’s calling your name. Trust me, your friends and family are going to be asking for these recipes on repeat.
I’m always gathering new dessert inspiration, so if you want to stay in the loop with my latest kitchen experiments and favorite finds, Follow me on HaileeRecipes on Pinterest. Now let’s dive into these five cheesecake recipes that are absolutely worth saving and making again and again!
1. Reese's Peanut Butter Brownie Cheesecake
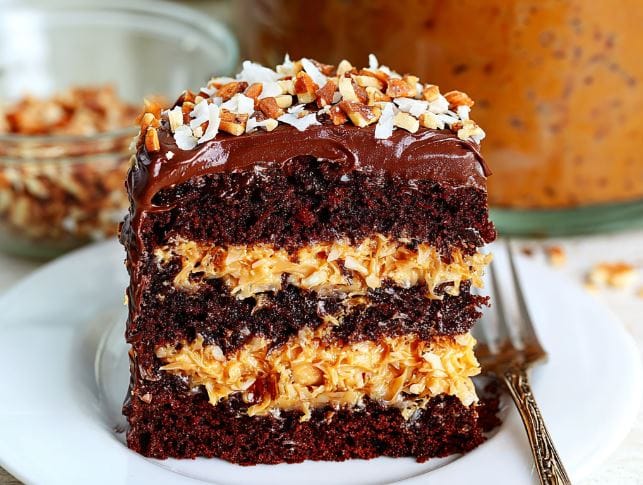
This indulgent dessert combines three beloved flavors into one showstopping treat: rich brownie base, creamy peanut butter cheesecake filling, and Reese’s peanut butter cups throughout. The fudgy brownie layer provides a sturdy foundation and chocolate contrast, while the peanut butter cheesecake stays silky and smooth. Perfect for chocolate and peanut butter lovers, this cheesecake works wonderfully for dinner parties, potlucks, or special celebrations. The combination of textures—from the dense brownie to the airy cheesecake—creates a memorable dessert that feels restaurant-quality but is surprisingly manageable to make at home.
Why You’ll Love It
- Combines three crowd-pleasing flavors in one impressive dessert that tastes like an elevated candy bar.
- The brownie base adds structure and prevents the typical cheesecake cracking issues.
- Reese’s cups mixed into the filling provide pockets of chocolate-peanut butter flavor throughout every slice.
Ingredients
- 1 box brownie mix, plus ingredients listed on box
- 32 ounces cream cheese, softened
- 1 cup creamy peanut butter
- 1 cup granulated sugar
- 4 large eggs
- 1 teaspoon vanilla extract
- 1 cup Reese’s peanut butter cups, chopped into bite-sized pieces
- 1/4 cup sour cream
How To Make It
- Preheat your oven to 325 degrees Fahrenheit. Prepare a 9-inch springform pan by lining the bottom and sides with parchment paper, then wrapping the outside with aluminum foil to prevent water from seeping in during the water bath.
- Prepare and bake the brownie mix according to package directions in the prepared springform pan. Let it cool completely, about 15 minutes, while you prepare the cheesecake filling.
- In a large mixing bowl, beat the softened cream cheese and peanut butter together until completely smooth and creamy, about 3 minutes. Scrape down the bowl frequently to ensure no lumps remain.
- Gradually add the sugar to the peanut butter mixture and beat until well combined. Add eggs one at a time, beating on low speed after each addition to avoid overmixing. Stir in vanilla extract and sour cream until just combined.
- Gently fold the chopped Reese’s cups into the cheesecake batter, reserving a few pieces for topping if desired.
- Pour the peanut butter cheesecake filling over the cooled brownie base, smoothing the top with a spatula.
- Place the springform pan into a larger roasting pan and fill the roasting pan with hot water until it reaches halfway up the sides of the springform pan. Bake for 55 to 65 minutes, until the edges are set but the center still jiggles slightly when gently shaken.
- Turn off the oven and crack the door open slightly. Leave the cheesecake in the oven for 1 hour to cool gradually, then remove and refrigerate for at least 8 hours or overnight before serving.
Variations And Substitutions
For a chocolate peanut butter version, swap half the cheesecake filling with chocolate cheesecake batter. Use natural peanut butter if you prefer a less sweet filling, though you may need to add an extra tablespoon of sugar. If Reese’s cups are unavailable, substitute with chopped peanut butter cookies or a mix of chocolate chips and peanut butter chips. For a no-bake option, use a store-bought brownie instead of baking from scratch.
Make-Ahead, Storage, And Serving Tips
This cheesecake is best made one day ahead, as the flavors meld beautifully overnight. Store covered in the refrigerator for up to 5 days. You can also freeze the entire cheesecake for up to 2 months; thaw overnight in the refrigerator before serving. For clean slices, dip your knife in hot water and wipe it between cuts. If cracks form on top, don’t worry—they’ll be hidden under a chocolate ganache drizzle or whipped cream topping. Serve chilled with extra Reese’s cups on the side or a drizzle of chocolate sauce.
2. Orange Jell-O Nilla Wafer Cheesecake
This retro-inspired cheesecake combines creamy vanilla cheesecake with bright orange Jell-O layers and a buttery Nilla Wafer crust for a nostalgic dessert that tastes like a dreamy orange creamsicle. The citrusy sweetness perfectly complements the subtle vanilla notes, while the crispy wafer crust provides wonderful textural contrast. This showstopping dessert is ideal for potlucks, holiday gatherings, or whenever you want to serve something that feels both comforting and elegant. The combination of familiar ingredients makes it approachable for home bakers while delivering impressive results that guests will remember.
Why You’ll Love It
- Nostalgic flavors that transport you back to childhood desserts with an elevated cheesecake twist.
- Simple ingredient list using pantry staples and no-fuss techniques that don’t require professional baking skills.
- Visually stunning with colorful orange layers that make it a natural centerpiece for any dessert table.
Ingredients
- 2 cups crushed Nilla Wafers (about 40 wafers)
- 6 tablespoons melted butter
- 2 tablespoons sugar
- 16 ounces cream cheese, softened
- 1/2 cup granulated sugar
- 1 cup sour cream
- 1 teaspoon vanilla extract
- 2 packages (3 ounces each) orange Jell-O
- 1 1/2 cups boiling water
- 1/2 cup cold water
How To Make It
- Preheat your oven to 325 degrees Fahrenheit. Combine crushed Nilla Wafers with melted butter and 2 tablespoons sugar, then press firmly into the bottom of a 9-inch springform pan. Bake for 8 minutes until lightly golden, then remove and let cool.
- Beat softened cream cheese and 1/2 cup sugar together until smooth and fluffy, about 2-3 minutes. Stir in sour cream and vanilla extract until just combined.
- Pour the cheesecake filling over the cooled crust and smooth the top. Bake for 25-30 minutes until the edges are set but the center still jiggles slightly when gently shaken.
- Remove the cheesecake from the oven and let it cool to room temperature on a wire rack for about 30 minutes.
- While the cheesecake cools, dissolve both packages of orange Jell-O in 1 1/2 cups of boiling water, stirring for 2 minutes until completely dissolved. Add 1/2 cup cold water and stir well.
- Allow the Jell-O to cool to room temperature, then carefully pour it over the cooled cheesecake, spreading gently to cover the entire surface.
- Refrigerate the cheesecake for at least 6 hours, or preferably overnight, until the Jell-O layer is completely set and firm.
- Before serving, run a thin knife around the edges and release the springform pan. Slice with a sharp knife dipped in hot water between each cut for clean slices.
Variations And Substitutions
Try different Jell-O flavors like lemon, raspberry, or strawberry for unique flavor combinations. Substitute the Nilla Wafer crust with graham cracker crust for a different texture, or use honey graham crackers for added sweetness. For a lighter version, use reduced-fat cream cheese and Greek yogurt in place of some of the sour cream. You can also add a tablespoon of orange zest to the cheesecake filling for more intense citrus flavor, or layer the Jell-O with whipped cream for a mousse-like topping.
Make-Ahead, Storage, And Serving Tips
This cheesecake is best made one day ahead, allowing both the filling and Jell-O layer to set properly. Store covered in the refrigerator for up to 4 days. Do not freeze, as the Jell-O layer will become grainy and separate. For serving, keep the cheesecake chilled until just before slicing, and wipe your knife clean between cuts for the most attractive presentation. If the Jell-O layer cracks during slicing, simply serve individual slices with a dollop of whipped cream to hide any imperfections.
3. Andes Mint Oreo Cheesecake
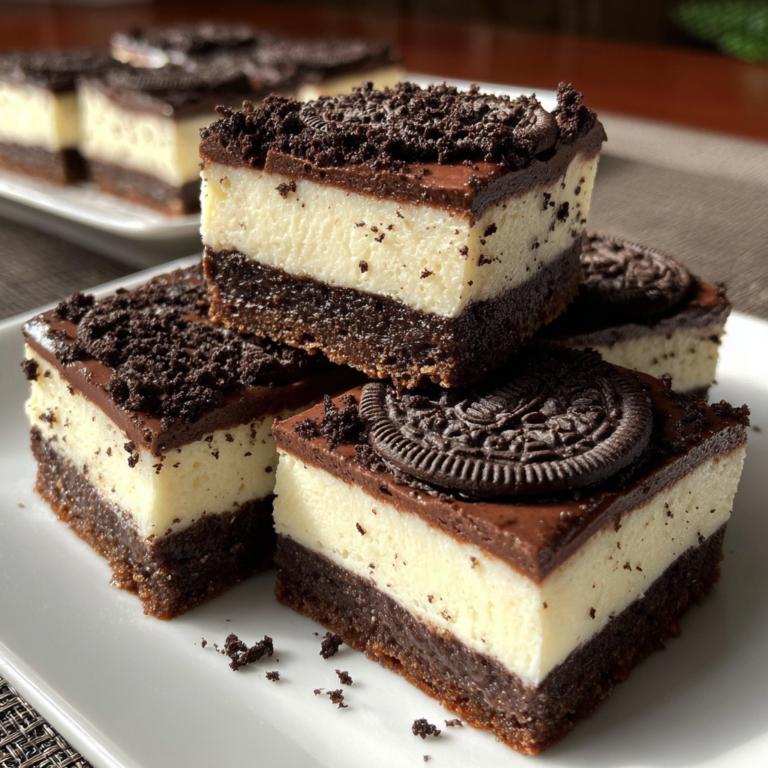
This show-stopping dessert combines three beloved flavors in one decadent package: creamy cheesecake, crispy Oreos, and cool Andes mints. The smooth, rich filling studded with crushed Oreo pieces sits atop a dark chocolate cookie crust, while a layer of melted Andes mints swirled into the top creates beautiful green ribbons and a refreshing peppermint finish. The contrast between the dense, fudgy crust and the silky filling, punctuated by cookie crunch and mint coolness, makes this an impressive dessert for special occasions or holiday gatherings. It’s particularly perfect for winter celebrations and anyone who loves the combination of chocolate and peppermint.
Why You’ll Love It
- Combines three classic flavors that complement each other perfectly for an elegant presentation.
- The Oreo crust and cookie pieces add satisfying texture throughout the entire cheesecake.
- Andes mints create a stunning visual effect and refreshing peppermint flavor without extra effort.
Ingredients
- 20 Oreo cookies, crushed
- 4 tablespoons melted butter
- 32 ounces cream cheese, softened
- 1 cup granulated sugar
- 4 large eggs
- 1 teaspoon vanilla extract
- 1 cup crushed Oreo cookies
- 20 Andes mint candies, divided
- 2 tablespoons heavy cream
How To Make It
- Preheat your oven to 325 degrees Fahrenheit and wrap the outside of a 9-inch springform pan with aluminum foil to prevent water from seeping in during the water bath.
- Mix the crushed Oreos with melted butter and press firmly into the bottom of the prepared pan to create an even crust layer.
- Beat softened cream cheese and sugar together until smooth and fluffy, about 2 minutes, then add eggs one at a time, beating on low speed after each addition to avoid overmixing.
- Stir in vanilla extract and fold in the 1 cup of crushed Oreo cookies gently until just combined.
- Pour the filling over the crust and smooth the top with a spatula.
- Place the springform pan in a larger roasting pan and pour hot water into the roasting pan until it reaches halfway up the sides of the springform pan.
- Bake for 55 to 65 minutes, until the edges are set but the center still jiggles slightly when gently shaken.
- Melt 15 Andes mints with heavy cream over low heat or in the microwave, then swirl this mixture across the top of the cheesecake and garnish with remaining whole Andes mints before cooling.
Variations And Substitutions
For a different flavor profile, substitute the Andes mints with crushed candy canes or white chocolate peppermint bark. You can also replace regular Oreos with Double Stuf Oreos for extra cookie flavor, or use a combination of crushed Oreos and chocolate wafer cookies in the crust. For a less minty version, reduce the Andes mints to 10 candies total and add a layer of hot fudge instead.
Make-Ahead, Storage, And Serving Tips
Prepare this cheesecake up to 2 days ahead and store it covered in the refrigerator. You can also freeze the baked and cooled cheesecake for up to 3 months; thaw it overnight in the refrigerator before serving. Allow the cheesecake to cool completely at room temperature for 1 hour before refrigerating for at least 6 hours or overnight to achieve the best texture. For the cleanest slices, dip your knife in hot water and wipe it clean between cuts. Serve chilled with hot fudge sauce or fresh whipped cream on the side.
4. Unicorn Sprinkles Cool Whip Cheesecake
This whimsical no-bake cheesecake combines creamy dreamy textures with playful pastel colors and rainbow sprinkles for a dessert that’s equal parts delicious and Instagram-worthy. The fluffy Cool Whip base creates an impossibly light and airy filling that contrasts beautifully with the buttery graham cracker crust. Perfect for birthday parties, baby showers, or any celebration where fun matters as much as flavor, this cheesecake delivers sweet vanilla notes with a subtle frosting-like taste that appeals to both kids and adults alike.
Why You’ll Love It
- No-bake convenience means no oven required and minimal cleanup.
- The fluffy Cool Whip base creates an incredibly light texture that feels indulgent yet refreshing.
- Fully customizable with your favorite sprinkle colors and types for a personalized celebration cake.
Ingredients
- 2 cups graham cracker crumbs
- 6 tablespoons melted butter
- 16 ounces cream cheese, softened
- 1/2 cup powdered sugar
- 1 teaspoon vanilla extract
- 8 ounces Cool Whip, thawed
- 1/2 cup rainbow sprinkles, plus more for topping
- 9-inch springform pan
How To Make It
- Mix graham cracker crumbs with melted butter until the texture resembles wet sand, then press firmly into the bottom of your springform pan to create an even crust.
- Beat softened cream cheese with powdered sugar and vanilla extract until smooth and creamy, scraping down the bowl occasionally to ensure no lumps remain.
- Gently fold the thawed Cool Whip into the cream cheese mixture in two additions, being careful not to deflate the whipped topping.
- Fold in half a cup of rainbow sprinkles, reserving some for garnish, distributing them evenly throughout the filling.
- Spread the filling evenly over the graham cracker crust and smooth the top with an offset spatula.
- Refrigerate for at least 4 hours or overnight until the cheesecake is firm and set.
- Top with additional sprinkles just before serving for maximum color and crunch.
Variations And Substitutions
Swap regular sprinkles for pearl sprinkles, nonpareils, or star-shaped varieties for different visual effects. Try pastel-colored sprinkles for a softer aesthetic or metallic sprinkles for extra glamour. You can substitute the vanilla extract with almond extract or add a tablespoon of food coloring to tint the filling itself. For a crunchy element, add crushed candy melts or white chocolate chips alongside the sprinkles.
Make-Ahead, Storage, And Serving Tips
This cheesecake can be prepared up to two days ahead, making it ideal for party planning. Store it covered in the refrigerator for up to three days. For best results, add fresh sprinkle toppings just before serving to maintain their crispness. If the cheesecake becomes too soft, place it in the freezer for 30 minutes before slicing. Serve chilled with fresh berries or whipped cream on the side for added flavor and elegance.
5. Peach Crumble Graham Cracker Cheesecake
This elegant Peach Crumble Graham Cracker Cheesecake combines creamy, tangy cheesecake with warm, spiced peaches and a buttery crumble topping. The graham cracker crust provides a classic foundation, while fresh or canned peaches create a luscious fruit layer that cuts through the richness. The crumble adds delightful texture and a hint of cinnamon warmth. Perfect for summer gatherings, dinner parties, or when you want an impressive dessert that feels restaurant-quality, this cheesecake balances indulgence with bright fruit flavors that keep it from feeling overly heavy.
Why You’ll Love It
- The combination of creamy cheesecake, juicy peaches, and crunchy crumble creates multiple satisfying textures in every bite.
- Graham cracker crusts are forgiving and require no special skills, making this dessert accessible for home bakers.
- You can prepare it one to two days ahead, making it ideal for entertaining without last-minute stress.
Ingredients
- 2 cups graham cracker crumbs
- 6 tablespoons melted butter
- 32 ounces cream cheese, softened
- 1 cup granulated sugar
- 4 large eggs
- 1 teaspoon vanilla extract
- 3 cups fresh or canned peaches, diced
- 2 tablespoons cornstarch
- 1 teaspoon ground cinnamon
- 1 cup old-fashioned oats, 6 tablespoons cold butter, and 1/3 cup brown sugar mixed for crumble topping
How To Make It
- Preheat your oven to 325 degrees Fahrenheit. Mix graham cracker crumbs with melted butter and press firmly into the bottom of a 9-inch springform pan. Bake for 5 minutes until lightly golden, then remove and let cool slightly.
- Beat softened cream cheese and granulated sugar together until smooth and fluffy, about 2 to 3 minutes. Add eggs one at a time, beating gently after each addition. Stir in vanilla extract until just combined.
- Pour the cheesecake batter over the cooled crust, smoothing the top with a spatula.
- In a small bowl, toss diced peaches with cornstarch and cinnamon. Scatter the peach mixture evenly over the cheesecake batter.
- Combine oats, cold diced butter, and brown sugar in a bowl, mixing with your fingertips until crumbly. Sprinkle this mixture generously over the peaches.
- Bake for 50 to 60 minutes until the cheesecake is set but still slightly jiggly in the center. The crumble should be golden brown.
- Turn off the oven and crack the door open about 2 inches. Let the cheesecake cool in the oven for 1 hour to prevent cracking.
- Remove from the oven and refrigerate for at least 4 hours or overnight before serving.
Variations And Substitutions
Swap peaches for nectarines, apricots, or even blueberries for different seasonal options. Add a splash of bourbon or peach schnapps to the fruit layer for an adults-only version. For the crumble, incorporate chopped almonds or pecans for extra crunch, or substitute the oats with crushed gingersnap cookies for spiced depth. If you prefer a no-bake option, use a store-bought graham cracker crust and skip the initial bake time.
Make-Ahead, Storage, And Serving Tips
This cheesecake is best made one to two days in advance, allowing flavors to meld and the texture to set perfectly. Store covered in the refrigerator for up to 5 days. For longer storage, wrap individual slices in plastic wrap and freeze for up to 3 months; thaw overnight in the refrigerator before serving. Serve chilled with a dollop of whipped cream or Greek yogurt. If your cheesecake cracks during baking, don’t worry—the crumble topping will conceal minor imperfections beautifully.
Final Thoughts
Whether you’re a cheesecake enthusiast or someone looking to expand your dessert repertoire, these creative recipes offer something for everyone. From fruity twists to unexpected flavor combinations, each variation brings its own charm to this beloved classic. The beauty of cheesecake is its versatility—it welcomes both traditional and daring ingredients with open arms.
We encourage you to pick one recipe that speaks to you and give it a try. Start with whichever flavor combination excites you most, and don’t be afraid to make it your own along the way. Your kitchen is about to smell absolutely amazing, and your loved ones will thank you for the delicious results.
Reese's Peanut Butter Brownie Cheesecake
Ingredients
Method
- Preheat oven to 325°F and line a 9-inch springform pan with parchment paper.
- Mix flour, cocoa powder, 1/2 cup sugar, melted butter, and 1 egg to form brownie base. Press into prepared pan and bake for 10 minutes.
- Beat softened cream cheese and peanut butter together until smooth and creamy.
- Add remaining sugar, sour cream, vanilla extract, and 1 egg to the peanut butter mixture. Mix until well combined.
- Fold chopped Reese's peanut butter cups into the cheesecake batter.
- Pour cheesecake mixture over the baked brownie layer.
- Bake for 45-55 minutes until the center is set but slightly jiggly. Cool completely, then refrigerate for at least 4 hours.