Banana Split Icebox Cake Recipe | No-Bake Dessert
Banana Split Icebox Cake Recipe | No-Bake Dessert
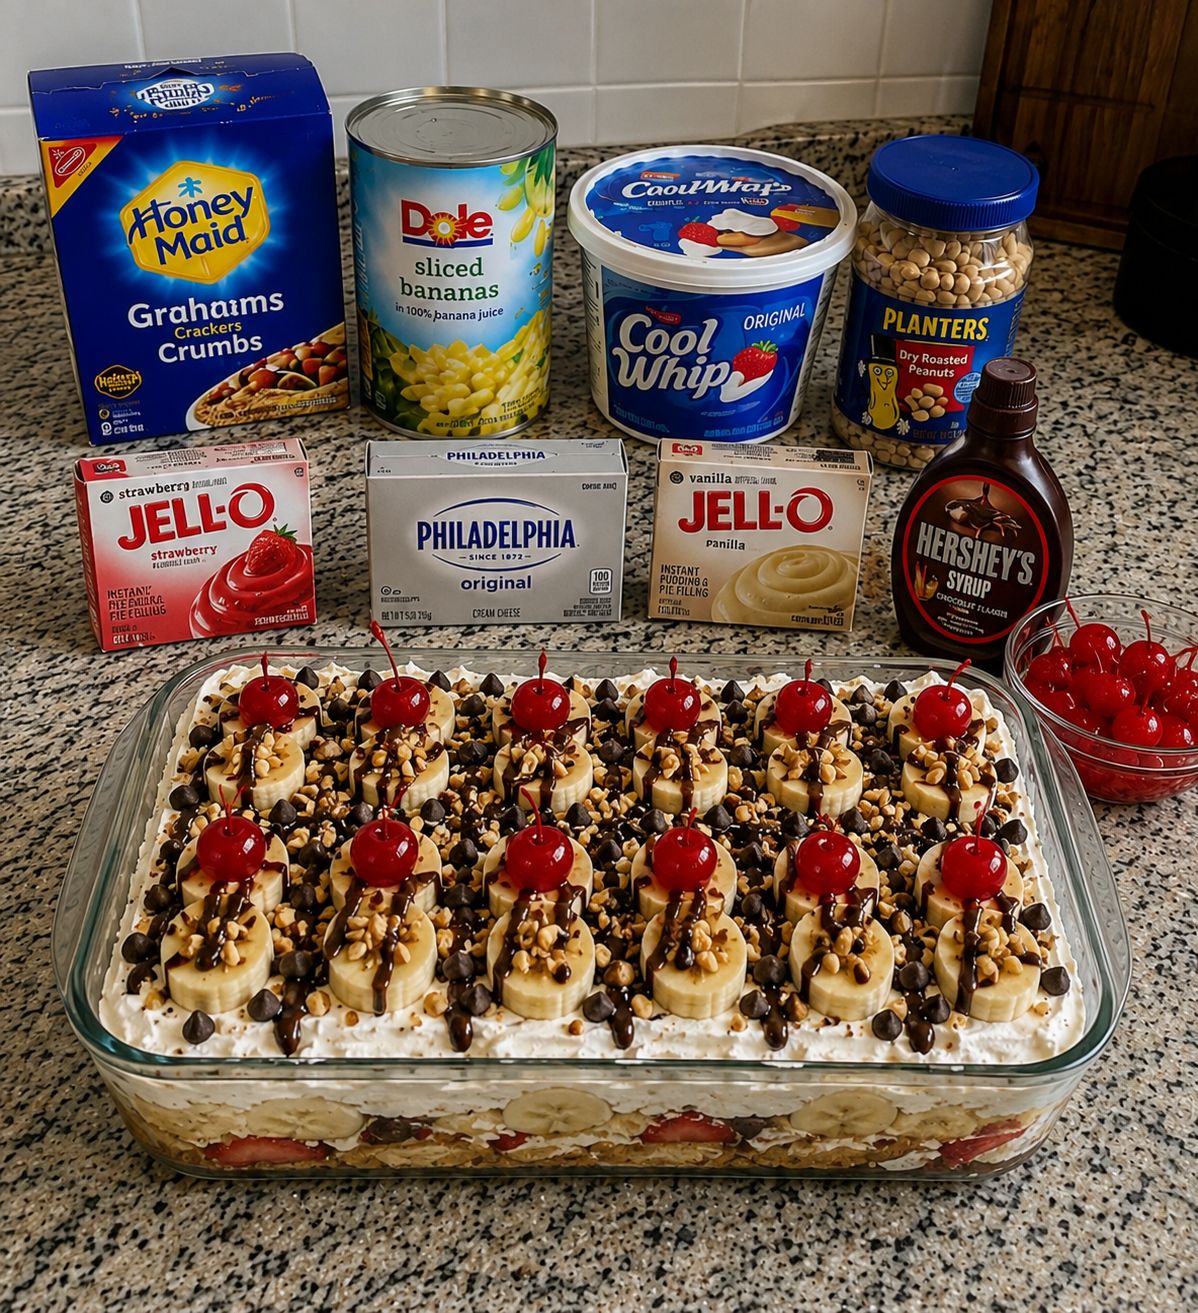
Banana Split Icebox Cake: The No-Bake Dessert That Saved My Summer
I created this Banana Split Icebox Cake on one of those sweltering July afternoons when the thought of turning on my oven felt like a personal betrayal. My kids were begging for something sweet, my kitchen was already hot enough to bake bread on the countertops, and I had exactly three bananas, some whipped cream, and a sleeve of vanilla wafers staring at me from the pantry. So I did what I always do in these moments: I improvised.
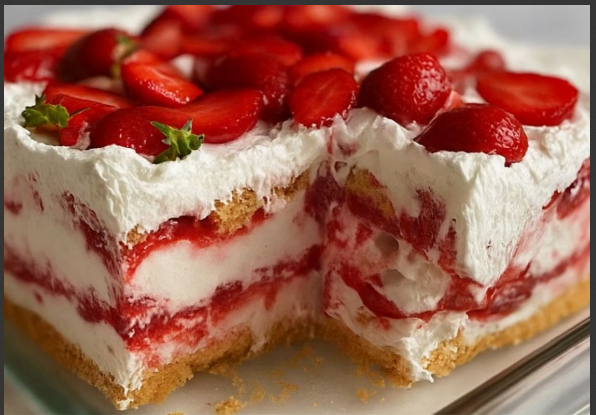
What came out of my fridge eight hours later was nothing short of magical. Layers of soft vanilla wafers, pillowy whipped cream, fresh bananas, and a drizzle of chocolate and strawberry sauce created something that tasted like a banana split sundae had decided to become a cake. My husband actually paused mid-bite and asked if I’d been secretly taking a pastry course. I hadn’t. I’d just been desperate and a little bit clever.
Here’s the thing about this recipe: it’s foolproof in the best way possible. There’s no baking involved, no temperamental oven, no waiting around wondering if your cake will rise. You layer, you refrigerate, you serve. The wafers soften into something cake-like without any actual baking required. It’s the kind of dessert that looks impressive enough to serve at a dinner party but honest enough to make on a random Tuesday because you felt like it.
This recipe is for anyone who wants homemade dessert without the heat, the fuss, or the complicated instructions. It’s for families with kids who want to help layer things. It’s for people who are intimidated by traditional baking. It’s for anyone who’s ever craved a banana split but wanted it to last longer than five minutes. If that’s you, I’m so glad you’re here. Follow me on HaileeRecipes on Pinterest for more no-bake desserts and cozy recipes that actually fit into real life.
Why You’ll Love This Recipe
Let me be honest about what makes this dessert special, because it’s not just one thing.
It requires zero baking skills. I’m not exaggerating. If you can layer things and use a whisk, you can make this. There’s no creaming butter and sugar, no worrying about overmixing, no checking for doneness. It’s all assembly and patience, which is honestly my favorite kind of cooking.
It actually tastes like a banana split. This isn’t some distant cousin of the classic sundae. You’ve got fresh bananas, whipped cream, chocolate, strawberries, and that vanilla wafer crunch. Every bite reminds you why you loved banana splits in the first place.
It’s perfect for hot weather. No oven means no additional heat in your kitchen. You’re making something cold and refreshing when you need it most. This is genuinely my go-to July and August dessert.
It looks way fancier than it actually is. I’ve served this at dinner parties and casual family dinners alike. People always assume I spent hours on it. When I tell them it took fifteen minutes of hands-on time, they don’t believe me until I walk them through it.
The texture is absolutely perfect. The wafers soften into something tender without getting mushy. The whipped cream stays light and airy. The bananas stay fresh-tasting. It’s one of those rare desserts where every component stays true to itself while also becoming part of something greater.
Ingredients
- 1 box (about 40) vanilla wafers
- 2 cups heavy whipping cream
- 3 tablespoons powdered sugar
- 1 teaspoon vanilla extract
- 4 ripe but firm bananas
- 1/2 cup chocolate syrup
- 1/2 cup strawberry syrup or jam thinned with a splash of water
- 1/4 cup chopped maraschino cherries (optional, but they’re fun)
- 2 tablespoons chopped roasted peanuts (optional)
- Pinch of salt
Hailee’s Tip: Buy your vanilla wafers a day or two before you make this. They’re slightly softer and absorb moisture better than brand-new ones. Also, don’t skip the salt in the whipped cream. I know it sounds weird, but it actually makes the sweetness taste better and more balanced.
Hailee’s Tip: Use bananas that are ripe but still have a tiny bit of firmness to them. If they’re too soft, they’ll get mushy when they sit in the fridge. If they’re too green, they won’t have enough flavor. That sweet spot in the middle is your friend.
Hailee’s Tip: Heavy cream whips better when it’s cold. I keep mine in the fridge until the exact moment I’m ready to use it. Some people even chill their mixing bowl and beaters, which is fancy but honestly works.
Optional Add-Ins and Variations
This recipe is honestly flexible, which I love. Here are some things I’ve added when I felt like switching it up:
- Crushed pineapple: Layer it between the whipped cream and bananas for a tropical vibe. Drain it well first, though, or you’ll end up with a soggy cake.
- Pecans or walnuts: Toast them first for way more flavor. Sprinkle between layers or on top.
- A splash of rum extract: Just a tiny bit in the whipped cream gives it a sophisticated edge.
- Sliced strawberries: Fresh ones are beautiful and add a tartness that balances the sweetness.
- Crushed cookies: Mix some crushed vanilla wafers into the whipped cream for extra texture.
- Caramel drizzle: Some people skip the syrups and go full caramel. I haven’t tried it, but I’m not against it.
Step-by-Step Method
Step 1: Make your whipped cream. Pour your cold heavy cream into a mixing bowl. Add powdered sugar, vanilla extract, and a pinch of salt. Using an electric mixer (or a whisk if you’re feeling strong), whip until stiff peaks form. This usually takes about three to four minutes with a mixer. You want it thick and fluffy, not runny or buttery. I always stop just before I think it’s done, because overwhipped cream turns into butter real fast, and that’s a different recipe entirely.
What I messed up: The first time I made this, I whipped the cream too far ahead and it started to separate. Now I make it about thirty minutes before assembly, which gives me time to prep my bananas without the cream getting sad.
Step 2: Slice your bananas. Cut them into quarter-inch rounds. This is important because thinner slices will get brown and oxidized-looking, and thicker slices won’t integrate well with the cake layers. You want that goldilocks thickness. Do this right before you start layering, or toss them with a tiny squeeze of lemon juice to keep them from browning.
Step 3: Start layering in a nine-by-thirteen-inch baking dish. Here’s how I do it: whipped cream on the bottom (about half an inch), then a layer of vanilla wafers (they don’t have to be perfect or fit perfectly), then more whipped cream, then banana slices, then a light drizzle of chocolate syrup. Then I repeat. The key is not to overthink it. You’re building layers, not constructing a skyscraper.
What I messed up: I used to make my layers too thick, which meant the whole thing would collapse when you tried to serve it. Thinner, more numerous layers are actually more stable and easier to scoop.
Step 4: Finish with a top layer. I usually do whipped cream, then a few wafers broken into pieces, then a final drizzle of both syrups. Then I sprinkle the cherries and peanuts on top if I’m using them. This is where you can get a little artistic.
Step 5: Refrigerate for at least eight hours, but ideally overnight. This is when the magic happens. The wafers soften, the flavors meld, and everything becomes one cohesive, beautiful thing. I usually make this in the evening and serve it the next day for dessert.
Common Mistakes to Avoid
Using wafers that are too fresh and crispy. They won’t soften properly. A box that’s been open for a few days is actually better for this recipe.
Slicing bananas too early. They’ll brown and look sad. Do it right before you layer, or use that lemon juice trick.
Making the whipped cream too far in advance. It can separate or get watery. Make it within an hour of assembly.
Being too generous with the syrups. They’ll make the whole thing soggy if you go overboard. A light drizzle is all you need. You can always add more when you serve it.
Not chilling it long enough. I know eight hours seems like forever, but it really does need that time. The structure needs to set, and the flavors need to get to know each other.
My Tested Substitutions
If you don’t have vanilla wafers: Nilla wafers work great, obviously. But I’ve also used ladyfinger cookies and even soft sugar cookies. They all work, just with slightly different textures. Ladyfingers are more delicate. Sugar cookies are thicker. Both are delicious.
If you don’t have heavy cream: I’ve used half heavy cream and half Greek yogurt in a pinch. It’s tangier and a bit less fluffy, but it still works. I wouldn’t go full Greek yogurt, though.
If you don’t have the specific syrups: Any chocolate and fruit syrup combination works. Chocolate and raspberry. Chocolate and blueberry. Chocolate and caramel. I’ve honestly never made this the same way twice.
If you want to go dairy-free: Use coconut cream instead of heavy cream. It whips up similarly, though it’s a bit more delicate. You might need to add a teaspoon of cornstarch to help it hold its shape.
How to Customize
This recipe is genuinely a jumping-off point. Here are some directions you could take it:
Go tropical: Use coconut cream instead of regular whipped cream, add pineapple and mango, and use a passion fruit syrup. Suddenly you’ve got something completely different but equally delicious.
Go chocolate-forward: Use chocolate wafers instead of vanilla. Add chocolate chips to the whipped cream. Use chocolate syrup and chocolate fudge syrup instead of the fruit syrup. It becomes a chocolate lover’s dream.
Go berry-heavy: Skip the bananas entirely and layer fresh berries. Raspberries, blackberries, blueberries. Use berry syrup instead of strawberry. This is actually stunning.
Make it boozy: Add a tablespoon of rum or Kahlua to the whipped cream. Add a splash to the syrups. Suddenly it’s a grown-up dessert.
Serving Ideas
I serve this straight from the baking dish, which is honestly the most elegant way because it looks so pretty. Just scoop out a square with a spatula or cake server.
If you want individual servings, layer everything in clear glasses or mason jars instead of a baking dish. It looks gorgeous and people can see all the layers. Plus, everyone gets their own portion without any negotiating.
A dollop of extra whipped cream on top is never wrong. Neither is a drizzle of extra syrup right before serving. Or both. I’m not here to judge.
Serve it cold, straight from the fridge. This is not a room-temperature dessert. The coldness is part of the whole appeal.
Meal Prep and Storage
This dessert is actually perfect for planning ahead, which is one of my favorite things about it.
Make-ahead: You can assemble this up to two days in advance. It actually gets better as it sits. The flavors deepen and the texture becomes more cohesive. I often make it the day before I need it.
Storage: Keep it covered in the refrigerator. I use plastic wrap or aluminum foil. It’ll stay fresh for three to four days, though honestly, it rarely lasts that long in my house.
Freezing: I don’t recommend freezing this because the texture changes significantly when it thaws. The wafers get mushy and the whipped cream gets weird. Fresh is definitely best.
Transporting: If you need to take this somewhere, keep it in the baking dish and cover it well. Transport it in a cooler if it’s a long drive. It travels better than you’d think.
Nutritional Breakdown
This is a rough estimate per serving, assuming you cut the cake into twelve servings:
- Calories: approximately 280
- Protein: 2g
- Carbohydrates: 38g
- Fat: 13g
- Fiber: 1g
Keep in mind that this varies based on how thick your layers are and how generous you are with the syrups. This is definitely a treat, not an everyday dessert, but it’s one where you can see all the real ingredients and feel good about what you’re eating.
Final Thoughts
I love this recipe because it represents everything I believe about cooking: it’s simple, it’s real, it uses ingredients you probably already have, and it brings people joy. There’s no pretension here. It’s just a dessert that tastes like summer and makes people smile.
The first time you make this, you might feel like you’re doing something wrong because it’s so easy. You’re not. Easy doesn’t mean bad. Sometimes the best things in life are the simplest ones, and this Banana Split Icebox Cake is proof of that.
I’d love to know if you make this. Tell me what you added, what you changed, what made it special in your kitchen. That’s the whole point of sharing recipes, right? So they become yours, not just mine.
Now go make this thing. Your future self will thank you.
Recipe Card
Banana Split Icebox Cake Recipe | No-Bake Dessert
Ingredients
Method
- Make whipped cream by combining cold heavy cream, powdered sugar, vanilla extract, and salt in a mixing bowl. Whip with an electric mixer until stiff peaks form, about 3-4 minutes. Set aside.
- Slice bananas into quarter-inch rounds. Do this right before assembling to prevent browning.
- In a 9x13-inch baking dish, spread a half-inch layer of whipped cream on the bottom.
- Layer vanilla wafers over the whipped cream.
- Add another layer of whipped cream, then banana slices, then a light drizzle of chocolate syrup.
- Repeat layers until you reach the top of the dish, ending with whipped cream.
- Top with broken vanilla wafer pieces, a final drizzle of both syrups, cherries, and peanuts if using.
- Cover with plastic wrap and refrigerate for at least 8 hours, preferably overnight.
- Scoop directly from the baking dish and serve cold.