Sautéed Garlic Parmesan Mushrooms
Sautéed Garlic Parmesan Mushrooms
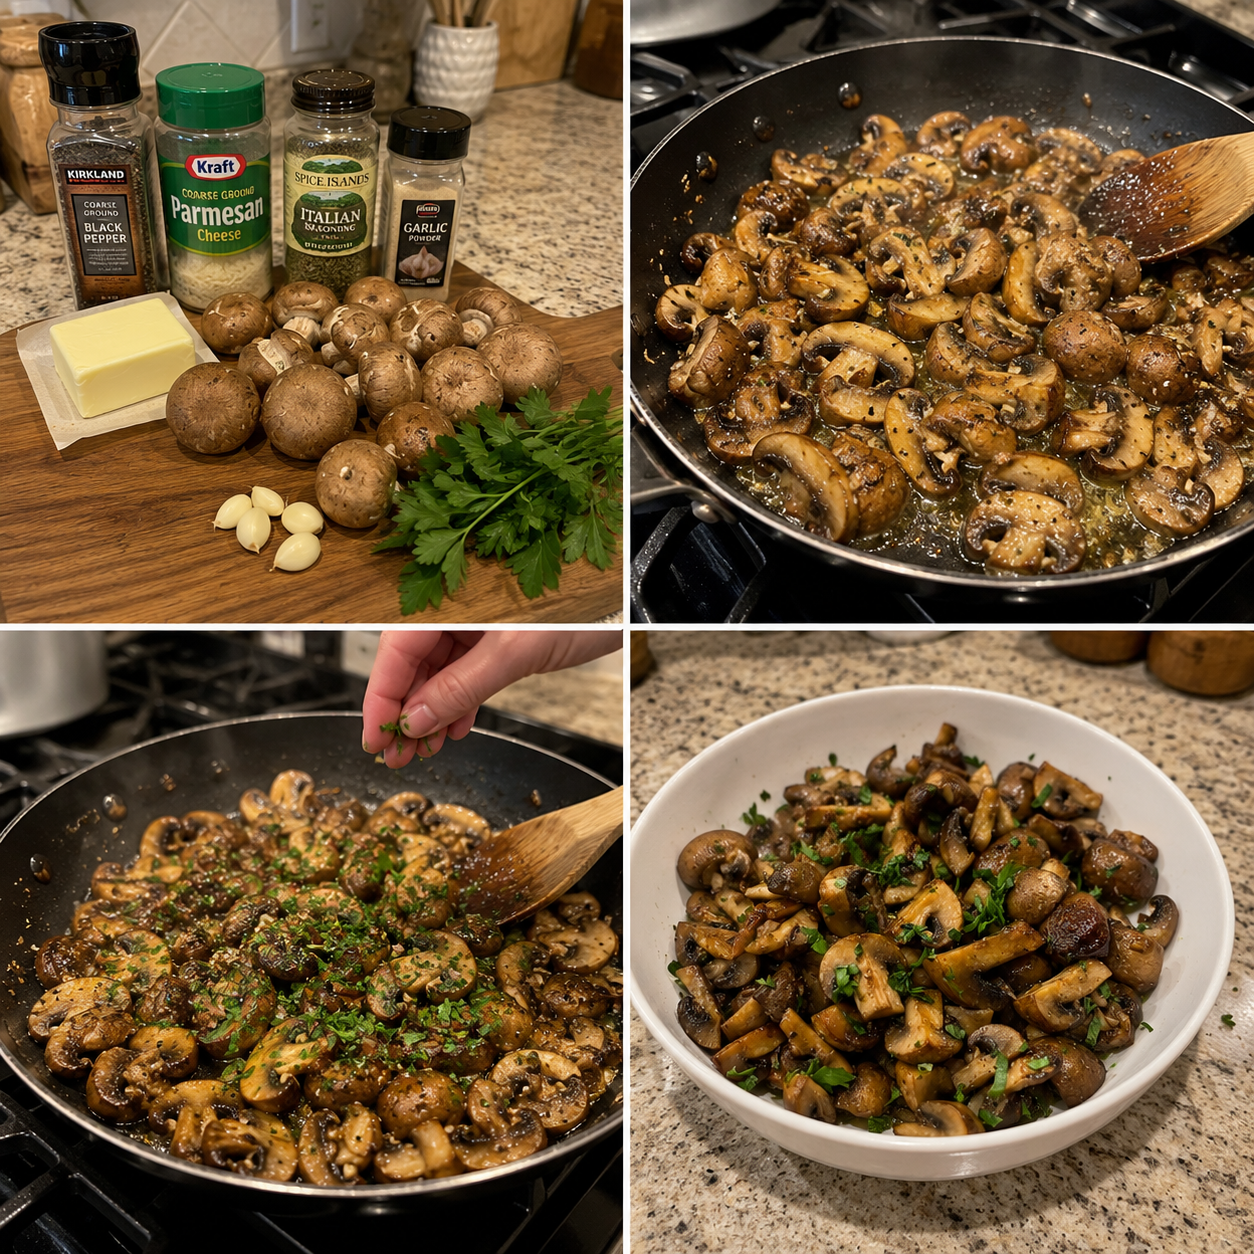
Sautéed Garlic Parmesan Mushrooms: A Recipe That Saved My Weeknight Dinners
I’m going to be honest with you—there was a season in my life when I was absolutely burnt out on cooking. I’d come home from work, stare into the fridge, and feel this wave of “I have no idea what to make.” Sound familiar? That’s when I started leaning on this sautéed garlic parmesan mushrooms recipe like it was my lifeline. And honestly? It kind of was.
I remember the first time I made this dish. It was a random Tuesday night, and I’d grabbed a container of cremini mushrooms at the farmer’s market without any real plan. I had garlic, butter, and parmesan in my kitchen—basically the holy trinity of “I can make something delicious right now.” Twenty minutes later, I had a side dish so good that I ate the entire pan while standing at my kitchen counter. My partner walked in, saw the empty skillet, and just laughed. He knew right then that this recipe was going to become a regular thing in our rotation.
Here’s what I love most about sautéed garlic parmesan mushrooms: they’re ridiculously simple, yet they taste like you actually tried. They’re the kind of dish that works as a side for a fancy dinner, a topping for pasta, a filling for sandwiches, or honestly just a snack on their own. They’re vegetarian, naturally gluten-free if you’re careful with your parmesan, and they come together so fast that you can make them on even your most chaotic nights. If you’re looking for something that feels fancy but doesn’t require a culinary degree, this is it.
Whether you’re meal prepping for the week, looking for an impressive side dish, or just trying to use up those mushrooms before they go bad, this recipe is going to become your go-to. I promise. Follow me on HaileeRecipes on Pinterest for more easy, real-life recipes like this one.
Why You’ll Love This Recipe
Let me break down exactly why this dish has earned permanent real estate in my kitchen rotation:
- It’s genuinely fast. We’re talking 15-20 minutes from start to finish. No long cook times, no complicated techniques. Just you, a hot pan, and some good things happening.
- It tastes fancy but feels easy. The combination of garlic, butter, and parmesan creates this rich, restaurant-quality flavor that makes people think you spent way more time than you actually did.
- It’s incredibly versatile. Serve it as a side, toss it with pasta, put it on crostini, stuff it in a sandwich, or eat it straight from the pan like I do. It works everywhere.
- You probably have the ingredients already. Mushrooms, garlic, butter, and parmesan are kitchen staples for most people. No weird specialty shopping required.
- It’s forgiving. This isn’t a recipe where timing needs to be exact or temperatures need to be precise. You have room to work and adjust as you go.
- It’s naturally vegetarian and can be made vegan. Just swap the butter for olive oil and use nutritional yeast instead of parmesan, and you’ve got a plant-based version that tastes incredible.
Ingredients for Sautéed Garlic Parmesan Mushrooms
- 1.5 pounds mixed mushrooms (cremini, button, or oyster work best), cleaned and sliced
- 4 tablespoons butter
- 6 cloves garlic, minced (about 2 tablespoons)
- 1/2 cup freshly grated Parmesan cheese
- 1/4 cup fresh parsley, chopped (or 1 tablespoon dried)
- 1/2 teaspoon salt, plus more to taste
- 1/4 teaspoon black pepper, plus more to taste
- 1/4 teaspoon red pepper flakes (optional, but I love them)
- 2 tablespoons dry white wine or chicken broth (optional, but adds depth)
- 1 tablespoon fresh lemon juice (optional, brightens everything up)
Hailee’s Tip: Buy your mushrooms as close to when you plan to cook them as possible. They deteriorate faster than you’d think, and fresher mushrooms will give you better texture and flavor. Also, don’t wash them under running water like you would other vegetables—just gently wipe them clean with a damp paper towel or a soft brush. Mushrooms are like little sponges, and excess water will make them mushy instead of perfectly golden.
Hailee’s Tip: Invest in a microplane or box grater if you don’t already have one, and grate your Parmesan fresh. Pre-grated parmesan has anti-caking agents that can make your sauce feel slightly grainy. Fresh grated is worth the extra 30 seconds, I promise.
Hailee’s Tip: Mince your garlic fresh. Jarred minced garlic works in a pinch, but fresh garlic has so much more flavor and character. Plus, mincing garlic takes literally two minutes with a sharp knife.
Optional Add-Ins and Variations
One of my favorite things about this recipe is how easily it adapts to whatever you have on hand or whatever your mood is calling for:
- Thyme or rosemary: Add 1 teaspoon of fresh herbs (or 1/2 teaspoon dried) for an earthier, more savory profile. I do this when I’m serving the mushrooms alongside steak or roasted chicken.
- A splash of balsamic vinegar: Add 1 tablespoon at the end for sweetness and depth. This is my move when I want to serve these over polenta or creamy pasta.
- Cream: Stir in 1/4 cup heavy cream or sour cream in the last minute for a richer, creamier version. This turns it into more of a sauce situation, which is perfect over steak or mashed potatoes.
- Mushroom variety: Mix cremini, shiitake, oyster, and even some dried porcini (rehydrated) for complexity. Different mushrooms bring different flavors and textures to the party.
- Shallots: Use 2-3 minced shallots instead of some of the garlic for a slightly sweeter, more delicate onion flavor.
- Spinach or kale: Toss in a handful of fresh greens in the last minute. They’ll wilt right into the mushrooms and add nutrition without changing the flavor much.
- Truffle oil: A small drizzle at the very end is absolutely decadent if you’re feeling fancy or want to impress someone.
Step-by-Step Method
Step 1: Prep your mise en place. This is a fancy way of saying “get everything ready before you start cooking.” Slice your mushrooms, mince your garlic, chop your parsley, and measure out everything else. I cannot stress this enough—when you’re working with high heat and quick cooking, you don’t want to be scrambling to find ingredients mid-sauté. Trust me on this one.
Step 2: Heat your pan and add the butter. Use a large skillet (12-inch is ideal) over medium-high heat. Add the butter and let it melt completely. You want it foamy and fragrant, but not brown. This usually takes about 1-2 minutes. If your butter starts browning, your heat is too high—dial it back a bit.
Step 3: Add the mushrooms. Once your butter is melted and foamy, add all your sliced mushrooms at once. I know it looks like a lot—your pan will be overflowing. Don’t panic. This is normal. Let them sit for about 2-3 minutes without stirring. This is where the magic happens. The mushrooms will start to release their moisture and begin to brown on the bottom. This browning is flavor.
What I messed up the first time: I kept stirring the mushrooms constantly because I was nervous they’d burn. All I did was steam them instead of searing them. Resist the urge to stir. Let them sit. Be patient. Your future self will thank you.
Step 4: Stir and continue cooking. After those initial 2-3 minutes, give everything a good stir. You’ll notice the mushrooms have released liquid and reduced in volume significantly. They should be starting to look golden and delicious. Continue cooking, stirring occasionally, for another 5-7 minutes until most of the liquid has evaporated and the mushrooms are tender and golden brown.
Step 5: Add the garlic. Once your mushrooms are looking good, add your minced garlic, salt, pepper, and red pepper flakes if you’re using them. Stir everything together and cook for about 1-2 minutes. Your kitchen is going to smell absolutely incredible at this point. This is not a drill.
What I messed up the second time: I added the garlic too early and it burned before the mushrooms were done. Burnt garlic tastes bitter and awful, so timing is actually important here. Wait until your mushrooms are mostly cooked before adding the garlic.
Step 6: Add the wine or broth (if using). If you want to add that optional white wine or broth, do it now. It’ll deglaze the pan and add another layer of flavor. Let it simmer for about 1-2 minutes until it’s mostly absorbed. This step is optional, but I do it probably 80 percent of the time because it makes the whole dish taste more complex.
Step 7: Finish with cheese, lemon, and parsley. Remove the pan from heat and stir in your grated Parmesan cheese, fresh lemon juice if you’re using it, and most of the fresh parsley (save some for garnish). The residual heat will melt the cheese into a light, creamy coating without making it heavy or greasy.
Step 8: Taste and adjust. This is crucial. Taste your mushrooms and adjust the seasoning as needed. More salt? More pepper? A squeeze more lemon? This is your moment to make it exactly how you like it. Garnish with the remaining fresh parsley and serve immediately while everything is still warm and beautiful.
Common Mistakes to Avoid
I’ve made all of these mistakes so you don’t have to:
- Overcrowding the pan. If you don’t have a large enough skillet, work in batches. Overcrowding means the mushrooms steam instead of sear, and you lose that gorgeous golden color and caramelized flavor.
- Using wet mushrooms. Moisture is the enemy of browning. Wipe those mushrooms dry before they hit the pan.
- Adding garlic too early. It burns. We covered this. Don’t do it.
- Skipping the initial rest period. Those first few minutes of not stirring are when the real browning happens. Don’t rush it.
- Using pre-shredded Parmesan. It has anti-caking agents that make the sauce feel grainy. Grate it fresh. It takes two minutes.
- Cooking on too high heat. Medium-high is perfect. Too high and your butter burns and your garlic chars. Too low and your mushrooms take forever and get mushy.
- Forgetting to taste and adjust. Everyone’s palate is different. What tastes perfect to me might need more salt for you. Always taste before serving.
My Tested Substitutions
Real life happens, and sometimes you don’t have exactly what the recipe calls for. Here’s what actually works:
- Butter alternatives: Olive oil works great and gives a lighter, more Mediterranean feel. Ghee is fantastic if you have it. For vegan, use olive oil or coconut oil.
- Parmesan alternatives: Pecorino Romano is sharper and equally delicious. Gruyère is richer and more decadent. Nutritional yeast works for vegan versions. Asiago is nutty and wonderful.
- Fresh parsley alternatives: Chives are lighter and more delicate. Tarragon is more elegant. Basil is more Italian. Thyme is more savory. Use whatever fresh herb you have.
- Wine alternatives: Chicken or vegetable broth works just as well. Apple cider vinegar adds brightness. Even water works in a pinch.
- Mushroom varieties: Any mushroom works here. Button mushrooms are mild and classic. Cremini are earthier. Oyster mushrooms are meaty. Shiitake are rich and umami-forward. Mix and match based on what’s available.
How to Customize
This recipe is genuinely a canvas. Here’s how I change it up depending on what I’m serving it with:
For a lighter version: Use olive oil instead of butter, skip the cheese or use just a light sprinkle, and add extra lemon juice and fresh herbs. It becomes bright and fresh instead of rich and creamy.
For a richer version: Add 1/4 cup heavy cream or crème fraîche at the end, use more Parmesan, and consider adding a splash of truffle oil. This is your fancy dinner version.
For a more Mediterranean version: Use olive oil, add sun-dried tomatoes, fresh basil instead of parsley, and maybe some capers or olives. Skip the Parmesan or use just a little.
For an umami-bomb version: Use a mix of mushroom varieties, add a teaspoon of soy sauce or tamari, use beef broth instead of wine, and finish with a sprinkle of sesame seeds. This is incredible over rice.
For a spicy version: Increase the red pepper flakes to 1/2 teaspoon, add a pinch of cayenne, and maybe some fresh jalapeño. Serve over something mild like pasta or rice to balance the heat.
Serving Ideas
This is where sautéed garlic parmesan mushrooms really shine because they’re so versatile:
- As a side dish: Serve alongside steak, chicken, fish, or pork. They add elegance and earthiness to any protein.
- Over pasta: Toss with warm pasta and a little pasta water for a simple, elegant dinner. Add a fried egg on top if you want something more substantial.
- On crostini: Pile them on toasted bread for an elegant appetizer or light lunch.
- In a sandwich: Use them on a crusty roll with arugula, fresh mozzarella, and a drizzle of balsamic for an absolutely delicious vegetarian sandwich.
- Over polenta or creamy mashed potatoes: The richness of the mushrooms pairs beautifully with creamy starches.
- On a salad: Toss warm mushrooms over mixed greens for a warm salad situation. The heat wilts the greens slightly and creates something really special.
- As a pizza topping: Spread them on pizza dough, top with fresh mozzarella, and bake. Absolutely delicious.
- Straight from the pan: Sometimes the best way to eat them is exactly how I do it—standing at the kitchen counter, fork in hand, no apologies.
Meal Prep and Storage
I love making a big batch of these on Sunday and using them throughout the week:
Storage: Keep leftover sautéed garlic parmesan mushrooms in an airtight container in the refrigerator for up to 4 days. They hold up really well and actually taste great cold or at room temperature.
Reheating: Warm them gently in a skillet over medium heat with a splash of water or broth if they’ve dried out. You can also microwave them, but the skillet method keeps the texture better. They’ll take about 3-5 minutes to warm through.
Freezing: These freeze well for up to 2 months in a freezer-safe container. Thaw in the refrigerator overnight before reheating. They won’t have quite the same texture as fresh, but they’re still delicious and convenient.
Make-ahead tip: You can prep the mushrooms (slice them) and garlic (mince it) the night before and keep them in separate containers. This makes the actual cooking even faster on busy nights.
Nutritional Breakdown
Per serving (based on 4 servings):
- Calories: approximately 185
- Protein: 8g