Delicious Caramel Apple Dump Cake Recipe
Delicious Caramel Apple Dump Cake Recipe
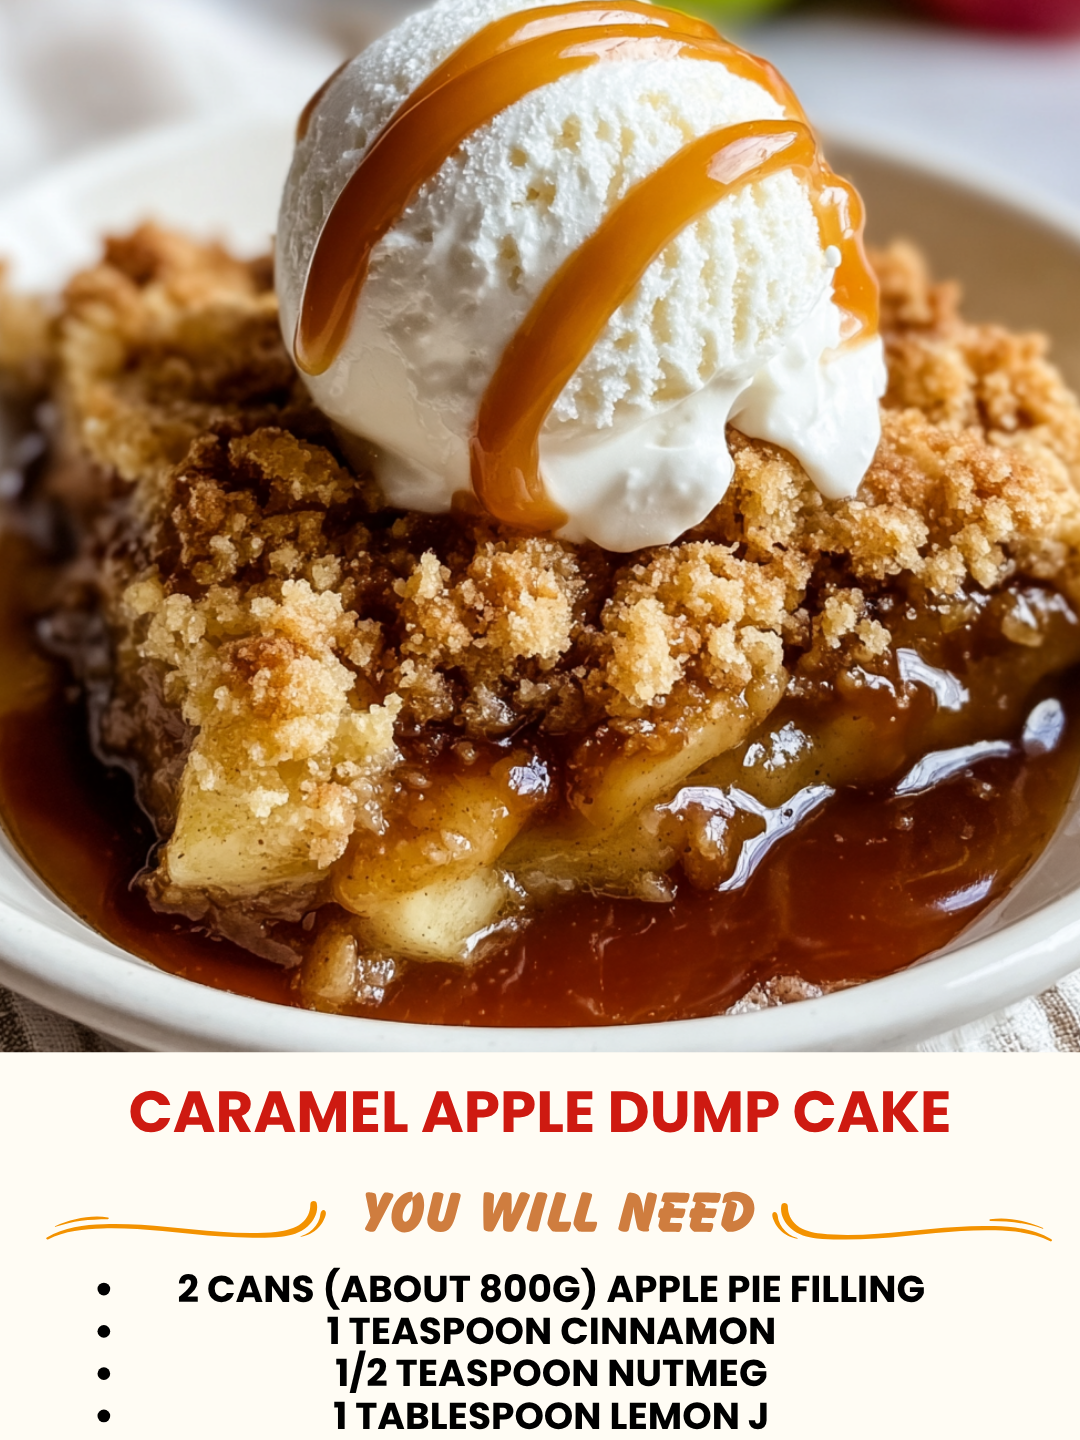
Delicious Caramel Apple Dump Cake Recipe: A Cozy Dessert That Actually Works
I’m going to be honest with you: I discovered dump cakes by accident. It was a Tuesday evening in late September, the kind where the air finally feels crisp and you’re desperately craving something warm and apple-y, but you’re too tired to actually make a real dessert. My kitchen was a mess from dinner prep, my energy was at about 40 percent, and I was staring at a bag of apples that were getting a little too soft to ignore.
So I did what any slightly desperate home cook would do—I threw everything into a baking dish and hoped for the best. What came out of the oven twenty minutes later completely changed my fall baking game. This delicious caramel apple dump cake recipe is now my go-to move when I want that cozy, homemade dessert feeling without actually having to fuss around with pie crust, lattice work, or any of that intimidating stuff.
Here’s what makes it so brilliant: it’s literally impossible to mess up. You dump your apples in a baking dish, sprinkle some dry ingredients on top, drizzle caramel, add a little butter, and let your oven do all the heavy lifting. The cake layer bakes right into the apples, creating this gorgeous, tender, caramel-soaked situation that tastes like you spent hours on it. But you didn’t. You spent maybe five minutes of actual prep work.
This recipe is perfect for anyone who loves fall flavors but doesn’t have the time or confidence to tackle traditional apple cake. It’s forgiving, it’s delicious, and it fills your entire house with the kind of smell that makes people ask what you’re baking. I’m talking pure comfort in a dish.
If you love easy desserts and cozy kitchen moments, follow me on HaileeRecipes on Pinterest for more recipes like this one that prove delicious doesn’t have to mean complicated.
Why You’ll Love This Recipe
Let me break down what makes this particular recipe worth your time and oven space.
It’s genuinely foolproof. I’ve made this with overripe apples, underripe apples, mixed varieties, and it works every single time. There’s no finicky timing, no temperature anxiety, and no way to accidentally ruin it. Even if you forget about it for five extra minutes, it’s still going to be delicious.
The texture is absolutely unreal. You get tender, caramel-soaked apples on the bottom, and a buttery, cake-like topping that’s crispy on the edges and soft in the middle. It’s like someone took apple pie and apple cake, mashed them together, and made it easier.
It tastes like you actually tried. I cannot stress this enough—people will think you spent way more effort than you actually did. You’ll get compliments. You’ll probably get asked for the recipe. And you can either tell them the truth or let them believe you’re just naturally gifted in the kitchen. I won’t judge.
It’s flexible and customizable. Want to add pecans? Go for it. Prefer brown sugar to white? Do your thing. Don’t have buttermilk? Use regular milk. This recipe is forgiving enough to handle your preferences and whatever you’ve got in your pantry.
It fills your house with the most amazing smell. Seriously. The combination of cinnamon, caramel, and baking apples is basically bottled coziness. Your family will be asking when it’s ready about fifteen minutes before it actually is.
Ingredients
For the Apple Filling:
- 5 to 6 medium apples (I use a mix of Granny Smith and Honeycrisp), peeled, cored, and sliced
- 1/3 cup caramel sauce (store-bought is totally fine, or homemade if you’re feeling fancy)
- 2 tablespoons granulated sugar
- 1 tablespoon brown sugar
- 1/2 teaspoon ground cinnamon
- 1/4 teaspoon ground nutmeg
- 1 tablespoon lemon juice
For the Cake Topping:
- 1 cup all-purpose flour
- 3/4 cup granulated sugar
- 1 teaspoon baking powder
- 1/4 teaspoon salt
- 1/2 cup whole milk or buttermilk
- 4 tablespoons unsalted butter, melted
- 1 teaspoon vanilla extract
For Finishing:
- 4 tablespoons unsalted butter, cut into small pats
- 1/4 cup additional caramel sauce (for drizzling on top)
- Pinch of sea salt (optional, but I recommend it)
Hailee’s Tip: Don’t stress about the apple varieties too much. I like mixing tart and sweet apples because it creates better flavor depth, but honestly, use whatever apples you have. The caramel is doing most of the heavy lifting here anyway.
Hailee’s Tip: Store-bought caramel sauce is your friend. I’m not a snob about this. Yes, homemade is lovely, but this recipe was born from “I don’t have time for that” energy, so use what makes your life easier.
Hailee’s Tip: The buttermilk versus regular milk thing isn’t a dealbreaker. I’ve used both, and the cake topping comes out tender either way. If you only have regular milk, add a tiny splash of lemon juice or vinegar and let it sit for a minute to mimic buttermilk’s acidity, but honestly, it’s not necessary.
Optional Add-Ins and Variations
This is where you can make this recipe completely your own. I love the base version, but I also love playing around with it depending on what I’m craving or what’s in my pantry.
- Nutty version: Stir 1/2 cup chopped pecans or walnuts into the cake batter. The nuttiness plays so well with caramel.
- Extra caramel lover: Drizzle a little caramel between the apples and the cake topping for maximum caramel moments. I’ve done this, and it’s absolutely worth it.
- Spiced up: Add 1/4 teaspoon ground ginger and a tiny pinch of ground cloves to the apple mixture for more complex fall flavor.
- Boozy option: Replace 2 tablespoons of the milk with bourbon or rum. It adds a subtle warmth that’s honestly incredible.
- Brown butter version: Use brown butter in the cake topping instead of regular melted butter. It adds this incredible nutty depth.
- Salted caramel twist: Use salted caramel sauce instead of regular, and skip the sea salt garnish (or use it anyway if you want extra salty-sweet action).
Step-by-Step Method
Step 1: Get Your Apples Ready
Preheat your oven to 350 degrees Fahrenheit. While it’s heating, peel, core, and slice your apples into about 1/4-inch thick slices. I use a vegetable peeler for the skin and a sharp knife for slicing, but honestly, an apple peeler gadget saves your hand if you’re doing a lot of apples. Toss the sliced apples in a large bowl with the granulated sugar, brown sugar, cinnamon, nutmeg, and lemon juice. The lemon juice keeps them from browning and adds brightness that balances the caramel. Mix it all together gently so everything’s coated.
What I Messed Up: The first time I made this, I forgot the lemon juice. The apples still tasted good, but they were a little one-note. That little bit of acid really does make a difference.
Step 2: Build Your Base Layer
Grab a 9×13 inch baking dish and pour the 1/3 cup of caramel sauce into the bottom. Spread it around so it’s relatively even. Now dump your apple mixture right on top of that caramel. Don’t stress about arranging them perfectly—this is a dump cake, not a fancy tart. Just get them in there. They’re going to settle and create their own beautiful situation.
Step 3: Make Your Cake Batter
In a separate bowl, whisk together the flour, sugar, baking powder, and salt. In another bowl (yes, I know it’s another dish, but it only takes a second), whisk together the milk, melted butter, and vanilla extract. Pour the wet ingredients into the dry ingredients and stir just until combined. Don’t overmix—lumpy batter is actually what you want here. Overmixing develops gluten, which makes the cake tough, and we’re going for tender.
What I Messed Up: I used to beat this batter like I was making a layer cake. It came out dense and heavy. The moment I started barely stirring it together, everything changed.
Step 4: Top It All Off
Spoon the cake batter over the apples. Don’t worry about covering every inch perfectly—the batter will spread a bit as it bakes. Drop the pats of butter all over the top of the batter. This is important because the butter creates those crispy, golden edges while keeping the center tender. Drizzle that extra 1/4 cup of caramel sauce over the top. If you want that sea salt pinch, sprinkle it now.
Step 5: Bake and Wait (The Hard Part)
Pop the whole thing into your preheated 350-degree oven for 35 to 45 minutes. You’re looking for a golden-brown cake topping and caramel that’s bubbling around the edges. The exact time depends on your oven, so start checking around the 35-minute mark. The cake is done when a toothpick inserted into the cake portion comes out clean or with just a few moist crumbs.
Step 6: Let It Rest
This is crucial: let it cool for at least 10 minutes before serving. I know it smells amazing and you want to dive in immediately, but those 10 minutes let everything set up so you actually get a nice slice instead of a soupy mess. Plus, it’s cooler and less likely to burn your mouth off.
Common Mistakes to Avoid
Using apples that are too soft. I get it—you’re trying to use what you have. But mushy apples will turn into applesauce, and you’ll end up with something more like apple soup cake. Aim for apples that are firm enough to hold their shape. If they’re on the softer side, reduce the baking time by 5 minutes.
Overmixing the cake batter. I mentioned this above, but it’s worth repeating because it’s so common. Mix just until the dry and wet ingredients come together. Lumps are fine. Lumps are actually your friend here.
Skipping the cooling time. I know it’s hard, but serve it too hot and it’s going to be a runny mess. That 10-minute rest makes all the difference.
Not using enough caramel. This isn’t a health food, so don’t hold back on the caramel. It’s literally the star of the show. Use the amounts I listed, and don’t apologize for it.
Forgetting to preheat your oven. This one’s simple but important. A fully preheated oven means the cake bakes evenly and comes out with that perfect texture.
My Tested Substitutions
Can I use gluten-free flour? Yes, but use a 1:1 gluten-free blend and add 1/4 teaspoon of xanthan gum if your flour doesn’t already have it. The texture won’t be exactly the same, but it still works beautifully.
What if I don’t have buttermilk? Use regular milk. Seriously. I’ve done it dozens of times. If you want to get fancy, add a tablespoon of lemon juice or vinegar to regular milk and let it sit for a minute, but it’s not necessary.
Can I use salted butter instead of unsalted? Yes, but reduce the sea salt garnish or skip it entirely so you don’t end up with an overly salty situation.
What about dairy-free milk? Almond, oat, or coconut milk all work fine. I’d skip the coconut milk unless you really want that flavor to come through—it can be a bit strong. Oat milk is my go-to dairy-free option here.
Can I use coconut oil instead of butter? You can, but the flavor will be slightly different. I prefer butter for this recipe because the caramel and spices pair better with butter’s richness, but coconut oil works in a pinch.
What if I want to use homemade caramel? Go for it. Make your favorite caramel recipe and use it the same way. Just make sure it’s at a pourable consistency when you use it.
How to Customize
The beauty of this recipe is that it’s genuinely flexible. Want to make it your own? Here’s how.
Different spices: If you’re not a nutmeg person, skip it. Love cardamom? Add 1/4 teaspoon. This is your dessert—make it taste like what you actually want to eat.
Different fruits: I’ve made this with pears, and it’s absolutely lovely. The technique stays the same, and the caramel works beautifully with pears too. You could even do a mix of apples and pears.
Crunchier topping: If you want more texture, mix 1/2 cup of oats into the cake batter, or sprinkle some on top before baking.
Less sweet: Reduce the sugar in the cake topping to 1/2 cup. The caramel is still providing sweetness, so the cake doesn’t need to carry the whole load.
More caramel: Drizzle extra caramel between layers, on top, or even stir a little into the cake batter. I’ve done all of these, and they all work.
Serving Ideas
This dump cake is perfect on its own, but here’s how I love to serve it.
- Warm with vanilla ice cream: This is the classic move. The cold ice cream melting into the warm cake and caramel is basically perfection.
- With whipped cream and a drizzle of caramel: If you’re not an ice cream person, whipped cream is elegant and delicious.
- With a scoop of salted caramel ice cream: For maximum caramel energy.
- Straight up, no toppings: It’s honestly good enough on its own. Sometimes simple is best.
- For breakfast the next day: Cold or reheated, it’s surprisingly good with coffee. I’m not judging you if you do this.
Meal Prep and Storage
How long does it keep? This dump cake stays fresh and delicious for up to 3 days when stored properly. After that, it starts to get a little dry, but it’s still edible.
How do I store it? Cover the baking dish with plastic wrap or transfer it to an airtight container. Store it at room temperature for up to 1 day, or in the refrigerator for up to 3 days. The texture stays best at room temperature, but the fridge is fine if you need the space.
Can I make it ahead? You can prep the apples and make the batter the night before, but I wouldn’t assemble it until you’re ready to bake. The apples will start to release their juices and get mushy if they sit too long with the sugar and spices.
Can I freeze it? Yes, absolutely. Let it cool completely, then cover it tightly and freeze for up to 2 months. Reheat it in a 300-degree oven for about 20 minutes until it’s warmed through.
Reheating tips: If you’re reheating from room temperature, a few minutes in a 325-degree oven will warm it up beautifully. If it’s coming straight from the fridge, give it about 10 minutes at 325 degrees. You can also microwave individual servings for about 30 seconds, but the oven method keeps the texture better