Strawberry Crunch Cheesecake Bites
Strawberry Crunch Cheesecake Bites
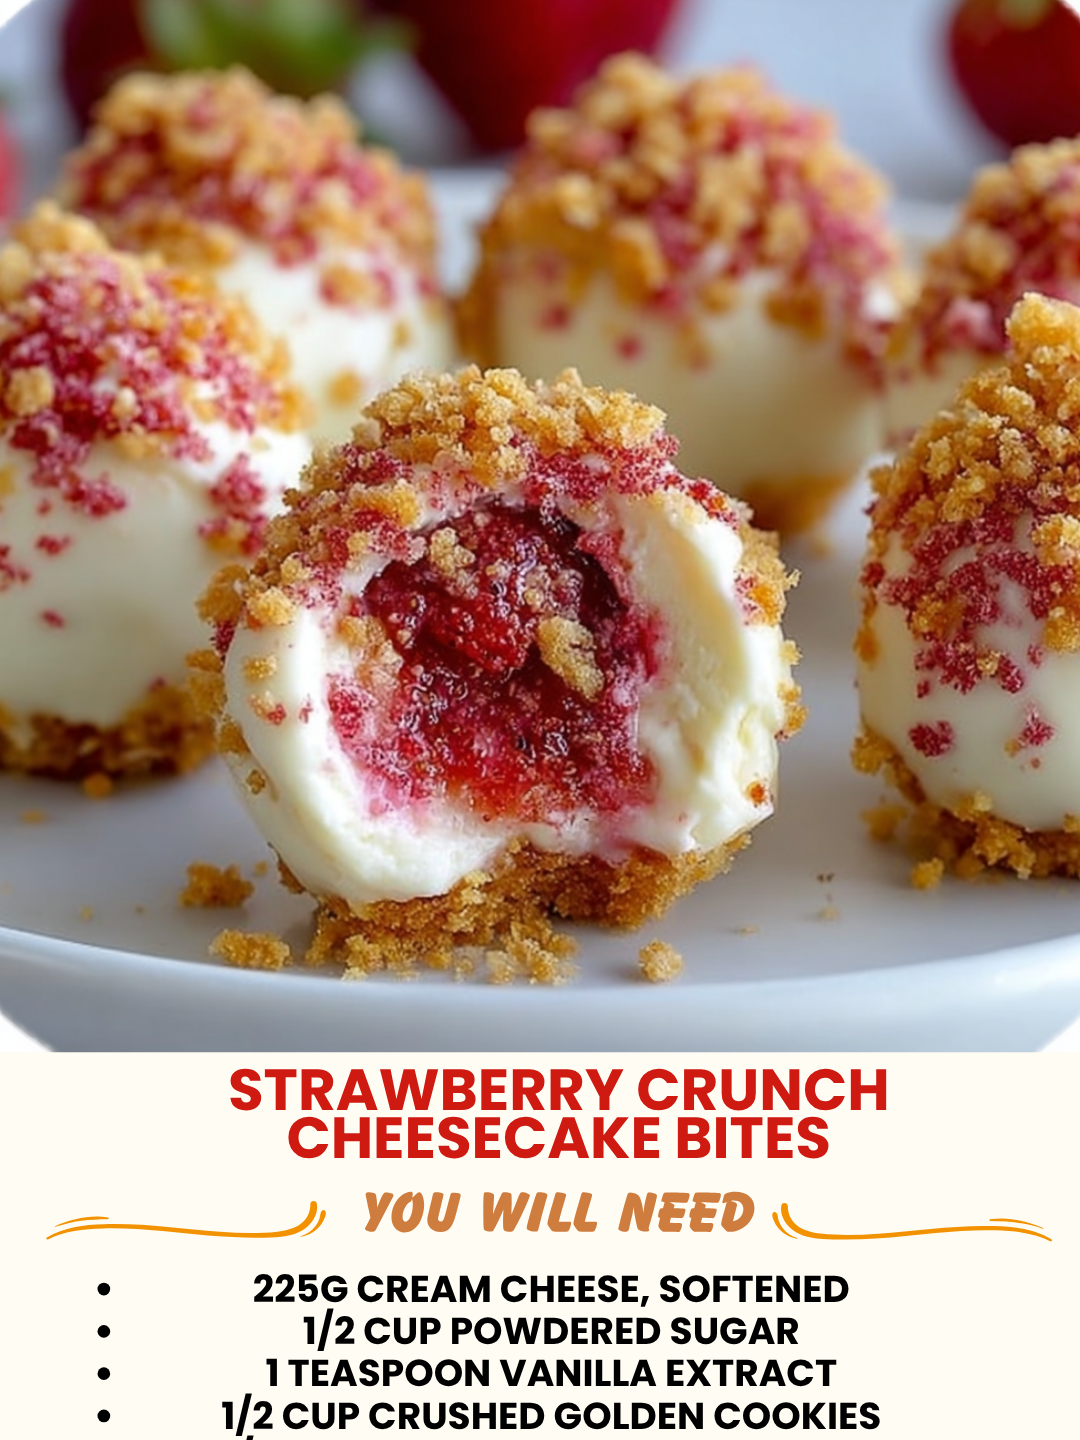
Strawberry Crunch Cheesecake Bites: A Cozy Recipe for Sweet Cravings
I created these Strawberry Crunch Cheesecake Bites on a random Tuesday night when I was standing in my kitchen at 9 PM, staring into the fridge like it might suddenly produce the answer to life’s biggest question: what do I actually want to eat right now? I had fresh strawberries that were getting close to their expiration date, a block of cream cheese that I’d been saving for something special, and this wild craving for something that felt like cheesecake but didn’t require me to commit to baking a full-sized cake and then eating it for the next week.
What I ended up with was pure magic, honestly. These little bites have this incredible contrast going on—a buttery, crunchy graham cracker base that gives way to this silky, tangy cheesecake layer, all topped with fresh strawberries that taste like summer. They’re small enough that you don’t feel guilty eating three of them (or five, I won’t judge), but they’re substantial enough that they actually satisfy that cheesecake craving.
Here’s what makes these so special: they’re no-bake, which means no oven stress. They come together in about 20 minutes of actual hands-on time, and then you just pop them in the fridge while you watch your favorite show or scroll through life. They’re perfect for meal prep, they’re gorgeous enough to serve at a dinner party, and they genuinely taste like you spent way more effort than you actually did. If you’re someone who loves the idea of homemade desserts but doesn’t love the fuss, these are your new best friend.
These bites work for basically anyone. If you’re gluten-free, we can swap the graham crackers. If you’re dairy-free, there are cream cheese alternatives that work beautifully. If you’re just someone who loves strawberries and cheesecake and wants to feel a little fancy on a random weeknight, well, you’re in exactly the right place.
I share recipes like this regularly on Follow me on HaileeRecipes on Pinterest, where you’ll find tons of other cozy, real-life friendly desserts that won’t make you feel like you need a culinary degree to pull off.
Why You’ll Love This Recipe
Let me be real with you—life is busy. You don’t have time to spend three hours making dessert, and you definitely don’t have time to stress about whether your cheesecake is going to crack in the oven. These bites eliminate all of that anxiety.
The beauty of this recipe is that it tastes indulgent without being complicated. You’re getting that creamy, tangy cheesecake flavor that makes you feel like you’re treating yourself, but you’re doing it in about 30 minutes from start to finish (not counting fridge time). The texture contrast is honestly what gets me every time—that crunch of the graham cracker base against the smooth cheesecake and the fresh, juicy strawberries on top.
They’re also incredibly forgiving. Unlike a full cheesecake that can be finicky about temperature and timing, these little bites are pretty hard to mess up. They’re portion-controlled, which means you can grab one or two without the temptation to eat half a cake. And they look impressive enough that you can serve them to guests without anyone knowing you made them in about 20 minutes.
Plus, they’re naturally pretty and colorful. I don’t know about you, but I eat with my eyes first, and these bites are just beautiful sitting on a plate with those bright red strawberries on top.
Ingredients
- 1 cup graham cracker crumbs (about 8-10 full crackers)
- 4 tablespoons unsalted butter, melted
- 2 tablespoons granulated sugar
- 8 oz cream cheese, softened to room temperature
- 1/4 cup powdered sugar
- 1/2 teaspoon vanilla extract
- 1/4 cup heavy whipping cream
- 1 pound fresh strawberries, hulled and halved
- 2 tablespoons strawberry jam (optional, for topping)
- Pinch of sea salt
Hailee’s Tip: The cream cheese really needs to be at room temperature. I know it seems like a small thing, but cold cream cheese won’t blend smoothly with the other ingredients, and you’ll end up with lumps. Pull it out of the fridge about 30 minutes before you start cooking.
Hailee’s Tip: Fresh strawberries make such a difference here. Frozen ones will work in a pinch, but they’ll be softer and a bit watery. If you’re using frozen, thaw them and pat them dry really well before adding them to the bites.
Optional Add-Ins and Variations
This is where you get to have fun and make this recipe your own. Here are some of my favorite tweaks:
- A drizzle of white chocolate: Melt some white chocolate and drizzle it over the top of each bite. It adds this luxe feel and tastes absolutely delicious with the strawberries.
- A sprinkle of crushed freeze-dried strawberries: If you can find these (they’re usually in the baking aisle), they add this intense strawberry flavor and a fun textural element.
- A touch of lemon zest: Add about half a teaspoon of lemon zest to the cheesecake mixture. It brightens everything up and plays really nicely with the strawberries.
- Almond extract: Use just a tiny bit—like 1/8 teaspoon—instead of vanilla. It’s subtle but adds this lovely depth.
- A layer of strawberry preserves: Spread a thin layer of strawberry jam on top of the graham cracker base before adding the cheesecake mixture. It’s like having jam in every bite.
Step-by-Step Method
Step 1: Prepare Your Muffin Tin
Line a standard 12-cup muffin tin with paper liners. This makes everything so much easier when it comes time to remove the bites, and honestly, it makes them look prettier too. If you don’t have paper liners, you can use silicone muffin cups or just grease the tin really well, but I promise the liners are worth it.
Step 2: Make the Crust
In a small bowl, combine your graham cracker crumbs, melted butter, granulated sugar, and that pinch of sea salt. Mix it all together until it looks like wet sand—you want everything evenly coated with the butter. This usually takes about a minute of stirring.
Here’s the thing: I used to press the crust down really firmly, thinking it would make it more solid. What I actually did was make it dense and hard to bite through. Now I press it down gently, just enough to make it compact but still a little bit crumbly. Divide the mixture evenly among your muffin cups—I use a small measuring spoon or the back of a teaspoon to press it down lightly. You want about a quarter-inch layer.
Step 3: Prepare the Cheesecake Mixture
This is where the magic happens. Make sure your cream cheese is truly at room temperature—it should be soft enough to press your finger into easily. Add it to a mixing bowl along with the powdered sugar, vanilla extract, and that pinch of sea salt.
Using an electric mixer (or a whisk and some arm strength), beat everything together until it’s smooth and creamy. This should take about 2-3 minutes with an electric mixer. You want absolutely no lumps. Stop halfway through and scrape down the sides of the bowl with a spatula to make sure everything gets incorporated.
Step 4: Whip the Cream
In a separate bowl, whip the heavy cream until soft peaks form. This should take about 2-3 minutes with an electric mixer. You know soft peaks when you see them—the cream holds its shape but the peaks are still a little droopy.
What I Messed Up: I once whipped the cream too far and ended up with something that was almost butter. The moral of the story is to watch it carefully and stop as soon as you see soft peaks.
Step 5: Fold It Together
Gently fold the whipped cream into the cream cheese mixture using a spatula. Do this in two additions—add half the whipped cream, fold it in gently until mostly combined, then add the rest. This keeps the mixture light and airy, which is what makes the cheesecake part so creamy and delicious. Don’t overmix—a few streaks of white are totally fine and actually better than overdoing it.
Step 6: Fill the Cups
Spoon the cheesecake mixture evenly into each muffin cup, on top of the graham cracker base. I use a small cookie scoop or a tablespoon, and I try to make them all roughly the same size so they look uniform. Fill them almost to the top—you want a nice thick layer of cheesecake.
Step 7: Chill
Pop the muffin tin into the fridge for at least 2 hours, but ideally overnight. This gives the cheesecake time to set up and firm up. You want them to be cold and solid when you top them with strawberries.
What I Messed Up: I once tried to top them after just 30 minutes in the fridge because I was impatient. They were still too soft, and the strawberries kind of sank into the filling. Not the end of the world, but definitely not ideal.
Step 8: Top and Serve
Once the cheesecake is set, remove the bites from the fridge. Top each one with a strawberry half or two, cut side up. If you want to use the strawberry jam, you can brush a tiny bit on top of each strawberry for a glossy finish and extra strawberry flavor.
Common Mistakes to Avoid
Using Cold Cream Cheese
I can’t stress this enough. Cold cream cheese won’t blend smoothly, and you’ll end up with a lumpy filling. Take it out of the fridge ahead of time.
Overmixing the Whipped Cream
Once you’ve whipped the cream, be gentle when you’re folding it in. Overmixing deflates all those lovely air bubbles, and your cheesecake won’t be as light and fluffy.
Pressing the Crust Down Too Hard
A gentle hand is your friend here. You want the crust to hold together but still have a bit of that crumbly texture.
Not Letting Them Chill Long Enough
I know waiting is hard, but trust me on this. At least 2 hours, ideally overnight. The texture and flavor are so much better when they’re properly chilled.
Adding Wet Strawberries
If your strawberries are really wet, pat them dry with a paper towel before adding them to the bites. Excess moisture can make the filling soggy.
My Tested Substitutions
For the Graham Crackers
If you need to go gluten-free, gluten-free graham crackers work beautifully. I’ve also used crushed vanilla wafers, digestive biscuits, and even almond flour mixed with a bit of butter. Each one creates a slightly different flavor, but they all work.
For the Cream Cheese
If you’re dairy-free, I’ve had great success with dairy-free cream cheese alternatives. They blend just as smoothly as regular cream cheese, though they sometimes need an extra minute or two to come to room temperature. Make sure you’re using a brand that’s specifically designed for baking, not just a spreadable alternative.
For the Heavy Cream
Coconut cream works here, though it will add a subtle coconut flavor. Full-fat Greek yogurt also works and adds a nice tangy flavor that actually complements the strawberries really well. Just whip it the same way you would the heavy cream.
For the Strawberries
Raspberries, blackberries, and blueberries all work beautifully. You could even do a mix of berries for a more colorful look. The flavor will be slightly different, but it’s all delicious.
For the Vanilla Extract
If you don’t have vanilla extract, you can skip it entirely—the cheesecake will still taste great. Or use a tiny bit of almond extract for a different flavor profile.
How to Customize
The best part about this recipe is that it’s totally customizable based on what you like and what you have on hand.
Make Them Sweeter
If you prefer a sweeter bite, add an extra tablespoon of powdered sugar to the cheesecake mixture. You could also brush a thin layer of honey or strawberry jam on top of the finished bites.
Make Them Tangier
Add a tiny squeeze of fresh lemon juice to the cheesecake mixture, or use Greek yogurt instead of some of the heavy cream. This gives you that tangy cheesecake flavor that some people absolutely love.
Change the Flavor Profile
Swap the strawberries for other toppings: fresh mint leaves, a drizzle of dark chocolate, crushed pistachios, or even a tiny dollop of whipped cream and a sprinkle of freeze-dried berries.
Make Mini Versions
Use a mini muffin tin instead of a regular one, and reduce the amounts slightly. You’ll get more bites, and they’re even cuter for serving at parties.
Serving Ideas
These bites are versatile little things, and there are so many ways to serve them.
As an Everyday Treat
Keep them in the fridge and grab one whenever you need a little something sweet. They’re perfect with your morning coffee or as an afternoon pick-me-up.
For a Dinner Party
Arrange them on a pretty platter and serve them as dessert. They look impressive, they’re easy to eat, and everyone will ask for the recipe.
For Meal Prep
Make a whole batch at the beginning of the week, and you’ve got dessert ready to go for the next several days.
With Extra Toppings
Set out a little spread of extra toppings—whipped cream, fresh mint, crushed nuts, chocolate sauce—and let people customize their own.
As a Breakfast Treat
I’m not going to tell you not to eat cheesecake for breakfast, but I’m also not going to judge you if you do. These are slightly lighter than a full slice of cheesecake, so it’s almost reasonable, right?
Meal Prep and Storage
In the Refrigerator
These will keep in an airtight container in the fridge for up to 5 days. I usually store them in the muffin tin covered with plastic wrap, which keeps them fresh and takes up less space.
In the Freezer
You can freeze these for up to 3 months. I like to freeze them in a single layer on a baking sheet first, then transfer them to a freezer bag once they’re solid. This prevents them from sticking together. Just thaw them in the fridge for a few hours before serving. The texture stays pretty much the same.
Make-Ahead Tips
You can make the crust and cheesecake filling up to a day ahead. Store the crust in an airtight container at room temperature, and keep the filling in the fridge. Just assemble and chill the morning of, or the night before, depending on when you want to serve them. Add the strawberry topping just before serving to keep them looking fresh.
Nutritional Breakdown
Here’s what you’re looking at per bite (makes 12 servings):
- Calories: approximately 185
- Protein: 3g
- Carbohydrates: 18g
- Fat: 11g
- Fiber: 1g
- Sugar: 14g
These