Baked Blueberry Fritter Bites
Baked Blueberry Fritter Bites
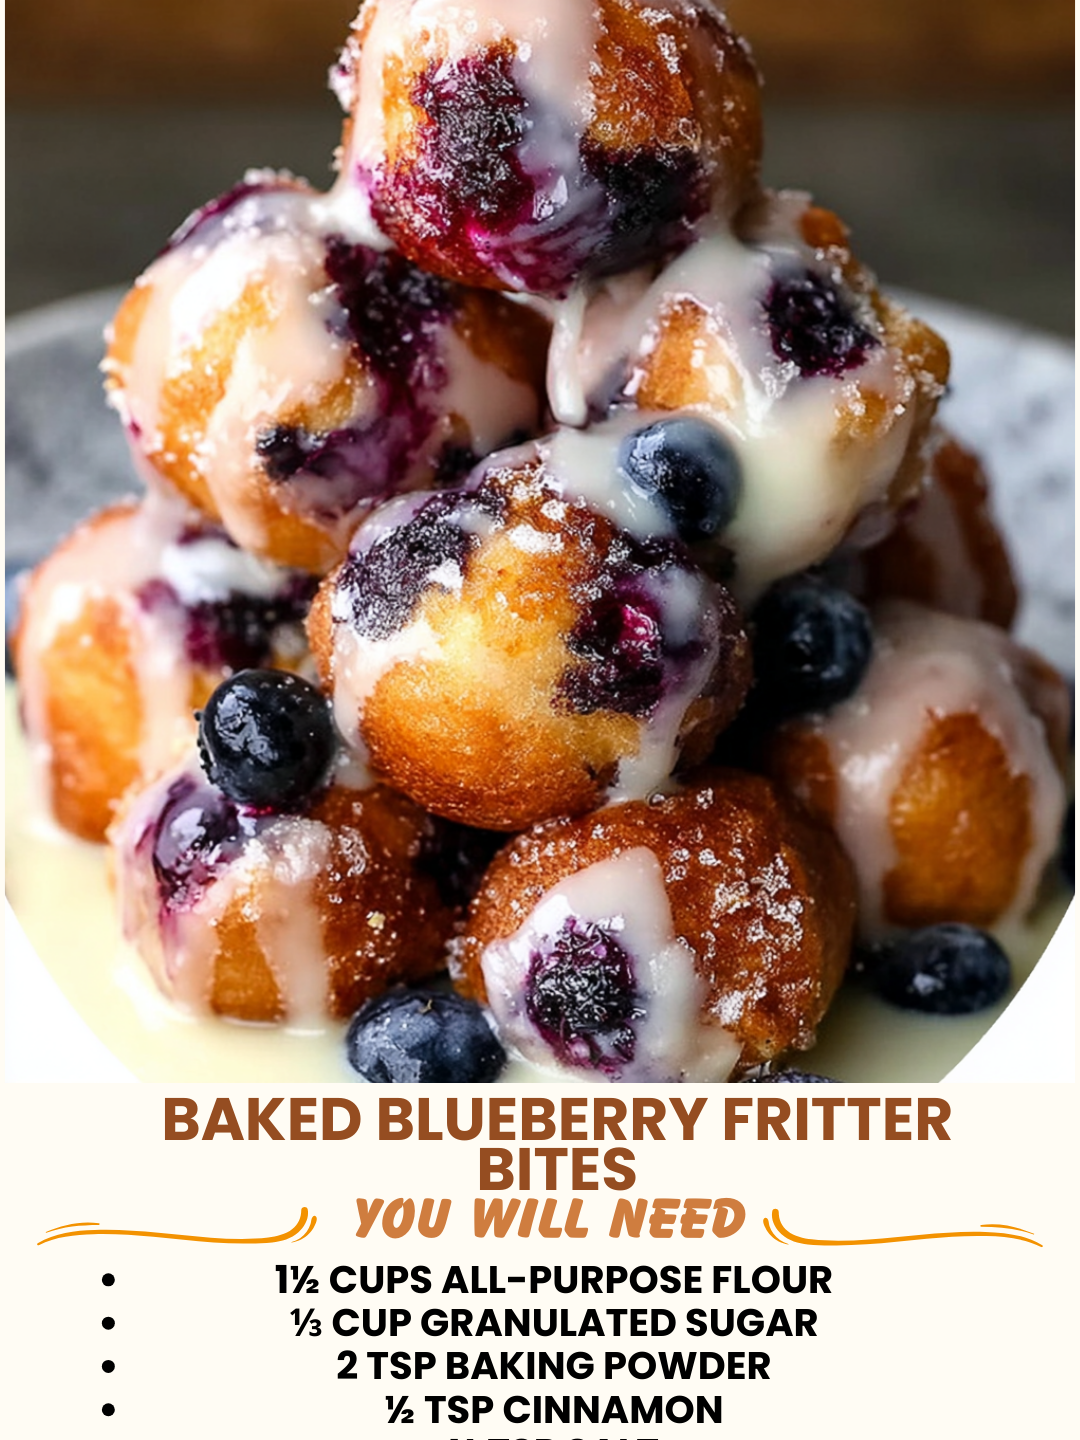
Baked Blueberry Fritter Bites: A Cozy Breakfast That Actually Tastes Like Dessert
I’m going to be honest with you: I created these Baked Blueberry Fritter Bites on a Tuesday morning when I was desperately craving fried dough but absolutely did not want to deal with the cleanup, the oil splatters, or the guilt that comes with deep-frying before 9 a.m. I stood in my kitchen, staring at a pint of blueberries I’d bought three days ago, wondering if there was a way to capture that crispy-on-the-outside, tender-on-the-inside magic of a real fritter without the whole production.
Spoiler alert: there absolutely is.
What I landed on is something I’ve made at least twice a week ever since. These little bites are essentially everything you love about a blueberry fritter—that slight crunch, the burst of juicy berries, the subtle sweetness—but baked until golden in your regular oven. They’re not trying to be a health food, but they’re also not going to leave your kitchen smelling like a deep fryer for three days. They’re just genuinely good, genuinely easy, and genuinely worth making on a lazy Sunday or a chaotic weekday morning.
These bites are for anyone who loves breakfast pastries but doesn’t want to spend an hour on them. They’re perfect for families, for meal prep, for impressing people at brunch, or for quietly eating four of them while you scroll through your phone before anyone wakes up. No judgment here.
If you’re looking for more cozy breakfast inspiration, follow me on HaileeRecipes on Pinterest where I share all my favorite morning recipes and baking ideas.
Why You’ll Love This Recipe
Let me break down why these have become my go-to:
- They’re actually crispy. I’m not exaggerating when I say the outside gets this beautiful, delicate crunch that rivals a fried fritter. It’s all about the baking temperature and a little trick I’ll share with you.
- Real blueberries stay whole. Unlike some baked goods where berries disappear into the batter, these little pockets of fruit stay intact and juicy. You bite into them and get this burst of tartness that balances the sweetness perfectly.
- They’re genuinely quick. From start to finish, you’re looking at maybe 35 minutes. Most of that is baking time, so you can actually do other things while they’re in the oven.
- They keep for days. Store them in an airtight container and they stay soft and delicious for up to five days. That’s not a promise I make lightly.
- No special equipment needed. Just a muffin tin and a mixing bowl. That’s it.
Ingredients
- 1 and 1/2 cups all-purpose flour
- 1/3 cup granulated sugar
- 2 teaspoons baking powder
- 1/2 teaspoon salt
- 1/4 teaspoon ground nutmeg
- 1 large egg
- 1/2 cup whole milk
- 1/4 cup melted butter or neutral oil
- 1 teaspoon vanilla extract
- 1 and 1/2 cups fresh blueberries (or frozen, thawed)
- 2 tablespoons flour (for coating the blueberries)
Hailee’s Tip: Fresh blueberries are ideal here because they stay plump and juicy, but frozen blueberries work too. Just thaw them first and pat them dry with a paper towel. Any extra moisture will make your batter soggy, and we don’t want that.
Hailee’s Tip: That 2 tablespoons of flour you use to coat the blueberries? It’s a game-changer. It keeps them from sinking to the bottom and distributes them evenly throughout the bites. I learned this the hard way after my first batch had all the berries pooled at the bottom.
Optional Add-Ins and Variations
The beauty of this recipe is how flexible it is. Here’s what I like to play around with:
- Lemon zest: Add one teaspoon of lemon zest to the dry ingredients. It brightens everything up and makes the blueberries taste even more vibrant.
- Cinnamon sugar topping: Mix 2 tablespoons sugar with 1/2 teaspoon cinnamon and sprinkle it on top of each bite before baking. It creates this caramelized crust that’s honestly addictive.
- Almond extract: Use 1/2 teaspoon almond extract instead of vanilla. It adds a subtle nuttiness that pairs beautifully with blueberries.
- Buttermilk swap: If you have buttermilk on hand, use it instead of regular milk for a slightly tangier flavor and a more tender crumb.
- Mixed berries: Raspberries, blackberries, or even diced strawberries work great alongside or instead of blueberries. Just keep the total amount around 1 and 1/2 cups.
Step-by-Step Method
Step 1: Get Your Oven Ready
Preheat your oven to 375 degrees Fahrenheit. While it’s heating, line a standard 24-cup mini muffin tin with paper liners or give each cup a light spray of cooking oil. I prefer the liners because they make cleanup ridiculously easy and they help the bites stay moist. If you only have a regular muffin tin (12 cups), that’s fine—you’ll just get fewer, larger bites. Adjust your baking time to about 18 to 20 minutes instead.
Step 2: Mix Your Dry Ingredients
In a medium bowl, whisk together the flour, sugar, baking powder, salt, and nutmeg. I use a whisk here because it aerates the flour slightly and helps everything combine evenly. You’re not looking for anything fancy—just make sure there are no lumps of baking powder hiding in there.
Step 3: Combine Your Wet Ingredients
In another bowl, crack your egg and whisk it gently. Add the milk, melted butter, and vanilla extract. Whisk until everything is combined and smooth. This is where I sometimes mess up: I used to use cold butter and it would create little clumps in the batter. Melted butter mixes in so much more smoothly, so don’t skip that step.
Step 4: Bring It Together (Gently!)
Pour the wet ingredients into the dry ingredients and stir with a spatula until just combined. Here’s the thing: you want to stop stirring as soon as you don’t see any dry flour streaks. Overmixing creates tough, dense bites, and nobody wants that. A few small lumps in the batter are totally fine and actually desirable.
Step 5: Coat Your Blueberries
In a small bowl, toss your blueberries with 2 tablespoons of flour until they’re lightly coated. This might seem weird, but it genuinely prevents them from all sinking to the bottom. Fold them gently into the batter.
Step 6: Fill Your Tin
Using a small cookie scoop or a teaspoon, divide the batter among your muffin cups. You want them about three-quarters full. If you overfill them, they’ll overflow and make a mess. If you underfill them, they won’t rise properly. I’ve done both, and neither is ideal.
Step 7: Bake Until Golden
Pop the tin into your preheated oven and bake for 12 to 14 minutes if you’re using a mini muffin tin. They should be golden brown on top and a toothpick inserted into the center should come out clean or with just a few moist crumbs. Don’t overbake them—they’ll dry out quickly.
Step 8: Cool and Enjoy
Let the bites cool in the tin for about 5 minutes, then transfer them to a wire rack. They’ll firm up as they cool, and that’s when you’ll notice that beautiful crispy exterior. Eat them warm if you can, but they’re also delicious at room temperature or even chilled.
Common Mistakes to Avoid
Overmixing the batter: This is the number one culprit for dense, tough bites. Mix just until combined, even if it looks a little lumpy.
Not coating the blueberries: I know I mentioned this already, but it’s important enough to repeat. That flour coating keeps the berries suspended throughout the batter instead of sinking.
Using frozen blueberries without thawing: If you use them straight from the freezer, they’ll release too much moisture and make your batter soggy. Thaw them first and pat them dry.
Overbaking: These are small and bake quickly. Check them at 12 minutes. A minute or two too long and they’ll be dry.
Opening the oven door too early: I know the temptation is real, but let them bake undisturbed for at least 10 minutes before peeking.
My Tested Substitutions
I’ve played around with this recipe enough times to know what works and what doesn’t.
Flour: You can use a one-to-one gluten-free flour blend here. The texture will be slightly different—a bit more delicate—but they’ll still be delicious. Don’t try to use almond flour or coconut flour; they behave completely differently.
Sugar: Brown sugar works beautifully and adds a subtle molasses flavor. Use the same amount and pack it lightly into the measuring cup.
Butter vs. Oil: Either works, but I prefer melted butter for flavor. If you use oil, use something neutral like vegetable or canola oil, not olive oil.
Milk: Whole milk gives the best texture, but 2% works fine. Almond milk or oat milk work too, though the bites will be slightly less tender.
Eggs: I haven’t successfully tested egg substitutes in this recipe, so I’d stick with a real egg here.
How to Customize
Want to make these your own? Here’s how:
If you like things sweeter, add an extra tablespoon of sugar to the dry ingredients. If you prefer less sweetness, reduce the sugar to 1/4 cup. You can also drizzle the cooled bites with a simple glaze made from powdered sugar and milk.
For a more sophisticated flavor, add 1/4 teaspoon of cardamom to the dry ingredients. It’s subtle but absolutely magical with blueberries.
If you want them extra crispy on the outside, brush the tops lightly with melted butter before baking. They’ll get this gorgeous golden crust.
You can also make a streusel topping by mixing 1/4 cup flour, 1/4 cup brown sugar, 2 tablespoons cold butter, and a pinch of salt with your fingers until it looks like breadcrumbs. Sprinkle it on top of each bite before baking for a little extra crunch.
Serving Ideas
These are incredibly versatile. Serve them warm with a cup of coffee for a quiet morning. Pack them in a lunchbox for a midday snack. Arrange them on a platter with whipped cream and fresh berries for a casual brunch. Dunk them in melted white chocolate for a slightly fancier treat. Honestly, they’re good however you serve them.
I also love pairing them with a simple yogurt for breakfast. The tartness of the yogurt balances the sweetness of the bites perfectly.
Meal Prep and Storage
This is where these bites really shine. Make a full batch and you’ve got breakfast sorted for the next few days.
Room Temperature: Store them in an airtight container on the counter for up to two days. They’ll stay soft and delicious.
Refrigerator: Keep them in an airtight container in the fridge for up to five days. They actually taste better after a day or two as the flavors meld.
Freezer: Cool them completely, then store them in a freezer-safe container or bag for up to three months. Thaw them at room temperature or pop them in the microwave for 20 to 30 seconds to warm them up.
Make-Ahead Tip: You can prepare the batter the night before, cover it, and refrigerate it. Just give it a gentle stir before filling your muffin tin. The batter might be slightly thicker, so add a splash of milk if needed.
Nutritional Breakdown
Per bite (makes about 24 mini bites):
- Calories: 65
- Protein: 1g
- Carbohydrates: 11g
- Fat: 2g
- Fiber: 0.5g
These are relatively light for a baked treat, especially since they’re so satisfying. The blueberries add fiber and antioxidants, and the baking method means there’s no excess oil hanging around.
Final Thoughts
I genuinely love these Baked Blueberry Fritter Bites. They feel like a little indulgence, but they’re actually pretty straightforward to make, and they fit into a busy life in a way that most pastries don’t. They’re the kind of recipe I come back to again and again because they just work.
The first time you make them, follow the recipe exactly. The second time, feel free to play around. Add that lemon zest, sprinkle cinnamon sugar on top, use raspberries instead of blueberries. This recipe is forgiving and flexible, and it’s meant to be made your way.
I’d love to hear how yours turn out. Come back and let me know if you tried any of the variations or if you discovered something new on your own. That’s the best part of cooking—sharing these little moments with people who actually care about good food.
Happy baking, friend. You’ve got this.
—
Baked Blueberry Fritter Bites
Ingredients
Method
- Preheat your oven to 375 degrees Fahrenheit and line a 24-cup mini muffin tin with paper liners or spray with cooking oil.
- In a medium bowl, whisk together the flour, sugar, baking powder, salt, and nutmeg until combined.
- In another bowl, whisk together the egg, milk, melted butter, and vanilla extract until smooth.
- Pour the wet ingredients into the dry ingredients and stir gently with a spatula until just combined. Do not overmix.
- In a small bowl, toss the blueberries with 2 tablespoons of flour to coat them lightly, then fold them into the batter.
- Using a small cookie scoop or teaspoon, divide the batter among the muffin cups, filling each about three-quarters full.
- Bake for 12 to 14 minutes, until the tops are golden brown and a toothpick inserted into the center comes out clean or with just a few moist crumbs.
- Let the bites cool in the tin for 5 minutes, then transfer to a wire rack to cool completely.
- Serve warm or at room temperature.