Reese’s Peanut Butter Cookies
Reese’s Peanut Butter Cookies
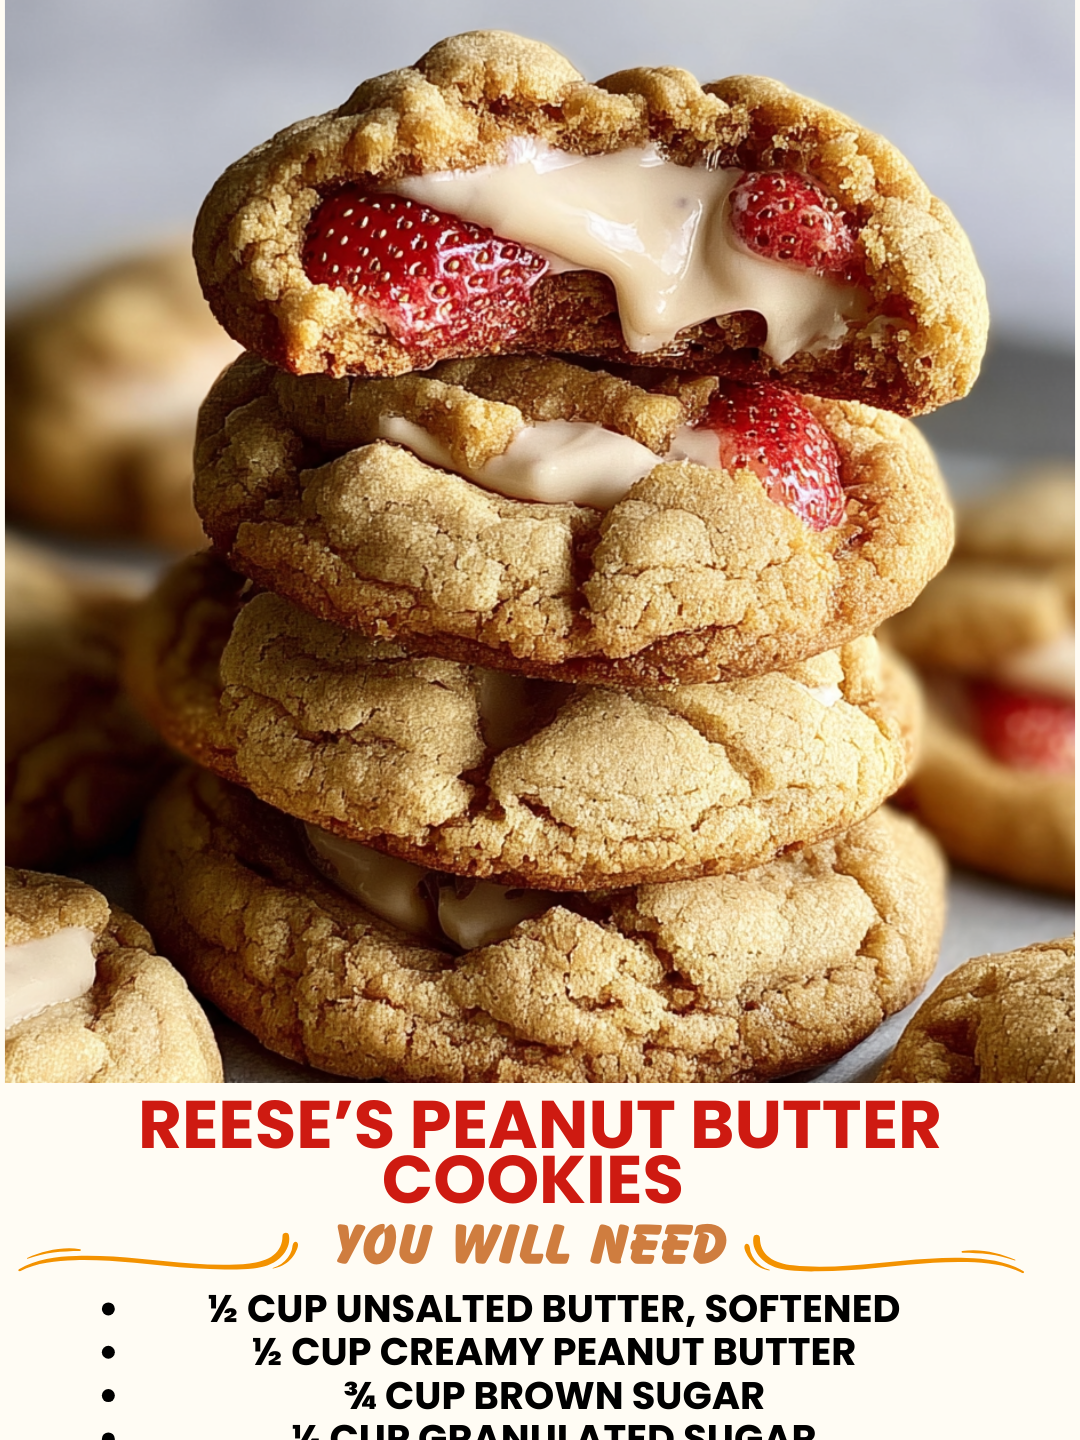
Reese’s Peanut Butter Cookies: My Love Letter to a Classic Combination
I’m going to be honest with you—I made these Reese’s Peanut Butter Cookies at 10 p.m. on a Tuesday night because I couldn’t stop thinking about them. Not in a dramatic way, but in that real, human way where you suddenly crave something so badly that you find yourself standing in your kitchen in your oldest sweatshirt, measuring out peanut butter like your life depends on it.
It started, as these things do, with a memory. My mom used to make peanut butter cookies when I was a kid, and my brother would sneak the Reese’s cups from the pantry to press into the warm dough. We’d pretend we were helping, but really we were just creating chaos and eating chocolate. Fast forward to now, and I wanted to recreate that feeling—that cozy, slightly messy, completely delicious moment—but in a way that felt intentional and a little more grown-up.
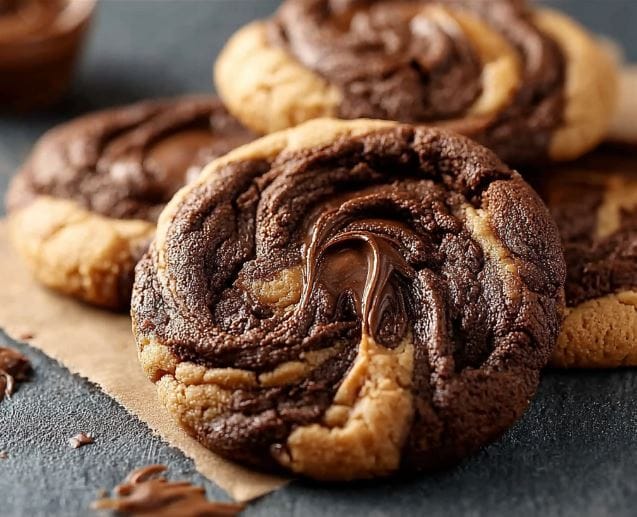
These cookies are soft, buttery, and absolutely loaded with peanut butter flavor. The Reese’s cups aren’t just a topping; they’re baked right into the dough, so every bite has that perfect combination of creamy peanut butter cookie and rich chocolate. I’m talking about cookies that are chewy in the center, hold their shape beautifully, and honestly taste like you spent way more time on them than you actually did.
Here’s what I love about this recipe: it’s forgiving, it’s foolproof, and it works whether you’re baking for a crowd or just for yourself on a random Tuesday. No fancy equipment needed. No intimidating techniques. Just good ingredients, simple steps, and the kind of cookies that make people ask for your recipe.
If you’re looking for something that bridges the gap between homemade and indulgent, that feels special but doesn’t require a culinary degree, then these are your cookies. And if you want more easy recipes like this, follow me on HaileeRecipes on Pinterest where I share all my favorite comfort food finds.
Why You’ll Love This Recipe
Let me break down why I’m genuinely excited about these cookies and why I think you will be too.
- They’re ridiculously easy. If you can cream butter and sugar together, you can make these. The method is straightforward, and there are no weird techniques to master.
- The flavor is unbeatable. Peanut butter plus chocolate is a combination that just works. It’s not overthinking it; it’s honoring what we all already love.
- They have the perfect texture. These cookies are soft and chewy, not hard or cakey. They stay that way for days, which is rare and wonderful.
- They’re customizable. Want to add something? Go for it. These cookies are a blank canvas for your creativity.
- They make great gifts. I’ve given batches of these to friends, coworkers, and neighbors, and every single time someone asks me to make them again.
- They satisfy cravings without being complicated. You get that indulgent, candy-like feeling, but you made them yourself with real ingredients.
Ingredients
- 1 cup creamy peanut butter (I use Jif, but natural works too)
- 1/2 cup unsalted butter, softened
- 3/4 cup granulated sugar
- 3/4 cup packed brown sugar
- 1 large egg
- 1 teaspoon vanilla extract
- 1 1/2 cups all-purpose flour
- 1 teaspoon baking soda
- 1/2 teaspoon salt
- 1 cup Reese’s peanut butter cups (about 8-9 mini cups), chopped into chunks
- 1/2 cup semi-sweet chocolate chips (optional, but I always add them)
Hailee’s Tip: Use peanut butter that’s at room temperature. Cold peanut butter is stubborn and won’t cream properly with the butter. I usually leave mine on the counter for 30 minutes before baking.
Hailee’s Tip: Don’t skip the salt. I know it seems small, but it’s what makes the peanut butter flavor pop and balances out the sweetness.
Hailee’s Tip: If you’re using natural peanut butter, make sure it’s well-mixed before measuring. The oil separates, and you need the whole thing for the best results.
Optional Add-Ins and Variations
The beauty of these cookies is that they’re a starting point. Here’s what I like to play around with:
- More chocolate: Add an extra 1/2 cup of chocolate chips or swap some of the Reese’s cups for dark chocolate chunks.
- Sea salt on top: Before baking, sprinkle a tiny pinch of fleur de sel on each cookie. It’s a game-changer.
- Crispy edges: Chill the dough for 30 minutes, then bake at 375°F for slightly crispier cookies.
- Peanut butter swirl: Drop a small spoonful of peanut butter onto each cookie before baking and swirl it in with a toothpick.
- Oat version: Replace 1/2 cup of flour with old-fashioned rolled oats for a nuttier texture.
- Espresso powder: Add 1 teaspoon of instant espresso powder to deepen the chocolate flavor without making them taste like coffee.
Step-by-Step Method
Step 1: Preheat and prep. Heat your oven to 350°F. Line two baking sheets with parchment paper. This matters because it prevents sticking and gives you an even bake. Trust me on this.
Step 2: Cream the butter and peanut butter. In a large bowl, beat together the softened butter and peanut butter until it’s light and fluffy. This takes about 2-3 minutes with an electric mixer. You’re looking for it to be pale and airy, not dense and heavy. This is where the magic starts.
Step 3: Add the sugars. Add both the granulated and brown sugar. Beat for another 2 minutes. The mixture should look like wet sand at this point.
Step 4: Add the egg and vanilla. Crack in your egg, add the vanilla, and beat until everything is combined. Scrape down the sides of the bowl so nothing gets left behind.
What I messed up the first time: I didn’t scrape the bowl, so I had little pockets of dry flour in my cookies. Now I’m obsessive about it.
Step 5: Mix the dry ingredients. In a separate bowl, whisk together the flour, baking soda, and salt. This prevents lumps and distributes the leavening evenly.
Step 6: Combine wet and dry. Add the dry ingredients to the wet ingredients and stir until just combined. Don’t overmix. You’re not making bread; you’re making cookies. A few flour streaks are okay.
Step 7: Fold in the Reese’s cups. Gently fold in the chopped Reese’s cups and chocolate chips. I use a rubber spatula for this because I like being gentle with my dough.
Step 8: Scoop and bake. Using a cookie scoop or a tablespoon, drop rounded portions onto your prepared baking sheets, spacing them about 2 inches apart. These cookies spread a little, so give them room.
Step 9: Into the oven. Bake for 10-12 minutes. The edges should be set, but the centers should still look slightly underbaked. This is intentional. They’ll continue cooking on the hot pan for a minute or two after you pull them out.
Step 10: Cool and enjoy. Let them cool on the baking sheet for 5 minutes, then transfer to a wire rack. They’ll firm up as they cool and reach that perfect chewy-but-set texture.
Common Mistakes to Avoid
Overbaking. This is the number one way to end up with hard, crumbly cookies. I pull mine out when they still look slightly soft in the center. They firm up as they cool, I promise.
Using cold peanut butter. Cold peanut butter won’t incorporate smoothly, and you’ll end up with lumpy dough. Let it sit out for a bit first.
Skipping the parchment paper. You can use silicone baking mats too, but something non-stick is essential. Cookies stick to bare baking sheets, and then you’re sad.
Mixing too much. Once the flour goes in, stop. Overmixing develops gluten, which makes cookies tough. We don’t want tough cookies.
Not chopping the Reese’s cups small enough. Big chunks are fun, but they can create uneven baking. Chop them into pieces about the size of a pea or smaller.
My Tested Substitutions
For the peanut butter: You can use almond butter or cashew butter if you have a peanut allergy, but the flavor will be different and slightly more delicate. The cookies will still be delicious, just not quite the same.
For the butter: I haven’t had success with coconut oil here, but I know some people swear by it. If you try it, use refined coconut oil so it doesn’t add coconut flavor.
For the egg: Use a flax egg (1 tablespoon ground flaxseed mixed with 3 tablespoons water, let sit for 5 minutes) if you’re vegan. The cookies will be slightly less chewy but still good.
For the Reese’s cups: You can use peanut butter chips mixed with chocolate chips, or you can use the full-size Reese’s cups chopped up. Just make sure you’re using about 1 cup of chocolate-peanut butter goodness total.
For the flour: I haven’t tested whole wheat flour here, but I imagine it would work if you use about 3/4 cup whole wheat and 3/4 cup all-purpose. The cookies might be slightly denser, but still delicious.
How to Customize
One of my favorite things about this recipe is that it’s flexible. Here’s how I play with it depending on my mood or what I have on hand:
Make them mini: Use a smaller cookie scoop and bake for 8-9 minutes instead. Perfect for snacking or gifting in a pretty box.
Make them bigger: Use a larger scoop and bake for 13-14 minutes. These are more like cookie cake bites, and honestly, they’re amazing.
Add crunch: Mix in 1/2 cup of crushed pretzels or chopped roasted peanuts for texture contrast.
Go fancy: Dip the cooled cookies halfway in melted chocolate and let them set on parchment paper.
Make it seasonal: Use Halloween-themed Reese’s cups in October or holiday-themed ones in December. The cookies taste the same, but they feel special.
Serving Ideas
These cookies are honestly good on their own, but here’s how I like to serve them:
- With a cold glass of milk. This is non-negotiable. The milk cuts through the richness and makes everything taste better.
- With coffee. The slight bitterness of coffee pairs beautifully with the sweet, rich cookie.
- On a dessert board alongside other treats. They look gorgeous arranged with fresh fruit or nuts.
- Slightly warmed with vanilla ice cream. If you have time, warm one up in the microwave for 10 seconds and top with a scoop of ice cream. You’ll understand why people write poetry about desserts.
- In a cookie box as a gift. Layer them between parchment paper and tie with a ribbon. People love homemade cookies.
Meal Prep and Storage
Room temperature storage: Keep these in an airtight container on your counter for up to 5 days. They’ll stay soft and chewy the whole time.
Freezing the dough: You can scoop the dough onto a baking sheet, freeze it until solid, then transfer the frozen scoops to a freezer bag. Bake them straight from frozen, adding 1-2 minutes to the baking time. This is my favorite hack for having fresh cookies whenever I want them.
Freezing baked cookies: Layer cooled cookies between parchment paper in a freezer container and freeze for up to 3 months. Thaw at room temperature for about 30 minutes before eating.
Make-ahead tip: I like to make a double batch and freeze half the dough. On a random Thursday when I want fresh cookies, I just bake a few scoops. It’s like having a secret stash of happiness in your freezer.
Nutritional Breakdown
I’m going to be real with you: these are indulgent cookies, and they should be. But here’s what you’re getting per cookie (makes about 24 cookies):
- Calories: 180
- Protein: 5g
- Carbohydrates: 18g
- Fat: 10g
- Fiber: 1g
The peanut butter gives you protein and healthy fats. The chocolate chips add a little antioxidant boost (or so I tell myself). These aren’t health food, but they’re not empty calories either. They’re treats made with real ingredients, and that counts for something.
Final Thoughts
Making these Reese’s Peanut Butter Cookies has become my favorite kind of therapy. There’s something grounding about measuring ingredients, watching dough come together, and pulling a tray of beautiful golden cookies out of the oven. It fills your house with the best smell and gives you something delicious to share with the people you care about.
I think that’s what cooking is really about, at least for me. It’s not about being perfect or impressing anyone. It’s about creating something warm and comforting and real. It’s about taking five minutes to do something kind for yourself or someone else.
These cookies do that. They’re unpretentious, they’re reliable, and they taste like someone cared enough to make them. I hope you make them soon, and I hope they bring you as much joy as they’ve brought me. Let me know how they turn out—I genuinely love hearing from people who’ve tried my recipes.
Happy baking, friends.
—
Recipe Card
Reese’s Peanut Butter Cookies
Ingredients
Method
- Preheat oven to 350°F and line two baking sheets with parchment paper.
- In a large bowl, beat together softened butter and peanut butter until light and fluffy, about 2-3 minutes.
- Add granulated sugar and brown sugar, beating for another 2 minutes until the mixture resembles wet sand.
- Add egg and vanilla extract, beating until combined. Scrape down the sides of the bowl.
- In a separate bowl, whisk together flour, baking soda, and salt.
- Add dry ingredients to wet ingredients, stirring until just combined. Do not overmix.
- Gently fold in chopped Reese's cups and chocolate chips using a rubber spatula.
- Using a cookie scoop or tablespoon, drop rounded portions onto prepared baking sheets, spacing them about 2 inches apart.
- Bake for 10-12 minutes until edges are set but centers still look slightly underbaked.
- Let cool on baking sheet for 5 minutes, then transfer to a wire