Chocolate Fudge Loaf Cake Recipe
Chocolate Fudge Loaf Cake Recipe
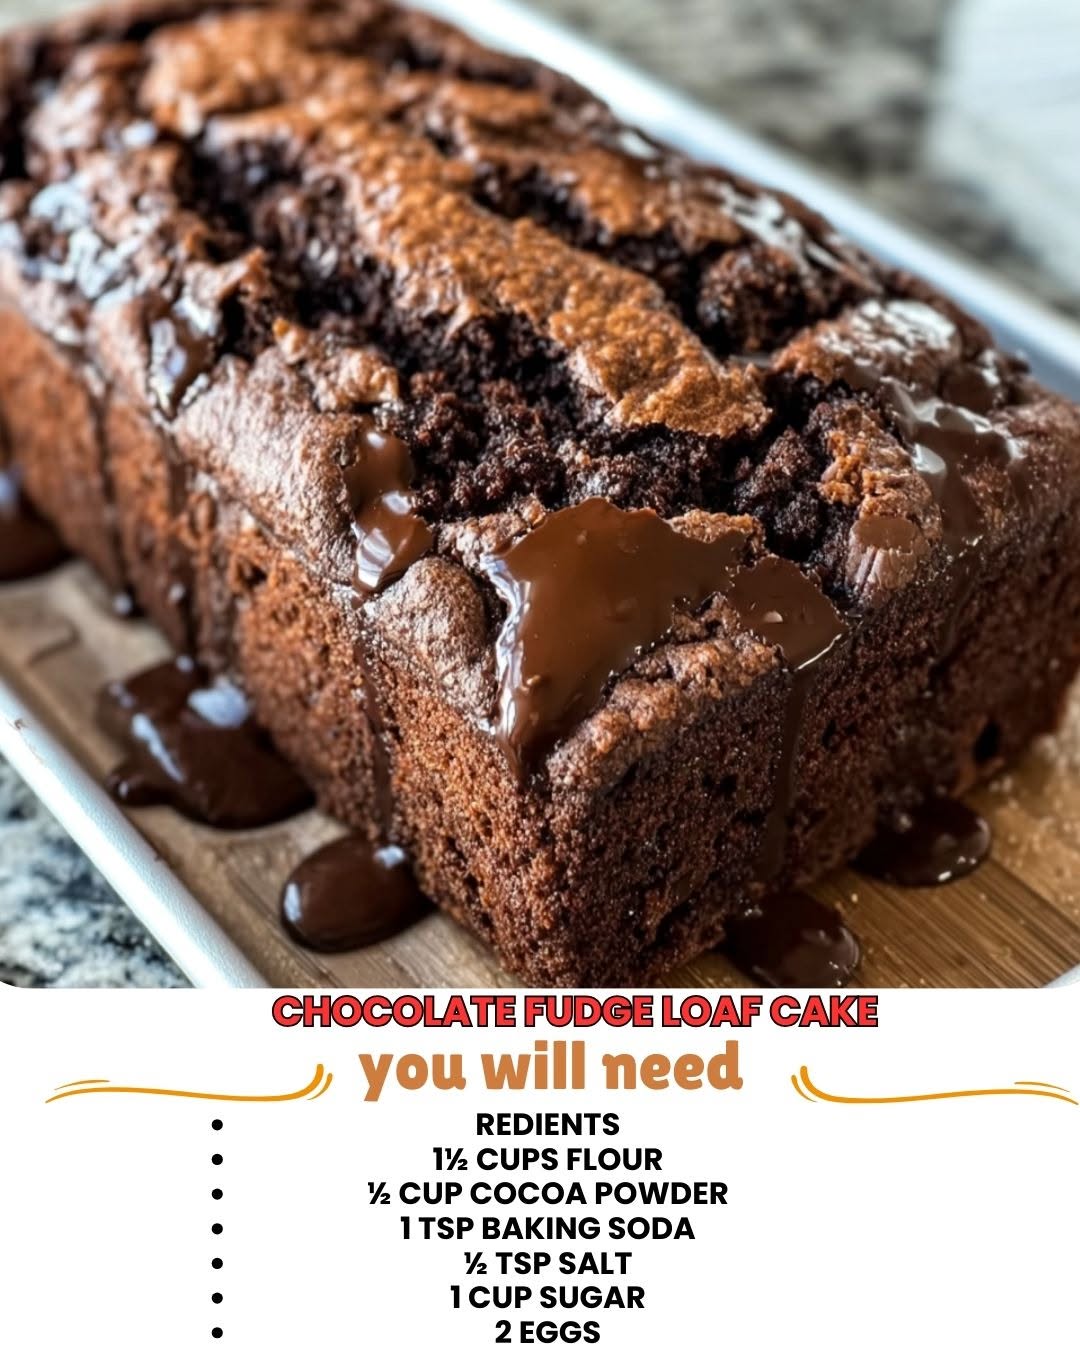
Chocolate Fudge Loaf Cake Recipe: My Go-To Cozy Dessert
There’s something about a rainy Tuesday afternoon that makes me crave chocolate. Not just any chocolate—I’m talking about that deep, fudgy, almost melting-on-your-tongue kind of chocolate that feels like a warm hug in cake form. That’s exactly what led me to develop this chocolate fudge loaf cake recipe, and honestly, it’s become my answer to almost every baking question in my life.
I first started making this cake about three years ago when my mom was going through a rough patch. She’d always been the baker in our family, and I wanted to do something that would remind her of the kitchen we grew up in. I spent a whole Saturday experimenting with different ratios, testing cocoa levels, and perfecting that fudgy crumb. By the time I pulled the final version from the oven, my kitchen smelled like a chocolate factory, and more importantly, my mom’s face when she took that first bite? Pure magic.
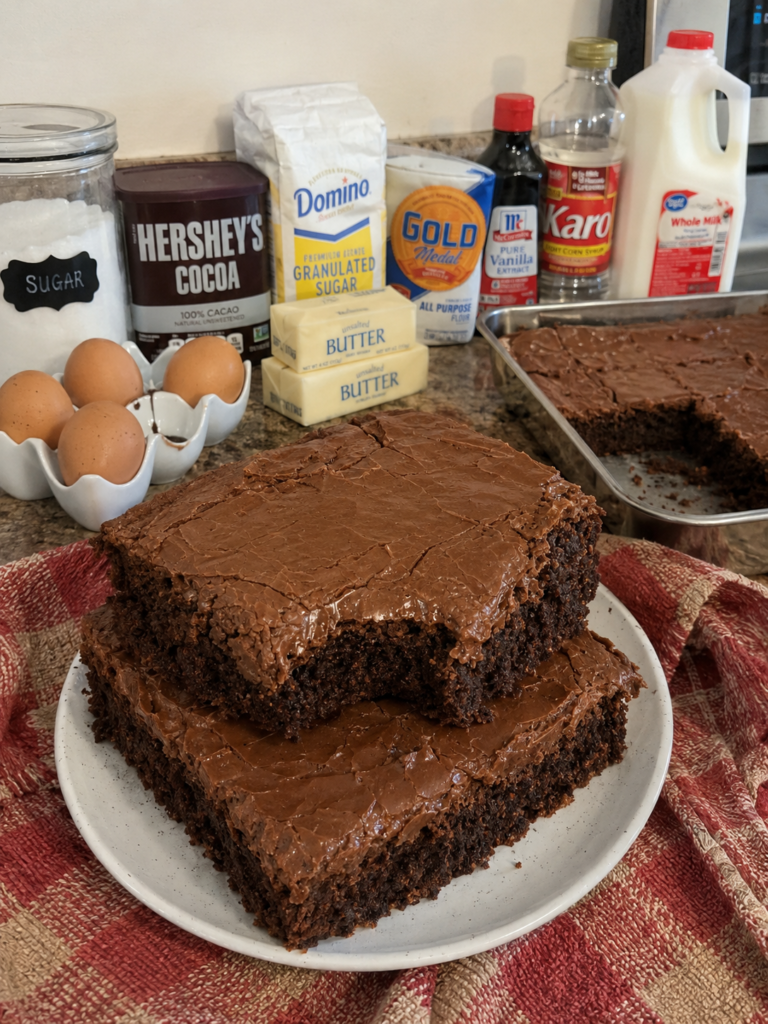
What makes this chocolate fudge loaf cake different is that it’s not overly complicated, but it also doesn’t taste like a box mix situation. It’s rich and moist without being heavy, with this beautiful fudgy center that makes people think you spent way more time on it than you actually did. The loaf shape means you get those perfectly caramelized edges, and it’s honestly the perfect size for a small household or for slicing up and sharing with neighbors.
This recipe is for anyone who loves chocolate but doesn’t want to spend three hours in the kitchen. It’s for the person who wants to impress their partner with homemade dessert on a Tuesday. It’s for kids who think they don’t like baking but actually just haven’t found their thing yet. And it’s definitely for me, on those days when nothing else will do.
If you love easy, reliable recipes that actually work, I’d love to have you follow along with my baking journey. Follow me on HaileeRecipes on Pinterest where I share all my tested favorites and kitchen adventures.
Why You’ll Love This Recipe
Let me be real with you: I’ve made a lot of chocolate cakes. Some were disasters. Some were fine. This one? This one is the sweet spot, and here’s why people keep coming back to it.
- It actually tastes homemade. There’s no weird aftertaste, no overly sweet frosting to cover up mediocre cake. Just real, honest chocolate flavor.
- The texture is chef’s kiss. It’s moist and tender without being gummy or dense. That fudgy crumb is what everyone talks about.
- You probably have everything already. No specialty ingredients, no weird chocolate percentages you have to hunt down. Pantry staples, mostly.
- It’s forgiving. I’ve made this cake at altitude, in humid weather, in my tiny apartment kitchen, and it works every single time.
- The loaf shape is practical. It fits in a standard loaf pan, slices beautifully, and looks elegant without trying too hard.
- It stays fresh for days. Unlike some cakes that dry out by day two, this one actually gets better as it sits.
Ingredients
Here’s what you’ll need. I’ve included my real-life tips for each ingredient because I want you to actually succeed with this.
- 1 3/4 cups all-purpose flour — Hailee’s Tip: Spoon and level your flour instead of scooping straight from the bag. This prevents you from packing too much in and ending up with a dense cake.
- 3/4 cup unsweetened cocoa powder — Hailee’s Tip: This is where quality matters. Splurge a little here. Dutch-process cocoa gives you that deeper, almost sophisticated chocolate flavor.
- 1 1/2 teaspoons baking soda — Hailee’s Tip: Check the expiration date on this. Old baking soda won’t give you that rise you need.
- 1/2 teaspoon baking powder — Hailee’s Tip: These two leavening agents work together, so don’t skip the baking powder just because you have baking soda.
- 1/2 teaspoon salt — Hailee’s Tip: This brings out the chocolate flavor. Don’t skip it, even if you think salt has no place in dessert.
- 3/4 cup (1 1/2 sticks) unsalted butter, softened — Hailee’s Tip: Softened means it should leave a slight indent when you press it with your finger. Not melted, not cold.
- 1 1/2 cups granulated sugar — Hailee’s Tip: You can use a mix of brown and white sugar here for extra depth, but stick with granulated if you’re new to baking.
- 2 large eggs, room temperature — Hailee’s Tip: Room temperature eggs blend better and create a more tender crumb. Take them out of the fridge 20 minutes before baking.
- 2 teaspoons vanilla extract — Hailee’s Tip: Real vanilla, please. The imitation stuff changes the flavor profile in a way you’ll notice.
- 3/4 cup sour cream — Hailee’s Tip: This is the secret weapon. It adds moisture and tanginess that balances the sweetness perfectly.
- 1/2 cup hot water or strong brewed coffee — Hailee’s Tip: Coffee deepens the chocolate without making it taste like coffee. It’s my favorite hack.
- 1/2 cup semi-sweet chocolate chips (optional, for extra fudginess) — Hailee’s Tip: Fold these in at the very end if you want pockets of melty chocolate throughout.
Optional Add-Ins and Variations
This is where you can make this recipe your own, and I genuinely love when people do that.
- Espresso powder: Add 1 teaspoon to the dry ingredients for a deeper, more sophisticated chocolate flavor.
- Cinnamon: A pinch (1/4 teaspoon) adds warmth and complexity without being obvious.
- Almond extract: Just 1/4 teaspoon alongside the vanilla creates this subtle, almost mysterious depth.
- Chocolate chunks: Use chopped dark chocolate instead of chips for a more luxe feel.
- Mint extract: If you love chocolate mint, add 1/2 teaspoon and maybe some crushed peppermints on top.
- Sea salt flakes: Sprinkle on top before baking for a sweet-salty contrast that’s absolutely addictive.
Step-by-Step Method
I’m going to walk you through this exactly how I do it in my kitchen, including the moments where I’ve messed up so you don’t have to.
Step 1: Prep your pan and preheat. Preheat your oven to 350°F. Grease a 9-by-5-inch loaf pan really well, or line it with parchment paper. I usually do both because I’m paranoid about sticking. Let the oven preheat while you do the next steps.
Step 2: Whisk the dry ingredients. In a medium bowl, whisk together your flour, cocoa powder, baking soda, baking powder, and salt. I like to whisk these together for about 30 seconds to make sure the cocoa is evenly distributed. This prevents those weird pockets of pure cocoa in your cake.
Step 3: Cream the butter and sugar. In a large bowl, beat the softened butter and sugar together for about 3 minutes. You want it to look pale and fluffy, almost like frosting. This is where the magic starts—you’re incorporating air into the batter, which gives you that tender crumb. What I messed up here for years: I’d rush this step. Don’t. Those three minutes matter.
Step 4: Add the eggs one at a time. Crack one egg into the butter mixture and beat until it’s fully incorporated before adding the second one. Then add your vanilla. This takes about 2 minutes total. The mixture should look smooth and slightly lighter than before.
Step 5: Alternate adding dry and wet ingredients. This is crucial. Add about one-third of your dry mixture and beat until just combined. Then add half of your sour cream and mix. Then another third of the dry mixture, then the rest of the sour cream, then the final third of the dry mixture. Beat gently after each addition. Don’t overmix—you want the batter to come together, but you’re not trying to develop gluten here.
Step 6: Add the coffee or hot water. Stir in your hot coffee or water gently. The batter will look thinner than you expect, almost like thick brownie batter. This is exactly right. If you’re using chocolate chips, fold them in now.
Step 7: Pour and bake. Pour the batter into your prepared loaf pan. Tap it gently on the counter a few times to release air bubbles. Bake for 50 to 60 minutes, until a toothpick inserted in the center comes out with just a few moist crumbs clinging to it. You want it fudgy, not wet. This is the hardest part—not overbaking it. I set a timer for 45 minutes and then start checking every 5 minutes after that.
Step 8: Cool completely. Let the cake cool in the pan for 15 minutes, then turn it out onto a wire rack. This prevents the bottom from getting soggy. Let it cool completely before slicing—I know it’s torture, but warm cake is fragile and will crumble. Cooled cake slices beautifully.
Common Mistakes to Avoid
I’ve made these mistakes so you don’t have to. Seriously.
- Skipping the room temperature step for eggs: Cold eggs don’t blend properly and can result in a less tender crumb. I know it feels like an extra step, but it genuinely changes the outcome.
- Overmixing the batter: Once you add the dry ingredients, treat the batter gently. Overmixing develops gluten, which makes the cake tough and dense. Mix until just combined.
- Opening the oven door too much: I used to be terrible about this. Every time you open the door, the temperature drops, and your cake bakes unevenly. Resist the urge to peek.
- Baking at the wrong temperature: If your oven runs hot or cold, invest in an oven thermometer. It’s like five dollars and prevents so many disasters.
- Not using enough cocoa powder: Some people try to reduce it to save money or because they think it’ll be less bitter. Don’t. The cocoa powder is what makes this special.
- Pulling it out too early: A slightly underbaked cake is better than an overbaked one, but you still want that toothpick test to work. A few moist crumbs is perfect. Wet batter is not.
My Tested Substitutions
Sometimes you don’t have exactly what the recipe calls for, and that’s okay. Here’s what I’ve actually swapped out and what worked.
- Sour cream: You can use Greek yogurt (same amount) or a mix of milk and lemon juice (3/4 cup milk plus 1 tablespoon lemon juice, let it sit for 5 minutes). It won’t be exactly the same, but it works.
- Butter: Coconut oil works in a pinch, but use refined so you don’t get coconut flavor. Use the same amount.
- All-purpose flour: I’ve used whole wheat pastry flour with decent results. Use the same amount, but know the cake will be slightly denser and earthier.
- Coffee: If you don’t drink coffee and don’t want to make it, use hot water. You’ll lose a tiny bit of depth, but the cake is still delicious.
- Sugar: You can substitute up to half the granulated sugar with brown sugar for a more complex flavor. Don’t go more than half, or the texture changes.
How to Customize
Make this recipe feel like yours. That’s the whole point of home baking.
For a richer, more decadent version: Use dark chocolate chips instead of semi-sweet, add an extra 1/4 cup cocoa powder to the dry ingredients, and dust the top with cocoa powder before serving.
For a lighter version: Replace half the butter with applesauce, use a mix of all-purpose and whole wheat flour, and reduce the sugar by 1/4 cup. It’ll be less fudgy but still delicious.
For a spiced chocolate version: Add 1 teaspoon cinnamon, 1/4 teaspoon cayenne pepper, and 1/4 teaspoon ground ginger to the dry ingredients. It sounds weird, but trust me.
For a boozy adult version: Replace the coffee with 1/2 cup strong brewed coffee mixed with 2 tablespoons of your favorite liqueur (I love brandy or Kahlúa here).
Serving Ideas
This cake is honestly perfect on its own, but here are some ways I like to dress it up.
- Dusted with powdered sugar: Simple, elegant, and makes it look fancier than it is.
- With whipped cream and fresh berries: The tartness of raspberries or strawberries cuts through the richness beautifully.
- With a drizzle of chocolate ganache: Melt 4 ounces of dark chocolate with 1/4 cup heavy cream, let it cool slightly, and drizzle over slices.
- With a scoop of vanilla ice cream: Warm cake with cold ice cream is a classic combination for a reason.
- With espresso on the side: A small cup of strong coffee alongside a slice is my favorite afternoon moment.
- Crumbled over Greek yogurt: For breakfast (don’t judge me), I sometimes crumble leftover cake over yogurt with granola.
Meal Prep and Storage
This is where this recipe really shines in terms of practicality.
Room temperature storage: Wrap the cooled loaf tightly in plastic wrap and keep it on the counter for up to 3 days. It actually stays moist and improves slightly as the flavors meld.
Refrigerator storage: Wrapped tightly, this cake keeps in the fridge for up to a week. It won’t dry out. I promise.
Freezer storage: Wrap the completely cooled loaf in plastic wrap, then aluminum foil, and freeze for up to 3 months. Thaw at room temperature for about 2 hours before serving.
Freezing individual slices: This is my favorite move. Slice the cooled cake, wrap each slice individually in plastic wrap, and store in a freezer bag. You can pull out one slice whenever you want a little chocolate moment. Thaw for 30 minutes at room temperature.
Make-ahead tip: You can prepare the batter up to 2 hours ahead and keep it covered in the fridge. Baking time might be 5 minutes longer since the batter will be cold.
Nutritional Breakdown
I’m not a nutritionist, but I do think it’s helpful to know what you’re eating. This is per slice, assuming you cut the loaf into 10 slices.
- Calories: 285
- Protein: 4g
- Carbohydrates: 38g
- Fat: 13g
- Fiber: 2g
- Sugar: 28g
Keep in mind that these are estimates and can vary based on your specific ingredients. If you use a food scale and weigh your ingredients, your nutritional info will be more accurate.
Final Thoughts
This chocolate fudge loaf cake recipe has become my answer to so many situations. A friend going through something tough? Baked good incoming. A potluck I forgot about until the last minute? This cake has my back. A Tuesday that just needs chocolate? Say no more.
What I love most about sharing this recipe with you is that it’s not precious or complicated. It doesn’t require special equipment or exotic ingredients. It just requires you to show up in your kitchen and make something with your
Chocolate Fudge Loaf Cake Recipe
Ingredients
Method
- I'm going to walk you through this exactly how I do it in my kitchen, including the moments where I've messed up so you don't have to. Step 1: Prep your pan and preheat. Preheat your oven to 350°F. Grease a 9-by-5-inch loaf pan really well, or line it with parchment paper. I usually do both because I'm paranoid about sticking. Let the oven preheat while you do the next steps. Step 2: Whisk the dry ingredients. In a medium bowl, whisk together your flour, cocoa powder, baking soda, baking powder, and salt. I like to whisk these together for about 30 seconds to make sure the cocoa is evenly distributed. This prevents those weird pockets of pure cocoa in your cake. Step 3: Cream the butter and sugar. In a large bowl, beat the softened butter and sugar together for about 3 minutes. You want it to look pale and fluffy, almost like frosting. This is where the magic starts—you're incorporating air into the batter, which gives you that tender crumb. What I messed up here for years: I'd rush this step. Don't. Those three minutes matter. Step 4: Add the eggs one at a time. Crack one egg into the butter mixture and beat until it's fully incorporated before adding the second one. Then add your vanilla. This takes about 2 minutes total. The mixture should look smooth and slightly lighter than before. Step 5: Alternate adding dry and wet ingredients. This is crucial. Add about one-third of your dry mixture and beat until just combined. Then add half of your sour cream and mix. Then another third of the dry mixture, then the rest of the sour cream, then the final third of the dry mixture. Beat gently after each addition. Don't overmix—you want the batter to come together, but you're not trying to develop gluten here. Step 6: Add the coffee or hot water. Stir in your hot coffee or water gently. The batter will look thinner than you expect, almost like thick brownie batter. This is exactly right. If you're using chocolate chips, fold them in now. Step 7: Pour and bake. Pour the batter into your prepared loaf pan. Tap it gently on the counter a few times to release air bubbles. Bake for 50 to 60 minutes, until a toothpick inserted in the center comes out with just a few moist crumbs clinging to it. You want it fudgy, not wet. This is the hardest part—not overbaking it. I set a timer for 45 minutes and then start checking every 5 minutes after that. Step 8: Cool completely. Let the cake cool in the pan for 15 minutes, then turn it out onto a wire rack. This prevents the bottom from getting soggy. Let it cool completely before slicing—I know it's torture, but warm cake is fragile and will crumble. Cooled cake slices beautifully.