Chocolate-Covered Christmas Ritz Peanut Butter Cookies
Chocolate-Covered Christmas Ritz Peanut Butter Cookies

These Chocolate-Covered Christmas Ritz Peanut Butter Cookies combine salty, buttery crackers with creamy peanut butter and rich milk chocolate for a festive, no-bake treat that sets quickly on your holiday counter.
Ingredients
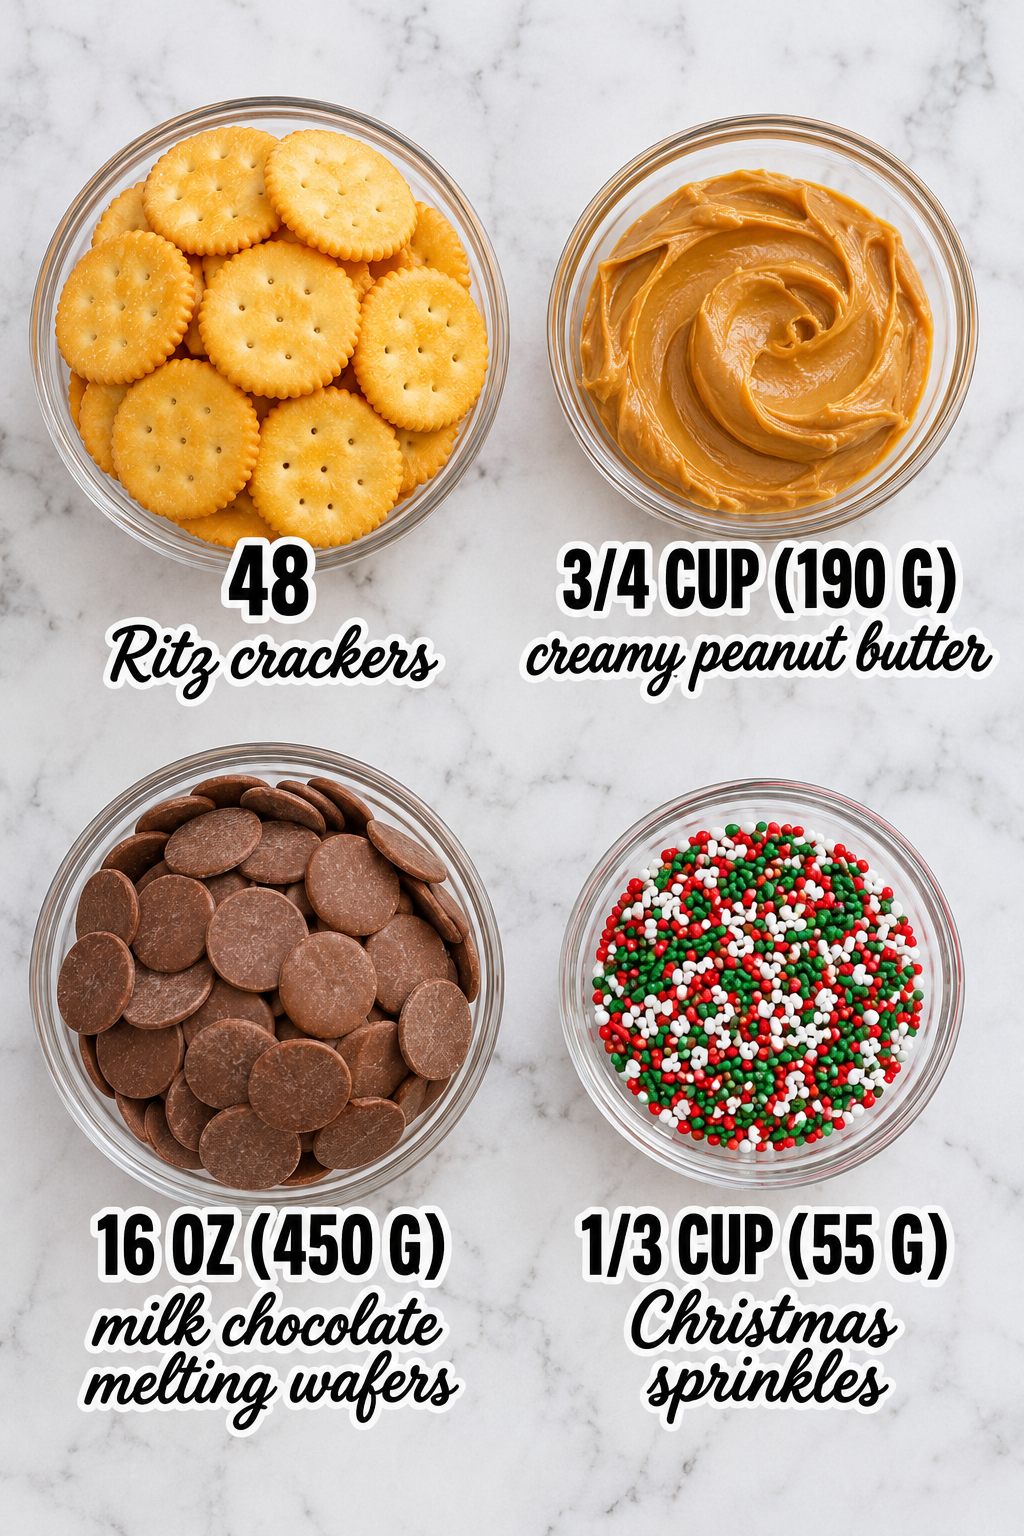
- 48 Ritz crackers: You will need exactly two full sleeves of these buttery round crackers. Ensure they are fresh and crisp; stale crackers will make the sandwich soggy before you even dip them.
- 3/4 cup (190 g) creamy peanut butter: Use standard commercial creamy peanut butter rather than natural or oil-separating varieties. The emulsifiers in standard brands help the filling hold its shape without oozing out when dipped in warm chocolate.
- 16 oz (450 g) milk chocolate melting wafers: These are specifically formulated to melt smoothly without seizing. Do not substitute with standard chocolate chips, as they contain stabilizers that prevent proper dipping consistency unless you add extra fat.
- 1/3 cup (55 g) Christmas sprinkles: Choose nonpareils or jimmies that adhere well to wet chocolate. Avoid large decorative pieces that might slide off the curved surface of the cracker once the chocolate hardens.
How To Make Chocolate-Covered Christmas Ritz Peanut Butter Cookies
- Assemble the Cracker Sandwiches
Begin by laying out 24 Ritz crackers on a clean, dry work surface. Scoop approximately one tablespoon of the creamy peanut butter onto the center of each cracker, spreading it gently to the edges but leaving a tiny margin so it doesn’t squeeze out when topped. Place the remaining 24 Ritz crackers directly on top of the peanut butter layer. Press down gently but firmly with your fingertips to create 24 neat, uniform sandwiches. This pressing step is crucial; if the layers are loose, the sandwich may separate during the dipping process, causing the peanut butter to smear on the fork or the chocolate coating to crack. If any peanut butter squeezes out the sides, wipe it away immediately with a damp paper towel to ensure a clean edge for the chocolate dip.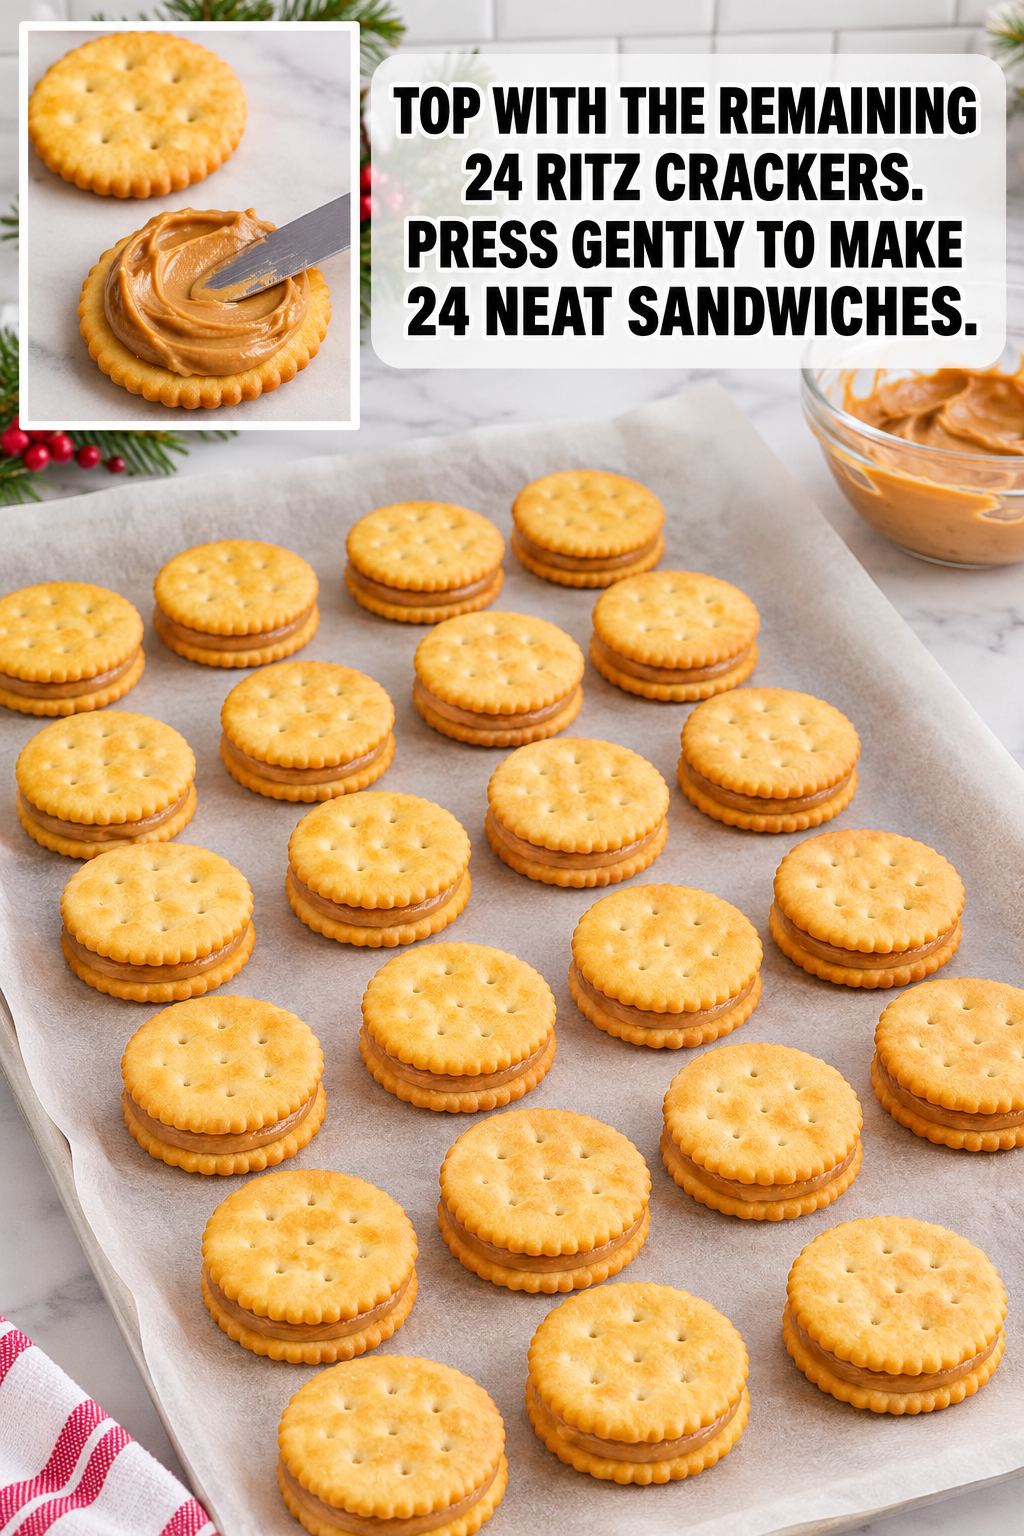
- Melt the Chocolate Wafers Properly
While the sandwiches rest, prepare your chocolate coating. Break the 16 oz (450 g) of milk chocolate melting wafers into smaller pieces to ensure even melting. Place the wafers in a microwave-safe bowl or a heatproof glass bowl set over a pot of simmering water (double boiler method). If using a microwave, heat in 30-second intervals, stirring vigorously between each interval, until the chocolate is completely smooth and fluid. If using a double boiler, ensure the bottom of the bowl does not touch the water, and stir constantly until melted. The chocolate should be thin enough to coat the back of a spoon but not so hot that it melts the peanut butter inside the cracker. If the chocolate becomes too thick or grainy, it has likely seized; add a teaspoon of vegetable shortening or coconut oil to restore流动性, though high-quality melting wafers usually do not require this adjustment. - Dip Each Sandwich Completely
Hold a fork in one hand and use it to lift one assembled cracker sandwich from your tray. Lower the sandwich into the bowl of melted chocolate, ensuring it is fully submerged. Tilt the fork slightly to allow the chocolate to flow over the top and sides, creating a complete seal. Lift the sandwich out slowly, allowing the excess chocolate to drip back into the bowl for about 3 to 5 seconds. This dripping time prevents the cookies from becoming too heavy with chocolate, which can cause them to slide off the parchment paper later. Be careful not to let the fork touch the bottom of the bowl, as this can introduce air bubbles or uneven coating thickness.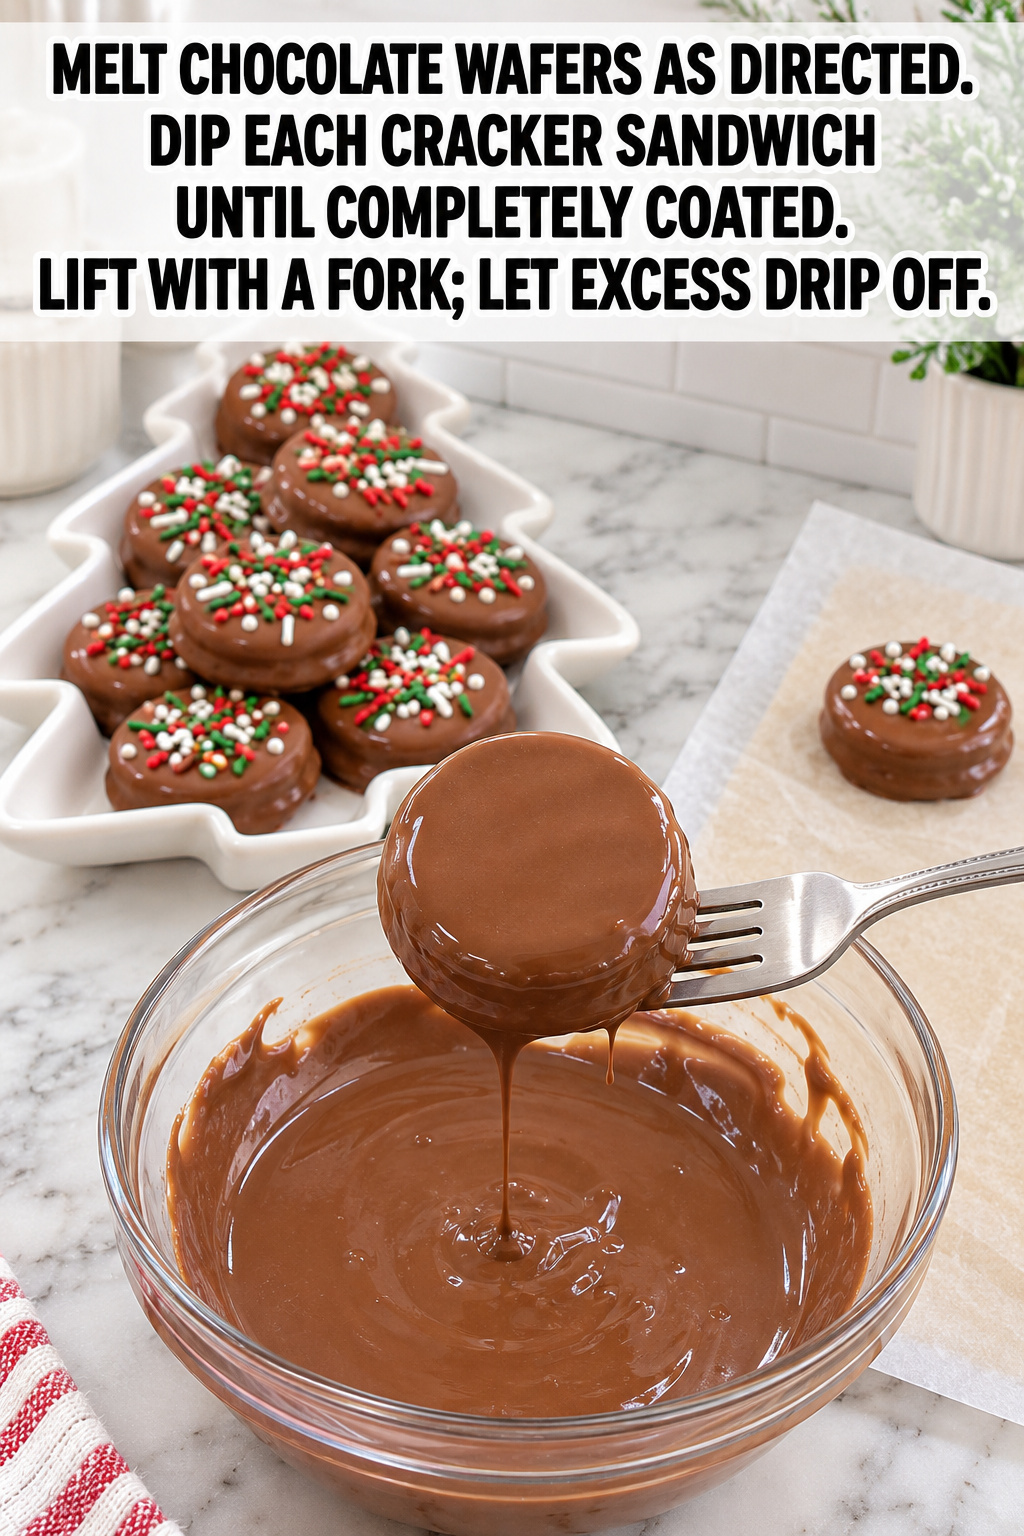
- Place on Parchment and Add Sprinkles
Immediately transfer the coated sandwich to a baking sheet lined with fresh parchment paper. The parchment is essential because chocolate sticks aggressively to metal or glass surfaces once cooled. While the chocolate is still visibly wet and glossy, sprinkle the Christmas sprinkles over the top. You only need to do this while the chocolate is wet; once the chocolate begins to set, the sprinkles will bounce off or fail to adhere. Distribute the sprinkles evenly across the surface of each cookie. Work efficiently through the batch, as the chocolate will begin to firm up within minutes depending on your kitchen temperature. If the chocolate starts to thicken too much in the bowl, briefly re-melt it for 10 seconds to maintain a smooth dipping consistency.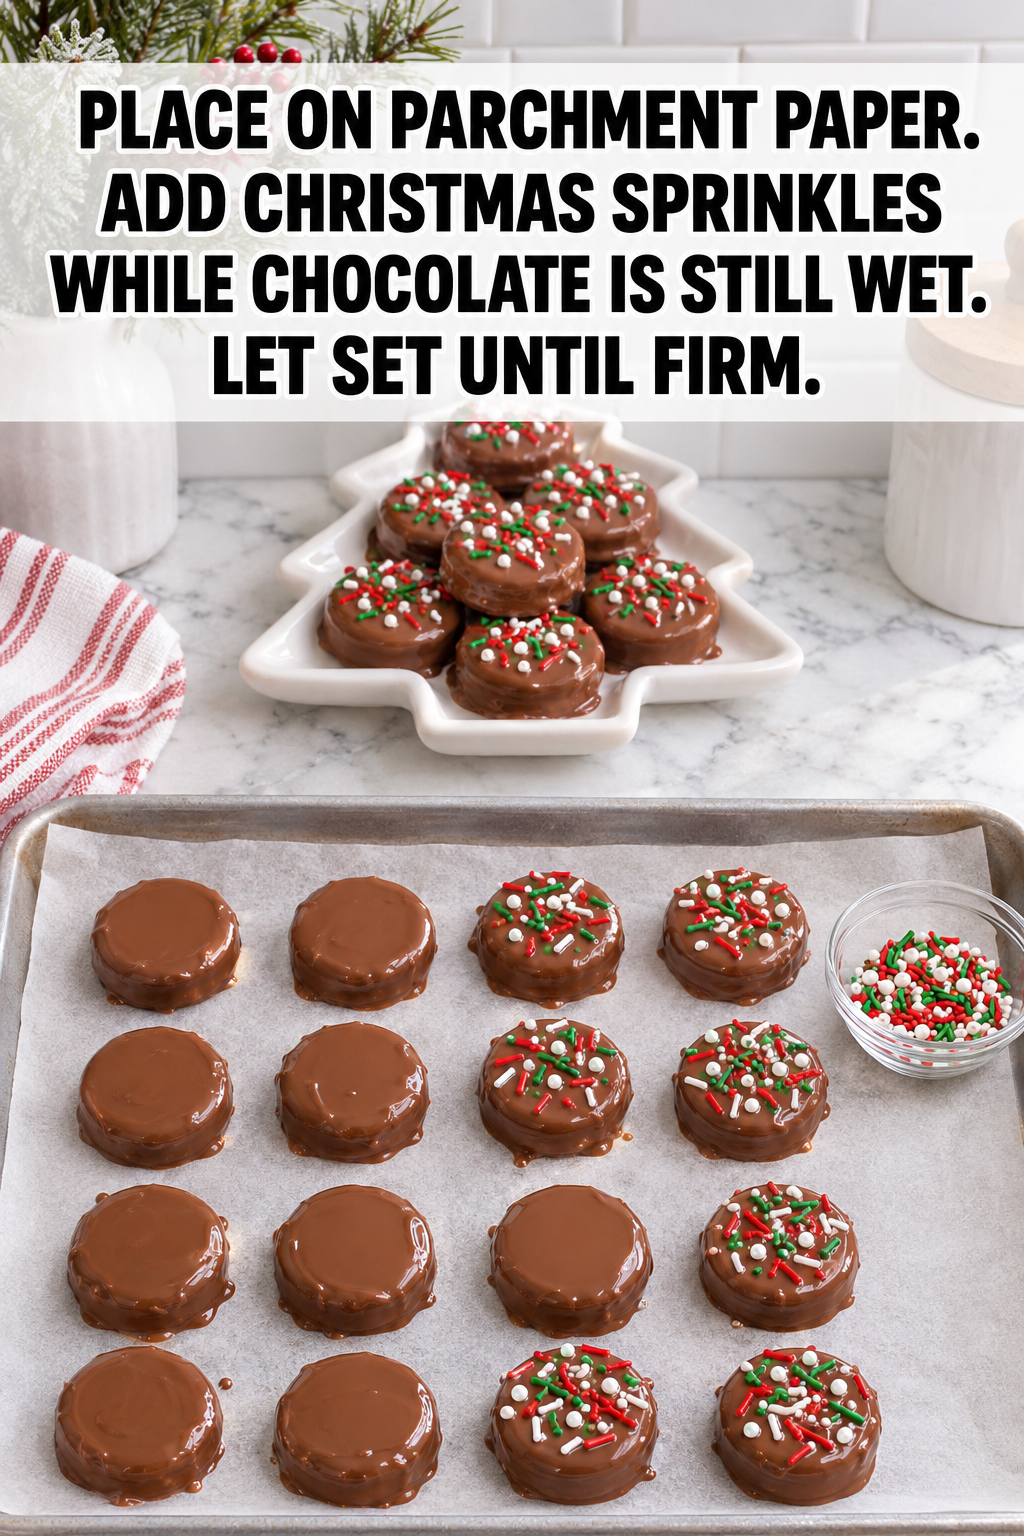
- Let Set Until Firm
Once all 24 cookies are coated and decorated, place the baking sheet in the refrigerator to speed up the setting process. Allow the cookies to chill for at least 15 to 20 minutes, or until the chocolate is completely hard to the touch. Rushing this step by moving them while soft will result in smudged designs or broken coatings. Once firm, carefully peel the cookies off the parchment paper. They are now ready to serve. If you are preparing these ahead of time, stack them in an airtight container with parchment paper between layers to prevent sticking. Store them in the refrigerator until serving to maintain the structural integrity of the cracker and peanut butter filling.
Why This Recipe Works
The success of this recipe relies on the specific balance of textures and the chemistry of the ingredients. The saltiness of the Ritz cracker provides a necessary contrast to the sweetness of the milk chocolate and peanut butter, preventing the treat from becoming cloyingly sweet. Using creamy peanut butter ensures a smooth texture that binds the two crackers together without gaps, while the specific formulation of melting wafers guarantees a glossy finish that snaps cleanly when bitten. The quick-chill method solidifies the fat in the chocolate rapidly, locking the structure in place so the delicate cracker base remains crisp rather than softening from the moisture of the filling.
Doneness And Troubleshooting
The primary indicator of doneness is the visual and tactile state of the chocolate coating. It should appear matte and opaque, not shiny or tacky. If the chocolate feels sticky after chilling, it may not have been allowed to set long enough, or the room temperature was too high. Simply return the tray to the refrigerator for another 10 minutes. If the peanut butter leaks out during dipping, your sandwiches were likely not pressed firmly enough, or the peanut butter was too warm. Always ensure your peanut butter is at cool room temperature, not straight from the fridge or heated by handling. Another common issue is the chocolate seizing or becoming grainy; this happens if water gets into the bowl or if the chocolate is overheated. If this occurs, discard the batch and start with fresh wafers, ensuring all utensils are completely dry.
Substitutions And Variations
For those with dietary restrictions or flavor preferences, there are several viable adjustments. You can swap the milk chocolate melting wafers for dark chocolate or white chocolate melting wafers to change the sweetness level. If you prefer a nut-free environment, replace the peanut butter with sunflower seed butter or a soy-based spread, keeping in mind that the flavor profile will shift slightly. For a more festive look, you can mix red and green sprinkles with white nonpareils, or use edible glitter instead of traditional sprinkles. Note that using natural peanut butter (oil separates) may require adding a small amount of powdered sugar or cornstarch to thicken the filling, otherwise, it may ooze out of the sides when dipped.
Serving Suggestions
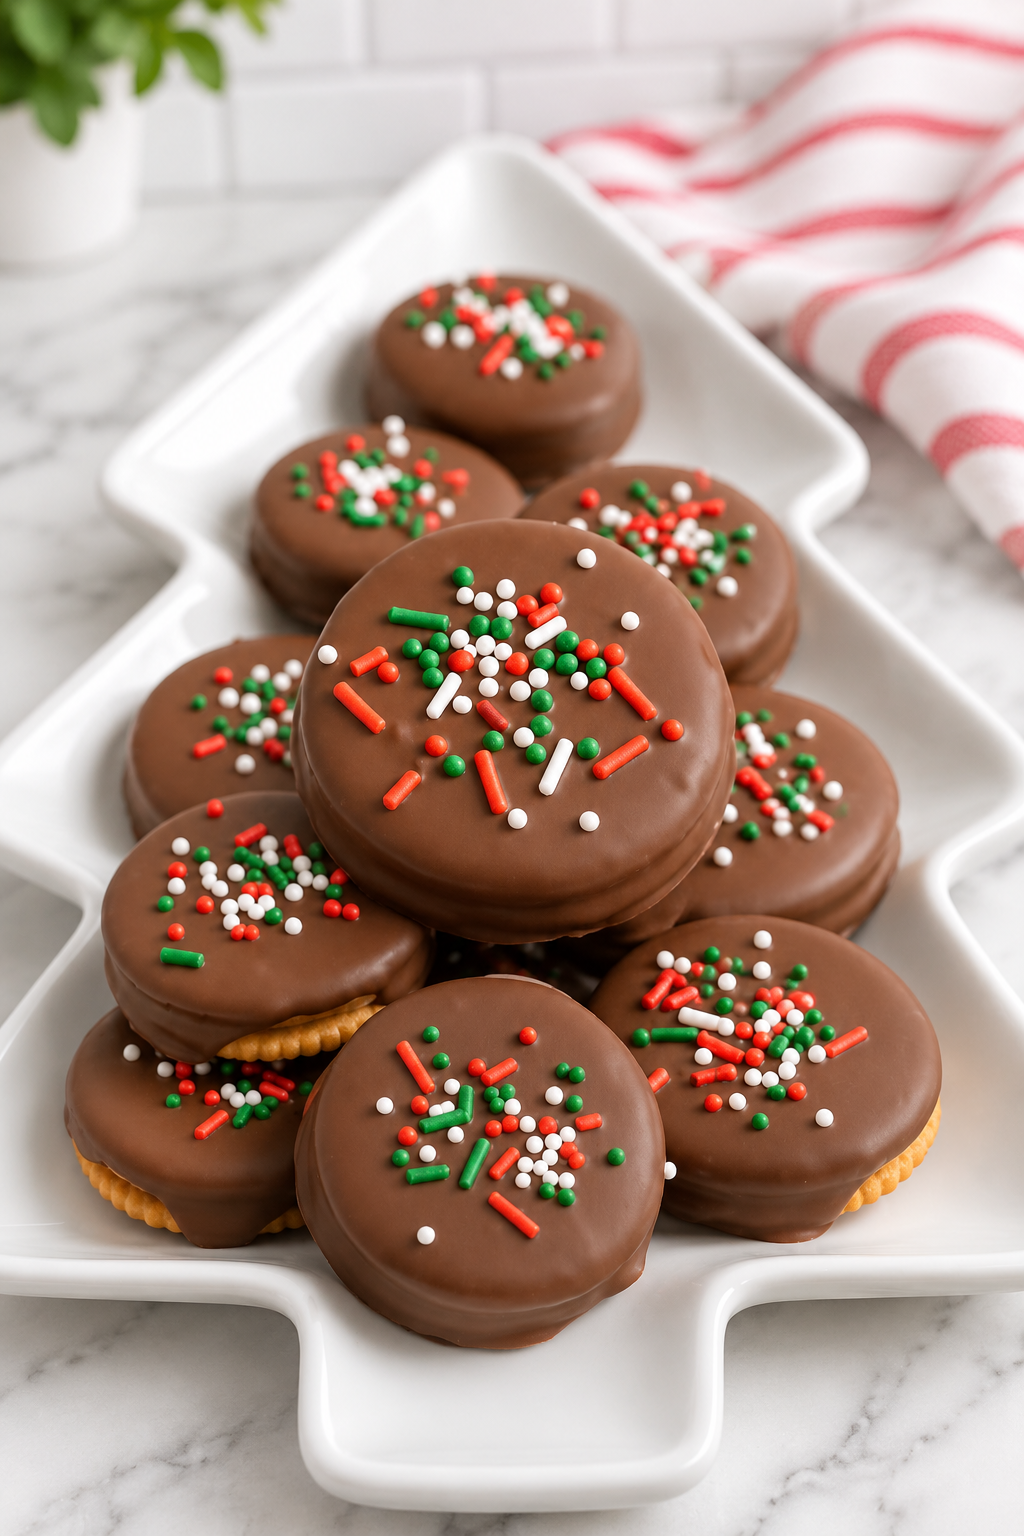
These cookies are ideal for holiday parties, school gift exchanges, or as a last-minute dessert when you have unexpected guests. Arrange them on a white platter shaped like a Christmas tree, as suggested by the visual presentation, to enhance the seasonal theme. They pair beautifully with a cold glass of milk or a cup of hot cocoa. Because they are bite-sized, they are perfect for buffet tables where guests can grab one or two without needing a plate. You can also package them individually in clear cellophane bags tied with red ribbon for easy party favors.
Storage And Reheating
Store the finished cookies in an airtight container in the refrigerator for up to one week. The cool environment keeps the chocolate firm and prevents the crackers from absorbing moisture from the air, which would make them chewy. If you need to store them for longer, you can freeze them for up to three months. Place a layer of parchment paper between each layer of cookies in the freezer bag to prevent them from sticking together. To serve frozen cookies, simply let them sit at room temperature for 5 minutes; do not attempt to reheat them in a microwave, as this will melt the chocolate and soften the cracker.
This simple combination of pantry staples creates a crowd-pleasing treat that requires no oven and minimal effort. For more festive ideas and easy recipes, Follow Hailee Recipes on Pinterest.
Chocolate-Covered Christmas Ritz Peanut Butter Cookies
Ingredients
Method
- Assemble the cracker sandwiches by placing peanut butter on 24 crackers and topping with the remaining 24; press gently to secure.
- Melt the chocolate wafers in a microwave-safe bowl or double boiler until smooth and fluid.
- Dip each sandwich into the melted chocolate using a fork, ensuring complete coverage, and let excess drip off.
- Place the coated sandwiches on parchment paper and immediately sprinkle with Christmas sprinkles while the chocolate is wet.
- Refrigerate until the chocolate is completely firm, then serve.