These Chocolate Chip Cookie Sticks offer the familiar, comforting taste of a classic cookie in a convenient, shareable stick form that is perfect for dipping into hot cocoa or enjoying as a portable treat.
Ingredients
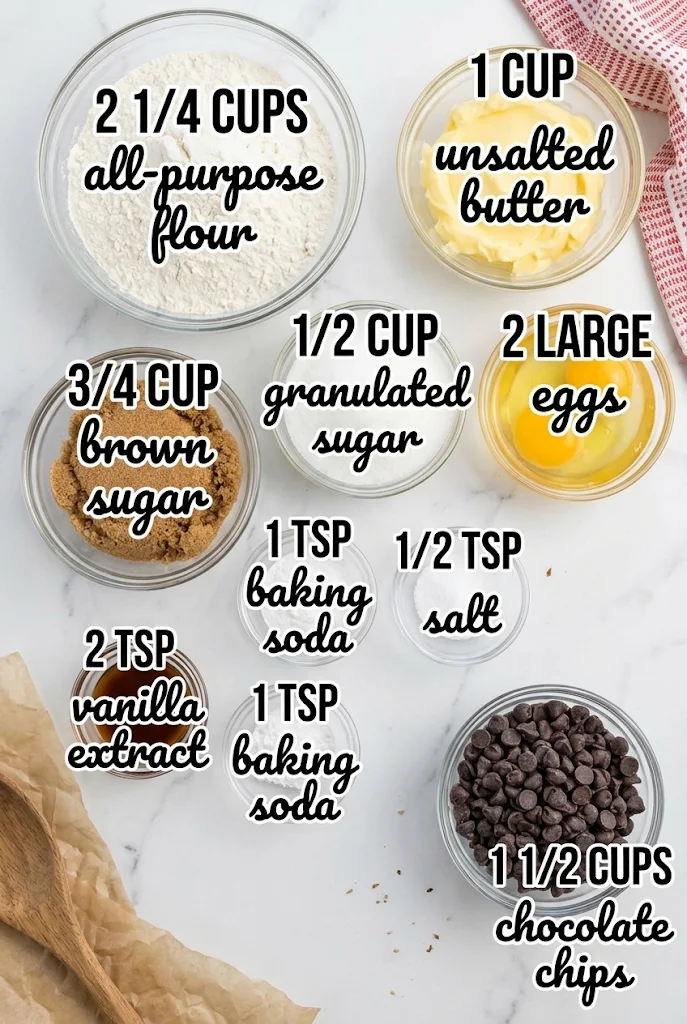
- 2 1/4 cups all-purpose flour: This provides the structural backbone. Using standard all-purpose flour ensures the sticks hold their shape without becoming too cakey or too dense.
- 1 cup unsalted butter: Softened to room temperature, this creates a rich, tender crumb and contributes significantly to the golden-brown color during baking.
- 3/4 cup brown sugar: Packed firmly, this adds moisture and a deep caramel-like flavor that keeps the cookies chewy rather than crisp.
- 1/2 cup granulated sugar: This helps with spreading and creates a slight crunch on the edges while balancing the sweetness of the brown sugar.
- 2 large eggs: These act as the binding agent, holding the fat and dry ingredients together while adding richness and structure.
- 1 tsp baking soda: Essential for leavening, this ingredient helps the dough rise slightly and promotes browning.
- 1/2 tsp salt: A crucial flavor enhancer that balances the sweetness and intensifies the chocolate notes.
- 2 tsp vanilla extract: Adds a warm, aromatic depth that complements the butter and chocolate perfectly.
- 1 1/2 cups semi-sweet chocolate chips: The star of the show; these provide pockets of melted chocolate in every bite.
How To Make Chocolate Chip Cookie Sticks
- Cream the Butter and Sugars
Begin by ensuring your butter is truly softened; it should yield easily to gentle pressure but not be melted or greasy. In a large mixing bowl, combine the 1 cup of softened unsalted butter, 3/4 cup of brown sugar, and 1/2 cup of granulated sugar. Using an electric hand mixer or a stand mixer fitted with the paddle attachment, beat these ingredients on medium speed until the mixture becomes light, fluffy, and creamy. This process usually takes about 2 to 3 minutes. The goal is to incorporate air into the fat, which will help create a lighter texture in the final baked goods. If you under-mix, the cookies may turn out dense and heavy. If you over-mix, the butter might become too warm, causing the cookies to spread too thin. Scrape down the sides of the bowl occasionally to ensure everything is evenly incorporated.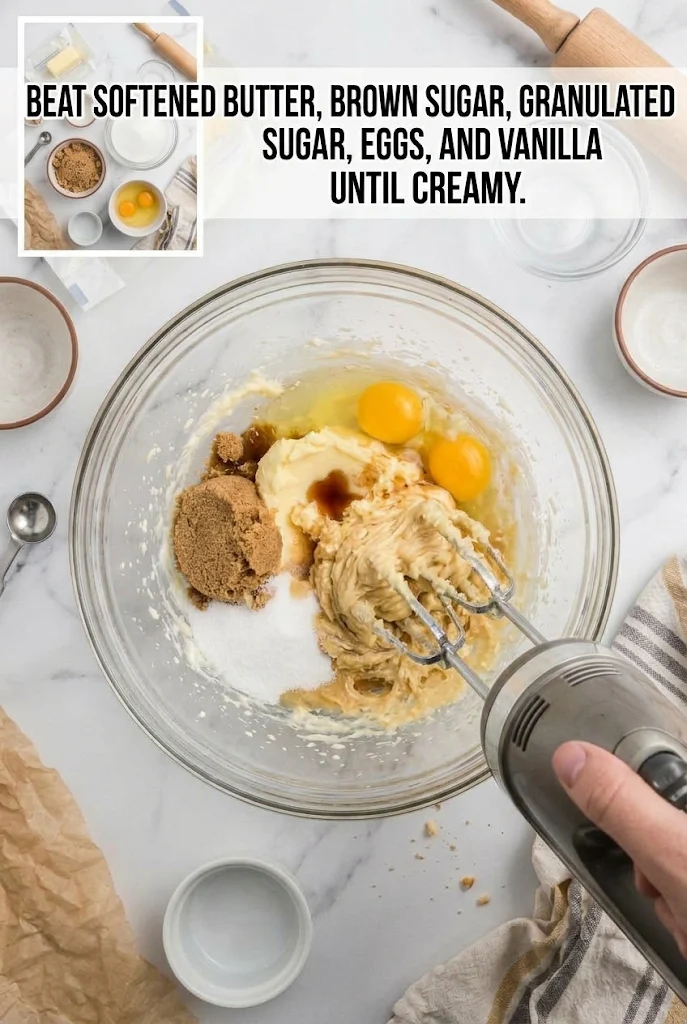
- Incorporate Eggs and Vanilla
Add the 2 large eggs one at a time to the creamed butter mixture, beating well after each addition. Ensure each egg is fully blended before adding the next to prevent the mixture from curdling. Once both eggs are mixed in, pour in the 2 teaspoons of vanilla extract. Continue to mix on low speed just until the vanilla is distributed throughout the batter. At this stage, the mixture should look smooth and consistent. Avoid over-beating at this point, as excessive agitation can develop gluten in the flour later, leading to tough cookies. The wet ingredients are now ready to receive the dry components. - Mix Dry Ingredients and Fold in Chocolate
In a separate medium bowl, whisk together the 2 1/4 cups of all-purpose flour, 1 teaspoon of baking soda, and 1/2 teaspoon of salt. Whisking these dry ingredients first ensures that the leavening agent and salt are evenly distributed throughout the flour, preventing bitter spots or uneven rising. Reduce your mixer speed to low and gradually add the dry mixture to the wet ingredients. Mix only until the flour streaks disappear; the dough will look somewhat shaggy at first but will come together quickly. Do not overmix once the flour is added. Once the dough is formed, switch to a spatula or wooden spoon and gently fold in the 1 1/2 cups of semi-sweet chocolate chips. Be careful not to crush the chips as you fold them in; you want distinct chunks of chocolate to remain intact within the dough.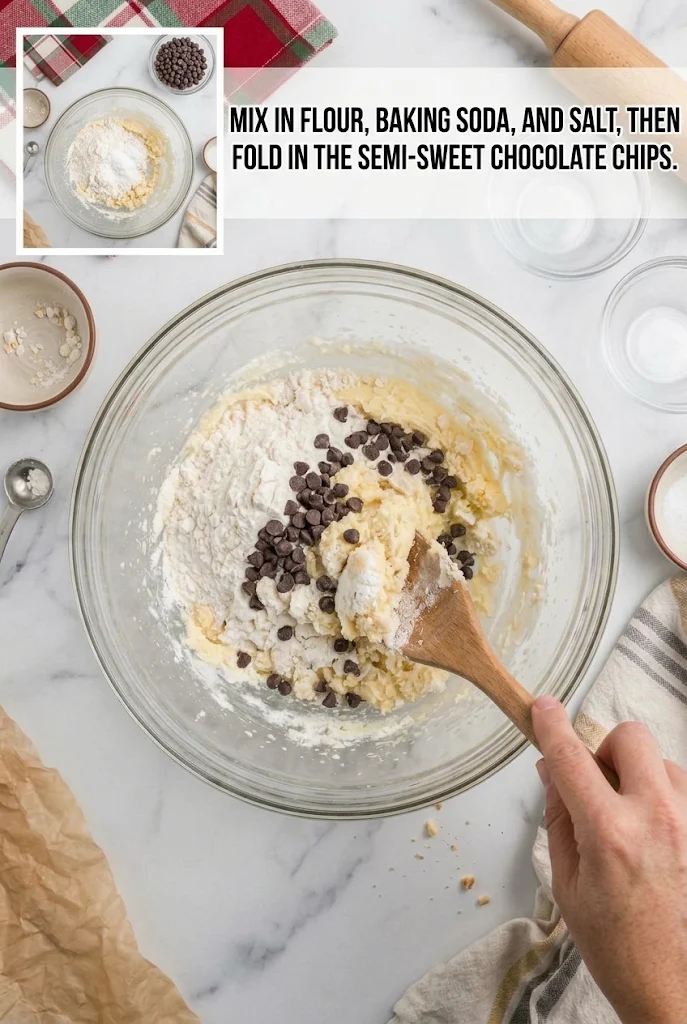
- Press Dough Into Pan
Preheat your oven to 350°F (175°C) while you prepare your baking sheet. Line a large rectangular baking pan, such as a 9×13 inch pan, with parchment paper, leaving a slight overhang on two opposite sides for easy removal later. Transfer the cookie dough onto the prepared pan. Using a piece of parchment paper or a flat-bottomed measuring cup, press the dough down firmly and evenly across the entire surface of the pan. You want the layer to be uniform in thickness, approximately 1/2 inch thick, so that the sticks bake evenly. If the dough is too thick in the center, the middle won’t cook through properly. If it is too thin, the edges will burn before the center is done. Smooth the top with your hands or the back of a spoon to create a flat, even surface.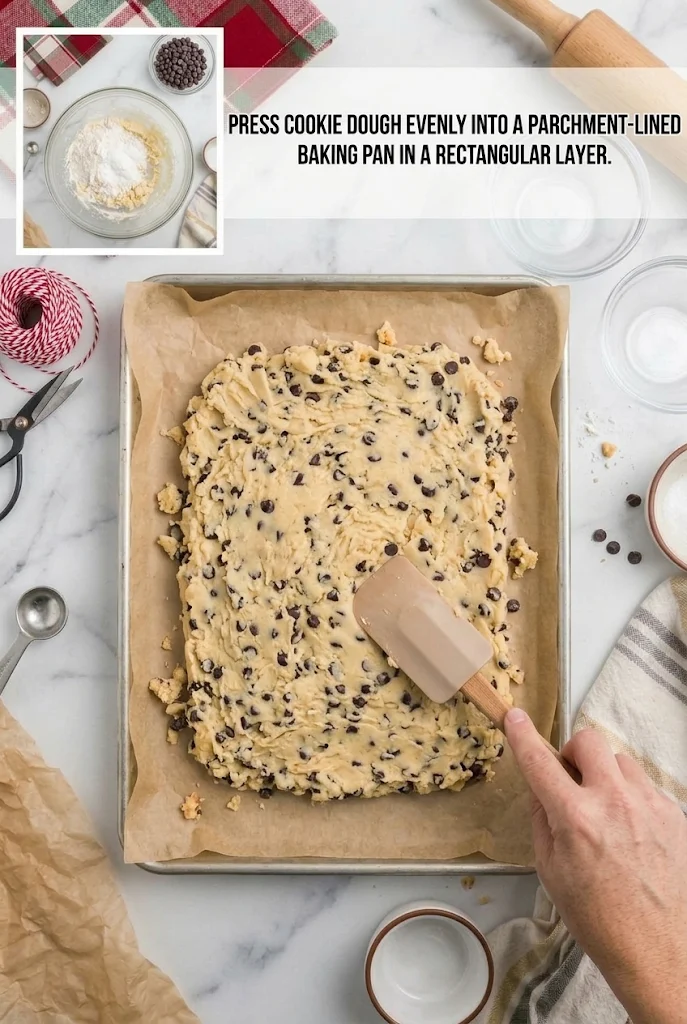
- Bake Until Golden
Place the pan in the center rack of the preheated oven. Bake for 20 to 25 minutes. The exact time depends on your oven’s calibration and the specific type of chocolate chips used. Watch closely around the 20-minute mark. The cookies are done when the edges are a deep golden brown and the center looks set but still soft. The tops should have a matte finish rather than a shiny, raw look. If the edges are browning too quickly, you can tent the pan loosely with aluminum foil for the last few minutes of baking. Overbaking will result in hard, brittle sticks, while underbaking will make them too soft to cut cleanly. Remove the pan from the oven and let it cool on a wire rack for about 10 to 15 minutes. The cookies need to firm up slightly to hold their shape when sliced. - Slice Into Sticks
Once the baked sheet has cooled slightly but is still warm enough to be pliable, use a sharp knife or a pizza cutter to slice the rectangle into long, even strips. Aim for strips that are about 1 inch wide, though you can adjust this based on your preference. Cutting while the cookie is completely cold can cause it to crack and shatter, while cutting while it is piping hot will result in messy, misshapen pieces. The “warm” window is the sweet spot where the cookie is firm enough to cut cleanly but flexible enough to bend slightly without breaking. Arrange the finished sticks on a serving platter or cooling rack to finish cooling completely before serving.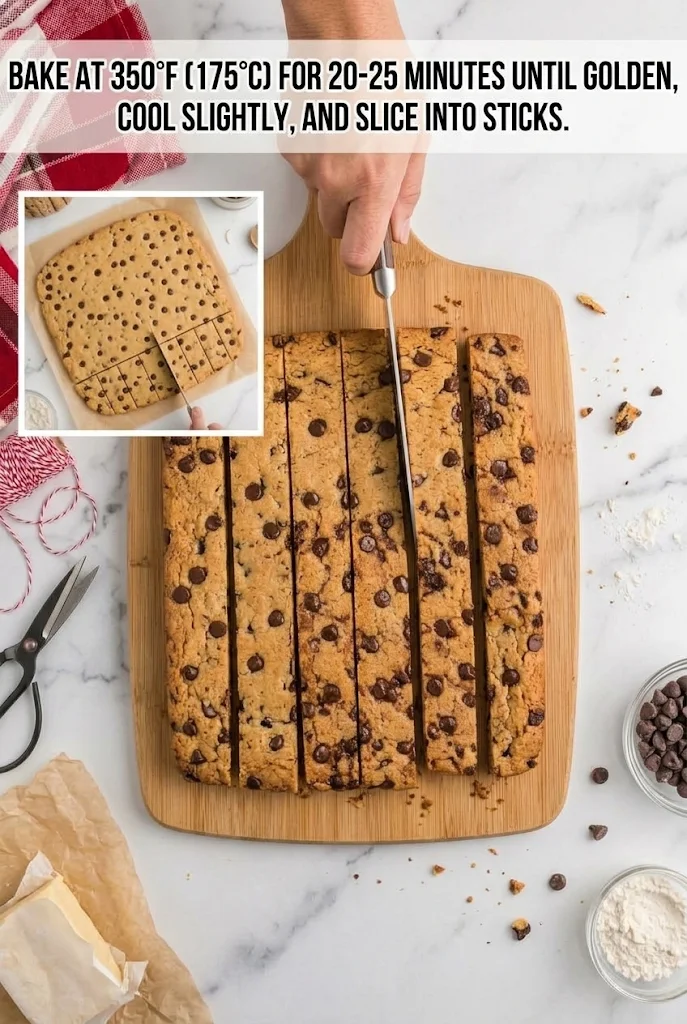
Why This Recipe Works
This recipe transforms a standard drop-cookie formula into a sheet-pan format, which offers several culinary advantages. By pressing the dough into a single layer, you eliminate the variables associated with spacing individual cookies, ensuring that every stick bakes at the same rate. The combination of brown sugar and granulated sugar creates a complex flavor profile: the brown sugar retains moisture for a chewy interior, while the white sugar encourages a bit of spread and edge crispness. Baking at 350°F allows the heat to penetrate the thicker dough slab evenly, cooking the center through without burning the exterior. The inclusion of baking soda ensures a proper rise, giving the sticks a tender lift rather than a flat, dense texture. Finally, slicing the sheet after a brief rest allows the structure to set, making the sticks sturdy enough to handle and dip without crumbling.
Doneness And Troubleshooting
Determining the perfect doneness for sheet cookies requires visual cues rather than a timer alone. Look for the edges to turn a rich golden brown; if they are pale, the cookie needs more time. The center should look set and no longer appear wet or glossy. If the center still looks raw and liquid, return the pan to the oven for another 2-3 minutes. Conversely, if the edges are dark brown and the top looks dry and cracked, the cookies are likely overbaked.
If your sticks are cracking when you try to slice them, the dough was likely pressed too thinly or the cookies were allowed to cool completely before cutting. Always wait for the “slightly warm” stage mentioned in the method. If the sticks are too soft to hold their shape, they may need a few more minutes in the oven to set the structure. For uneven browning, rotate the pan halfway through the baking time if your oven has hot spots.
Substitutions And Variations
You can customize these sticks to suit different dietary needs or flavor preferences. For a dairy-free version, substitute the unsalted butter with a high-quality plant-based butter stick that contains similar fat content. Note that some plant butters contain more water, which might alter the texture slightly, so check the label for a 1:1 substitution ratio. To make the recipe gluten-free, replace the all-purpose flour with a 1-to-1 gluten-free baking blend that includes xanthan gum.
For flavor variations, consider swapping the semi-sweet chocolate chips for milk chocolate chips for a sweeter profile, or use dark chocolate chips for a more intense, less sweet taste. You can also add 1/2 teaspoon of cinnamon to the dry ingredients for a warm spice note, or stir in 1/2 cup of chopped walnuts or pecans for added crunch. If you prefer a saltier kick, sprinkle a pinch of flaky sea salt over the dough immediately after pressing it into the pan and before baking.
Serving Suggestions
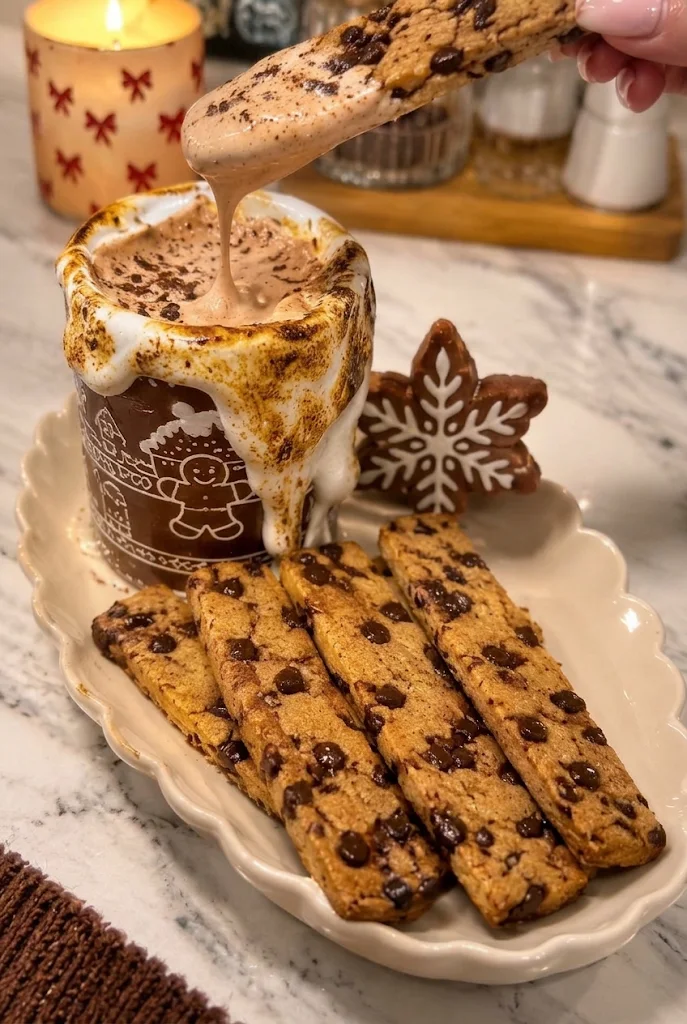
These sticks are incredibly versatile for various occasions. They pair beautifully with a glass of cold milk, a steaming mug of hot cocoa, or a cup of coffee. Because of their shape, they are excellent for dipping; simply break off a stick and dip it into your favorite beverage. They make a great addition to a holiday cookie exchange or a winter party snack table. You can arrange them on a tiered stand alongside other treats like snowflake cookies or shortbread. For a festive touch, drizzle the cooled sticks with melted white chocolate and sprinkle with crushed peppermint candies or red and green sprinkles.
Storage And Reheating
Store the cooled cookie sticks in an airtight container at room temperature for up to 5 days. Place a sheet of parchment paper between layers if stacking them to prevent sticking. For longer storage, you can freeze the unbaked dough. Press the dough into the pan, wrap tightly in plastic wrap and then foil, and freeze for up to 3 months. When ready to bake, thaw the dough in the refrigerator overnight and bake as directed, adding a few extra minutes to the baking time if the dough is still cold.
To reheat leftover sticks, place them on a baking sheet and warm them in a 300°F (150°C) oven for 5 to 8 minutes. This restores the soft, chewy texture and warms the chocolate chips. You can also microwave individual sticks for 10-15 seconds, though this may make the edges slightly softer. Avoid freezing already baked sticks for extended periods as they can lose their texture and become stale.
With its simple ingredients and straightforward method, this recipe is a reliable choice for any baker looking to create a crowd-pleasing dessert. For more delicious recipes and baking inspiration, Follow Hailee Recipes on Pinterest.
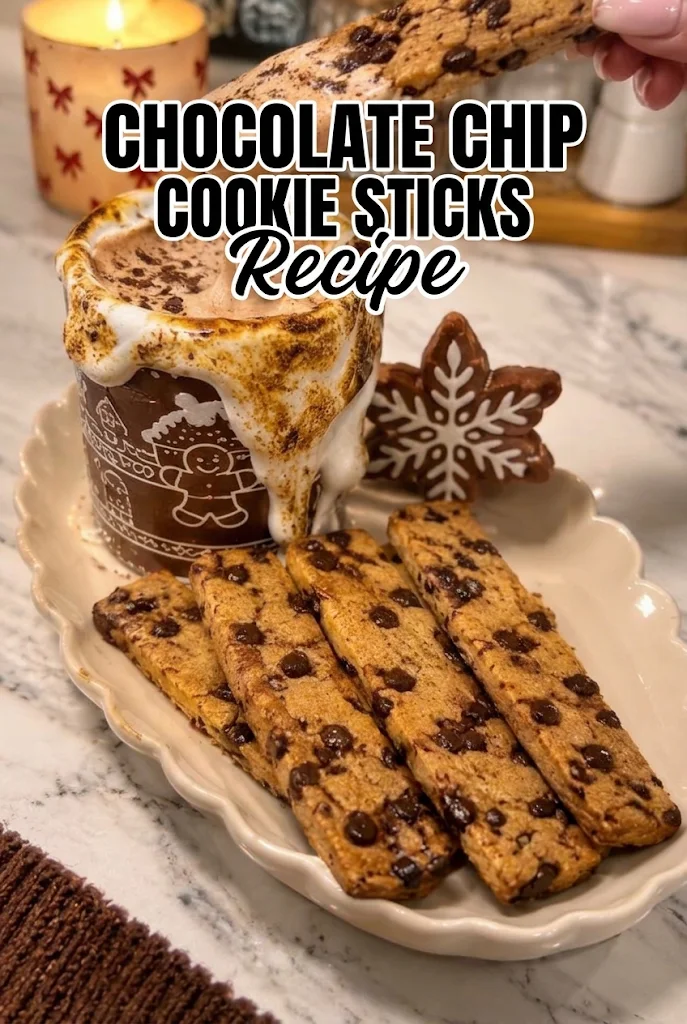
Chocolate Chip Cookie Sticks
Ingredients
Method
- Beat softened butter, brown sugar, granulated sugar, eggs, and vanilla until creamy.
- Mix in flour, baking soda, and salt, then fold in the semi-sweet chocolate chips.
- Press cookie dough evenly into a parchment-lined baking pan in a rectangular layer.
- Bake at 350°F (175°C) for 20-25 minutes until golden, cool slightly, and slice into sticks.