
Indulgent Red Velvet Cheesecake Layer Cake to Savor
Indulgent Red Velvet Cheesecake Layer Cake to Savo
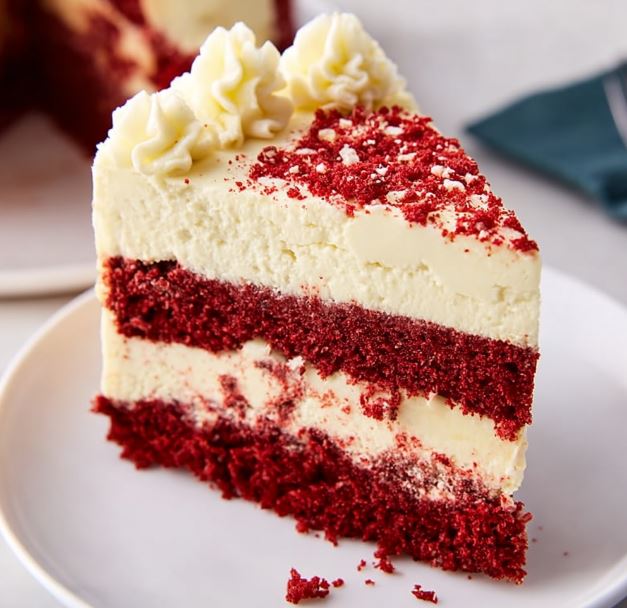
A Cozy Slice of Indulgence
Hi there, friends! I’m Hailee Nova, your resident cozy food blogger, and I’m so excited to share my absolute favorite Red Velvet Cheesecake Layer Cake recipe with you today. This decadent dessert has been a staple in my kitchen for years, and it never fails to bring a smile to my face (and a few extra inches to my waistline, let’s be real).
It all started a few winters ago when I was craving something rich, creamy, and downright indulgent to combat the chilly weather. I had a hankering for red velvet, but I also couldn’t resist the allure of a silky smooth cheesecake. So, naturally, I decided to combine the two and create a layer cake that would knock the socks off anyone who tried it. And let me tell you, the result was nothing short of heavenly.
As I stood in my cozy kitchen, mixing the batter and whipping up the cheesecake filling, the aroma of chocolate and vanilla filled the air, wrapping me in a warm hug. I couldn’t wait to sink my fork into that first slice, to feel the way the velvety cake melted on my tongue, complemented by the rich, creamy cheesecake. It was a moment of pure bliss, and I knew I had to share this recipe with all of you. Follow me on HaileeRecipes on Pinterest to see more of my favorite cozy creations!
Why This Recipe Works (and Why You’ll Love It)
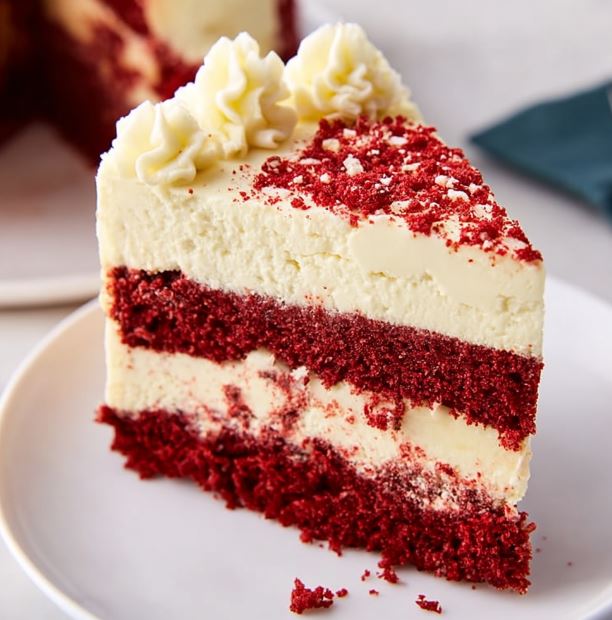
This Red Velvet Cheesecake Layer Cake is the ultimate indulgence for any occasion. The combination of the moist, velvety red velvet cake and the silky smooth cheesecake filling is an absolute dream. The contrast of the chocolate-y cake and the tangy cream cheese is simply divine, and the cream cheese frosting ties it all together in the most delectable way.
What I love most about this recipe is how it manages to be both decadent and comforting at the same time. It’s the kind of dessert that you can enjoy on a cozy night in, curled up on the couch, or serve as the showstopper at a fancy dinner party. And let’s not forget the stunning visual appeal – this cake is a true work of art, with its vibrant red layers and creamy white frosting.
Ingredients
To make this Red Velvet Cheesecake Layer Cake, you’ll need a few key ingredients:
- All-purpose flour: The foundation of the cake, providing structure and texture.
- Unsweetened cocoa powder: For that classic red velvet flavor.
- Baking soda and baking powder: To ensure the cake rises beautifully.
- Granulated sugar: Sweetens the cake and balances the cocoa powder.
- Eggs: Binds the cake together and adds richness.
- Vegetable oil: Keeps the cake moist and tender.
- Buttermilk: Adds moisture and a subtle tangy flavor.
- Red food coloring: For that vibrant red velvet hue.
- Cream cheese: The star of the cheesecake filling.
- Powdered sugar: Sweetens and stabilizes the cheesecake.
- Heavy cream: Whipped into the filling for a luxurious texture.
Hailee’s Tip: Be sure to use high-quality, full-fat cream cheese for the best results. The better the cream cheese, the creamier the filling will be.
Optional Add-Ins and Variations
While this Red Velvet Cheesecake Layer Cake is already an absolute showstopper, there are a few ways you can customize it to suit your tastes or the occasion:
- Chocolate Chips: Fold in a cup of semi-sweet chocolate chips to the cake batter for an extra chocolatey twist.
- Caramel Drizzle: Top the finished cake with a decadent caramel sauce for a salted caramel vibe.
- Seasonal Berries: Arrange fresh raspberries, blackberries, or strawberries around the edge of the cake for a pop of color and freshness.
- Toasted Nuts: Sprinkle chopped pecans or walnuts over the top of the cake for a delightful crunch.
Step-by-Step Method
Ready to get baking? Let’s dive into the step-by-step instructions for this Red Velvet Cheesecake Layer Cake:
- Preheat your oven to 350°F (175°C) and grease two 9-inch round cake pans. Line the bottoms with parchment paper for easy removal.
- In a large bowl, whisk together the all-purpose flour, cocoa powder, baking soda, and baking powder until well combined.
- Hailee’s Tip: Sift the dry ingredients to ensure there are no lumps and the cake bakes up nice and smooth.
- In a separate bowl, beat the granulated sugar and eggs together until light and fluffy. Slowly pour in the vegetable oil and buttermilk, mixing until fully incorporated.
- Add the red food coloring and mix until the batter is a deep, vibrant red.
- What I Messed Up At First: Be careful not to overmix the batter, as this can result in a tough, dense cake. Mix just until the ingredients are combined.
- Divide the cake batter evenly between the prepared pans and bake for 25-30 minutes, or until a toothpick inserted in the center comes out clean.
- Allow the cakes to cool in the pans for 10 minutes, then transfer them to a wire rack to cool completely.
- While the cakes are cooling, make the cheesecake filling. In a large bowl, beat the cream cheese with a hand mixer until smooth and creamy.
- Gradually add the powdered sugar, beating until well combined. Fold in the whipped heavy cream until the filling is light and fluffy.
- Hailee’s Tip: Be sure to use cold heavy cream for the best whipped cream texture.
- Once the cakes are completely cooled, use a serrated knife to carefully level the tops, if needed.
- Place one cake layer on a serving plate or cake stand, and spread half of the cheesecake filling evenly over the top.
- Top with the second cake layer and spread the remaining cheesecake filling over the top.
- Frost the sides and top of the cake with a generous amount of cream cheese frosting.
Common Mistakes to Avoid
While this Red Velvet Cheesecake Layer Cake is relatively straightforward to make, there are a few common pitfalls to watch out for:
- Overmixing the batter: As I mentioned earlier, this can lead to a tough, dense cake. Be sure to mix the ingredients just until they’re combined.
- Overbaking the cakes: Keep a close eye on the cakes in the oven and don’t let them bake for too long. Overbaked cakes can become dry and crumbly.
- Letting the cakes cool completely before assembling: If you try to assemble the cake while the layers are still warm, the cheesecake filling may melt and become a mess.
My Tested Substitutions
While I highly recommend sticking to the recipe as written for the best results, here are a few substitutions that have worked well for me in the past:
- Gluten-free flour: Use a 1-to-1 gluten-free flour blend in place of the all-purpose flour for a gluten-free version of this cake.
- Dairy-free cream cheese: Substitute a high-quality dairy-free cream cheese for the regular cream cheese in the filling.
- Almond milk: Use unsweetened almond milk in place of the buttermilk for a dairy-free cake.
Hailee’s Tip: When making substitutions, keep in mind that the texture and flavor of the final cake may vary slightly from the original recipe.
How to Customize This Recipe
One of the best things about this Red Velvet Cheesecake Layer Cake is how versatile it is. Here are a few ideas for how you can customize it for different occasions or dietary needs:
- For a Festive Holiday: Top the cake with crushed candy canes, a dusting of powdered sugar, or a drizzle of white chocolate for a festive touch.
- For a Healthier Option: Use a sugar substitute in place of the granulated sugar and opt for a dairy-free cream cheese in the filling.
- For a Keto-Friendly Version: Replace the all-purpose flour with a low-carb flour blend and use a keto-friendly sweetener instead of sugar.
Serving Ideas
This Red Velvet Cheesecake Layer Cake is the perfect dessert for any occasion, from cozy nights in to fancy dinner parties. I love to serve it as the showstopper at holiday gatherings, but it’s also a delightful treat for a special birthday or anniversary celebration.
Slice it up and enjoy it with a hot cup of coffee or a glass of milk for a decadent afternoon pick-me-up. Or, if you’re feeling extra indulgent, pair it with a scoop of vanilla ice cream for an over-the-top dessert experience.
Meal Prep & Storage Instructions
One of the best things about this Red Velvet Cheesecake Layer Cake is that it’s perfect for making ahead of time. You can bake the cake layers and prepare the cheesecake filling a day or two in advance, then assemble and frost the cake the day you plan to serve it.
The assembled and frosted cake can be stored in the refrigerator for up to 5 days. Simply cover it tightly with plastic wrap or store it in an airtight container. When you’re ready to serve, let the cake come to room temperature for about 30 minutes before slicing and enjoying.
Nutritional Breakdown
I know, I know – this Red Velvet Cheesecake Layer Cake is definitely not the healthiest dessert on the block. But hey, sometimes you just need to indulge, am I right? Here’s the nutritional breakdown per serving:
- Calories: 480
- Protein: 6g
- Carbohydrates: 54g
- Fat: 28g
- Fiber: 1g
Final Thoughts
There you have it, friends – my beloved Red Velvet Cheesecake Layer Cake recipe! I hope you’ll give this decadent dessert a try and experience the same joy and indulgence that I do every time I make it. Remember, life is short, so treat yourself to a slice (or two) of this heavenly cake. And don’t forget to follow me on HaileeRecipes on Pinterest for more cozy, comforting recipes like this one. Happy baking, and enjoy every bite!
Table of Contents
Red Velvet Cheesecake Cake
Ingredients
Equipment
Method
- Instructions
- Cheesecake Layer
- Preheat oven to 165°C (325°F). Line the springform pan with parchment.
- Beat cream cheese and sugar until smooth.
- Add eggs one at a time, then vanilla.
- Pour batter into pan and bake 40–45 minutes until set.
- Cool completely, then chill until firm.
- Red Velvet Cake
- Preheat oven to 175°C (350°F). Line cake pans.
- Whisk flour, sugar, cocoa, baking soda, and salt.
- Add oil, buttermilk, eggs, food coloring, vanilla, and vinegar. Mix until smooth.
- Divide batter evenly and bake 25–30 minutes. Cool fully.
- Assembly
- Place one cake layer on a plate. Add cheesecake layer on top.
- Top with second cake layer.
- Beat frosting ingredients until fluffy.
- Frost cake smoothly and decorate as desired.
- Chill 1 hour before slicing.



One Comment