Bacon Cheeseburger Stuffed Tater Tot Cones – Crispy, Cheesy & Epic
Bacon Cheeseburger Stuffed Tater Tot Cones – Crispy, Cheesy & EpicBacon Cheeseburger Stuffed Tater Tot Cones: Okay, So This Just Happened

Okay So This Just Happened
Okay, so… I was craving a bacon cheeseburger, but also something crispy, fun, and slightly ridiculous. Then I saw a bag of tater tots and thought, “What if… cone?”
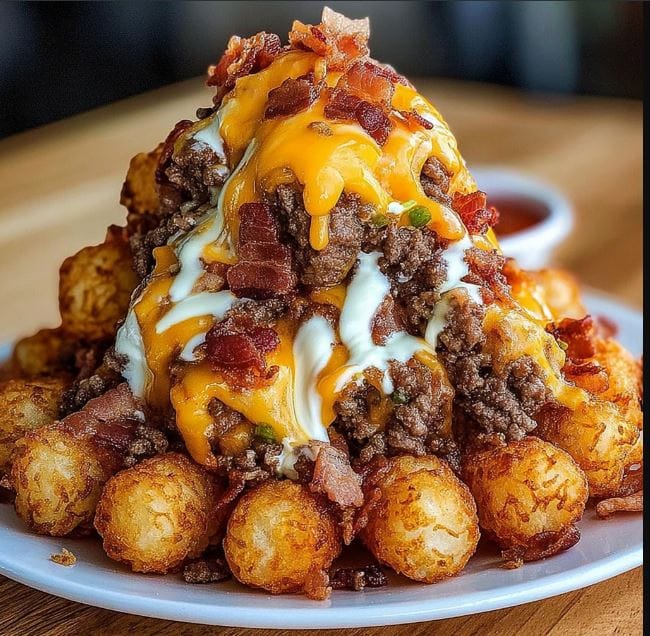
And listen — Bacon Cheeseburger Stuffed Tater Tot Cones are everything I hoped for and more. They’re crispy-crunchy on the outside, warm and cheesy inside, and totally handheld, which means you can walk around the kitchen feeling like a street-food icon.
Sarah took one bite and said, “I’m scared. This is too good.”
The “Did I Actually Just Make a Cone Out of Tater Tots?” Moment
You literally press tater tots around a foil cone, bake them until they crisp up, then stuff them with melty beef, bacon, cheese, and whatever toppings your heart desires.
It shouldn’t work. But it does. Beautifully.
Sarah said, “This feels illegal but delicious.”
What You Actually Need
It looks dramatic, but the ingredients are super simple.
Ingredients:
For the Tater Tot Cones:
- 1 bag frozen tater tots
- Cooking spray
- Salt + pepper
For the Cheeseburger Filling:
- 1 lb ground beef
- 1 teaspoon garlic powder
- 1 teaspoon onion powder
- Salt + pepper
- 4 slices bacon, cooked + chopped
- 1 cup shredded cheddar cheese
- ¼ cup ketchup
- 2 tablespoons mustard
- 2 tablespoons mayo
Toppings (all optional but recommended):
- Pickles
- Shredded lettuce
- Diced tomatoes
- Extra cheese
- Crumbled bacon
Sarah said, “If cheese and bacon are involved, I’m emotionally ready.”
Timing Breakdown
- Prep Time: 20 minutes
- Cook Time: 30 minutes
- Total Time: 50 minutes
- Servings: 6 cones
Step-by-Step (with all the chaos included)
Step 1: Shape the Foil Cones
Roll sheets of foil into cone shapes. Make them sturdy — these are your cone molds.
Spray with cooking spray so the tots don’t glue themselves to the foil.
Sarah said, “Why does this feel like arts and crafts for hungry adults?”
Step 2: Build the Tater Tot Cones
Arrange tater tots around each foil cone, pressing gently so they stick. Use additional foil or toothpicks to help secure any rogue tots.
Season lightly with salt and pepper.
Step 3: Bake Until Crispy
Place cones on a baking sheet and bake at 425°F (218°C) for 25–30 minutes, turning halfway through.
They should be golden, crispy, and holding their shape.
Yes, you just baked a tater tot cone.
Sarah said, “This is the most powerful I’ve ever felt in a kitchen.”
Step 4: Make the Cheeseburger Filling
Brown the ground beef, season with garlic powder, onion powder, salt, and pepper.
Stir in chopped bacon, cheese, ketchup, mustard, and mayo until melty and juicy.
It should look like sloppy-joe energy meets cheeseburger heaven.
Sarah took a forkful and whispered, “Therapy could never.”
Step 5: Assemble the Magic
Carefully remove the foil from the tater tot cones (twist gently).
Spoon in the warm bacon cheeseburger filling, letting it melt into every crispy crevice.
Top with pickles, lettuce, tomatoes, or extra cheese.
They’re warm, crunchy, juicy, cheesy… everything.
Sarah said, “If I could marry a food, this would be it.”
Step 6: Serve Immediately
These are best eaten hot while the tots are crispy and the cheeseburger filling is melty.
Perfect for game days, parties, sleepovers, or your personal food festival.
Flavor Upgrades
- BBQ Bacon Version: Add BBQ sauce instead of ketchup.
- Spicy Cheeseburger: Add jalapeños + pepper jack.
- Animal-Style: Mix in caramelized onions + secret sauce.
- Breakfast Cone: Replace beef with scrambled eggs + sausage.
Sarah’s favorite? Spicy. “It tastes like a dare I’m willing to take.”
Storage
- Fridge: Filling can be stored 3 days.
- Tater Tot Cones: Eat immediately (they soften fast).
- Freezer: No — cones lose crisp.
Real Talk
These Bacon Cheeseburger Stuffed Tater Tot Cones are messy, chaotic, crispy, cheesy, salty perfection.
They’re the kind of recipe you make once and immediately plan again. They’re fun, dramatic, unnecessarily extra — and 100% worth it.
Sarah said, “This is my Roman Empire now.”
If you make them, tag me on Pinterest:
https://www.pinterest.com/Haileerecipes/
And if you want something savory and structured afterward, here’s my grounding recipe:
https://www.haileerecipes.com/homemade-pizza-dough/
Table of Contents
Bacon Cheeseburger Stuffed Tater Tot Cones
Ingredients
Equipment
Method
- Instructions
- Shape foil into cone molds and spray with cooking spray.
- Arrange tater tots around each cone and season.
- Bake at 425°F for 25–30 mins until crisp.
- Brown beef; season. Add bacon, cheese, and sauces.
- Remove foil from cones and fill with beef mixture.
- Add toppings and serve hot.