BBQ Bacon Cheeseburger Sliders
BBQ Bacon Cheeseburger Sliders
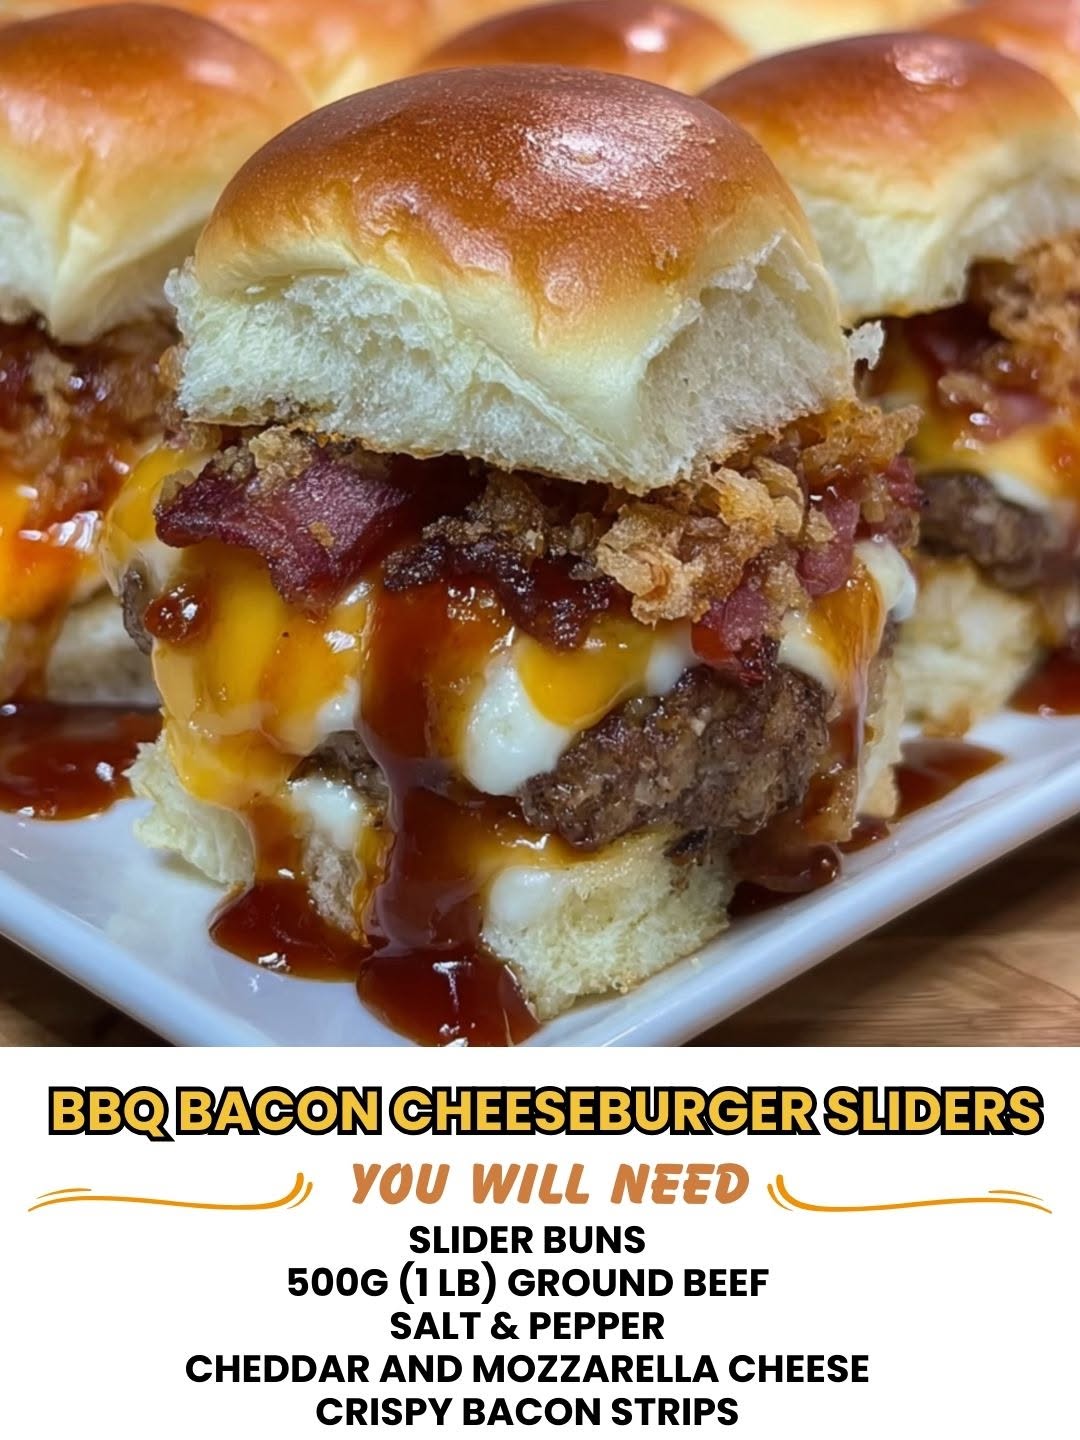
BBQ Bacon Cheeseburger Sliders: A Cozy Comfort Food Love Story
You know that feeling when you’re scrolling through your phone at 10 p.m., your stomach is rumbling, and you just want something that feels like a warm hug? That’s exactly where I was last summer when I first craved these BBQ Bacon Cheeseburger Sliders. I was hosting a casual backyard hangout with some friends, nothing fancy, just good people and good food. I wanted something that looked impressive but didn’t require me to stress in the kitchen all day. I also wanted my guests to feel like they were eating something special, not just another burger.
So I started playing around with slider-sized patties, crispy bacon, melted cheese, and a homemade BBQ glaze that actually tastes like it came from somewhere real, not a bottle. The first batch came off the griddle, and honestly? My friend Jake literally said, “These might be the best thing I’ve ever eaten at a casual hangout,” and I knew I was onto something good.
These sliders are perfect for anyone who loves classic comfort food but wants something a little more refined than just throwing a burger on a bun. They’re great for game day, backyard parties, family dinners, or even just a really satisfying weeknight meal. The best part? They’re totally manageable. You’re not fussing with huge patties or complicated techniques. Just good ingredients, simple steps, and about 30 minutes of your time.
If you love recipes that actually work and taste as good as they sound, I’d love to have you follow along. Follow me on HaileeRecipes on Pinterest for more recipes like this one that feel homemade, taste incredible, and don’t make you want to pull your hair out.
Why You’ll Love This Recipe
Let me be honest with you. There are a lot of burger recipes out there. So why should you make these sliders specifically?
- They’re actually manageable. Sliders are smaller, which means they cook faster and more evenly. No more wrestling with a giant patty that’s charred on the outside and raw in the middle.
- The flavor is real. I’m not dumping a bottle of store-bought BBQ sauce on these. The glaze is made from scratch with actual depth and complexity. It takes maybe five minutes to whisk together.
- Bacon makes everything better. I know this isn’t revolutionary, but there’s something about crispy bacon on a warm, juicy burger that just works. It’s textural, it’s salty, it’s everything.
- They’re customizable. Want to load them up with pickles, onions, and jalapeños? Go for it. Want to keep them simple? That works too. They adapt to what you’re craving.
- You can prep ahead. Form your patties in advance, make your BBQ glaze the day before, cook your bacon whenever. This recipe is actually flexible, which I love.
- They look impressive without being fussy. Your guests will think you spent hours on these. You didn’t. That’s the magic.
Ingredients
For the Sliders
- 1 pound ground beef (80/20 blend is ideal)
- 8 slices of bacon
- 4 slices of cheddar or American cheese (or 8 half-slices if you want two per slider)
- 8 slider buns or small brioche rolls
- 1 teaspoon kosher salt
- 1/2 teaspoon freshly ground black pepper
- 1/2 teaspoon garlic powder
- Butter for toasting the buns (about 2 tablespoons)
For the BBQ Glaze
- 1/2 cup ketchup
- 3 tablespoons apple cider vinegar
- 2 tablespoons brown sugar
- 1 tablespoon Worcestershire sauce
- 1 teaspoon smoked paprika
- 1/2 teaspoon garlic powder
- 1/4 teaspoon cayenne pepper (optional, for a little heat)
- Salt and pepper to taste
Hailee’s Tips on Ingredients
Ground beef ratio matters. I use an 80/20 blend because it has enough fat to keep the patties juicy, but it’s not so fatty that they shrink down to nothing or leave a puddle of grease. If you only have 90/10, add a tablespoon of melted butter to your meat mixture to compensate.
Cheese choice is yours. I love American cheese here because it melts so smoothly and has that classic diner vibe. Cheddar is great too if you want something with a bit more personality. Avoid pre-shredded cheese if you can, as it has anti-caking agents that make it melt unevenly.
Bacon quality changes everything. Splurge a little here. Good bacon has better flavor and crisps up beautifully. Thin, rubbery bacon from a value pack is going to disappoint you, and you’ll know it the second you bite in.
Don’t skip the smoked paprika in the glaze. It’s what makes this BBQ sauce taste homemade and smoky, not like a generic bottled version. It’s a small thing, but it matters.
Optional Add-Ins and Variations
This is where you get to have fun and make these sliders your own. Here’s what I like to play around with:
- Caramelized onions. Cook sliced onions low and slow in a skillet with a pinch of salt for about 15 minutes. They add sweetness and depth. Total game-changer.
- Crispy fried onions. If you want crunch without the time commitment, sprinkle some crispy fried onions on top of the cheese before the bun goes on. They stay crunchy even with the glaze.
- Jalapeños. Thin-sliced fresh jalapeños add a nice kick. If you want them softer, you can sauté them quickly first.
- Pickles. Dill pickle chips are classic for a reason. They cut through the richness of the cheese and bacon.
- Different cheeses. Try pepper jack for heat, Swiss for something lighter, or even a smoked gouda if you’re feeling fancy.
- A fried egg. If you’re making these for brunch or dinner, a runny fried egg on top is absolutely decadent.
- Avocado or guacamole. A thin slice of creamy avocado on top of the cheese is lovely and adds a different texture.
Step-by-Step Method
Step 1: Make Your BBQ Glaze
I like to do this first because it needs a few minutes to come together and let the flavors meld. In a small bowl, whisk together the ketchup, apple cider vinegar, brown sugar, Worcestershire sauce, smoked paprika, garlic powder, and cayenne pepper if you’re using it. Taste it. Does it need more salt? Add a pinch. More sweetness? A touch more brown sugar. This is your glaze, so make it taste good to you. Set it aside.
Step 2: Cook Your Bacon
I cook bacon in the oven because it’s less messy and crisps up more evenly. Preheat your oven to 400°F, lay the bacon strips on a parchment-lined baking sheet, and bake for about 12 to 15 minutes until it’s crispy but not brittle. (If you prefer stovetop, cook it in a skillet over medium heat, turning occasionally, until crispy. It takes about 10 minutes.) Once it’s done, lay it on paper towels to drain. This can be done ahead of time.
Step 3: Form Your Patties
This is important, so listen up. Take your pound of ground beef and gently divide it into 8 equal portions. I like to use a kitchen scale for this, but honestly, eyeballing it works fine too. Don’t overwork the meat. Overworking it makes the patties dense and tough, which is the opposite of what we want. Gently form each portion into a patty that’s about 2 inches wide and 1/2 inch thick. Make a tiny indent in the center of each patty with your thumb. This helps prevent them from puffing up like little domes while they cook.
Season each patty generously on both sides with salt, pepper, and garlic powder. I season them right before cooking so the salt doesn’t start breaking down the meat.
Step 4: Cook Your Patties
Heat a skillet or griddle over medium-high heat. You want it hot enough that when you place a patty down, you hear a nice sizzle. If you have a cast-iron skillet, this is your moment to shine. Add a tiny bit of butter or oil to the pan (just a light coating), and place your patties down. Don’t touch them. I know it’s tempting, but let them cook undisturbed for about 2 to 3 minutes so they develop a nice crust. Flip them once, and cook for another 1 to 2 minutes on the other side. They should be medium rare to medium at this point.
What I Messed Up the First Time: I kept flipping my patties every 30 seconds because I was nervous they weren’t cooking right. This is a rookie mistake. Flipping constantly prevents them from forming that beautiful brown crust and makes them dry. Flip once. That’s it.
Step 5: Add Your Cheese
In the last 30 seconds of cooking, place a slice of cheese on top of each patty. If your skillet has a lid, pop it on for 10 to 15 seconds to help the cheese melt. If not, just let it melt on its own. It will.
Step 6: Toast Your Buns
While your patties are finishing up, butter your slider buns and toast them in a separate skillet or on a griddle over medium heat until they’re golden and warm. This is a small step that makes a huge difference. A toasted bun holds up better to the glaze and toppings, and it tastes infinitely better than a cold, spongy bun.
Step 7: Assemble Your Sliders
Spread a thin layer of BBQ glaze on the bottom bun. Add your patty with melted cheese. Top with a piece of bacon (or break it in half if you want it to fit better). Add any other toppings you’re using. Spread a little more glaze on the top bun, and place it on top. That’s it. You’re done.
Common Mistakes to Avoid
Using meat that’s too lean. I mentioned this earlier, but it’s worth repeating. Lean meat makes dry burgers. The fat is where the flavor lives. Stick with 80/20.
Overworking the meat. Mix your seasoning in gently. Don’t knead it like bread dough. The less you handle it, the better your texture will be.
Cooking on too high heat. If your heat is too high, the outside will char before the inside cooks through. Medium-high is your sweet spot.
Skipping the toasted bun step. I get it, you want to speed things up. But a toasted bun is the difference between a good slider and a great one. Don’t skip it.
Making your patties too thick. Sliders should be thin and cook quickly. If your patties are too thick, they’ll take forever to cook and might end up overcooked on the outside.
Not seasoning your meat enough. Taste a tiny piece of your raw meat mixture to see if your seasoning is right. It should taste good on its own, not bland.
My Tested Substitutions
If you don’t eat beef: Ground turkey or chicken works, but add a tablespoon of melted butter to the mixture so they don’t dry out. Ground lamb is also amazing if you’re feeling adventurous. The flavor is richer and pairs beautifully with the BBQ glaze.
If you’re out of bacon: Crispy pancetta is a solid substitute. So is prosciutto if you want something a bit fancier. Honestly, even crispy sautéed mushrooms add a savory depth if you’re going vegetarian.
If you don’t have slider buns: A regular hamburger bun works fine; you’ll just have larger burgers. You could also use dinner rolls or even toasted bread slices if you’re in a pinch.
If you want a different sauce: This glaze is my favorite, but you can absolutely use store-bought BBQ sauce if you’re short on time. I won’t judge. I might add a teaspoon of Worcestershire sauce and a pinch of smoked paprika to elevate it a bit, but it’s totally optional.
If you’re dairy-free: Skip the cheese, or try a dairy-free cheddar alternative. Honestly, these sliders are so flavorful that they’re still delicious without cheese if you want to go that route.
How to Customize
The beauty of this recipe is that it’s a foundation. You can build on it however you want. Here are some flavor combinations I love:
The Classic: Exactly as written. Burger, bacon, cheese, BBQ glaze. Sometimes simple is best.
The Southern Comfort: Add caramelized onions and a fried egg. Serve with a cold beer. You’re welcome.
The Spicy Version: Use pepper jack cheese, add jalapeños, and increase the cayenne in the glaze. It’s got a nice kick without being overwhelming.
The Gourmet Twist: Use a smoked gouda, add crispy fried onions, a thin slice of avocado, and a drizzle of garlic aioli instead of (or in addition to) the BBQ glaze.
The Breakfast Slider: Top with a fried egg and crispy bacon. Serve on a toasted English muffin if you want something a little different.
Serving Ideas
These sliders are flexible enough to work in almost any setting. Here’s how I like to serve them:
- Backyard parties: Make a slider bar and let guests customize their own with different toppings. Set out the patties, cheese, bacon, and glaze, and let people build what they want.
- Game day: Serve with classic sides like chips, coleslaw, or pickles. They’re easy to eat while watching the game.
- Casual weeknight dinner: Pair with a simple salad or some roasted vegetables to feel a little more balanced.
- Date night at home: Plate them nicely with a side of homemade fries or sweet potato fries. Add some ambiance with candles, and suddenly you’ve got a restaurant-quality meal at home.
- Picnics: These travel well. Pack them in a container, and they’re still good even if they’ve cooled down a bit.
Meal Prep and Storage
Make-ahead options: You can form your patties up to 24 hours ahead of time. Store them on a parchment-lined plate in the fridge, covered with plastic wrap. The glaze can be made up to 3 days ahead. Store it in an airtight container in the fridge. Bacon can be cooked a day or two ahead and reheated gently in a 300°F oven for a few minutes.
Storing leftovers: If you somehow have leftover sliders (I’ve never managed this, but theoretically it could happen), store them in an airtight container in the fridge for up to 2 days. They’re best eaten fresh, but they’re still pretty good cold the next day. You can reheat them gently in a 350°F oven for about 5 minutes if you want them warm.
Freezing: Uncooked patties freeze beautifully for up to 3 months. Lay them on a parchment-lined baking sheet, freeze until solid, then transfer to a freezer bag. Cook them straight from frozen, just add a minute or two to the cooking time.
Nutritional Breakdown
These numbers are approximate and based on a slider with one patty, one slice of cheese, one piece of bacon, and the glaze, without any additional toppings.
- Calories: approximately 420