Breakfast Protein Biscuits: Fluffy, Filling, and Surprisingly Easy
Breakfast Protein Biscuits: Fluffy, Filling, and Surprisingly Easy
Okay So This Just Happened
Okay, so you know how I’m constantly running late in the mornings? Like, every single day I swear I’ll “wake up earlier and make a real breakfast,” and then suddenly I’m sprinting out the door with half a granola bar in my mouth and coffee sloshing all over my tote bag. Classic.
But then plot twist: I stumbled into making Breakfast Protein Biscuits—and I’m not even kidding, they might be the only reason I don’t collapse before lunch anymore. Fluffy like regular biscuits, but secretly packed with enough protein to keep me alive through Zoom calls, traffic, and the fact that I always forget my water bottle at home.
Sarah (my roommate, the brutally honest one) took one bite and went: “Wait. These don’t taste healthy.” Which, honestly, is the highest form of praise in this apartment.
👉 Also, if you’re a Pinterest scroller like me, pin this for your “I swear I’m going to get my life together” mornings: Hailee Recipes Pinterest.
What You Actually Need (And What You Don’t)
Real talk: I side-eye recipes with ingredient lists longer than my Target receipt. This one? Shockingly manageable.
Stuff You Probably Already Have:
- 2 cups flour – the foundation of literally everything good
- 1 tbsp baking powder – don’t skip this, trust me, or you’ll end up with sad pancake-flats
- ½ tsp salt – my mom says “just a pinch,” but every time I eyeball it, Sarah yells at me
- 2 tbsp butter (cold) – I tried coconut oil once… nope, never again
The Protein Power Players:
- 1 cup Greek yogurt – thick, tangy, and secretly protein-packed
- ½ cup protein powder – vanilla works best, but I once used chocolate and Sarah called it “breakfast dessert”
- ½ cup milk – I used almond milk because that’s what was in the fridge, but cow’s milk works fine
Optional but Worth It (aka Future Me Thanks Past Me):
- Honey drizzle – for sweet vibes
- Everything bagel seasoning – because we’re chaotic like that
- Sharp cheddar – mix into the dough if you want cheesy biscuits (do it, trust me)
About Those Substitutions:
- No protein powder? Use extra yogurt, but they’ll be more dense.
- Out of butter? Honestly… don’t. Margarine was a fail, and Sarah still brings it up.
- Gluten-free flour? Works, but texture shifts to “chewy scone” mode.
The Actual Time This Takes
Let’s be honest because I hate when recipes lie about timing.
- Prep: 10 minutes if you’re organized. 20 if you’re me, because I had to wash the mixing bowl mid-way.
- Cook: 12–15 minutes. Don’t walk away unless you want “crispy hockey pucks.”
- Total: 25–30 minutes, which is shockingly less time than I waste scrolling TikTok in the morning.
My Sunday Prep Hack: Bake a double batch on Sunday, freeze half, and reheat in the toaster. Boom: instant weekday breakfast that doesn’t feel like punishment.
Step 1: The Setup (Don’t Skip This Part)
Mix your dry stuff first—flour, baking powder, salt, and protein powder.
Real talk: The first time I made this, I dumped everything in one bowl and called it a day. Plot twist: wrong move. The biscuits came out looking like weird protein craters. Sarah took one bite and just looked at me like, “You’re feeding me drywall?”
What to watch for: If it looks clumpy, break it down with a fork. You want a soft, sandy texture before moving on.
Step 2: Where the Magic Actually Happens
Cut in that cold butter. This is where it feels like real biscuit-making. Use a pastry cutter if you’re fancy, or just two knives if you’re me and lost your cutter somewhere behind the rice cooker.
Shortcut tip: I stick the butter in the freezer for 5 minutes first. Tiny frozen chunks = flaky layers = chef’s kiss.
Step 3: The Messy Middle
Add yogurt and milk. Stir gently until it looks like a shaggy dough.
Mini fail story: I over-mixed once because I got distracted by Sarah showing me a cat video. Ended up with dense, gummy biscuits. Moral of the story: stop mixing when it just comes together.
Step 4: The Moment of Truth
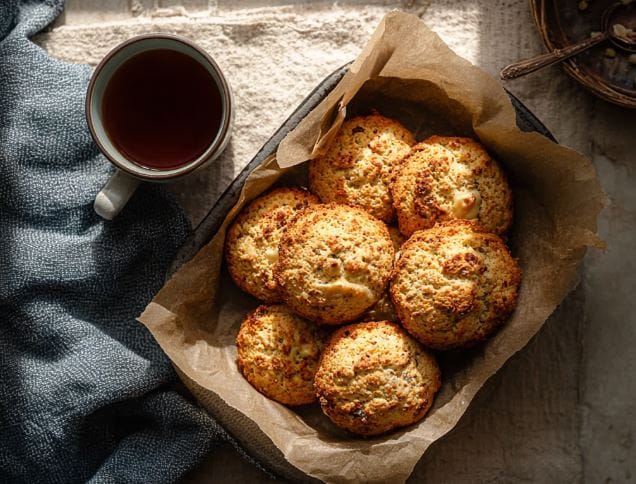
Scoop dough onto a baking sheet (I go rustic blob-style, no cutters needed). Bake at 425°F for 12–15 minutes until golden.
Visual cue: Tops should be lightly browned. If they’re pale, keep going. If they’re dark brown, congrats, you made charcoal snacks.
The Health Stuff (But Make It Real)
Look, I’m not a nutritionist, but I did the math (with a calculator, not vibes):
Per Biscuit (roughly):
- Calories: 150
- Protein: 10g (👏 actually filling)
- Carbs: 18g
- Fat: 5g
Why I keep making these: They’ve got enough protein that I don’t feel like raiding the office snack drawer an hour later. Plus, compared to my usual Starbucks breakfast sandwich habit? Way cheaper.
Ways to Not Screw This Up (Plus Some Ideas)
- Add shredded cheddar + jalapeños → spicy cheesy protein biscuits (Sarah’s fave).
- Swap vanilla protein powder for cinnamon → autumn vibes, no pumpkin spice latte required.
- Drizzle with honey → sweet + savory heaven.
Storage Secrets
- Fridge: 3–4 days in an airtight container.
- Freezer: 2 months wrapped individually.
- Reheat: Toaster oven = crispy edges, soft center. Microwave = meh, but works in emergencies.
Bottom Line
These Breakfast Protein Biscuits are the kind of recipe that sticks—because it’s delicious and doesn’t require me to have my life together. Sarah literally asked for seconds, which is rarer than me actually folding laundry on the same day.
👉 Pin this now so Future You doesn’t end up eating stale granola bars again: Hailee Recipes Pinterest.
Oh, and if you’re a sweet tooth? You need to check out my Japanese Cheesecake (Cotton Soft Recipe)—fluffiest thing I’ve ever made.
Breakfast Protein Biscuits
Ingredients
Equipment
Method
- Instructions
- Preheat oven to 425°F (220°C). Line a baking sheet with parchment paper.
- In a large bowl, whisk together flour, baking powder, salt, and protein powder.
- Cut in cold butter until mixture resembles coarse crumbs.
- Stir in Greek yogurt and milk until dough just comes together (don’t overmix).
- Scoop dough into rustic rounds on the prepared baking sheet.
- Bake 12–15 minutes, until tops are golden brown.
Notes
Notes
- Storage: Refrigerate 3–4 days in an airtight container or freeze up to 2 months.
- Reheat: Toaster oven brings back crisp edges.
- Variations: Add cheddar + jalapeños for savory; drizzle honey for sweet.