Cheesy Pepperoni Pull-Apart Bread
Cheesy Pepperoni Pull-Apart Bread
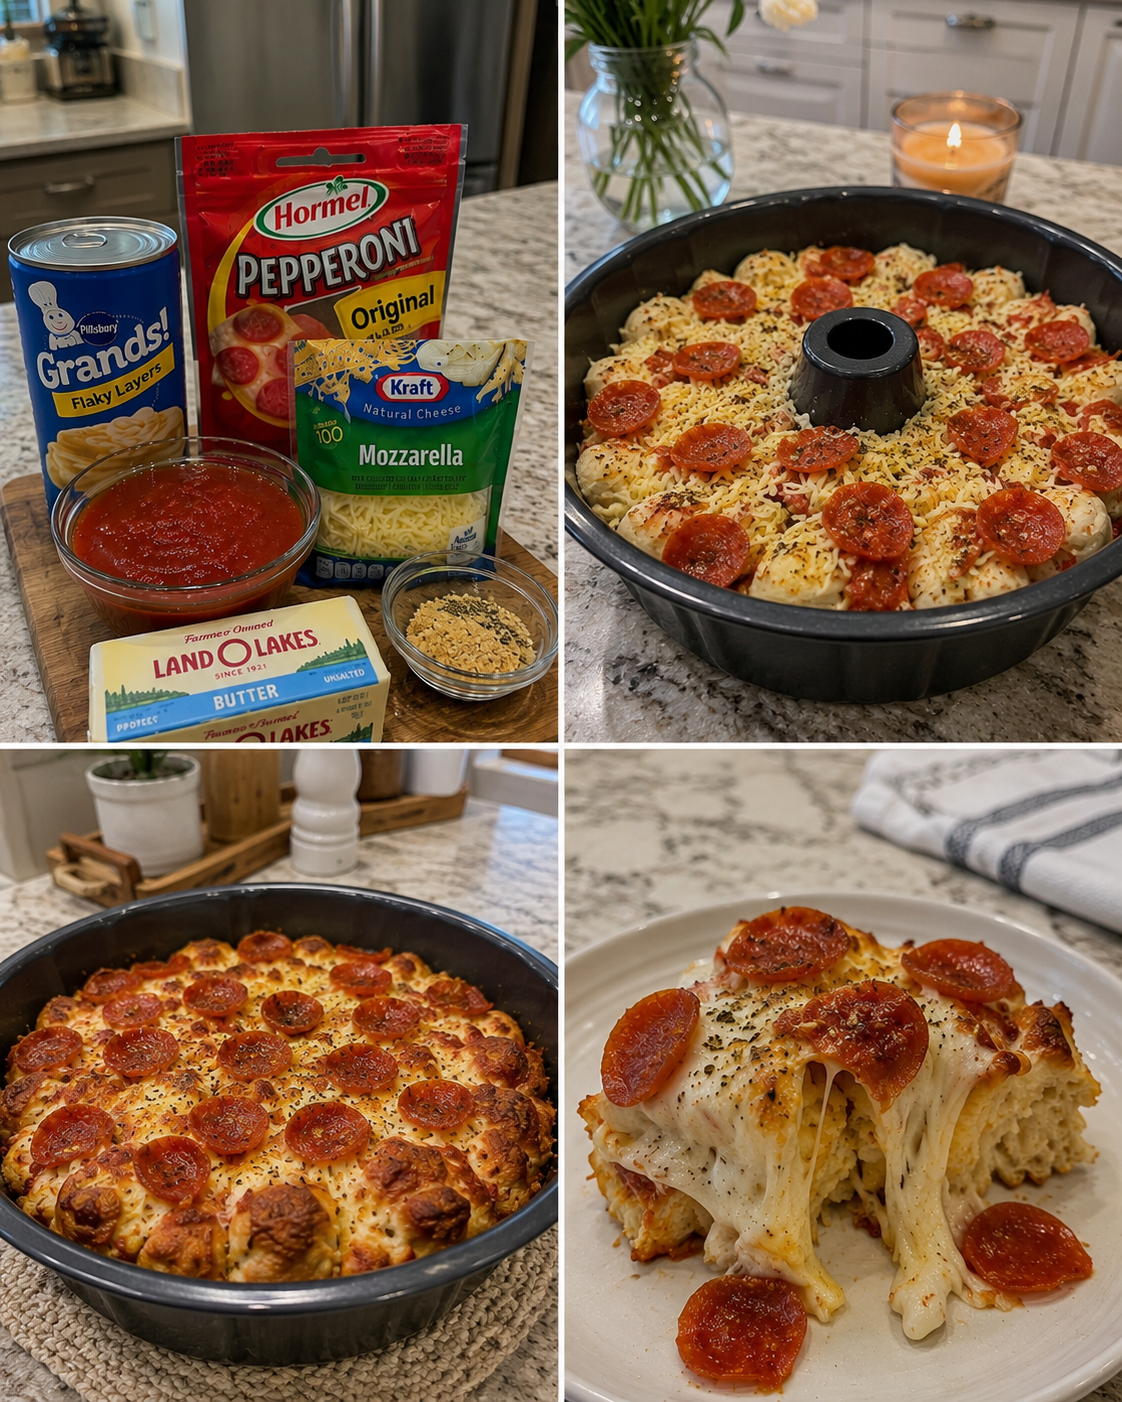
Cheesy Pepperoni Pull-Apart Bread: The Cozy Dinner That Feels Like a Hug
I made this Cheesy Pepperoni Pull-Apart Bread on a random Tuesday night when my partner came home looking absolutely exhausted. You know that feeling—when someone walks through the door and you can just tell they need comfort food, not a lecture about nutrition? Yeah, that was the vibe.
I had a store-bought pizza dough in the fridge (because let’s be real, I’m not always making dough from scratch), some mozzarella, pepperoni, and garlic butter. Nothing fancy. But when that bread came out of the oven, golden and bubbling, with cheese stretching between every pull-apart piece, the whole apartment smelled like an Italian pizzeria decided to move in permanently. My partner literally stopped mid-sentence and just stared at it.
That’s when I knew this recipe was a keeper.
Cheesy Pepperoni Pull-Apart Bread is exactly what it sounds like—soft, pillowy bread studded with mozzarella and pepperoni, baked until the cheese gets all melty and slightly crispy at the edges. It’s the kind of thing you can tear into with your hands, and it’s perfect for game nights, casual dinners, or when you want something that feels indulgent but doesn’t require you to spend three hours in the kitchen. It’s also incredibly forgiving, which means even if you’re not a confident baker, you’re going to nail this.
This recipe works for busy weeknights, potlucks where you want to impress people without sweating, or literally any time you’re craving pizza in bread form. If you love comfort food that’s a little bit fancy but still totally approachable, you’re going to want to save this one. Follow me on HaileeRecipes on Pinterest for more recipes like this that feel like home.
Why You’ll Love This Recipe
Let me be honest with you: this bread checks a lot of boxes. It’s visually impressive—like, the kind of thing that makes people think you spent way more effort than you actually did. But it’s also genuinely delicious and surprisingly simple.
The texture is what really gets me. You’ve got that soft, tender bread on the inside, with crispy, slightly charred edges where the cheese touches the pan. The pepperoni gets a little bit crispy too, and the cheese gets all melty and golden. It’s a textural dream.
Plus, it’s customizable. You can add different cheeses, throw in some herbs, swap the pepperoni for different toppings—whatever you’re in the mood for. And it comes together in under an hour, which is clutch when you’re hungry and don’t want to wait forever.
Ingredients
- 1 pound pizza dough (store-bought or homemade)
- 2 cups shredded mozzarella cheese (I use low-moisture for less weeping)
- 1 cup pepperoni slices (about 4 ounces)
- 4 tablespoons butter, melted
- 4 cloves garlic, minced
- 1 teaspoon Italian seasoning
- 1/2 teaspoon red pepper flakes (optional, but I love the heat)
- 1/2 teaspoon salt
- 1/4 teaspoon black pepper
- 1/4 cup grated Parmesan cheese
- Fresh parsley for garnish (optional but really nice)
Hailee’s Tip: Use low-moisture mozzarella instead of fresh mozzarella. Fresh mozzarella releases a lot of water, and you’ll end up with a soggy bread situation. Trust me on this one—I learned the hard way.
Hailee’s Tip: Buy pre-sliced pepperoni if you can. It’s a time-saver, and it cooks more evenly than chunks.
Hailee’s Tip: If your pizza dough is cold, let it sit on the counter for about 15 minutes before you start working with it. Cold dough is cranky and will fight you every step of the way.
Optional Add-Ins and Variations
Here’s where you can get creative without breaking anything:
- Caramelized onions: Adds sweetness and depth. Layer them in with the cheese.
- Fresh basil: Sprinkle it between the layers for brightness. Use it fresh, not dried.
- Roasted red peppers: Adds sweetness and a slightly smoky flavor.
- Jalapeños: If you like heat and don’t have red pepper flakes on hand.
- Different cheeses: Try mixing mozzarella with provolone, fontina, or even a little sharp cheddar.
- Italian sausage: Crumbled and browned, instead of pepperoni.
- Spinach: Wilted and squeezed dry so it doesn’t release moisture.
Step-by-Step Method
Step 1: Prep Your Pan and Dough
Preheat your oven to 375°F. Lightly grease a 9-inch round cake pan or a loaf pan—whatever you have. I usually use a round cake pan because the finished bread looks prettier and pulls apart more easily.
Take your pizza dough out of the fridge if it’s been cold. Let it sit for about 15 minutes so it’s easier to work with. Then, on a lightly floured surface, roll it out into a thin rectangle, about 12 by 10 inches. Don’t stress about it being perfect—rustic is your friend here.
What I Messed Up: The first time I made this, I tried to roll the dough too thin, and it tore. Then I got frustrated and overworked it, which made the gluten tight and angry. Just roll it out gently, and if it tears a little, pinch it back together. It’s fine.
Step 2: Make the Garlic Butter
While the dough is resting, whisk together your melted butter, minced garlic, Italian seasoning, red pepper flakes (if using), salt, and black pepper. This is going to be your flavor base, so don’t skip the garlic. I usually mince it pretty fine so it distributes evenly.
Step 3: Build the Layers
Brush about half of the garlic butter all over the surface of your dough. Sprinkle about 1 cup of the mozzarella over the butter. Then add about half of the pepperoni slices in an even layer. Sprinkle the remaining mozzarella on top, then the rest of the pepperoni. This layering is what makes it so good—you get cheese and pepperoni in every bite.
Step 4: Roll and Cut
Starting from one of the long sides, roll the dough up tightly, like you’re making a cinnamon roll. Once it’s rolled, use a sharp knife or kitchen shears to cut it into 1.5-inch pieces. You should get about 8 to 10 pieces.
What I Messed Up: I used a dull knife the first time, and it squished the roll instead of cutting it cleanly. The pieces were uneven, and some cooked faster than others. A sharp knife makes all the difference.
Step 5: Arrange in the Pan
Place the cut pieces spiral-side up in your prepared pan. They should fit snugly but not be crammed. If you’re using a round cake pan, arrange them in a circle. If you’re using a loaf pan, line them up. Brush the tops with the remaining garlic butter, and sprinkle the Parmesan cheese over everything.
Step 6: Bake
Pop it in the oven for 25 to 30 minutes, until the bread is golden brown and the cheese is bubbling at the edges. You’ll know it’s done when it smells absolutely incredible and the top has some light browning.
Step 7: Cool and Garnish
Let it cool for about 5 minutes—I know it’s hard to wait, but this gives the cheese a chance to set slightly so it doesn’t all slide off when you pull a piece. Sprinkle with fresh parsley if you have it. It adds color and a fresh element that balances all the richness.
Common Mistakes to Avoid
Using fresh mozzarella: I mentioned this before, but it bears repeating. Fresh mozzarella releases too much water, and your bread will be soggy. Low-moisture mozzarella is the move.
Overstuffing the dough: I get excited and want to pile on the toppings, but too much filling makes it hard to roll and can cause the dough to burst. Stick to the amounts in the recipe.
Not letting the dough rest: Cold dough is stiff and tears easily. Give it 15 minutes on the counter, and it’ll be way more cooperative.
Cutting the rolls too thick: If your pieces are too big, the outside will brown before the inside is cooked through. Stick to about 1.5 inches.
Skipping the cooling time: I know you’re hungry, but five minutes makes a real difference. The bread will hold together better when you pull it apart.
My Tested Substitutions
Homemade dough: If you want to make dough from scratch, any basic pizza dough recipe works. Just make sure you have about 1 pound of dough (usually 3 to 4 cups flour). The baking time stays the same.
No pepperoni? No problem: Use sliced Italian sausage, ham, bacon, or even sun-dried tomatoes. The concept is the same—you’re just layering flavors into bread.
Different cheeses: A mix of mozzarella and provolone is really nice. You could also use fontina, or even a little sharp cheddar mixed in for extra flavor.
Dairy-free option: Use dairy-free mozzarella and vegan butter. The texture won’t be exactly the same, but it’ll still be tasty.
Gluten-free: Use a gluten-free pizza dough from the store. The baking time might be slightly different, so watch it closely.
How to Customize
The beauty of this recipe is that it’s a framework, not a strict rulebook. Here are some ideas:
Make it spicy: Add more red pepper flakes, throw in some jalapeños, or use hot pepperoni.
Make it herbaceous: Add fresh basil, oregano, or thyme. Fresh herbs are best—add them after baking so they don’t dry out.
Make it veggie-forward: Layer in roasted red peppers, caramelized onions, spinach, or mushrooms. Just make sure any vegetables are cooked or dried first so they don’t release moisture.
Make it fancy: Use prosciutto instead of pepperoni, add arugula after baking, or drizzle with truffle oil.
Make it a main: Serve it with a simple salad and call it dinner. It’s rich enough to be satisfying on its own.
Serving Ideas
This bread is versatile. Here’s how I usually serve it:
- As an appetizer: Cut it into smaller pieces and serve with marinara sauce for dipping.
- With soup: Pair it with tomato soup or minestrone for a cozy dinner.
- With salad: Serve alongside a simple green salad or Caesar salad.
- For game day: Cut into pieces and let people grab what they want. It’s perfect for casual eating.
- For brunch: Yes, really. It’s delicious with a simple salad or some fruit.
- With dipping sauces: Marinara, garlic aioli, or even ranch all work beautifully.
Meal Prep and Storage
Storing leftovers: This bread keeps well for about three days in an airtight container at room temperature. After that, it starts to dry out a bit.
Refrigerating: If you want to store it longer, wrap it well and refrigerate for up to five days. Reheat gently in a 300°F oven for about 10 minutes.
Freezing: You can freeze the unbaked roll (cut into pieces) for up to two months. Just thaw it in the fridge overnight and bake as directed. You might need an extra 5 to 10 minutes of baking time.
Make-ahead tip: You can assemble this the night before, wrap it tightly, and refrigerate it. Bake it the next day, adding about 5 minutes to the baking time since it’ll be cold.
Reheating: If you have leftovers (which is rare in my house), reheat them in a 300°F oven for 10 to 15 minutes until warm and the cheese is melty again. Don’t use the microwave—it makes the bread tough.
Nutritional Breakdown
This recipe makes about 8 to 10 servings, depending on how big you cut your pieces.
Per serving (based on 8 servings):
- Calories: approximately 380
- Protein: approximately 16g
- Carbohydrates: approximately 32g
- Fat: approximately 20g
- Fiber: approximately 1g
Keep in mind that this is an estimate and can vary based on the exact products you use. If you’re tracking macros, adjust accordingly.
Final Thoughts
I love this recipe because it’s one of those things that feels special but doesn’t require you to be a special baker. It’s the kind of food that brings people together, that makes your house smell amazing, and that reminds you why comfort food exists in the first place.
The first time you make Cheesy Pepperoni Pull-Apart Bread, you might feel a little nervous. That’s normal. But I promise you, by the time it comes out of the oven, you’re going to feel like a rockstar. And the second time you make it, you’ll already be thinking about what variations you want to try.
That’s the mark of a good recipe, in my opinion. It’s reliable, it’s delicious, and it makes you want to cook again.
I hope this becomes a regular thing in your kitchen, whether you make it exactly as written or you make it your own. Either way, I’d love to hear how it turns out. Enjoy every pull-apart bite.
—
Cheesy Pepperoni Pull-Apart Bread
Ingredients
Method
- Preheat oven to 375°F and lightly grease a 9-inch round cake pan or loaf pan. Let pizza dough rest at room temperature for 15 minutes, then roll out into a thin 12 by 10 inch rectangle on a floured surface.