Chocolate Fudge Brownie Shake Recipe | Indulgent
Chocolate Fudge Brownie Shake Recipe | Indulgent
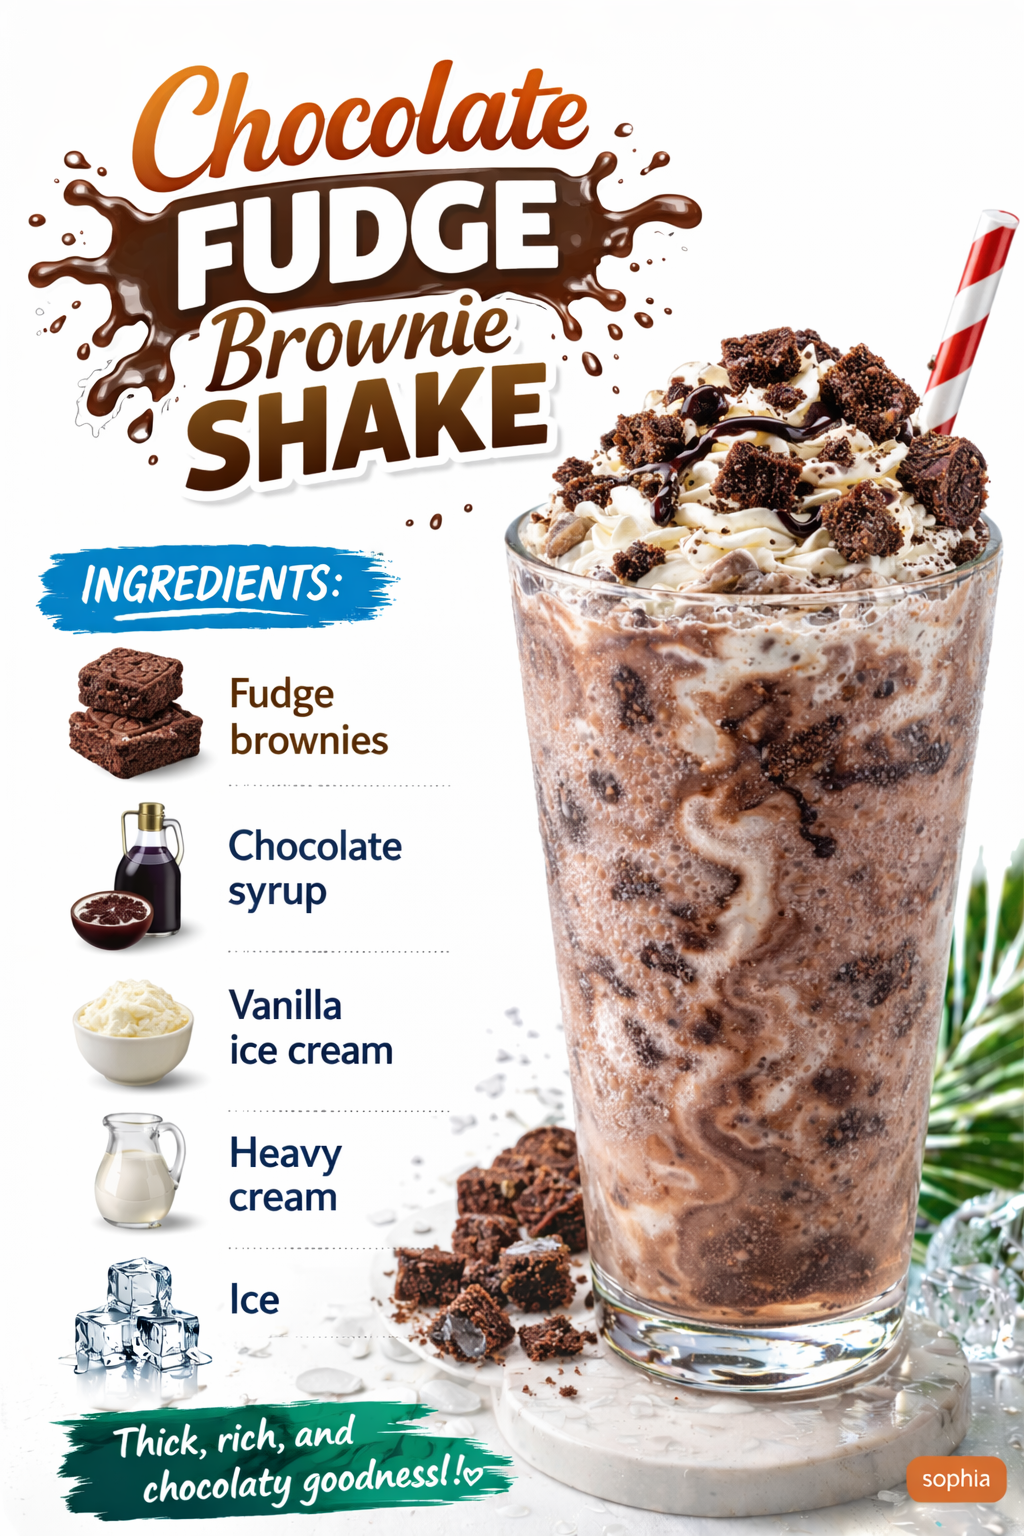
Chocolate Fudge Brownie Shake: The Dessert Drink That Tastes Like Indulgence But Isn’t
I created this Chocolate Fudge Brownie Shake on a Tuesday night when I was absolutely craving something rich and decadent, but I didn’t have the energy to actually bake. You know that feeling? You want the brownie experience—the fudgy, dense, chocolatey goodness—but you want it in five minutes and you want it drinkable.
My partner walked into the kitchen while I was blending, took one sip, and literally said, “Wait, this tastes like a brownie had a baby with a milkshake.” Which, honestly, is exactly what I was going for.
Here’s the thing about this shake: it’s not pretending to be a health drink. It’s not hiding vegetables or sneaking in protein powder like some kind of nutritional Trojan horse. It’s a legitimate dessert drink that happens to be made from real ingredients you probably already have. Cocoa powder, chocolate, ice cream, milk, and a few smart additions that make it taste legitimately fudgy without being cloyingly sweet.
This recipe works for late-night cravings, for when you’re hosting friends and want something faster than baking, for chocolate lovers who want their fix without the commitment, and honestly, for anyone who’s ever thought, “I wish I could drink a brownie.” If that’s you, I’ve got you covered.
I’ve made this shake probably fifty times now—tweaking it, testing it, figuring out exactly what makes it taste like actual fudgy brownies instead of just chocolate milk. And I’m excited to walk you through it. Follow me on HaileeRecipes on Pinterest for more recipes like this one.
Why You’ll Love This Recipe
Let me be real with you: this shake is beloved in my house because it delivers on the promise. When you’re craving chocolate, you don’t want something that tastes like a watered-down approximation. You want the real deal.
- It tastes genuinely fudgy. The combination of cocoa powder and melted chocolate (plus a tiny bit of espresso powder if you have it) creates that deep, almost-brownie flavor that makes you close your eyes while drinking it.
- It’s ready in five minutes. No oven, no waiting, no cleanup beyond rinsing your blender. This is crucial on nights when you need comfort fast.
- You can make it as thick or thin as you want. Prefer it like soft-serve ice cream? Add less milk. Want something you can drink through a straw? Easy fix. You’re in control.
- It’s endlessly customizable. Want to add peanut butter? Do it. Prefer it with almond milk? Go ahead. I’ll walk you through all the variations I’ve tested.
- It actually satisfies a craving. I’m not exaggerating when I say this has replaced my need to bake brownies on most nights. It hits the same spot.
Ingredients
- 2 tablespoons unsweetened cocoa powder (the real stuff, not the sugary hot chocolate mix)
- 2 ounces semi-sweet or dark chocolate, chopped or broken into small pieces
- 1 cup whole milk (or milk of your choice)
- 1 cup vanilla ice cream (about 2 generous scoops)
- 1 tablespoon sugar or honey (adjust to taste)
- 1/4 teaspoon vanilla extract
- Pinch of sea salt
- 1/4 teaspoon espresso powder (optional but genuinely recommended)
- 2-3 ice cubes (if you like it extra cold and thick)
Hailee’s Tip: Use real chocolate here, not chocolate syrup. I learned this the hard way. Syrup makes it taste more like a chocolate milk shake, and we’re going for brownie territory. Quality matters when you have so few ingredients.
Hailee’s Tip: The espresso powder is my secret weapon. You won’t taste “coffee” in the final shake, but it deepens the chocolate flavor so much that people always ask what’s in it. It’s optional, but I genuinely recommend it if you have it on hand.
Hailee’s Tip: Don’t skip the salt. A tiny pinch of sea salt against chocolate is one of those magical combinations that makes your brain go, “Wait, why is this so good?” It’s the same reason fancy brownies always have a pinch of salt.
Optional Add-Ins and Variations
This is where you get to make the shake your own. I’ve tested all of these, and they all work beautifully.
- Peanut Butter Fudge: Add 1 tablespoon of creamy or chunky peanut butter. Blend it in with everything else. This becomes a full dessert.
- Brownie Crunch: Blend in a small handful of crushed brownies or brownie crumbs. It adds texture and makes it even more brownie-like.
- Bourbon or Whiskey: If you want to get fancy, add 1 tablespoon of bourbon or whiskey. It adds a subtle warmth and sophistication. Not for kids, obviously.
- Mint Chocolate: Add 1/4 teaspoon peppermint extract or a few fresh mint leaves. Blend well.
- Caramel Swirl: Drizzle a tablespoon of caramel sauce into the blender before blending, or swirl it into the finished shake.
- Extra Fudgy: Add an additional tablespoon of cocoa powder if you want it even more intensely chocolate.
Step-by-Step Method
This is the easiest part, but I’m going to walk you through it because I want you to understand why we do each step.
- Start with the cocoa powder and chocolate. Add your 2 tablespoons of cocoa powder and your chopped chocolate to the blender. Don’t add the milk yet.
- Pour in about 1/4 cup of the milk. Just a splash. Blend this together until it forms a thick, muddy paste. This step is important because it dissolves the cocoa and melts the chocolate without lumps. If you dump everything in at once, you’ll get little chocolate bits floating around that don’t fully blend.
- Add the rest of your ingredients. Now add the remaining milk, ice cream, sugar, vanilla extract, salt, and espresso powder (if using). Add your ice cubes too if you want extra thickness and chill.
- Blend until smooth and creamy. This should take about 45 seconds to 1 minute. You want no visible chocolate bits and a smooth, thick consistency. It should look almost like soft-serve ice cream poured into a glass.
- Taste and adjust. This is crucial. Does it need more sweetness? Add another teaspoon of sugar or honey. Too thick? Add a splash more milk. Too thin? Add another scoop of ice cream. You’re the boss here.
- Pour into a glass and serve immediately. This shake is best enjoyed right away while it’s cold and thick. If you let it sit, it’ll start to separate and melt.
What I Messed Up (So You Don’t Have To): The first time I made this, I tried to blend the chocolate and cocoa with cold milk right away. The chocolate didn’t fully incorporate, and I ended up with a grainy texture. The warm-milk-first method changed everything. Trust me on this one.
Common Mistakes to Avoid
I’ve made these mistakes, my friends have made them, and I want to save you the trouble.
- Using chocolate syrup instead of real chocolate. It’s convenient, but it tastes different. Syrup is too sweet and doesn’t give you that fudgy depth. Spend the extra thirty seconds chopping real chocolate.
- Skipping the cocoa powder. You need both chocolate and cocoa powder for the full brownie effect. Chocolate alone is too smooth and creamy. Cocoa adds that earthy, intense chocolate flavor.
- Using too much ice. Too many ice cubes will dilute it as they melt. I use 2-3 at most. If you want it colder, use colder milk or add it to the freezer for five minutes before serving.
- Not tasting as you go. Everyone’s blender is different, everyone’s ice cream is a different density, and everyone’s chocolate preferences vary. Taste it. Adjust it. Make it yours.
- Letting it sit too long before drinking. This shake is best enjoyed immediately. After about ten minutes, it starts to separate and get thinner as the ice cream melts.
My Tested Substitutions
Not everyone has the exact same ingredients on hand, and that’s okay. Here’s what I’ve actually tested and what works.
- Milk alternatives: I’ve made this with almond milk, oat milk, and cashew milk. Oat milk is my favorite because it’s creamy and doesn’t make the shake taste thin. Almond milk works but is slightly less rich.
- Ice cream flavors: Vanilla is the classic choice, but I’ve also used chocolate ice cream (which makes it even more intense), coffee ice cream (amazing), and even salted caramel. All work beautifully.
- Sweetener: I’ve used regular sugar, honey, maple syrup, and agave. They all work. Honey adds a slight floral note I love. Maple syrup makes it taste a bit more autumnal. Use whatever you have.
- Chocolate type: I prefer semi-sweet because it’s not too dark or too light. But dark chocolate makes it more intense and sophisticated. Milk chocolate makes it sweeter and creamier. Go with what you like.
- No espresso powder? Skip it. Honestly. It’s optional. The shake is still delicious without it; it just won’t have that extra depth.
How to Customize
This is my favorite part because it means you can make this shake exactly how you want it.
For a thicker shake: Use less milk (start with 3/4 cup instead of 1 cup) or add an extra scoop of ice cream. You want it spoonable, I get it.
For a thinner shake: Add more milk, a splash at a time, until you reach your preferred consistency. Some people want to drink this through a straw; others want to eat it with a spoon.
For extra fudginess: Add an extra tablespoon of cocoa powder or an extra ounce of chocolate. Go bold.
For less sweetness: Reduce the sugar to 1 teaspoon or skip it entirely if your ice cream is sweet enough. Taste as you go.
For a protein boost: Add 1/4 cup of Greek yogurt or a scoop of chocolate protein powder. It’ll make it thicker and more filling.
For a creamier texture: Add a tablespoon of cream cheese or a splash of heavy cream. It sounds weird, but it works.
Serving Ideas
Okay, so you’ve made your shake. Now what?
- Classic serve: Pour it into a tall glass and drink it with a spoon or wide straw. This is how I usually have it.
- Fancy presentation: Rim the glass with crushed brownies or chocolate sprinkles. Drizzle chocolate sauce down the inside of the glass before pouring. Top with whipped cream and a sprinkle of sea salt.
- With a brownie: Serve alongside an actual brownie for the full experience. They complement each other beautifully.
- Pair it with coffee: If you want to get really cozy, have this shake alongside a cup of black coffee. The chocolate and coffee together are unbeatable.
- For guests: Make a batch of these for friends. People are always impressed by how good they are, and they’re ready in minutes.
Meal Prep and Storage
Real talk: this shake is best enjoyed fresh. But I know life doesn’t always work that way.
Can you make it ahead? You can prep your dry ingredients (cocoa powder, sugar, salt, espresso powder) in a small container and store them for a few days. When you’re ready, just add your milk, chocolate, and ice cream and blend. It takes literally the same amount of time, but it feels a bit more organized.
Can you freeze it? Yes, but it becomes more like a frozen dessert than a shake. If you want to do this, blend everything, pour into a container, and freeze for 1-2 hours. Eat it with a spoon. It’s delicious, but it’s a different experience.
Leftover shake? If you somehow have leftover shake (which rarely happens in my house), pour it into a container and refrigerate for up to 24 hours. It’ll separate a bit, so give it a stir before drinking. It won’t be as thick or as good as fresh, but it’s still pretty tasty.
Nutritional Breakdown
I’m not a nutritionist, but I can tell you what’s roughly in here. This is based on standard ingredients, so it’ll vary depending on your specific choices.
Per serving (makes 1 large shake or 2 smaller servings):
- Calories: approximately 380-420
- Protein: 6-7g
- Carbohydrates: 45-50g
- Fat: 18-20g
- Fiber: 2-3g
This is dessert. It’s not meant to be a light snack or a meal replacement. It’s meant to satisfy a chocolate craving in a way that feels indulgent but doesn’t require an hour of baking. If you want to make it lighter, use less ice cream, use a lower-fat milk, or reduce the chocolate slightly.
Final Thoughts
I love this shake because it’s honest. It doesn’t pretend to be something it’s not. It’s a dessert drink that tastes like chocolate and fudge and brownies, and it comes together in minutes. On nights when I’m tired or when someone drops by unexpectedly and I want to offer them something special, this is what I make.
The beauty of it is that it’s so simple, but it tastes so intentional. You’re not just throwing ingredients together; you’re creating something that tastes like you actually put thought into it. And the best part? You did, but it only took five minutes.
I hope you make this Chocolate Fudge Brownie Shake and love it as much as I do. And if you tweak it or add something I didn’t think of, I’d genuinely love to hear about it. That’s how recipes evolve, and that’s how we all get better at cooking.
Now go blend yourself something delicious.
—
Recipe Card
Chocolate Fudge Brownie Shake Recipe | Indulgent
Ingredients
Method
- Add cocoa powder and chopped chocolate to a blender with 1/4 cup of the milk. Blend until you have a smooth, muddy paste with no lumps.
- Add the remaining milk, ice cream, sugar, vanilla extract, salt, espresso powder (if using), and ice cubes.
- Blend until smooth and creamy, about 45 seconds to 1 minute.
- Taste and adjust sweetness or consistency as needed.
- Pour into a glass and serve immediately.