Christmas Ornament Cookies Recipe
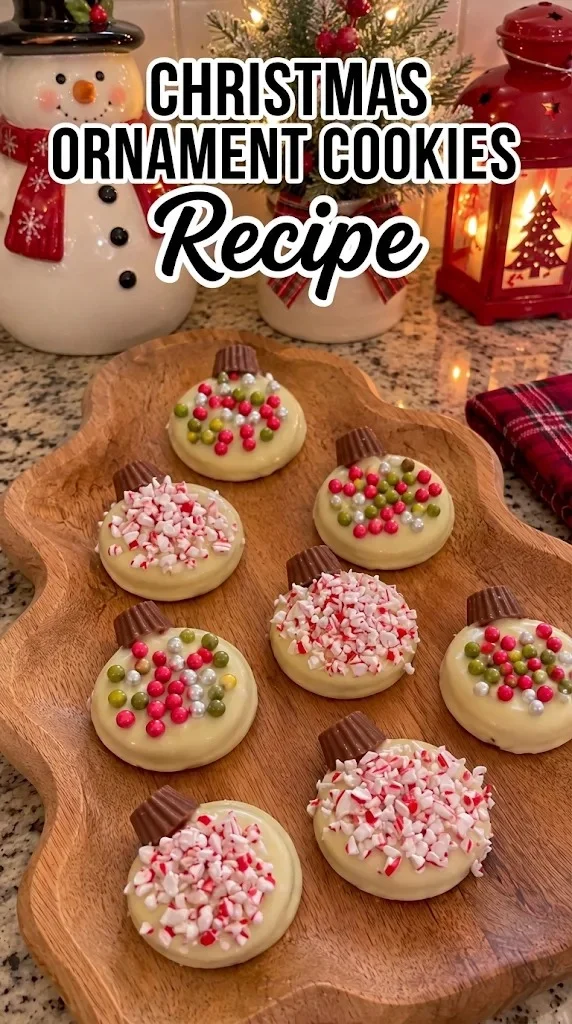
Crisp white chocolate meets a soft, buttery vanilla cookie in these Christmas Ornament Cookies, and the salty peanut butter cup cap keeps each bite interesting. It only takes a few simple steps, and the finished treats look festive on a platter. You can make a batch in one afternoon without an oven.
Christmas Ornament Cookies Ingredients
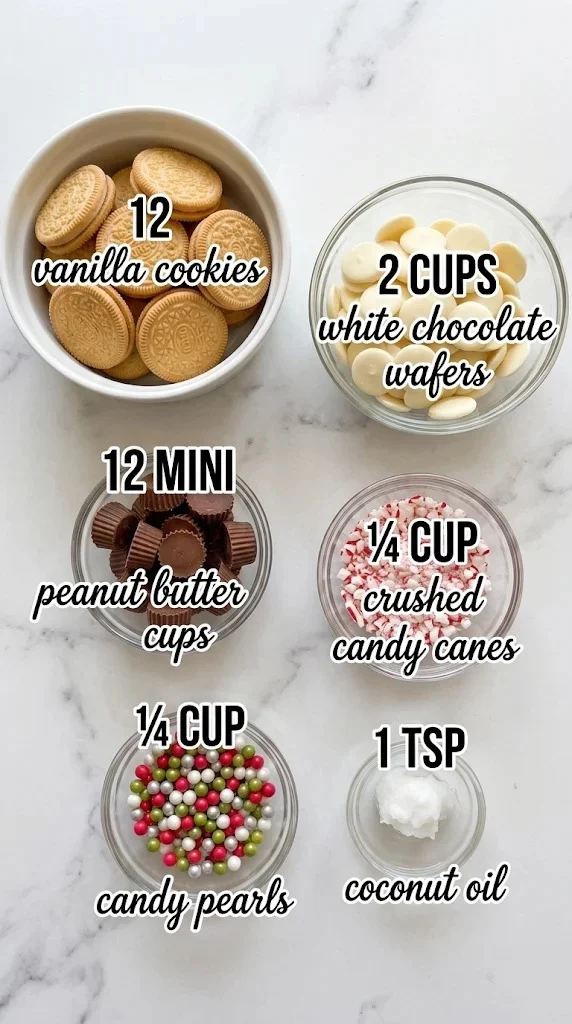
- 12 vanilla cookies — The cookie is the base of each ornament, so choose a plain, sturdy one with a flat top. Vanilla sandwich-style cookies hold their shape well under the coating. Check that each cookie sits flat on the tray before you start, since a rounded top makes the coating slide off.
- 2 cups white chocolate wafers — These melt into a smooth, glossy coating. Wafers are easier to melt evenly than chopped bars, so they are the right choice here. Keep them dry, because even a few drops of water can make the chocolate seize into a grainy paste.
- 1 tsp coconut oil, divided — A little coconut oil thins the melted chocolate so it coats smoothly and sets with a clean finish. Divide it evenly among the bowls as you melt the coating. Use the half you set aside later if the chocolate turns too thick.
- 12 mini peanut butter cups — These become the caps at the top of each ornament. Chilled cups hold their shape better when you press them on, so keep them in the refrigerator until you need them.
- 1/4 cup candy pearls — Candy pearls add sparkle and a little crunch. Use the colors you like for a classic holiday look. Sprinkle them while the coating is still wet so they stick firmly.
- 1/4 cup crushed candy canes — Crushed candy canes give a peppermint pop and a festive red-and-white finish. Crush them fine enough to sit flat on the coating. Large shards can slide off once the chocolate sets, so aim for small, even pieces.
Substitutions And Additions
White Chocolate Wafers
I’d use candy melts or good-quality white chocolate chips if you’re short on wafers. Chips can seize if you overheat them, so melt them slowly in short bursts and stir between each one. Candy melts are the easiest to work with because they stay fluid at a lower temperature and set quickly.
Mini Peanut Butter Cups
Mini chocolate-covered mints or a chocolate chip pressed into the coating will also work as a cap. They change the flavor, but the shape and finish stay the same. If you use a chip, press it in while the coating is still wet so it stays put.
Vanilla Cookies
Any plain, flat-topped cookie with a similar size will work. A thicker cookie will need more coating to cover it, so I’d stick with thin, sturdy vanilla cookies. Avoid cookies with crumbly edges, because they can break when you dip them.
How To Make This Christmas Ornament Cookies Recipe
-
Melt the coating. Put the 2 cups white chocolate wafers and half of the 1 tsp coconut oil in a microwave-safe bowl. Heat in 20-second bursts, stirring well after each one, until the chocolate is smooth and fully melted. Stop heating as soon as the last few lumps melt, so the chocolate stays glossy. Chocolate can keep its shape even when it looks melted, so stir thoroughly before you judge it.
Pro Tip: If the chocolate looks thick, add a few drops more coconut oil and stir until it flows smoothly. Do not add water, because it will make the coating grainy.
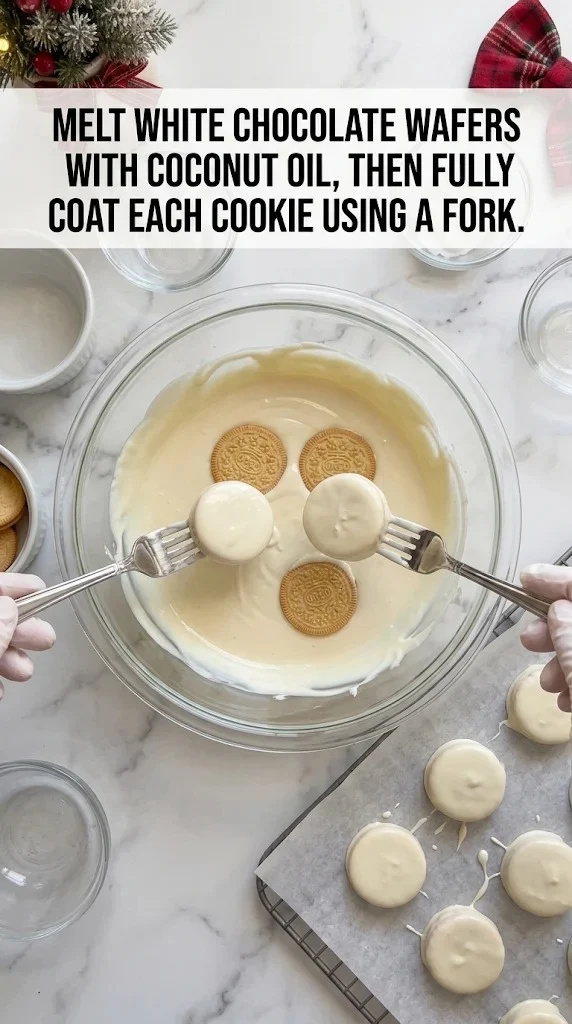
Coat each cookie. Set a vanilla cookie on a fork and lower it into the melted white chocolate. Spoon the coating over the top and sides until the cookie is completely covered. Lift it out, tap off the extra chocolate, and set it on a parchment-lined tray. Tapping removes drips that would otherwise pool at the bottom and set unevenly.
Pro Tip: Work quickly while the coating is still fluid, and fully coat each cookie so no cookie edges show through. If the chocolate cools and thickens during dipping, reheat it for 5 to 10 seconds and stir before continuing.
-
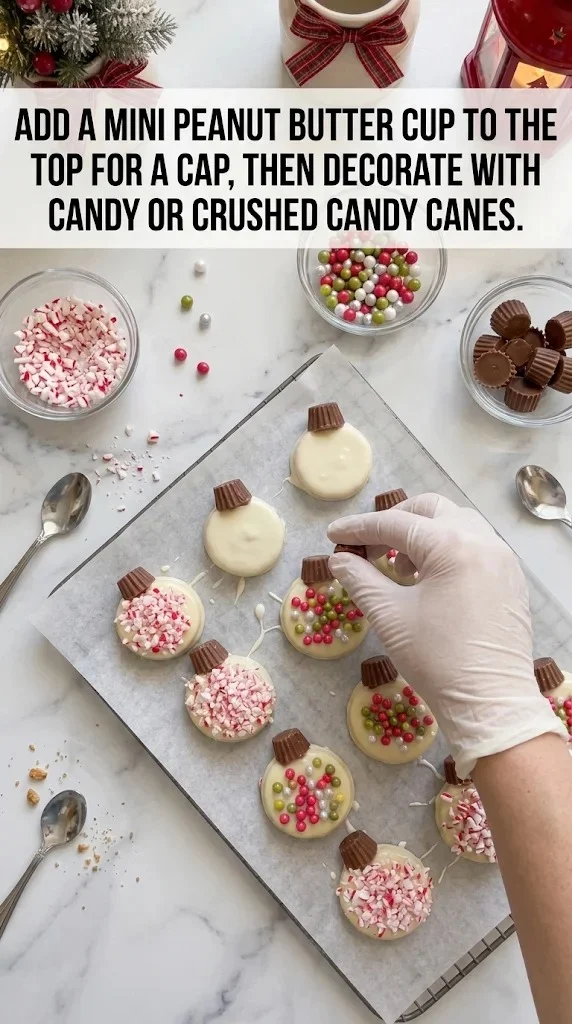
Add the peanut butter cup cap. While the coating is still wet, press one mini peanut butter cup onto the top of each cookie. Press gently until it sticks, so the cap sits level and centered. Pressing too hard can crack the cookie, so use a light, steady pressure.
Decorate and set. Sprinkle the candy pearls and crushed candy canes over the wet coating. Use the 1/4 cup candy pearls and 1/4 cup crushed candy canes across all 12 ornaments. Let the cookies sit at room temperature until the coating is firm and no longer tacky, about 20 to 30 minutes. Avoid moving them before then, or the decorations can smudge.
Pro Tip: Decorate right after you add the cap, because the sprinkles only stick while the coating is still wet. If the coating sets too fast in a warm kitchen, work with a few cookies at a time so each one is decorated while still wet.

How To Serve And Store
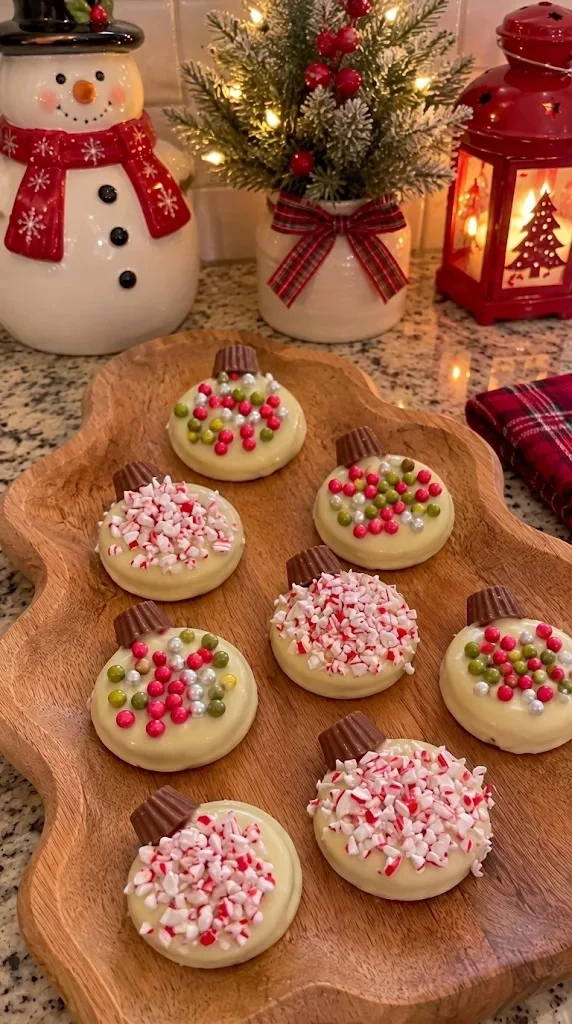
Arrange these on a platter for a holiday dessert table, or tuck one into a small gift box for a neighbor. They also look sweet next to a mug of hot cocoa.
In The Fridge
Store the cookies in a single layer in an airtight container in the refrigerator for up to 1 week. Let them sit at room temperature for about 10 minutes before eating so the coating softens slightly.
In The Freezer
Freeze the cookies in a single layer on a tray, then move them to an airtight container for up to 2 months. Thaw them in the refrigerator overnight, then bring them to room temperature before serving.
Frequently Asked Questions
Can you make Christmas Ornament Cookies ahead?
Yes, you can make them up to 2 days before serving. Keep them in an airtight container in the refrigerator, and let them come to room temperature before eating.
Can I use something other than a peanut butter cup?
Yes, a mini chocolate-covered mint or a chocolate chip works well. The cap will taste different, but the shape and finish will look just as festive.
How do I know when the coating is set?
The coating is set when it looks dry and no longer sticks to your finger. If it still feels soft, give it a few more minutes at room temperature.
Can I make these without candy canes?
Yes, you can skip the crushed candy canes and use only the candy pearls. The ornaments will still look bright and festive.
More Recipes You’ll Love
- Christmas Oreo Ornament Cookies Recipe
- Chocolate Cherry Brownie Bombs
- Christmas Snowman Donut Pops
- Santa Strawberry Cookie Bites Recipe
Find more holiday treats and easy dessert ideas by visiting Follow Hailee Recipes on Pinterest.

Christmas Ornament Cookies Recipe
Ingredients
Method
- Melt the 2 cups white chocolate wafers with half of the 1 tsp coconut oil in a microwave-safe bowl, heating in 20-second bursts and stirring until smooth. Set a vanilla cookie on a fork, lower it into the melted white chocolate, and spoon the coating over the top and sides until fully covered. Lift it out, tap off the extra, and set it on a parchment-lined tray.
- While the coating is still wet, press one mini peanut butter cup onto the top of each cookie. Sprinkle the 1/4 cup candy pearls and 1/4 cup crushed candy canes over the wet coating, then let the cookies sit at room temperature until firm, about 20 to 30 minutes.