
Christmas Snow Globe Sugar Cookies

Dry, bland sugar cookies are easy to avoid when you make Christmas Snow Globe Sugar Cookies, which bake up buttery and lightly crisp around a smooth, cloud-like cream cheese filling. Each one is topped with a clear sugar dome over a small festive scene, so the cookie looks as fun as it tastes. They suit holiday cookie trays and anyone who wants a special-looking cookie without complicated decorating.
Christmas Snow Globe Sugar Cookies Ingredients
Yield: 24 cookies | Total time: about 1 hr 45 min, including chilling and cooling
For the cookies
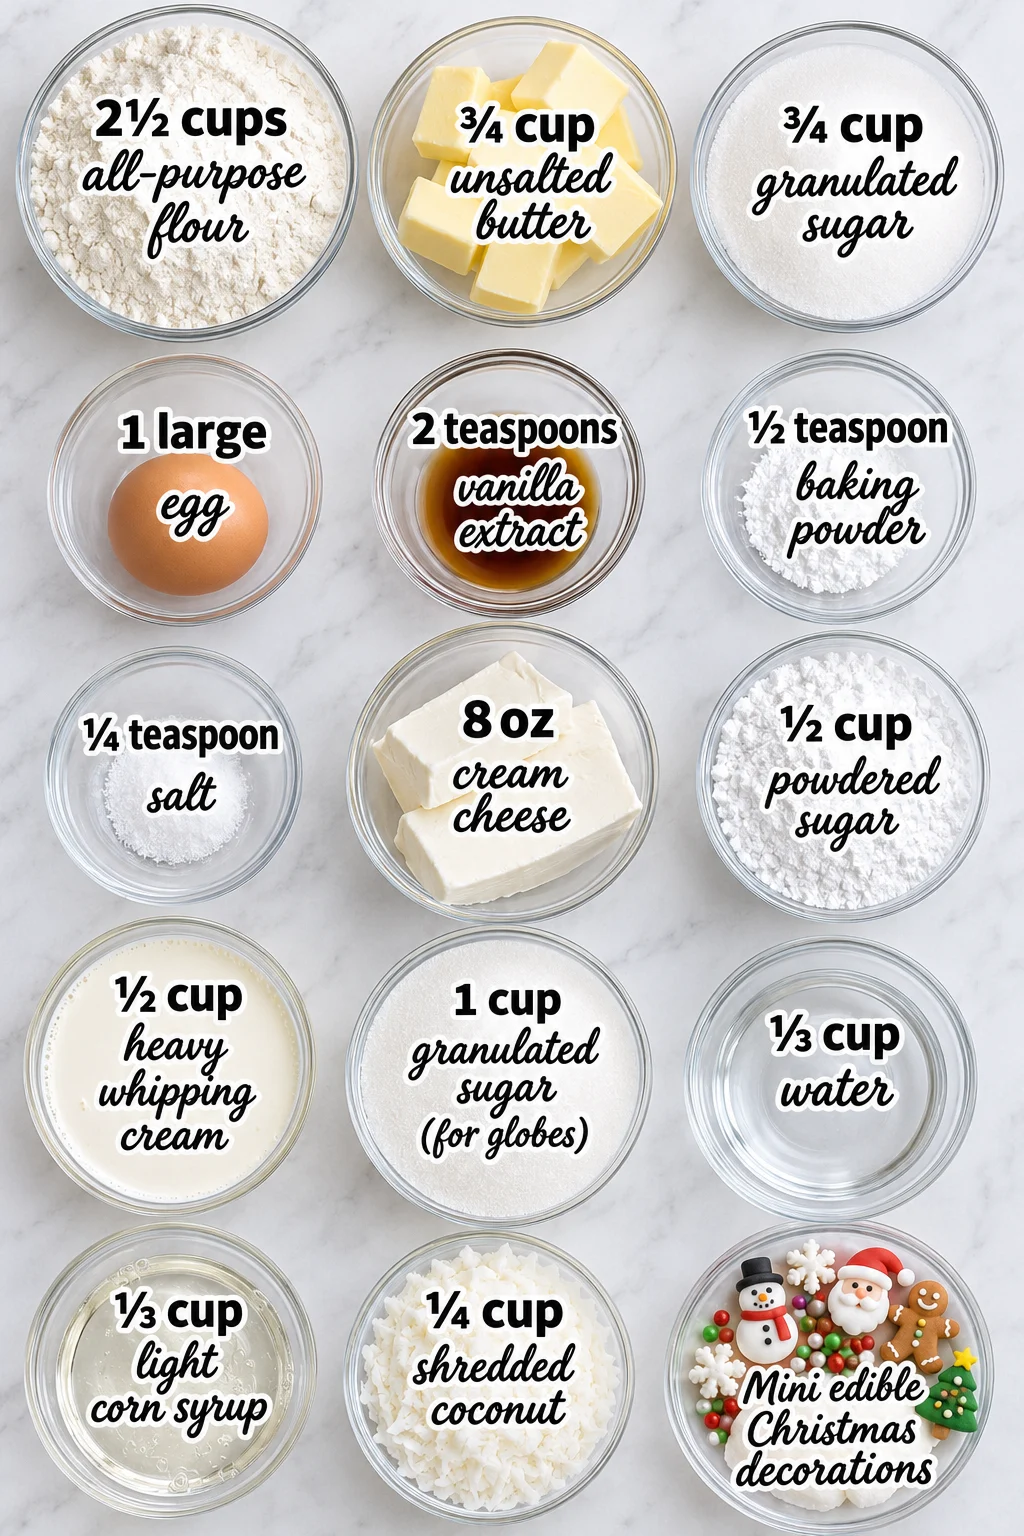
- 2 1/2 cups all-purpose flour — The structure of the cookie. Spoon it into the measuring cup and level it off so the dough does not turn dry and crumbly.
- 3/4 cup unsalted butter — Gives the cookies their tender, rich base. I like to soften it first so it creams easily with the sugar.
- 3/4 cup granulated sugar — Creams with the butter to lift the dough and give the baked edges a crisp finish.
- 1 large egg — Binds the dough and adds richness.
- 2 teaspoons vanilla extract — Rounds out the sweetness and gives the cookie its classic flavor.
- 1/2 teaspoon baking powder — Gives the cookies a light lift so they hold their shape.
- 1/4 teaspoon salt — Keeps the butter and sugar from tasting flat.
For the cream cheese filling
- 8 oz cream cheese — Use block cream cheese, not the spreadable tub style, so the filling holds its shape.
- 1/2 cup powdered sugar — Sweetens the filling and makes it silky smooth.
- 1/2 cup heavy whipping cream — Whipped and folded into the cream cheese for a light, fluffy filling. Chill the cream and bowl well before whipping, so the topping stays light.
For the sugar globes and decorations
- 1 cup granulated sugar (for globes) — The sugar that becomes the clear domes. It is separate from the cookie sugar above.
- 1/3 cup water — Dissolves the globe sugar so it cooks into a clear, glassy syrup.
- 1/3 cup light corn syrup — Helps keep the globe sugar smooth and clear instead of grainy.
- 1/4 cup shredded coconut — Forms the “snow” on each cookie. Unsweetened coconut gives a less sweet result.
- Mini edible Christmas decorations, as needed — The small scenes set inside each dome. Choose pieces small enough to fit under the sugar globe.
Substitutions And Additions
Cream Cheese
I’d reach for reduced-fat block cream cheese if you want a lighter filling. It will be a little softer, so chill it well before piping. Avoid spreadable tub cream cheese, which stays loose and will not hold its shape inside the cookie.
Coconut
Sweetened shredded coconut works if that is what you have. It makes the snow a bit sweeter and moister. Flaked coconut also works, though it may look more irregular on top.
Heavy Whipping Cream
Heavy cream is the best choice because it whips thick and stays stable. Half-and-half and milk will not whip and will leave the filling runny.
How To Make This Christmas Snow Globe Sugar Cookies Recipe
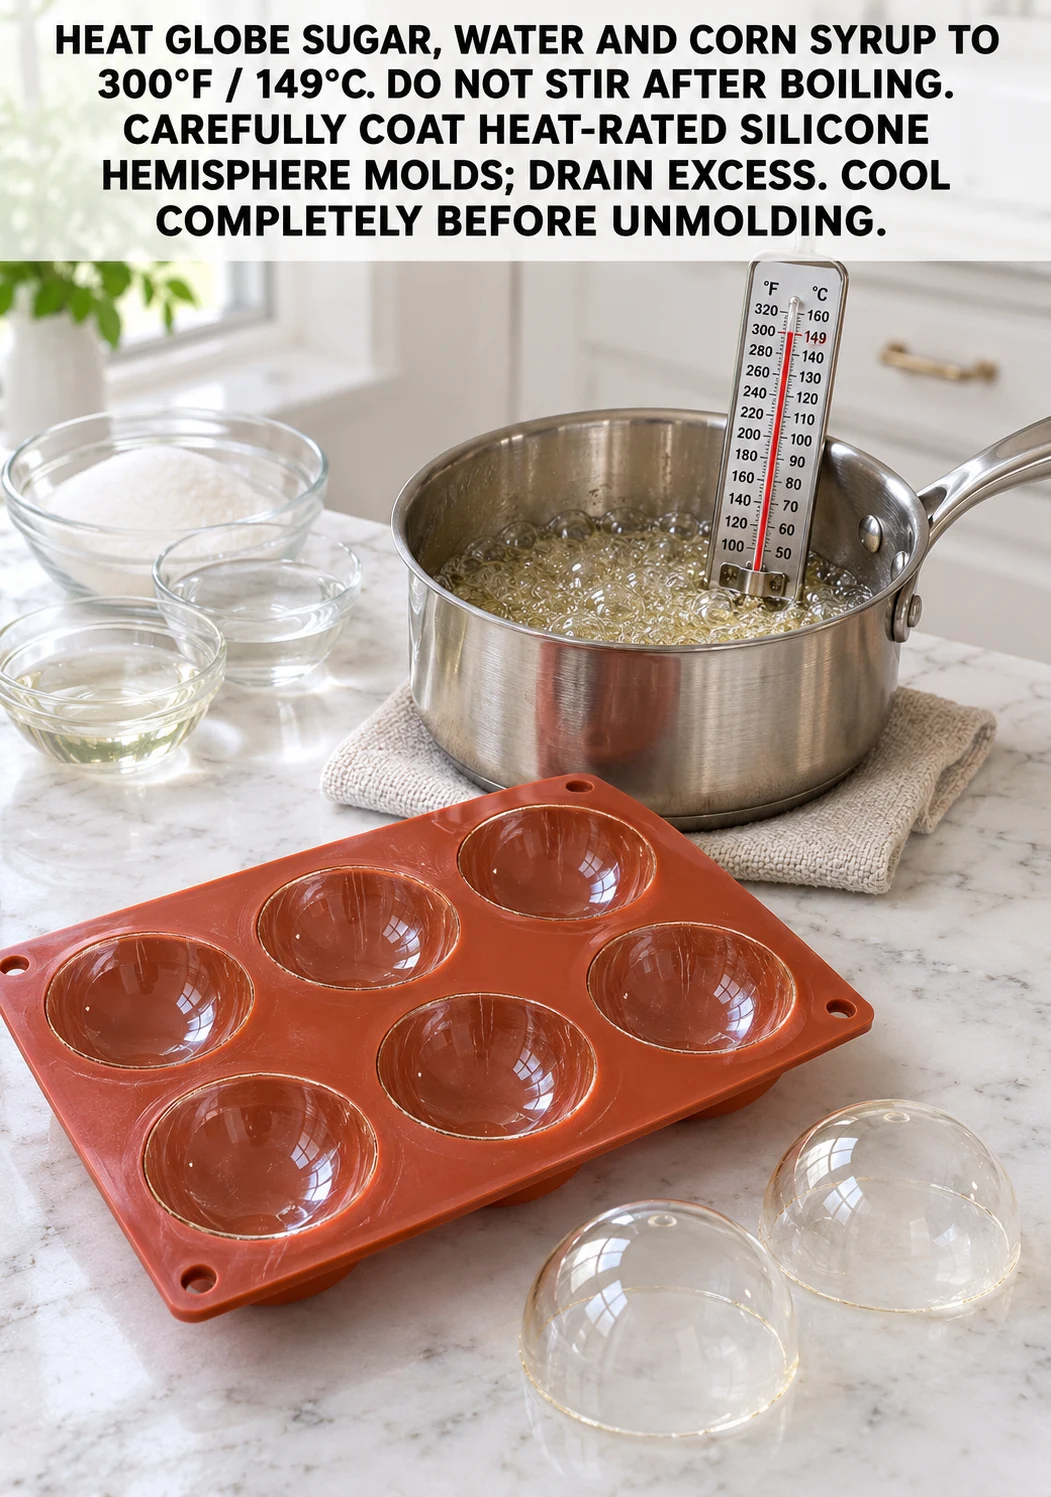
- Cook the globe sugar. Combine 1 cup granulated sugar, 1/3 cup water, and 1/3 cup light corn syrup in a small saucepan. Heat over medium heat, stirring only until the sugar dissolves, then stop stirring. Cook until the mixture reaches 300°F (149°C) on a candy thermometer. Do not stir after it boils, because stirring can make the sugar grainy. Watch the thermometer closely, since the syrup can go from clear to browned quickly near the target temperature.
- Coat the silicone molds. Carefully coat heat-rated silicone hemisphere molds with the hot syrup, then drain off the excess. Work slowly and use oven mitts, because the syrup is extremely hot. Let the domes cool completely before unmolding, usually about 15 to 20 minutes. Unmolding early can crack the domes or make them stick.
- Cream the butter and sugar. In a large bowl, beat 3/4 cup softened unsalted butter and 3/4 cup granulated sugar with a mixer on medium speed until light and fluffy, about 2 to 3 minutes. Creaming traps air and gives the cookies a tender texture. Scrape the bowl often so no butter is left unmixed at the bottom.
- Beat in the egg and vanilla. Add 1 large egg and 2 teaspoons vanilla extract and beat until fully combined and smooth. If the mixture looks split, keep mixing for another 30 seconds, since it usually comes back together.
- Add the dry ingredients. Add 2 1/2 cups all-purpose flour, 1/2 teaspoon baking powder, and 1/4 teaspoon salt. Mix on low speed just until a soft dough forms. Mix only until the flour disappears into the dough, since going further toughens these snow globe cookies.
- Chill the dough. Wrap the dough and chill it for 30 minutes. Chilling firms the butter so the cut cookies keep their shape in the oven. The dough should feel firm but still easy to roll.
- Roll and cut the dough. On a lightly floured surface, roll the dough 1/4 inch thick. Cut into rounds with a cookie cutter, rerolling scraps once if needed. Transfer the rounds to a parchment-lined baking sheet, spacing them about 2 inches apart.
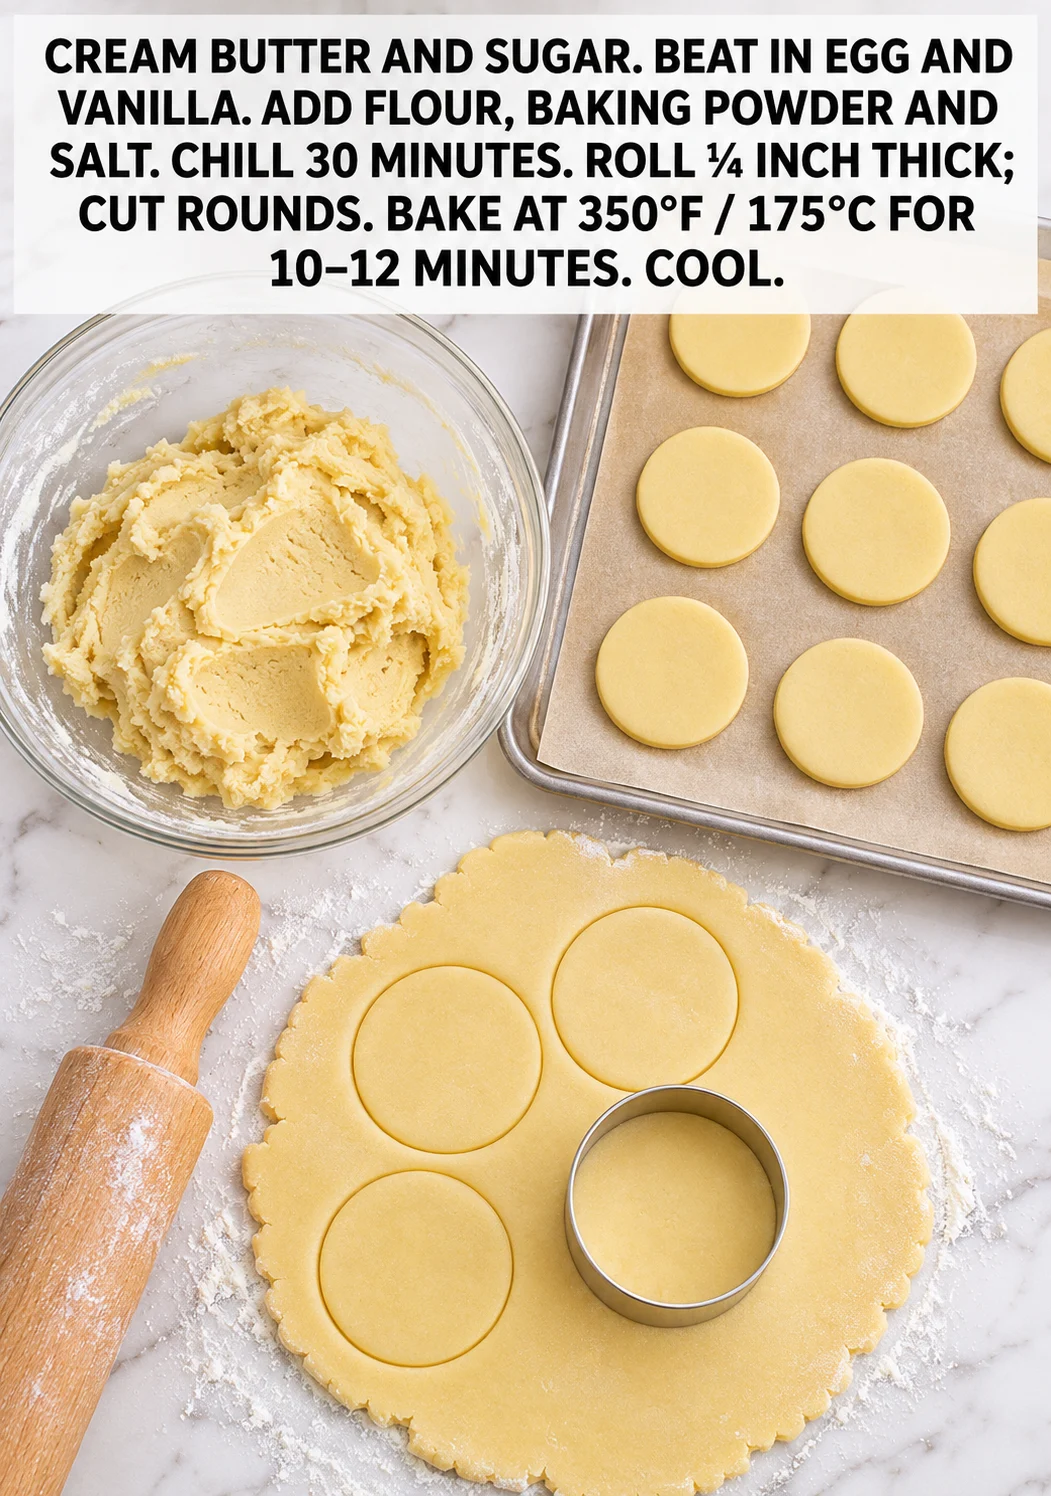
- Bake the cookies. Bake at 350°F (175°C) for 10 to 12 minutes, until the edges are just golden. Pull them when the edges are golden rather than browned to keep the centers soft. Let the cookies rest on the baking sheet for 2 minutes, then move them to a wire rack.
- Cool the cookies. Let the cookies cool completely on the wire rack before filling. Warm cookies will melt the cream cheese filling and make it runny.
- Make the cream cheese filling. In a bowl, beat 8 oz cream cheese and 1/2 cup powdered sugar until smooth with no lumps. In a separate bowl, whip 1/2 cup cold heavy whipping cream until soft peaks form. Fold the whipped cream into the cream cheese mixture gently with a spatula so the filling stays light. Keep the cream cheese filling cold right up until it goes into the piping bag.
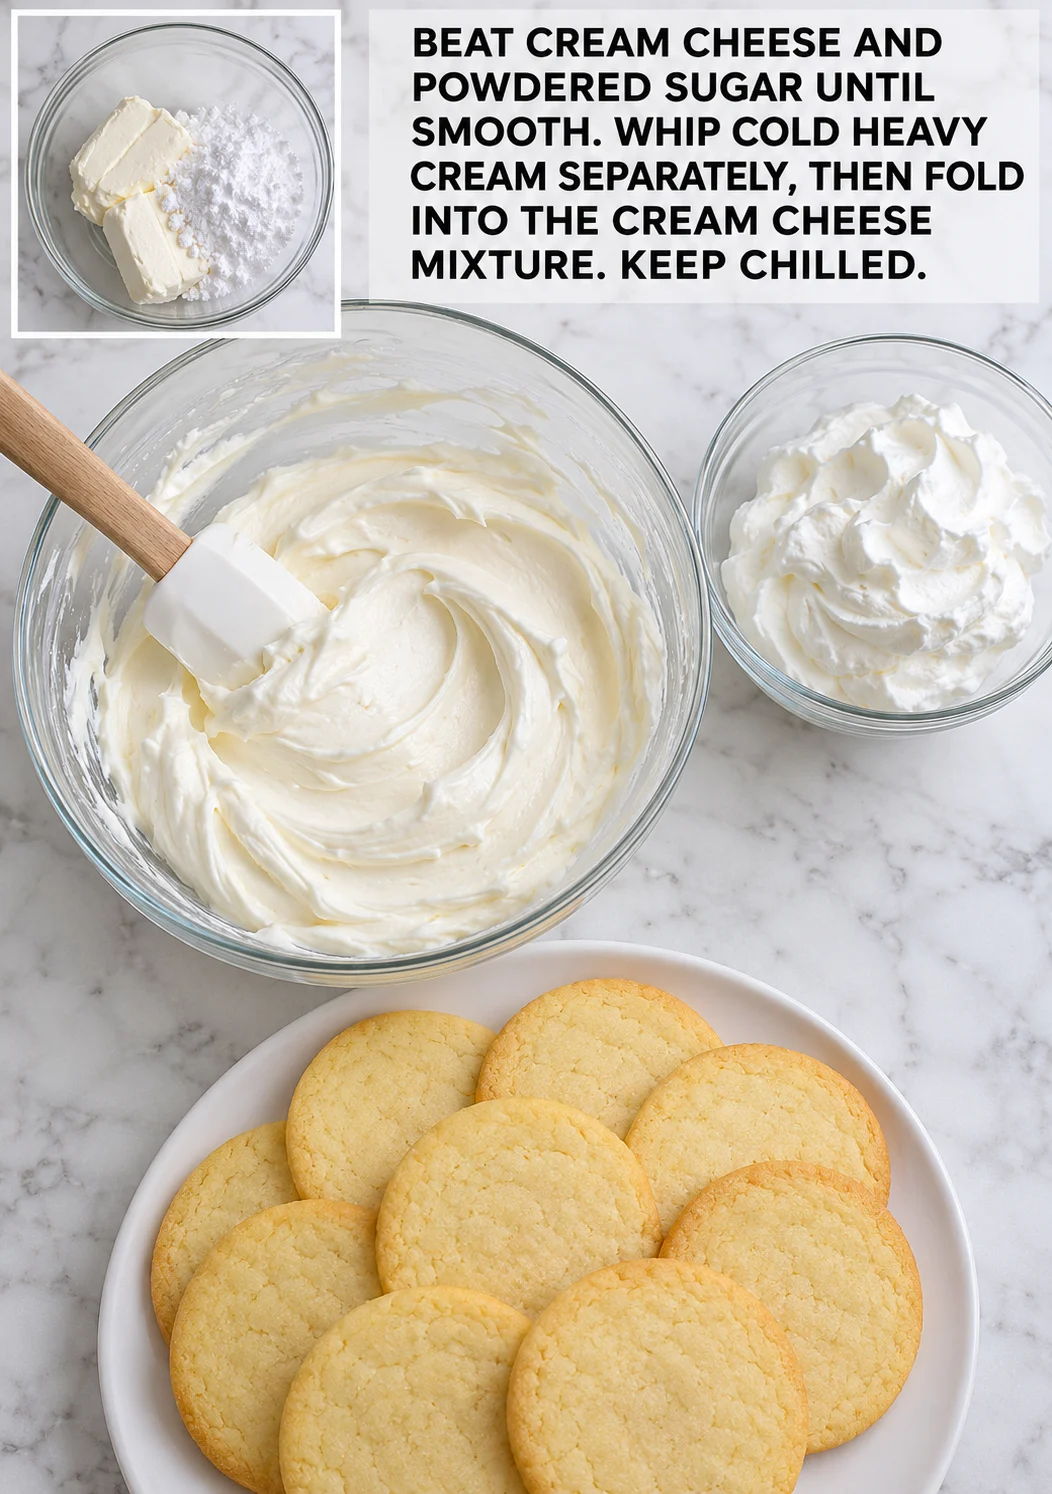
- Pipe the filling. Pipe the cream cheese filling onto the cooled cookies, covering the center. If the filling feels soft, chill it for 20 to 30 minutes before piping, since it firms as it gets cold.
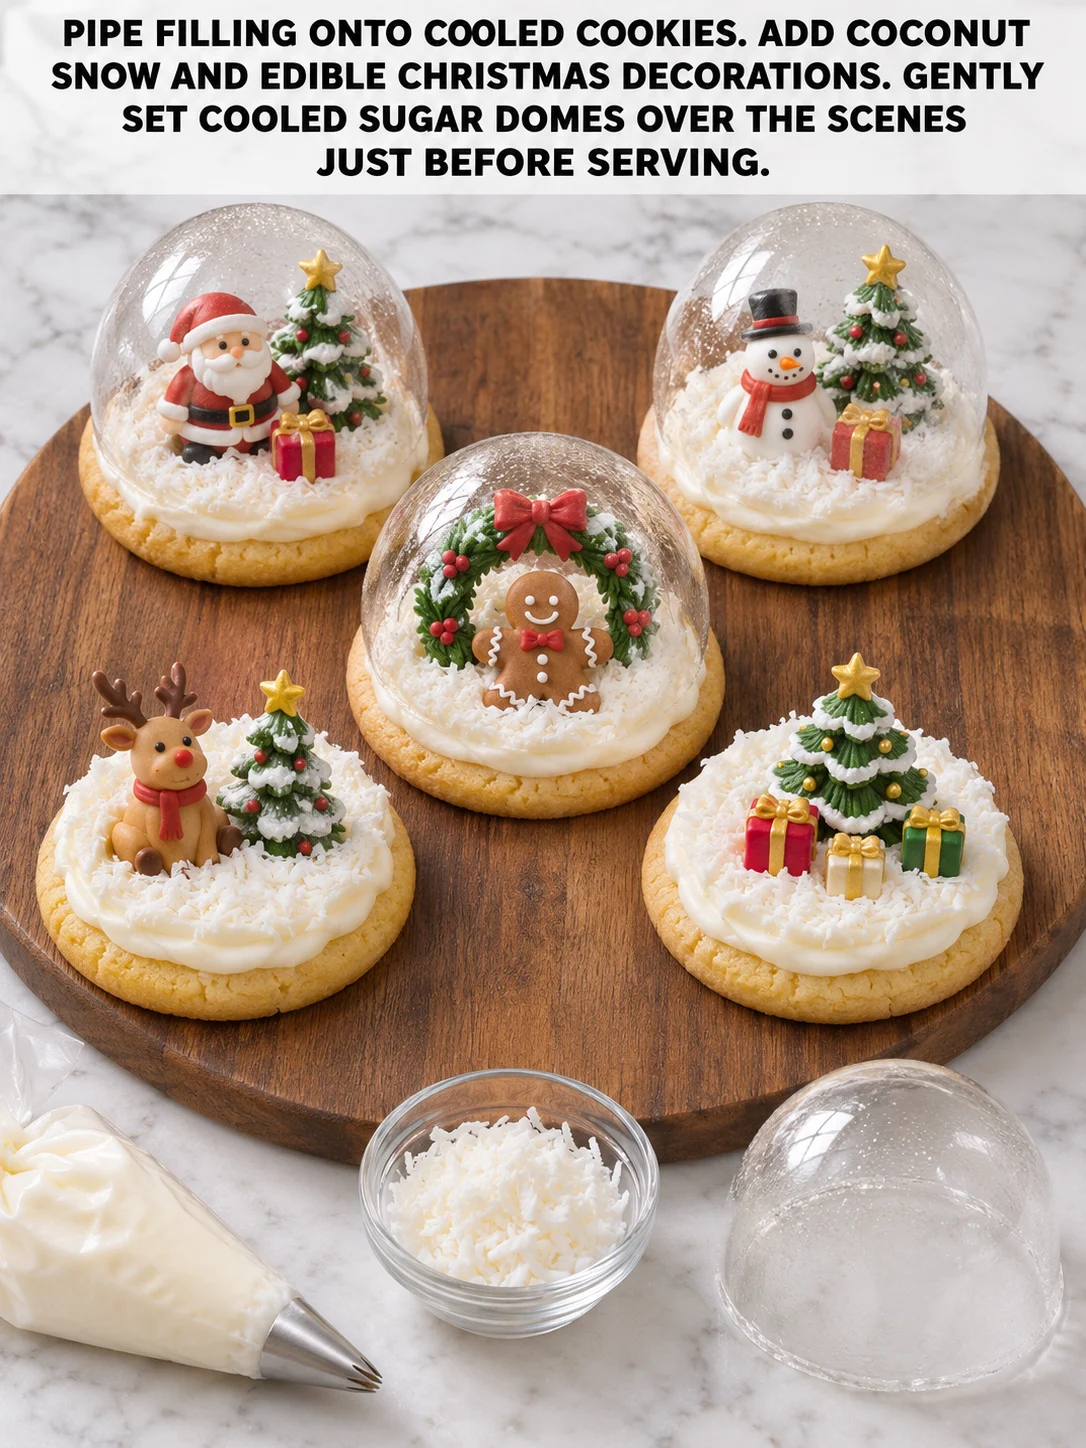
- Add the snow and decorations. Sprinkle 1/4 cup shredded coconut over the filling and add the mini edible Christmas decorations. Press them lightly so they stay in place.
- Set the sugar domes. Gently set the cooled sugar domes over the scenes just before serving. Lower them carefully so the decorations stay inside the dome and the cookie stays intact.

How To Serve And Store
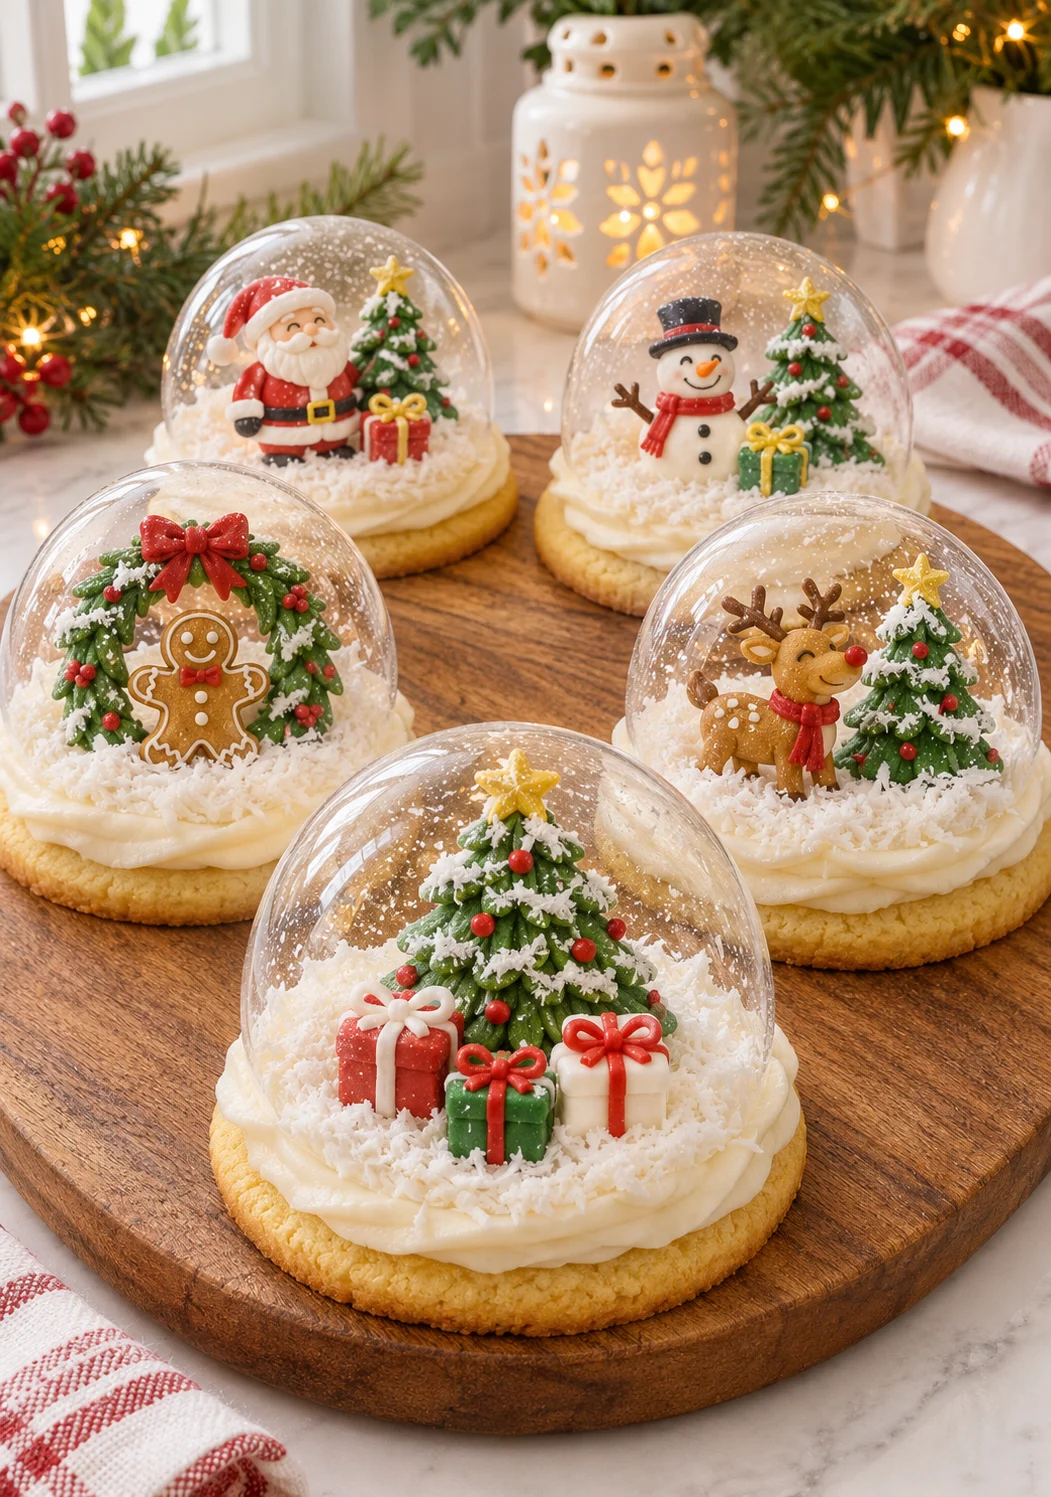
Serve these on a holiday platter with hot cocoa or coffee. Add the domes just before serving so the sugar stays clear and sharp.
In The Fridge
Store the filled cookies, without the domes, in an airtight container in the refrigerator for up to 3 days. Place the domes on top when you are ready to serve.
In The Freezer
Freeze the plain baked cookies, without filling or domes, in an airtight container for up to 3 months. Let them come to room temperature before filling, then add the decorations right before serving. Do not freeze the filled cookies, because the cream cheese filling becomes watery when thawed.
Frequently Asked Questions
Can you make these cookies ahead?
Yes. Bake the plain cookies and make the sugar domes ahead, storing them separately in airtight containers. Keep the cookies and domes at room temperature until serving time. Fill the cookies and refrigerate them as described above, then add the domes just before serving.
Why did my sugar domes crack?
Cracks usually happen when the domes are pulled from the mold before they have cooled completely. Wait until the coating is fully cool before unmolding.
What if my filling is too soft?
Chill the filling for 20 to 30 minutes before piping. It firms as it gets cold and holds its shape better on the cookies.
More Recipes You’ll Love
- Cranberry Cream Cups in Red Coral Lace Tuiles
- Christmas Candle Cake Treats
- Pistachio Cream Cups in Green Coral Lace Tuiles
- Crispy Garlic Parmesan Potato Sticks

Christmas Snow Globe Sugar Cookies
Ingredients
Method
- Cook the globe sugar: combine 1 cup granulated sugar, 1/3 cup water, and 1/3 cup light corn syrup in a small saucepan; heat over medium heat, stirring only until the sugar dissolves, then stop stirring; cook until the mixture reaches 300°F (149°C) on a candy thermometer, without stirring after it boils.
- Coat the silicone molds: carefully coat heat-rated silicone hemisphere molds with the hot syrup and drain off the excess; cool completely for about 15 to 20 minutes before unmolding.
- Cream the butter and sugar: beat 3/4 cup softened unsalted butter and 3/4 cup granulated sugar until light and fluffy, about 2 to 3 minutes.
- Beat in the egg and vanilla: add 1 large egg and 2 teaspoons vanilla extract and beat until fully combined and smooth.
- Add the dry ingredients: add 2 1/2 cups all-purpose flour, 1/2 teaspoon baking powder, and 1/4 teaspoon salt, mixing on low speed just until a soft dough forms.
- Chill the dough: wrap the dough and chill for 30 minutes until firm but easy to roll.
- Roll and cut the dough: roll the dough 1/4 inch thick on a lightly floured surface and cut into rounds, rerolling scraps once if needed.
- Bake the cookies: bake at 350°F (175°C) for 10 to 12 minutes until the edges are just golden; rest 2 minutes on the sheet, then move to a wire rack.
- Cool the cookies: let the cookies cool completely on the wire rack before filling.
- Make the cream cheese filling: beat 8 oz cream cheese and 1/2 cup powdered sugar until smooth; whip 1/2 cup cold heavy whipping cream to soft peaks and fold gently into the cream cheese mixture; keep chilled.
- Pipe the filling: pipe the cream cheese filling onto the cooled cookies, covering the center; if soft, chill 20 to 30 minutes before piping.
- Add the snow and decorations: sprinkle 1/4 cup shredded coconut over the filling and add the mini edible Christmas decorations, pressing lightly.
- Set the sugar domes: gently set the cooled sugar domes over the scenes just before serving.