Classic Baked Macaroni and Cheese
Classic Baked Macaroni and Cheese
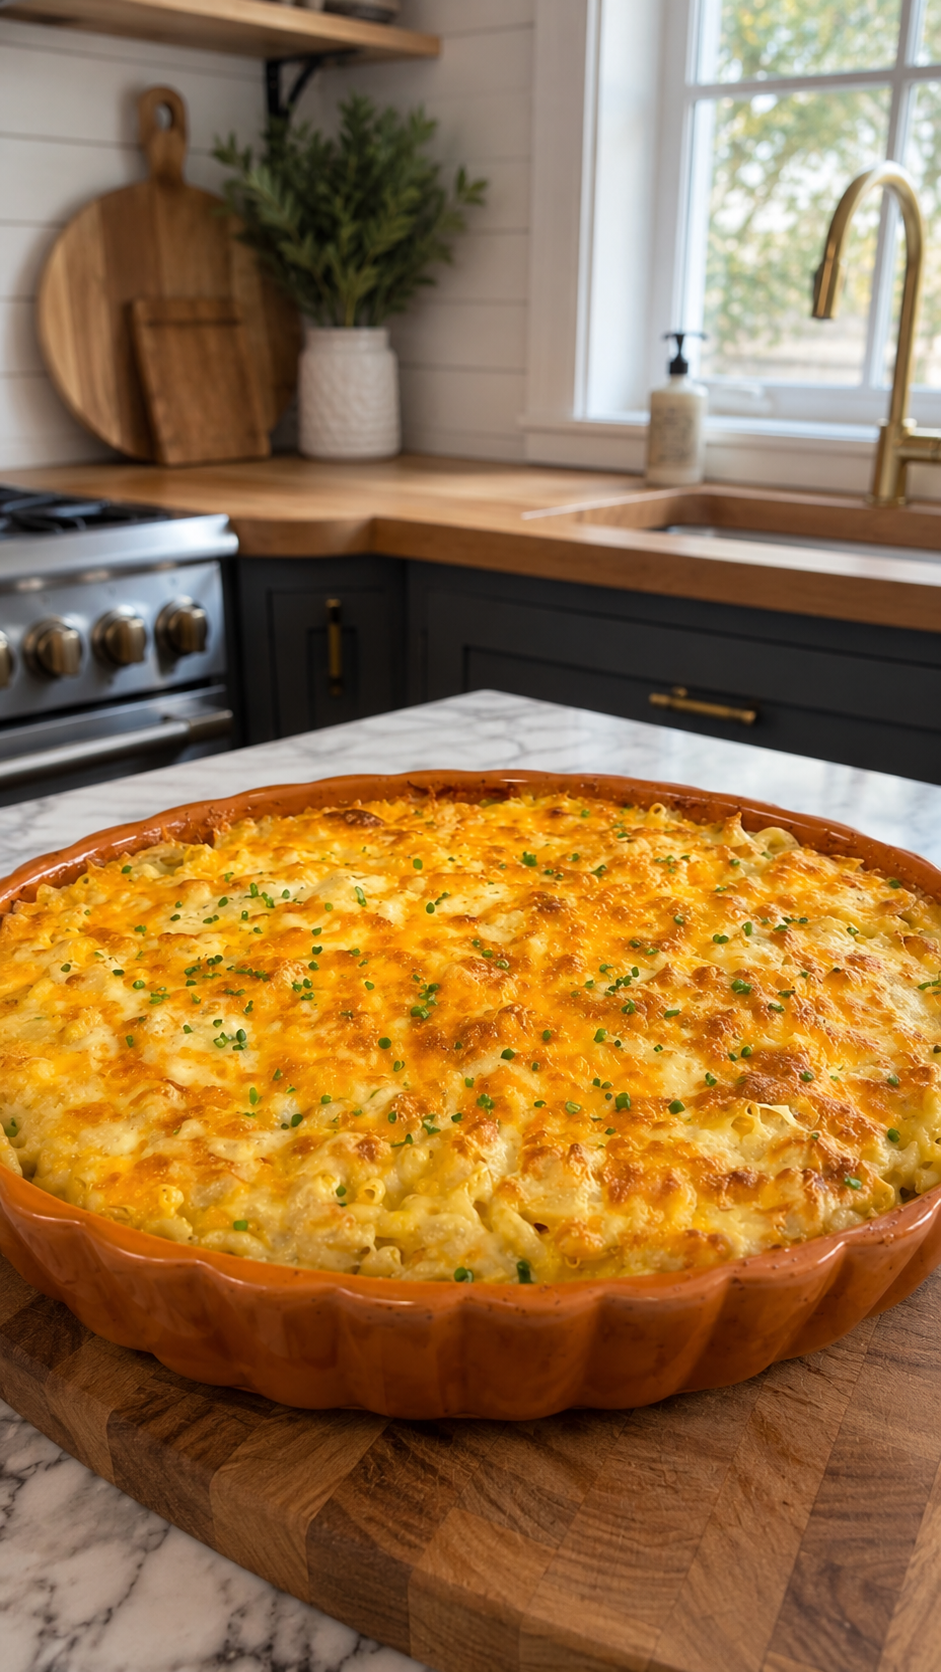
Classic Baked Macaroni and Cheese: A Recipe That Actually Tastes Like Home
I’m going to be honest with you right from the start: I didn’t grow up making homemade mac and cheese from scratch. My mom used the blue box, and I loved it. There’s nothing wrong with that. But somewhere in my twenties, after a particularly rough day, I found myself standing in my kitchen at 9 p.m., craving something warm and creamy and deeply comforting—and I decided to try making it myself.
That first attempt was a disaster. I made a roux that broke, cheese that got grainy, and a top that burned while the inside stayed cold. But I was determined. Over the years, I’ve made this dish probably a hundred times, and I’ve learned exactly what works, what doesn’t, and why. This Classic Baked Macaroni and Cheese recipe is the result of all that trial and error, and honestly, it’s become one of my most-requested recipes from friends and family.
What makes this version special isn’t anything fancy or complicated. It’s a real, honest baked mac and cheese with a creamy, velvety cheese sauce, tender pasta, and a golden, buttery breadcrumb topping that actually stays crispy. It’s the kind of dish that works for weeknight dinners, potlucks, holiday sides, or just when you need something that tastes like a hug. Whether you’re cooking for your family, impressing someone new, or feeding a crowd, this recipe delivers every single time.
If you’re looking for more cozy comfort food recipes like this one, follow me on HaileeRecipes on Pinterest—I share recipes that are real, tested, and actually delicious.
Why You’ll Love This Recipe
Let me break down what makes this mac and cheese worth your time and effort.
- It’s genuinely creamy. This isn’t a watery, disappointing casserole. The cheese sauce is thick, luxurious, and coats every piece of pasta.
- The flavor is balanced. I use a combination of sharp cheddar, gruyere, and a touch of cream cheese to create depth without being one-note or overwhelming.
- The texture is perfect. Tender pasta, creamy sauce, and a crispy-buttery topping that doesn’t get soggy.
- It’s actually simple. You don’t need to be a trained chef. If you can boil pasta and make a basic sauce, you can do this.
- It reheats beautifully. Unlike some casseroles that dry out, this one stays creamy when you reheat it properly.
- It’s endlessly customizable. Want to add bacon? Jalapeños? Lobster? This base recipe is your canvas.
Ingredients
Here’s what you’ll need. I’ve included some notes about each ingredient because the quality of what you use really does matter.
- 1 pound elbow macaroni — Use regular pasta, not the whole wheat kind for this recipe. It needs to be tender and absorb the sauce properly.
- 4 tablespoons unsalted butter — This is the base of your roux. Don’t skip the butter or try to use oil.
- 4 tablespoons all-purpose flour — This thickens your sauce. Make sure it’s fresh and not clumpy.
- 3 cups whole milk — Whole milk matters here. Low-fat milk won’t give you the richness you need. Warm it slightly before adding if you want to avoid lumps.
- 1 cup heavy cream — This is what makes it silky. You could use half-and-half in a pinch, but cream is ideal.
- 2 cups sharp cheddar cheese, shredded — Sharp, not mild. The flavor is more pronounced and interesting. Please shred it yourself from a block if possible; pre-shredded cheese has anti-caking agents that can make your sauce grainy.
- 1 cup gruyere cheese, shredded — This adds a nutty, sophisticated flavor. If you can’t find it, extra sharp cheddar works, but gruyere is worth seeking out.
- 2 ounces cream cheese, cubed — This keeps the sauce silky and prevents it from becoming grainy. It’s a secret weapon.
- 1 teaspoon salt — Adjust to taste at the end.
- ½ teaspoon black pepper — Fresh cracked is better than pre-ground.
- ¼ teaspoon cayenne pepper — Optional but recommended. It adds a subtle warmth without heat.
- ¼ teaspoon garlic powder — Just a whisper of garlic flavor.
- ¼ teaspoon smoked paprika — Adds depth and a tiny hint of smokiness.
- ½ cup panko breadcrumbs — For the topping.
- 2 tablespoons melted butter — To mix with the breadcrumbs.
- 2 tablespoons grated Parmesan cheese — For the topping, for extra flavor and golden color.
Hailee’s Tip: Buy your cheeses from a real cheese counter if you can. The quality difference is noticeable, and the staff can usually help you pick the right ones. If your store doesn’t have a counter, look for blocks in the specialty section, not the pre-shredded bags.
Hailee’s Tip: Warming your milk slightly (just a few seconds in the microwave) before adding it to the roux helps prevent lumps. It’s not required, but it’s a small step that makes a real difference.
Optional Add-Ins and Variations
This is where you can make this recipe your own. Here are some additions I love, and how to use them:
- Crispy bacon: Cook 6 slices, crumble them, and stir into the sauce before baking. Add extra to the breadcrumb topping too.
- Caramelized onions: Make these ahead and fold them in. They add sweetness and depth.
- Fresh thyme or sage: Add 1 teaspoon of fresh herbs to the sauce. Dried works too, but use half the amount.
- Jalapeños or hot sauce: For heat, add ½ cup diced jalapeños or 1 tablespoon of your favorite hot sauce to the cheese sauce.
- Lobster or crab: Fold in 1 to 1½ cups of cooked lobster or crab meat for a fancy version. This is genuinely good.
- Roasted broccoli or cauliflower: Toss in 2 cups of roasted vegetables. This makes it feel less heavy and adds nutrition.
- Truffle oil: Drizzle a tiny bit over the top before serving. A little goes a long way.
Step-by-Step Method
I’m going to walk you through this the way I actually make it, with the honest moments included.
Step 1: Start your pasta water and preheat. Fill a large pot with salted water and bring it to a boil. While that’s happening, preheat your oven to 350°F. Grease a 9-by-13-inch baking dish with butter or cooking spray.
Step 2: Cook the pasta. Add your elbow macaroni to the boiling water and cook it to just under al dente—about one minute less than the package says. You want it slightly firm because it will continue cooking in the oven. Drain it well, but don’t rinse it. Set aside.
Hailee’s What I Messed Up Moment: I used to cook the pasta all the way to al dente and then bake it, which resulted in mushy mac and cheese. That one minute of difference matters.
Step 3: Make your roux. In a large saucepan, melt the 4 tablespoons of butter over medium heat. Once it’s foaming, add the flour and whisk constantly for about 2 minutes. You’re cooking out the raw flour taste. It should smell a little nutty. Don’t let it brown.
Step 4: Add your milk and cream. Slowly pour in the warm milk while whisking constantly. This is where people get lumps, and it’s usually because they’re adding the milk too fast. Take your time. Once all the milk is incorporated, add the heavy cream and whisk until smooth. Continue cooking, stirring occasionally, until the sauce thickens enough to coat the back of a spoon, about 5 to 7 minutes.
Step 5: Add your seasonings. Stir in the salt, pepper, cayenne, garlic powder, and smoked paprika. Taste it. Does it need more salt? This is the time to adjust.
Step 6: Add your cheeses. Remove the pan from heat. Add the shredded cheddar and gruyere cheese, stirring until completely melted. Then add the cubed cream cheese and stir until it’s fully incorporated. The cream cheese will melt into the sauce and make it silky. If you’re adding any mix-ins like bacon or herbs, stir them in now.
Hailee’s What I Messed Up Moment: I used to add the cheese while the pan was still on the heat, which caused it to break and become grainy. Removing it from the heat first makes all the difference.
Step 7: Combine everything. Pour the cheese sauce over the cooked pasta and stir gently until every piece of pasta is coated. Transfer this mixture to your prepared baking dish.
Step 8: Make the topping. In a small bowl, mix the panko breadcrumbs with the melted butter and grated Parmesan cheese. Sprinkle this evenly over the top of the mac and cheese.
Step 9: Bake. Place the baking dish in the preheated oven and bake for 25 to 30 minutes, until the top is golden brown and the edges are bubbling. If your topping is browning too quickly, you can cover it loosely with foil for the first 15 minutes.
Step 10: Rest and serve. Let it sit for 5 minutes before serving. This helps it set slightly and makes it easier to serve. It will still be creamy and warm.
Common Mistakes to Avoid
I’ve made all of these mistakes so you don’t have to.
- Using pre-shredded cheese: Those anti-caking agents will make your sauce grainy and weird. Block cheese only.
- Adding cheese while the pan is hot: This breaks the sauce. Always remove from heat first.
- Cooking the pasta all the way to al dente: It will overcook in the oven. Undercook it slightly.
- Adding milk too quickly to the roux: This creates lumps. Whisk constantly and add slowly.
- Skipping the cream cheese: It’s not just for flavor; it keeps the sauce from breaking. Don’t skip it.
- Not seasoning enough: Taste your sauce before it goes in the oven. It should taste a little more seasoned than you’d eat it plain, because the pasta dilutes the flavor.
- Baking at too high a temperature: 350°F is right. Higher temperatures can cause the top to burn before the inside is heated through.
- Not letting it rest before serving: Five minutes makes a real difference in how it holds together on the plate.
My Tested Substitutions
Not everyone has the exact ingredients on hand, and that’s okay. Here’s what you can swap without ruining the dish:
- No gruyere? Use all sharp cheddar, or half sharp cheddar and half extra sharp white cheddar.
- No cream cheese? You can skip it, but add an extra tablespoon of butter and an extra ¼ cup of heavy cream to keep it silky.
- Half-and-half instead of heavy cream? It works, but the sauce won’t be quite as rich. Use 1¼ cups instead of 1 cup.
- No panko? Regular breadcrumbs work, but use slightly less because they’re denser. You can also use crushed crackers or crushed potato chips for something fun.
- Lactose-free milk and cream? These work perfectly. The process is the same.
- Gluten-free flour? Use a one-to-one gluten-free flour blend for the roux. It works great.
How to Customize
This recipe is a foundation, and you can build on it in so many ways.
Make it fancy: Add lobster or crab, use a mix of cheeses like fontina and aged cheddar, and finish with a sprinkle of fresh herbs and truffle oil.
Make it spicy: Add diced jalapeños, a dash of hot sauce, and maybe some smoked paprika. Some people like to add a pinch of cayenne to the breadcrumb topping too.
Make it loaded: Add crispy bacon, caramelized onions, roasted garlic, and fresh thyme. This becomes a main dish on its own.
Make it lighter: Use half-and-half instead of cream, add roasted vegetables, and use a mixture of cheeses with less fat content.
Make it gourmet: Use a mix of aged cheddar, gruyere, fontina, and a tiny bit of blue cheese. Add roasted mushrooms and fresh sage.
Serving Ideas
Mac and cheese is incredibly versatile. Here’s how I serve it:
- As a main dish: Pair it with a simple green salad and crusty bread. Add a protein on the side like roasted chicken or grilled vegetables.
- As a side dish: Serve it alongside grilled steak, roasted chicken, or baked salmon.
- At a potluck: Transport it in the baking dish, covered with foil, and reheat it gently at the venue.
- For a crowd: Double the recipe and use a larger baking dish, or make two batches.
- With toppings: Serve with extra crispy bacon, fresh chives, or a drizzle of hot sauce on the side.
Meal Prep and Storage
This is one of the best things about this recipe: it stores beautifully.
Refrigerator: Store leftovers in an airtight container for up to 4 days. The sauce will thicken as it cools, which is normal.
Freezing: You can freeze this before baking. Assemble it completely, cover it tightly with plastic wrap and then foil, and freeze for up to 3 months. Bake from frozen, adding 15 to 20 minutes to the baking time. Or freeze leftovers in individual portions for up to 2 months.
Reheating: This is important. Don’t use the microwave if you can help it; it dries things out. Instead, preheat your oven to 325°F, transfer the mac and cheese to a baking dish, cover it with foil, and bake for 15 to 20 minutes until heated through. You can add a splash of milk or cream to the top if it seems dry.
Make-ahead tip: You can make the cheese sauce up to 2 days ahead and store it in the refrigerator. When you’re ready to use it, gently reheat it over low heat, stirring constantly, and proceed with the recipe.
Nutritional Breakdown
This is a rich, indulgent dish, and I’m not going to pretend otherwise. But here’s what you’re getting per serving (this recipe makes 8 servings):
- Calories: approximately 620
- Protein: 28g
- Carbohydrates: 48g
- Fat: 35g
- Fiber: 2g
This is comfort food. It’s meant to be enjoyed, not eaten every day, but also not something you need to feel guilty about. A reasonable portion with a big salad and some vegetables makes