Homemade Strawberry Shortcake Cheesecake
Homemade Strawberry Shortcake Cheesecake
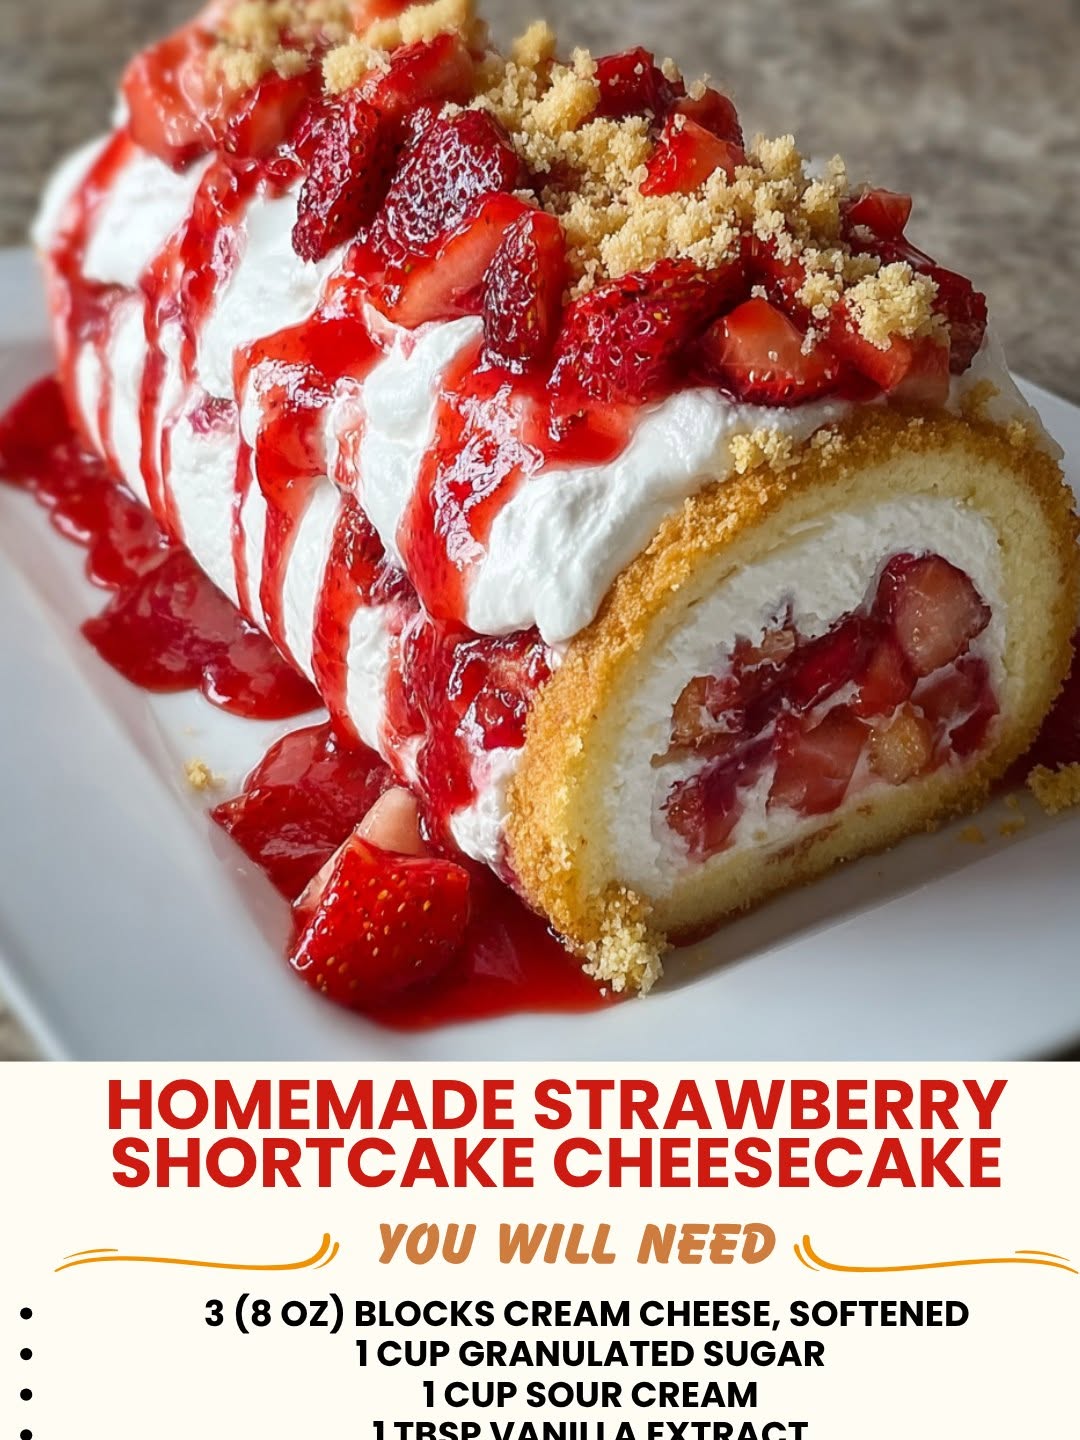
Homemade Strawberry Shortcake Cheesecake: A Love Letter to Two Desserts
I’m going to be honest with you right from the start: I’ve been obsessed with this recipe for about three years now, and I still make it whenever I need to impress someone or just remind myself why I love baking so much.
Here’s how it started. My best friend Sarah was getting married, and her mom mentioned—very casually, mind you—that Sarah had always dreamed of a dessert that combined two things: her grandmother’s strawberry shortcake and the cheesecake her dad made every Thanksgiving. I remember standing in my kitchen thinking, “Wait. Why not both?” And that’s when I became absolutely determined to create a Homemade Strawberry Shortcake Cheesecake that would honor both traditions in one incredible dessert.
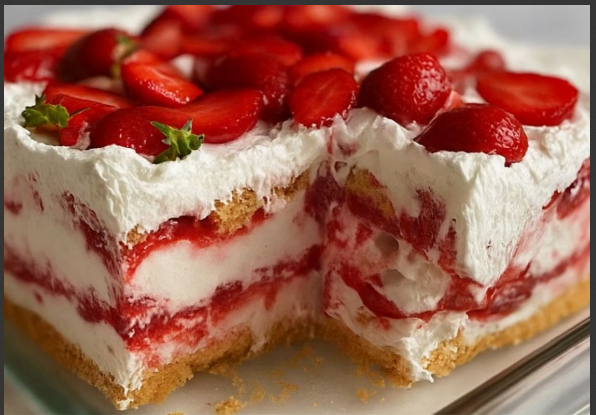
What I ended up creating is something that genuinely feels special every single time I make it. It’s a three-layer situation: a buttery graham cracker crust on the bottom, a creamy, tangy cheesecake middle that’s baked just right so it’s dense but not heavy, and then a fluffy vanilla sponge cake layer on top that you can pile with fresh strawberries and whipped cream. It sounds fancy, but I promise you it’s totally doable in a regular home kitchen.
This recipe is for anyone who wants to feel like a fancy baker without spending eight hours in the kitchen. It’s for the person who shows up to potlucks and wants people to ask for the recipe. It’s for quiet Sunday afternoons when you want to bake something that makes your whole house smell incredible. And honestly? It’s for anyone who’s ever felt torn between two desserts and thought, “I want both.”
If you love this kind of cozy, from-scratch baking, I’d love to have you follow along with me. Follow me on HaileeRecipes on Pinterest for more recipes like this one, plus all my kitchen experiments and the occasional beautiful failure.
Why You’ll Love This Recipe
Let me break down what makes this dessert actually worth your time and effort.
It’s a showstopper that doesn’t require professional skills. Seriously. You don’t need a pastry degree or fancy equipment. You need a springform pan, a mixing bowl, and patience. That’s it.
The flavor combination is genuinely magical. The tartness of the cheesecake plays beautifully against the sweetness of the vanilla cake and fresh strawberries. Every bite feels balanced and intentional, not like you just threw things together.
It actually gets better after a day in the fridge. Unlike some desserts that peak immediately, this one develops deeper flavor as the layers meld together overnight. Make it the day before your event and thank me later.
You can customize it to death. Want to use a different fruit? Go for it. Prefer a chocolate cake layer? I’ve got you. This recipe is flexible enough to work with your preferences while still maintaining its integrity.
It serves a crowd without being stressful. One dessert feeds 12 to 14 people easily, which means you’re not scrambling to make multiple things.
Ingredients
For the Graham Cracker Crust
- 2 cups graham cracker crumbs (about 14 to 16 crackers)
- 6 tablespoons melted butter
- 3 tablespoons sugar
- Pinch of sea salt
For the Cheesecake Layer
- 32 ounces cream cheese, softened to room temperature
- 1 cup sour cream
- 3/4 cup sugar
- 3 large eggs
- 2 teaspoons vanilla extract
- 2 tablespoons all-purpose flour
- 1 tablespoon cornstarch
Hailee’s Tip: The cornstarch is my secret weapon. It helps prevent cracks and keeps the texture silky without being grainy. Don’t skip it.
For the Vanilla Cake Layer
- 1 1/2 cups all-purpose flour
- 1 1/2 teaspoons baking powder
- 1/4 teaspoon salt
- 1/2 cup butter, softened
- 3/4 cup sugar
- 2 large eggs
- 1/2 cup sour cream
- 2 teaspoons vanilla extract
Hailee’s Tip: Sour cream in the cake layer is not optional. It adds moisture and a subtle tang that keeps the cake from being too sweet. Trust me on this one.
For Topping and Assembly
- 1 pound fresh strawberries, hulled and sliced
- 2 tablespoons sugar (for the berries)
- 1 cup heavy whipping cream
- 2 tablespoons powdered sugar
- 1 teaspoon vanilla extract
- Extra whole strawberries for garnish (optional but pretty)
Hailee’s Tip: Toss your sliced strawberries with a bit of sugar about 30 minutes before serving. They’ll release their juices and become like a natural compote. It’s the difference between good and absolutely perfect.
Optional Add-Ins and Variations
This is where you get to make this recipe yours. I love a basic version, but here are some fun twists I’ve tried.
Lemon zest in the cheesecake: Add 1 tablespoon of lemon zest to the cheesecake filling. It brightens everything up and makes it feel summery even in winter.
Almond extract in the cake layer: Use 1 teaspoon almond extract plus 1 teaspoon vanilla instead of just vanilla. It adds a subtle nod to classic shortcake flavors.
Strawberry jam swirl: Dollop a few tablespoons of good strawberry jam into the cheesecake batter and swirl it gently before baking. Just don’t overmix, or you’ll lose the pretty effect.
Whipped mascarpone topping: Instead of regular whipped cream, whip together 8 ounces mascarpone, 1/4 cup powdered sugar, and 1/2 teaspoon vanilla. It’s richer and more luxurious.
Different berries: Raspberries, blueberries, or blackberries all work beautifully here. Use what’s fresh and in season where you live.
Step-by-Step Method
Prep Work (The Boring But Important Part)
Preheat your oven to 325 degrees Fahrenheit. Wrap the outside of a 9-inch springform pan with heavy-duty aluminum foil—this prevents water from seeping in during the water bath, which is crucial for a crack-free cheesecake. Trust me, I learned this the hard way after my first attempt looked like it had been through an earthquake.
Let your cream cheese sit on the counter for at least an hour. I know it seems fussy, but cold cream cheese doesn’t blend smoothly, and you’ll end up with lumps. Not fun.
Making the Crust
Step 1: In a small bowl, combine graham cracker crumbs, melted butter, sugar, and salt. Mix with a fork until it looks like wet sand. It should hold together when you squeeze it.
Step 2: Press this mixture firmly into the bottom of your prepared springform pan. Use the bottom of a measuring cup to get it really compact and even. Bake for 8 minutes at 325 degrees, then remove and let cool slightly. This prevents a soggy crust, which is something I definitely experienced before I figured out this step.
Making the Cheesecake Layer
Step 3: In a large bowl, beat the softened cream cheese with an electric mixer on medium speed for about 2 minutes until it’s smooth and creamy. Scrape down the sides of the bowl frequently.
Step 4: Add sour cream and sugar, and beat for another 2 minutes. The mixture should be light and fluffy.
Step 5: Add eggs one at a time, beating on low speed after each addition. Don’t overmix once the eggs are in—just combine until you don’t see streaks of egg white. Overmixing incorporates too much air, which causes cracks.
Step 6: Stir in vanilla extract, flour, and cornstarch by hand with a spatula. Fold gently until just combined.
Step 7: Pour this filling over your cooled crust and smooth the top with a spatula.
Making the Cake Layer
Step 8: In another bowl, whisk together flour, baking powder, and salt.
Step 9: In a separate bowl, cream together butter and sugar until light and fluffy, about 3 minutes. This is where you build the structure of your cake, so don’t rush it.
Step 10: Add eggs one at a time, beating well after each addition. Add vanilla extract.
Step 11: Alternate adding the flour mixture and sour cream, starting and ending with the flour mixture. Do this in three additions: flour, sour cream, flour, sour cream, flour. Mix on low speed just until combined after each addition.
Step 12: Gently spoon this cake batter over the cheesecake layer. Don’t press down or spread aggressively—you want to keep the layers distinct. Just let it settle naturally, then use an offset spatula to gently smooth the top if needed.
The Water Bath and Baking
Step 13: Place your springform pan inside a larger roasting pan. Pour hot water into the roasting pan until it comes halfway up the sides of the springform pan. This gentle, moist heat is what keeps your cheesecake creamy instead of cracked and dry.
Step 14: Bake for 1 hour and 15 minutes. The cheesecake is done when the edges are set but the center still jiggles slightly when you gently shake the pan. It should look almost underbaked—that’s actually perfect.
Step 15: Turn off the oven and crack the door open about 4 inches. Let the cheesecake sit in the cooling oven for 1 hour. This gradual temperature change prevents the dreaded crack situation.
Step 16: Remove from the oven and let cool completely on a wire rack, about 2 hours. Then refrigerate for at least 8 hours, preferably overnight.
Common Mistakes to Avoid
Using cold cream cheese: I cannot stress this enough. Room temperature cream cheese is non-negotiable. It blends smoothly and prevents lumps in your filling.
Overmixing the batter: Once eggs are in, stop. Overmixing incorporates air bubbles that expand during baking and create cracks. Mix until just combined, then walk away.
Skipping the water bath: I know it seems like extra work, but it’s the difference between a creamy cheesecake and a dense, cracked one. Don’t skip it.
Not wrapping the pan properly: If water seeps into your cheesecake, you’re going to have a bad time. Use heavy-duty foil and wrap it well.
Opening the oven door during baking: I get it—you want to peek. Don’t. Every time you open that door, you let heat out and create temperature fluctuations that cause cracks. Set a timer and trust the process.
Rushing the cooling process: I know you want to eat this immediately. I really do. But patience here pays off. A properly cooled cheesecake has a better texture and fewer cracks.
My Tested Substitutions
Greek yogurt instead of sour cream: You can use half Greek yogurt and half sour cream in the cheesecake layer. It makes it slightly lighter and more tangy, which I actually love. Just don’t use all Greek yogurt—the texture gets weird.
Honey instead of sugar in the filling: Use 3/4 cup honey instead of sugar in the cheesecake. It adds a subtle floral note and keeps the cheesecake incredibly moist. Reduce the baking time by about 10 minutes since honey caramelizes faster.
Whole wheat flour in the cake layer: Substitute up to 1/2 cup of the all-purpose flour with whole wheat flour. It adds a subtle nuttiness and more fiber. The texture is still tender and delicious.
Almond flour crust: Replace 1/2 cup of graham cracker crumbs with finely ground almond flour. This creates a more sophisticated, slightly less sweet crust.
Coconut oil instead of butter: In both the crust and cake layers, coconut oil works beautifully. Use the same amount and make sure it’s melted. It adds a subtle coconut flavor that pairs surprisingly well with strawberries.
How to Customize
Here’s the thing about recipes: they’re starting points, not commandments. This dessert is flexible enough to work with what you have and what you love.
Make it less sweet: Reduce the sugar in the cheesecake layer to 1/2 cup and in the cake layer to 1/2 cup. The sour cream provides plenty of sweetness on its own.
Make it more decadent: Add 4 ounces of melted white chocolate to the cheesecake filling for a white chocolate strawberry version. It’s absolutely divine.
Add texture: Sprinkle the top with crushed pistachios, toasted almonds, or even a bit of granola before serving. It adds a nice contrast to the creamy layers.
Make individual portions: Divide the layers among mason jars or individual serving glasses for a deconstructed version. Layer crust, cheesecake, cake, then top with berries and whipped cream.
Go dairy-free: Use dairy-free cream cheese and sour cream, plus dairy-free butter and milk-free whipped cream. The flavor profile changes slightly, but it’s still delicious.
Serving Ideas
This dessert is beautiful on its own, but here are some ways I like to serve it that make it feel extra special.
The classic way: Slice it carefully (a hot, wet knife helps), top with fresh whipped cream and a few sliced strawberries, and maybe a sprinkle of powdered sugar. Simple and stunning.
Deconstructed bowls: Crumble some of the cake and cheesecake into a bowl, layer with whipped cream and fresh strawberries. It’s casual and fun for a dinner party.
With a berry compote: Make a quick compote by simmering strawberries with a bit of sugar and lemon juice for 10 minutes. Drizzle this over each slice. It adds moisture and extra berry flavor.
With a strawberry coulis: Blend fresh strawberries with a bit of powdered sugar and lemon juice, then strain through a fine mesh sieve. Drizzle this elegant sauce around the plate.
With champagne or prosecco: Serve alongside a glass of bubbly. The acidity cuts through the richness beautifully, and it feels fancy without being pretentious.
Meal Prep and Storage
Make-ahead timeline: You can make this up to 3 days in advance. In fact, I recommend making it at least 1 day ahead so the flavors have time to meld. Store it covered in the refrigerator.
Storing leftovers: Keep covered in the fridge for up to 4 days. The texture actually improves as it sits, so don’t hesitate to make this early in the week.
Freezing: Yes, you can freeze this. Wrap individual slices tightly in plastic wrap and then foil, and freeze for up to 2 months. Thaw in the refrigerator overnight before serving. The texture is still good, though slightly less creamy than fresh.
Transporting: If you need to take this somewhere, keep it in the springform pan until you’re ready to serve. Leave it in the fridge as long as possible,