Japanese Katsu Bowls: Crispy, Comforting, and Surprisingly Easy
Japanese Katsu Bowls: Crispy, Comforting, and Surprisingly Easy
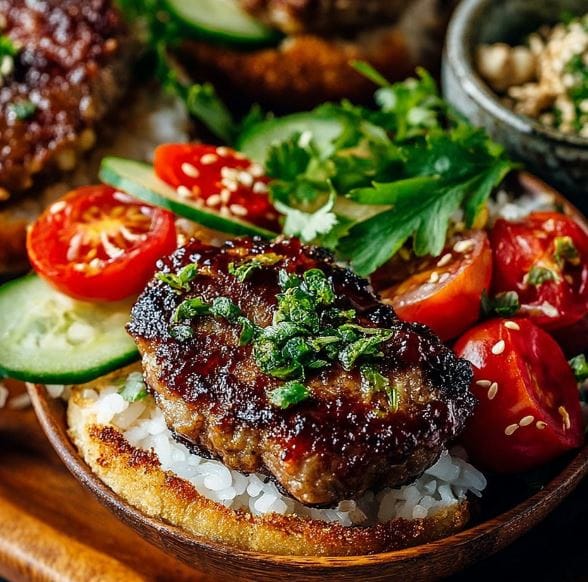
Why Japanese Katsu Bowls Just Work
Here’s the thing about Japanese Katsu Bowls: they’re the perfect balance of comfort and crunch.
“Katsu” literally means cutlet. Traditionally, it’s pork (tonkatsu), but chicken (chicken katsu) is super popular too. What makes katsu stand out is the panko breadcrumbs. They fry up lighter and crispier than normal breadcrumbs, which means you get crunch without feeling like you swallowed a brick.
Then you put it over rice? With cabbage and tangy-sweet sauce? Suddenly, it’s not just dinner—it’s therapy in a bowl.
And the best part? It’s way easier than it looks. Like, shockingly easy. This is one of those “impress your friends without crying in the kitchen” meals.
What You Actually Need (And What You Don’t)
Stuff You Probably Already Have
- Chicken breasts or thighs (thin cut is key)
- Eggs (aka dredging glue)
- Flour (basic pantry stuff)
- Salt + pepper
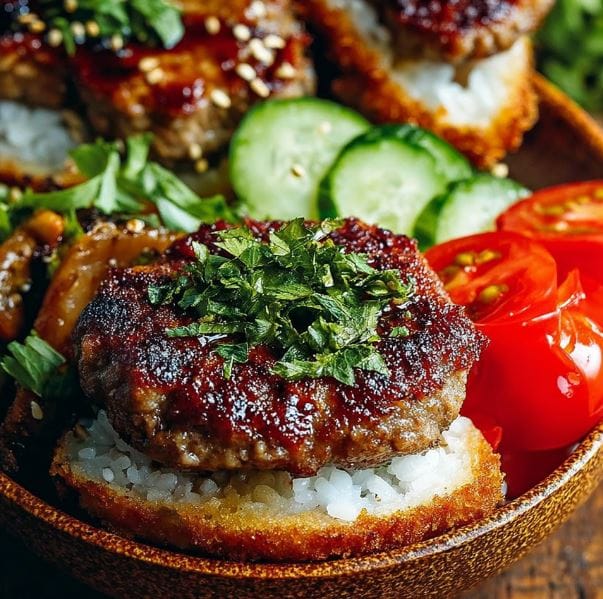
The Shopping List (aka MVPs)
- Panko breadcrumbs (seriously, don’t sub regular)
- Tonkatsu sauce (store-bought or DIY with ketchup + Worcestershire + soy sauce)
- Green onions (garnish that makes you look like you tried)
- Shredded cabbage (optional but classic and balances the richness)
Substitutions I’ve Survived
- Pork instead of chicken → traditional, delicious.
- Air fryer instead of frying pan → healthier, still crunchy.
- Brown rice instead of white → “healthier,” but Sarah said, “Not the same vibe.”
- Forgot tonkatsu sauce → mixed ketchup, Worcestershire, and soy sauce. Surprisingly close.
The Actual Time This Takes
Let’s be honest about timing because some recipes straight-up lie.
- Prep: 15 minutes (aka dredging station chaos)
- Cook: 15 minutes (shallow fry, quick and done)
- Total: 30 minutes
Pro tip: Start your rice first. That way, you’re not staring at the chicken while your rice cooker is still counting down.
Step-by-Step (With Chaos Commentary)
Step 1: Chicken Glow-Up
Pound chicken thin so it cooks evenly. Season with salt + pepper. Don’t skip this unless you like crunchy outsides + raw middles (been there, don’t recommend).
Step 2: The Dredging Olympics
Set up bowls: flour → egg → panko. Dip chicken in that order. Sarah once tried skipping flour. Result? Crust slid off like a sad jacket. Lesson learned.
Step 3: Fry Without Crying
Heat oil in skillet. Shallow fry chicken for about 3 minutes per side, until golden + cooked through. First time I made this, I cranked the heat too high → burnt crust, raw chicken. Now I babysit the heat like it’s my new job.
Step 4: Sauce Situation
If you’ve got store-bought tonkatsu sauce, you’re golden. If not, whisk together ketchup, Worcestershire, and soy sauce. Sarah now calls it “house sauce” and dips fries in it.
Step 5: Bowl Build
Scoop rice, add cabbage, slice katsu, drizzle sauce, sprinkle green onions. Optional: fried egg on top because extra = happiness.
The Health Stuff (But Make It Real)
Per serving (4 servings):
- Calories: ~520
- Protein: 32g
- Carbs: 55g
- Fat: 20g
It’s not kale, but it’s better than greasy takeout.
Ways to Not Screw This Up (Plus Fun Twists)
- Spicy kick: Add sriracha or chili flakes.
- Tofu katsu: Coat tofu instead of chicken. Surprisingly crunchy.
- Creamy drizzle: Mix mayo + sriracha for spicy mayo vibes. Sarah devoured this version.
- Air fryer hack: Spray cutlets with oil, cook at 400°F for 12 minutes, flip halfway.
Serving Ideas (How We Ate Them All Week)
- Classic Bowl: Rice + cabbage + chicken + sauce. Done.
- Sandwich Mode: Brioche bun + katsu + cabbage + tonkatsu sauce. Comfort food chaos.
- Leftover Remix: Next day, I poured Japanese curry over the cutlets. Instant katsu curry. Life-changing.
- Snack Time: Sarah dipped cold cutlets in ranch. I judged her. Then I joined her.
Real Talk: Why I Keep Making These
Because Japanese Katsu Bowls are one of those unicorn recipes: fast, impressive, and deeply comforting. They taste like effort but secretly take less than 30 minutes.
Also, they photograph like a dream. I’m not kidding—Sarah posted a pic with the caption, “Homemade > takeout” and got way too many DMs.
And yes, I pinned like a dozen katsu variations on Pinterest. If you want a sweet finish, you have to try my Amish Apple Fritter Bread too—it’s dessert comfort food.
Storage (If They Last That Long)
- Chicken: Best crispy, but keeps in fridge 2 days. Reheat in oven/air fryer.
- Rice + cabbage: Store separately, reheat rice, add cabbage fresh.
- Sauce: Fridge for 1 week. Great on fries, burgers, and Sarah’s “random snack plates.”
Bottom Line
Japanese Katsu Bowls are crispy, saucy, filling, and way easier than they look. Perfect weeknight food when you want comfort without the chaos.
Sarah’s final verdict? “This is going in the permanent rotation.” Honestly? That’s all I needed.
So yeah—make them, drizzle extra sauce, burn your tongue because you can’t wait, and pin it to your Pinterest board.
Table of Contents
Japanese Katsu Bowls
Ingredients
Equipment
Method
- Instructions:
- Season chicken with salt and pepper.
- Dredge chicken in flour, dip in egg, then coat in panko breadcrumbs.
- Heat oil in skillet. Fry chicken for about 3 minutes per side until golden brown and cooked through. Drain on paper towels.
- Slice chicken katsu. Assemble bowls with rice, shredded cabbage, sliced chicken, tonkatsu sauce, and green onions.
- Optional: Top with a fried egg for extra comfort.
Notes
– Pork or tofu can replace chicken for variations.
– Air fryer method: 400°F (200°C) for 12 minutes, flipping halfway.
– Homemade tonkatsu sauce: mix 1/4 cup ketchup, 2 tbsp Worcestershire sauce, 1 tbsp soy sauce.
– Best eaten fresh; chicken stays crispy if reheated in oven or air fryer.