Jell-O No Bake Cheesecake
Jell-O No Bake Cheesecake
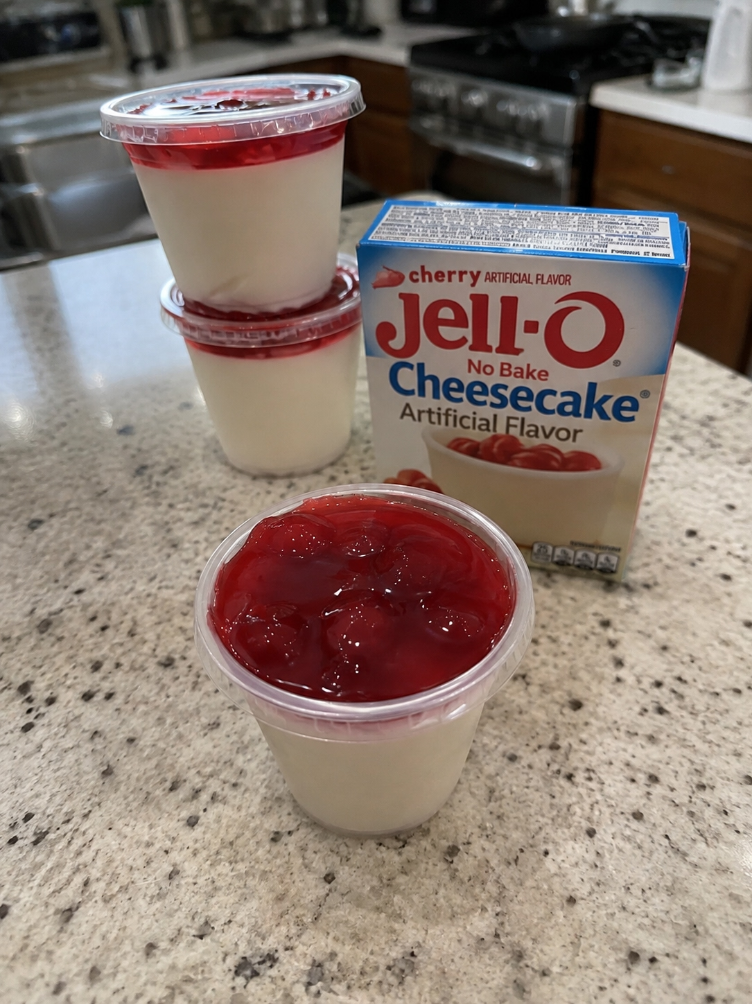
A Jell-O No Bake Cheesecake is a refreshing, creamy dessert that combines the rich tang of cream cheese with the bright sweetness of cherry gelatin. This treat offers a smooth, custard-like texture that melts in your mouth without any baking required. It is an ideal choice for warm summer evenings, potlucks, or when you need a sweet finish to a meal but want to avoid turning on the oven. The distinct flavor profile features a delicate balance between the dense dairy base and the fruity, slightly tart gelatin layers, often topped with a glossy cherry glaze. Its simplicity makes it accessible for cooks of all skill levels, while its elegant appearance ensures it feels special enough for guests.
If you are looking for more easy-to-make desserts to add to your collection, Follow Hailee Recipes on Pinterest for daily inspiration and tested favorites.
Why This Recipe Works
This recipe succeeds because it relies on the natural setting properties of gelatin rather than heat to create structure. By combining softened cream cheese with sweetened condensed milk and dissolved cherry gelatin, the mixture achieves a stable emulsion that holds its shape once chilled. The no-bake method preserves the fresh, light flavor of the dairy without the risk of curdling or overcooking, which can happen with traditional baked cheesecakes. The inclusion of a graham cracker crust provides a necessary textural contrast, offering a buttery crunch that complements the soft, jiggly filling. Because the dessert sets in the refrigerator, the flavors have time to meld together, resulting in a cohesive taste where the cherry notes permeate the entire slice rather than just sitting on top.
Ingredients
To make this classic dessert, you will need a few specific items that work together to create the right consistency and flavor. Ensure all dairy products are at room temperature before starting to guarantee a smooth, lump-free batter.
- Cream Cheese: 16 ounces (two 8-ounce blocks), softened to room temperature.
- Sweetened Condensed Milk: 1 can (14 ounces).
- Jell-O Cherry Gelatin: 1 package (3 ounces), artificial flavor.
- Hot Water: 1 cup, for dissolving the gelatin.
- Cold Water: 1 cup, to cool the gelatin mixture.
- Graham Cracker Crumbs: 1 ½ cups, for the crust.
- Unsalted Butter: 6 tablespoons, melted, for binding the crust.
- Cherry Pie Filling or Glaze: 1 can (21 ounces), optional for topping.
The key here is the specific type of gelatin listed. The visible text from the source image confirms the use of “Jell-O” with “cherry ARTIFICIAL FLAVOR.” This specific variety is essential for achieving the traditional red color and distinct taste associated with this dessert. Do not substitute with sugar-free versions unless you are aware they may alter the setting time and texture significantly.
How To Make Jell-O No Bake Cheesecake
- Prepare the Crust: Preheat your oven to 350°F (175°C). In a medium bowl, combine the graham cracker crumbs and melted unsalted butter. Stir until the mixture resembles wet sand and holds together when pinched. Press this mixture firmly into the bottom of a 9-inch springform pan or a deep-dish pie plate. Use the bottom of a measuring cup to ensure the layer is even and compact. Bake for 8 to 10 minutes until lightly golden, then remove from the oven and let it cool completely while you prepare the filling.
- Dissolve the Gelatin: In a small saucepan or microwave-safe bowl, bring 1 cup of water to a boil. Add the 3-ounce package of cherry gelatin powder. Stir continuously for about 2 minutes until every grain has completely dissolved and the liquid is clear. If using a microwave, heat in 30-second intervals, stirring in between, to ensure full dissolution without boiling over.
- Cool the Mixture: Carefully stir in 1 cup of cold water into the hot gelatin solution. This step is crucial; if the mixture is too hot, it will melt the cream cheese later. Allow the liquid to sit at room temperature for about 10 to 15 minutes until it feels lukewarm to the touch but still flows easily.
- Whip the Base: In a large mixing bowl, beat the softened cream cheese with an electric mixer on medium speed until it is completely smooth and free of lumps, about 2 minutes. Gradually pour in the sweetened condensed milk while continuing to mix. Scrape down the sides of the bowl frequently to ensure everything is incorporated evenly. The mixture should look fluffy and pale pink as the gelatin begins to tint it.
- Combine and Chill: Slowly drizzle the cooled gelatin mixture into the cream cheese blend while the mixer is running on low speed. Once fully combined, stop the mixer and give it one final fold by hand with a spatula to ensure no streaks remain. Pour the filling over the cooled graham cracker crust. Smooth the top with an offset spatula. Cover the pan loosely with plastic wrap and refrigerate for at least 6 hours, though overnight chilling is recommended for the firmest slices.
- Add the Topping: Just before serving, spoon the cherry pie filling or glaze over the set cheesecake. If you prefer a layered effect, you can spread half the filling first, chill briefly, then add the rest, but a single generous layer on top is standard for this style. Slice with a sharp knife dipped in hot water for clean cuts.
Doneness And Troubleshooting
Success with this dessert is measured by how well the filling holds its shape when sliced. A properly set cheesecake will be firm to the touch around the edges and slightly wobbly in the center, similar to a firm jelly. If the cake remains liquid after 6 hours, the gelatin likely did not dissolve fully, or the water ratio was incorrect. Ensure you used exactly 1 cup of hot and 1 cup of cold water as specified; adding extra liquid will prevent the gelatin from setting properly.
If your filling turns out grainy, the cream cheese was not fully softened before mixing, or the gelatin was added while still too hot, causing the dairy to separate. Always check that the gelatin mixture is lukewarm before pouring it into the cheese. Another common issue is a soggy crust. This happens if the crust is not baked long enough or if the filling is poured onto a warm crust. Always allow the crust to reach room temperature before adding the wet filling to maintain that essential crunch.
Substitutions And Variations
While the original formula relies on specific ingredients for authenticity, there are ways to adapt this recipe to suit different dietary needs or flavor preferences. For a lighter version, you can substitute the sweetened condensed milk with a mixture of heavy whipping cream and powdered sugar, though the texture will be less dense and more mousse-like. If you need a gluten-free option, simply swap the standard graham crackers for a certified gluten-free brand; the preparation method remains identical.
You can also experiment with different fruit flavors. While the OCR evidence specifies cherry, the same method works with lemon, lime, or strawberry gelatin. When changing flavors, keep the water ratios exact. For those who dislike the artificial flavoring found in standard gelatin packets, you can use high-quality natural fruit puree mixed with unflavored gelatin, but note that the color and sweetness will differ significantly from the classic red version. Always label any substitutions clearly so guests know what they are eating.
Serving Suggestions
This dessert shines as a standalone treat, but it pairs beautifully with simple accompaniments. Fresh berries like strawberries or blueberries add a tart contrast to the sweet, creamy filling. A dollop of freshly whipped cream adds richness without overpowering the gelatin flavor. For a festive presentation, garnish individual slices with a whole maraschino cherry or a sprig of mint. It is particularly popular during holiday gatherings because it can be made days in advance, allowing the kitchen to remain free for other cooking tasks.
Storage And Reheating
Store any leftovers in the refrigerator, covered tightly with plastic wrap or in an airtight container. The cheesecake will stay fresh for up to 5 days. Do not freeze this dessert, as the gelatin structure will break down upon thawing, resulting in a watery, separated texture. There is no need to reheat a no-bake cheesecake; it is best enjoyed cold straight from the fridge. If the surface becomes dry, you can gently wipe it with a damp cloth or add a fresh layer of glaze before serving.
Remember that food safety is paramount when handling dairy products. Keep the dessert chilled at all times and do not leave it out at room temperature for more than two hours during serving. This ensures the gelatin remains stable and the dairy stays safe to eat.
Making a Jell-O No Bake Cheesecake is a straightforward way to enjoy a classic dessert without the complexity of baking. With the right ingredients and patience for the chilling time, you can create a crowd-pleasing treat that looks professional and tastes delicious.
Jell-O No Bake Cheesecake
Ingredients
Method
- Preheat oven to 350°F. Mix graham cracker crumbs with melted butter and press into a 9-inch springform pan. Bake for 8-10 minutes and cool completely.
- Dissolve gelatin in 1 cup of boiling water, then stir in 1 cup of cold water. Let cool until lukewarm.
- Beat softened cream cheese until smooth. Gradually mix in sweetened condensed milk.
- Slowly add the cooled gelatin mixture to the cream cheese while mixing on low. Fold gently to combine.
- Pour filling over the cooled crust. Refrigerate for at least 6 hours or overnight. Top with cherry glaze before serving.