Peanut Butter DREAM BARS
Peanut Butter DREAM BARS
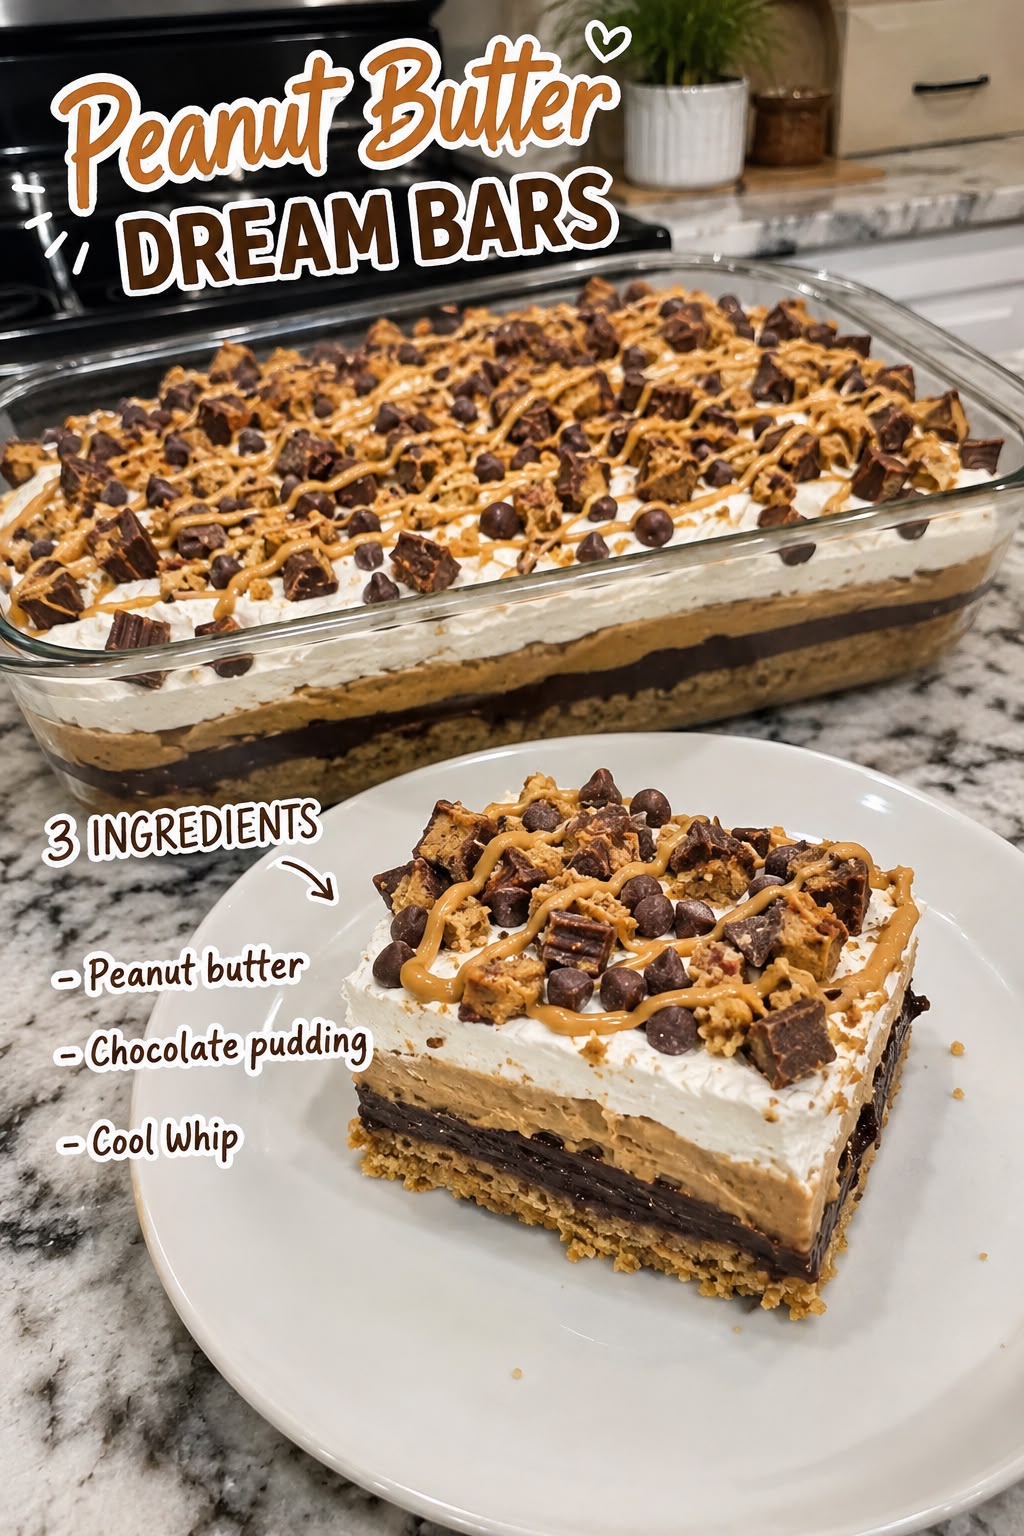
Peanut Butter DREAM BARS
If you are looking for a dessert that delivers maximum flavor with minimal effort, these Peanut Butter DREAM BARS are the answer. This no-bake treat features a rich, creamy texture that balances the salty depth of peanut butter with the sweet, velvety smoothness of chocolate pudding and fluffy marshmallow fluff. The result is a layered confection that melts in your mouth, offering a satisfying chewiness without being overly heavy or greasy. It is an ideal choice for potlucks, office parties, or a quick afternoon snack when you need something indulgent but don’t have time to stand over a stove. The bars hold their shape well when chilled, making them easy to slice into neat squares for serving.
This recipe relies on the classic combination of pantry staples to create a complex flavor profile. You do not need any special equipment or baking skills to assemble this dish. Simply mix the ingredients until smooth, layer them carefully, and let the refrigerator do the work. For more visual inspiration and similar simple treats, Follow Hailee Recipes on Pinterest. Whether you are a seasoned baker or a beginner cook, this method ensures consistent results every time you make it.
Why This Recipe Works
The success of these bars lies in the specific interaction between the three core ingredients. Peanut butter provides a dense, fatty base that acts as the structural glue for the dessert. When mixed with the other components, it creates a cohesive matrix that holds together without the need for gelatin or eggs. The instant chocolate pudding mix adds a crucial element of sweetness and a distinct chocolate flavor that cuts through the richness of the peanut butter. Because it is an instant mix, it dissolves quickly into the liquid components, creating a thick, mousse-like consistency rather than a runny one.
Cool Whip serves as the aerating agent. By folding this whipped topping into the mixture, you incorporate air bubbles that lighten the density of the bars. This prevents the dessert from feeling like a solid block of fat and gives it a cloud-like texture. The cold temperature of the refrigerator sets the fats in the peanut butter and the stabilizers in the Cool Whip, allowing the layers to firm up enough to be sliced cleanly. This no-bake approach preserves the fresh taste of the ingredients, avoiding any cooked flavors that might alter the intended profile of the dish.
Ingredients
To make a standard batch of these bars that fits a 9×13 inch pan, you will need exactly three items. Precision is key here because there are no flour or binding agents to adjust the ratio. Ensure all ingredients are at room temperature before starting, except for the Cool Whip, which should remain frozen until ready to use.
- Peanut butter: 1 cup (240g). Use a creamy, natural-style peanut butter for the best texture. Avoid “natural” varieties that separate significantly unless you stir them thoroughly, as excess oil can make the bars too soft.
- Chocolate pudding: 1 package (3.4 oz / 96g) of instant chocolate pudding mix. Do not use the cook-and-serve variety; the instant mix contains the necessary thickeners to set properly.
- Cool Whip: 1 container (8 oz / 227g) of thawed whipped topping. Thawing is essential so that it mixes smoothly without remaining icy chunks.
How To Make Peanut Butter DREAM BARS
- Prepare the Pan and Ingredients: Begin by lining a 9×13 inch baking dish with aluminum foil or parchment paper, leaving an overhang on two opposite sides. This will allow you to lift the entire block of dessert out of the pan once it has set, making slicing much easier. Ensure your peanut butter is at room temperature so it blends easily. Open the package of instant chocolate pudding mix and set it aside. Take the Cool Whip out of the freezer and let it sit on the counter for about 15 minutes until it is soft enough to fold but still holds its shape.
- Mix the Base: In a large mixing bowl, combine the 1 cup of peanut butter and the dry instant chocolate pudding mix. Stir vigorously with a sturdy spoon or spatula. At first, the mixture will look crumbly and dry as the powder absorbs the oils from the peanut butter. Continue mixing for about two minutes until the texture becomes uniform, smooth, and slightly glossy. There should be no visible streaks of dry powder remaining.
- Incorporate the Topping: Add the thawed Cool Whip to the peanut butter and pudding mixture. Using a rubber spatula, gently fold the Cool Whip into the base. Be careful not to overmix, as this can deflate the air bubbles and result in a denser final product. Fold just until the white topping is fully incorporated and the mixture turns a uniform light brown color. The consistency should resemble a thick, spreadable frosting or a stiff mousse.
- Transfer and Smooth: Scrape the mixture into the prepared 9×13 inch pan. Use the back of a spoon or an offset spatula to press the mixture down firmly and evenly. Ensure the layer reaches all four corners and is flat across the top. If you want a decorative touch, you can drizzle a little extra melted peanut butter over the top now, though this is optional. The goal is a perfectly level surface for clean cutting later.
- Chill Until Set: Cover the pan loosely with plastic wrap or a lid to prevent the dessert from absorbing odors from the refrigerator. Place the pan in the coldest part of your fridge. Allow the bars to chill for at least 4 hours, though overnight chilling yields the best results. The dessert needs this time for the fats to solidify and the pudding to fully hydrate, ensuring the bars hold their shape when sliced.
Doneness And Troubleshooting
Determining if your Peanut Butter DREAM BARS are ready to cut is straightforward. After the minimum 4-hour chilling period, the edges of the dessert should feel firm to the touch, and the center should not jiggle when you gently shake the pan. If the mixture feels soft or sticky, it simply needs more time in the refrigerator. Cold temperatures are critical for setting the structure of this no-bake dessert.
If your bars are crumbling when you try to slice them, the Cool Whip may have been overmixed, causing it to lose its volume, or the peanut butter was too warm during mixing. To fix this, ensure you fold the Cool Whip gently next time and keep your peanut butter at a cool room temperature. Conversely, if the bars are too hard to cut, they may have been chilled for too long or the peanut butter used had a high melting point. Let the pan sit at room temperature for 10 to 15 minutes before slicing to soften the edges slightly.
Another common issue is a grainy texture. This usually happens if the instant pudding mix was not stirred thoroughly into the peanut butter before adding the Cool Whip. Always ensure the dry mix is completely dissolved and integrated into the nut butter to avoid small pockets of unhydrated starch.
Substitutions And Variations
While the three-ingredient formula is designed to be kept simple, there are ways to adapt the recipe to suit different dietary needs or flavor preferences. For those who prefer a lighter option, you can substitute half of the Cool Whip with Greek yogurt, though this will change the texture to be less airy and more tangy. If you need a dairy-free version, ensure you use a dairy-free whipped topping and check that your peanut butter does not contain any milk solids.
You can also experiment with the type of peanut butter used. A crunchy peanut butter will add a pleasant textural contrast, providing little bursts of crunch against the smooth cream. However, note that using crunchy peanut butter may require slightly more stirring to distribute the pieces evenly. For a chocolate lover, you can sprinkle mini chocolate chips over the top after spreading the mixture, pressing them gently into the surface before chilling. This adds a visual appeal and an extra layer of chocolate flavor without altering the core ingredient count.
It is important to remember that changing the brand of Cool Whip or the type of pudding mix can affect the final texture. Some brands have higher sugar content or different stabilizers. Stick to the standard measurements provided to maintain the balance of the recipe. If you must substitute, do so gradually and observe how the mixture behaves before transferring it to the pan.
Serving Suggestions
These bars are versatile enough to be served in various ways. Once chilled and removed from the pan using the foil overhang, place the block on a cutting board. Use a sharp knife dipped in hot water and wiped dry between each cut to ensure clean, straight slices. Wiping the blade prevents the creamy mixture from sticking and tearing.
For a festive presentation, dust the tops with cocoa powder or a pinch of sea salt before serving. The salt enhances the sweetness and brings out the nutty flavor of the peanut butter. These bars pair wonderfully with a glass of cold milk or a cup of coffee. They are also excellent as a mid-afternoon pick-me-up or a dessert course after a casual dinner. Because they are individual portions, they are easy to serve at gatherings without needing plates or forks if you cut them into bite-sized squares.
Storage And Reheating
Proper storage is essential to maintain the quality of these bars. Keep them covered tightly in the refrigerator for up to 5 days. The Cool Whip and peanut butter can begin to separate or become too soft if left out at room temperature for extended periods, so refrigeration is non-negotiable. If you need to transport them, keep the pan in a cooler with ice packs to ensure they stay firm.
Freezing is also an option for longer storage. Wrap individual bars tightly in plastic wrap and place them in a freezer-safe bag or container. They can be frozen for up to 3 months. To serve, transfer the bars to the refrigerator to thaw slowly overnight. Avoid microwaving the bars, as this will melt the structure and turn the dessert into a liquid mess. The texture is specifically designed to be enjoyed cold and firm.
When preparing ahead, you can assemble the bars up to 24 hours in advance. This allows the flavors to meld together, often resulting in a richer taste. Just ensure the pan is sealed well to prevent the dessert from drying out or picking up other flavors from the fridge.
This recipe demonstrates that delicious desserts do not always require complex techniques. With just three ingredients and a little patience, you can create a crowd-pleasing treat that feels homemade and comforting. Enjoy the process of mixing and the satisfaction of slicing into a perfect bar.
Peanut Butter DREAM BARS
Ingredients
Method
- Line a 9x13 inch baking dish with foil, leaving an overhang.
- Mix peanut butter and instant chocolate pudding mix in a large bowl until smooth.
- Gently fold in the thawed Cool Whip until fully combined.
- Press the mixture firmly into the prepared pan and smooth the top.
- Refrigerate for at least 4 hours or overnight until firm.