
Crispy Waffles You’ll Love – Best 7-Ingredient Gluten-Free Recipe
The Ultimate Crispy Waffles Recipe (Gluten Free, Yeast-Raised, and Shockingly Good)

If you’ve been searching for a Crispy Waffles recipe that just happens to be gluten free, your hunt ends here. Most gluten free waffles fall short—either rubbery, bland, or prone to crumbling apart. But this yeast-raised dough changes everything. Lightly sweet, chewy inside, golden crisp outside, and endlessly customizable, it hits all the right notes without a hint of compromise.
“The texture is unreal. Golden crust, tender center, and the chocolate glaze seals the deal. Best gluten free waffles I’ve ever made.” – @NoWheatJustWow
Why This Crispy Waffles Recipe Actually Works
Most gluten free waffles rely on quick batters and baking powder, which produce dry or rubbery results. This recipe starts with a rich, yeasted dough adapted from brioche. It behaves just like traditional dough, holds fillings beautifully, and yields a crisp shell with a fluffy interior—exactly what we all crave from the best waffles.
- Yeast dough = real structure and flavor
- Versatile: Add chocolate chips, custard, or even red bean paste
- Freezer-friendly: Make-ahead convenience without sacrificing crispiness
- Rise and shine: True lift from yeast, no dense pucks here
It’s the same surprise I had when I first developed our fluffy cottage cheese cloud bread — gluten free can still mean indulgent.

Ingredients for Crispy Waffles (Gluten Free)
Dough Base:
- 270g gluten free cake flour blend (must include xanthan gum or guar gum)
- 40g sugar
- 2g salt
- 60g beaten egg
- 83g milk or dairy-free alternative (like almond or oat)
- 10g fresh yeast or 4.5g dry yeast
- 35g butter or vegan butter alternative
Filling Options (optional):
- Chocolate chips
- Pastry custard
- Red bean paste
Topping:
- 120g melted chocolate (dark, milk, or white)
Step-by-Step Instructions
Step 1: Mix and Knead
- In a bowl, whisk together flour, sugar, and salt.
- Add beaten egg, milk, and yeast. Mix until a sticky dough forms.
- Knead in the softened butter until the dough is cohesive. It should be soft and tacky, not overly wet.
- Adjust with a splash of milk or a dusting of flour if needed.
Step 2: First Rise & Shape
- Cover the dough and let it rise in a warm spot for 60 minutes or until doubled.
- Punch down the dough, divide into six portions.
- Flatten each piece, add filling to the center, then fold and shape into balls.
Step 3: Cook in Waffle Maker
- Preheat your waffle iron to medium-high.
- Place one dough ball in the center and gently press.
- Cook 2-3 minutes until golden and crisp.
- Let cool on a wire rack to preserve crunch.
“I filled mine with custard and dipped it in dark chocolate. It tasted like a dessert from a fancy café.” – @CrumbFreeKitchen
Step 4: Glaze
- Melt your chocolate topping of choice until glossy.
- Dip the top of each waffle. Let excess drip off.
- Place on parchment paper to dry. Top with sprinkles, crushed nuts, or dust with sugar.
Storage and Make-Ahead Tips
- Refrigerate Dough: After kneading, cover and chill overnight. Bring to room temp before shaping.
- Freeze Cooked Waffles: Let cool, wrap individually, and freeze for up to 1 month. Reheat in a toaster or oven.
- Avoid Premature Glazing: Glaze just before serving for max crisp.
Why Yeast Beats Baking Powder for Crispy Waffles
Yeast adds:
- Chewy, airy texture that feels like real bakery-style waffles
- Deep, developed flavor
- Moist crumb that stays tender even after reheating
It’s like our creamy tuna and potato casserole — once you try the slow method, you never go back.
Creative Filling Ideas
- Chocolate Chips: Choose dark or semisweet for balance. Chop bars for varied texture.
- Custard: Freeze dollops before shaping to prevent leaks.
- Red Bean Paste: Thick and sweet, traditional and satisfying.
Topping Variations
- Dark Chocolate Glaze: Rich and elegant
- White Chocolate Drizzle: Sweet contrast
- Powdered Sugar: For a simple finish
- Chopped Nuts: Almonds, hazelnuts, or pistachios
How to Store and Reheat Waffles
Dough:
- Store in a greased bowl, covered, in the fridge overnight.
- Bring to room temperature before using.
Cooked Waffles:
- Cool fully. Store in airtight container for 1 day at room temp, or 3 days in fridge.
Freezing:
- Wrap in parchment. Reheat from frozen in a toaster oven at 180°C for 5-7 minutes.
How to Make This Recipe Vegan
- Egg: 1 tbsp flaxseed + 3 tbsp water (let sit 5 min)
- Milk: Use oat, almond, or soy milk
- Butter: Use vegan spread or refined coconut oil
These swaps work seamlessly, as proven in our allergy-friendly baked donuts.
Serving Ideas
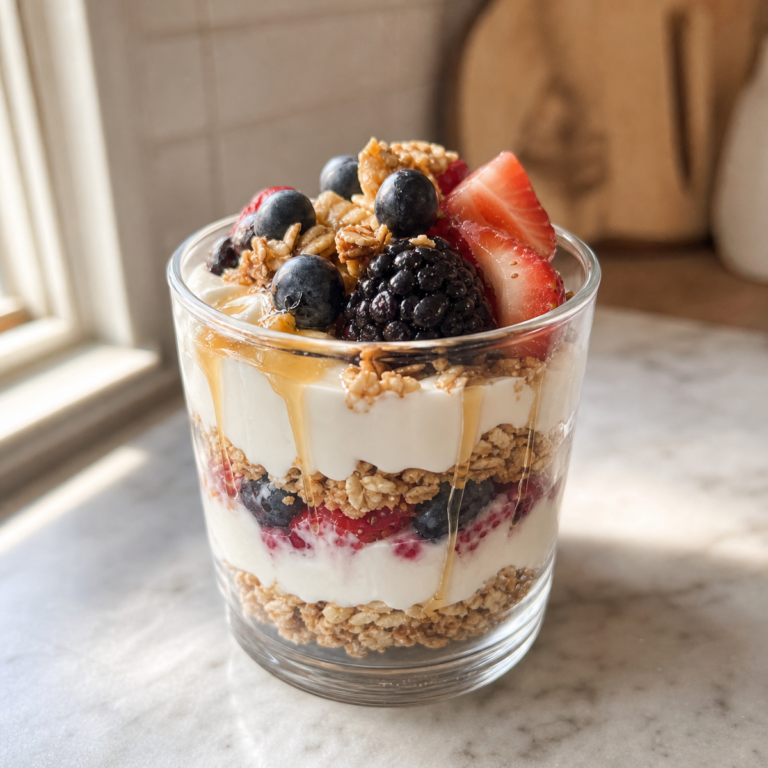
- Breakfast: Top with fruit, yogurt, and a drizzle of maple or honey
- Dessert: Sandwich with whipped cream and berries
- Party Platter: Quartered and decorated with glaze and nuts
FAQ
What flour works best?
Use a gluten free flour blend with xanthan or guar gum for structure.
Can I make this without yeast?
You can, but the texture won’t be as crisp or flavorful. Sub 2 tsp baking powder and skip rising.
Why do my waffles fall apart?
Lack of binding agents. Ensure your flour contains gum, and rest the dough before shaping.
How do I keep them crispy?
Cool immediately on a wire rack. Don’t stack or glaze too early.
Can I freeze them?
Absolutely. Freeze cooked waffles individually and reheat in toaster oven.
For more nourishing recipes that help you feel energized and balanced, follow me on Facebook. New blood sugar-friendly recipes posted every week.
Table of Contents
Soft and Crispy Waffles Recipe Gluten Free
Ingredients
Method
- Preheat waffle iron and lightly grease if needed.
- In a large bowl, whisk together flour, cornstarch, sugar, baking powder, baking soda, and salt.
- In another bowl, mix buttermilk, eggs, melted butter, and vanilla.
- Pour wet ingredients into dry ingredients and stir until just combined (do not overmix).
- Let the batter rest for 5 minutes to hydrate.
- Pour batter into preheated waffle iron and cook according to manufacturer instructions until golden brown and crispy.
- Serve immediately with your favorite toppings.
Notes
- For dairy-free: use plant-based milk + 1 tbsp lemon juice as a buttermilk substitute.
- To freeze: let waffles cool, then store in a zip-top bag. Reheat in a toaster or oven.
- For extra crisp waffles: leave them in the waffle iron for an additional 30–60 seconds after the indicator goes off.





5 Comments