Strawberry Layer Cake Recipe
Strawberry Layer Cake Recipe
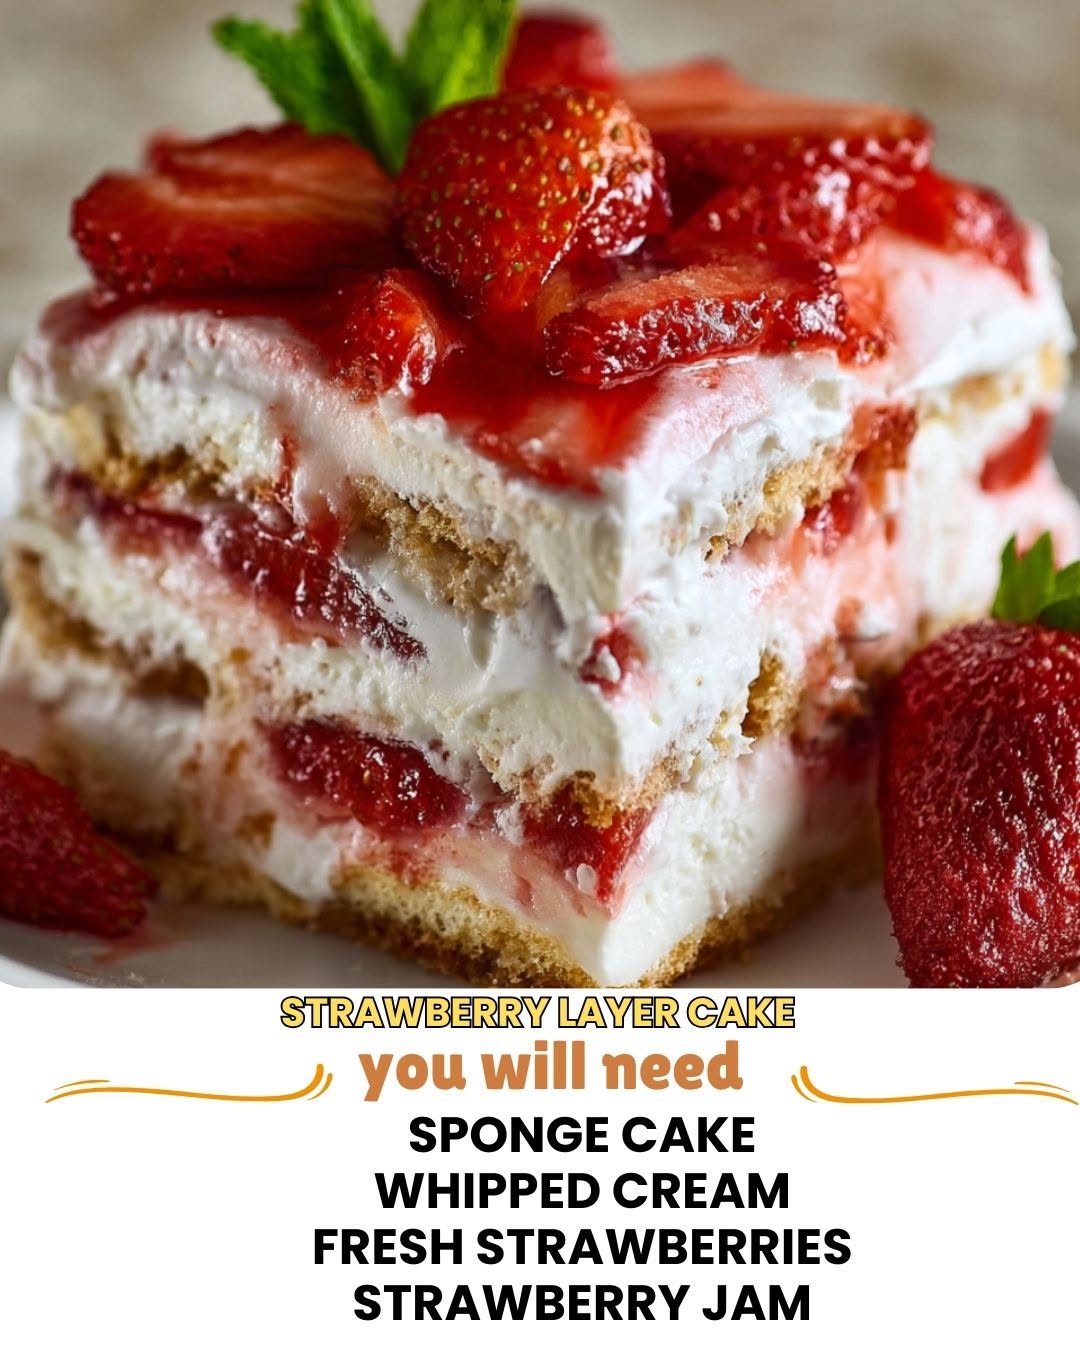
Strawberry Layer Cake Recipe: A Summer Celebration in Every Bite
I still remember the first time I made a strawberry layer cake from scratch. I was twenty-three, living in a tiny apartment with a kitchen the size of a shoebox, and I desperately wanted to impress my then-boyfriend’s family at a Fourth of July gathering. I’d never layered a cake before. I’d barely frosted one. But I had this wild idea that homemade strawberry cake would somehow make me look like I had my life together.
Spoiler alert: the cake leaned slightly to the left, the frosting was a little lumpy, and I absolutely panicked when I realized I’d forgotten to buy enough fresh strawberries. But you know what? Everyone loved it. My future mother-in-law asked for the recipe. Someone actually went back for a second slice. And I learned that perfection isn’t nearly as important as showing up with something made with your own two hands.
That’s what this strawberry layer cake recipe is all about. It’s not fussy. It’s not pretentious. It’s a real, honest, from-scratch cake that tastes like summer feels—bright, sweet, a little bit indulgent, and totally worth the effort. Whether you’re baking for a special occasion or just because you deserve something beautiful on a random Tuesday, this recipe works. I’ve made it dozens of times since that Fourth of July disaster, and I’m sharing every trick I’ve learned along the way.
This strawberry layer cake recipe is designed for home bakers who want impressive results without needing a pastry degree. The vanilla cake layers are tender and moist, the strawberry filling is bursting with real fruit flavor, and the cream cheese frosting is smooth, tangy, and absolutely dreamy. It feeds about twelve people, looks stunning on the dessert table, and honestly tastes even better the next day.
If you’re looking for more cake inspiration, follow me on HaileeRecipes on Pinterest where I share all my favorite layered cakes, frosting techniques, and dessert ideas.
Why You’ll Love This Recipe
Let me be honest: there are a lot of strawberry cake recipes out there. Some use cake mixes, some use weird flavor combinations, and some are honestly just too complicated for a weeknight mood. This one is different because it actually tastes like strawberries, the cake stays moist for days, and the technique is forgiving enough that even if you mess up a little, nobody will know.
The vanilla cake layers are my secret weapon. They’re buttery and tender without being dense, which means they can actually support the filling and frosting without collapsing. I use a combination of buttermilk and sour cream to keep everything incredibly moist. The strawberry flavor comes from real strawberry puree mixed right into the frosting—not artificial extract, not food coloring, just actual strawberries.
I also love this recipe because it’s flexible. You can make it ahead, you can customize the flavors, you can use frozen strawberries if that’s what you have, and you can even scale it down to a smaller cake if you’re not feeding a crowd. It’s the kind of recipe that grows with you.
Ingredients
For the Cake Layers
- 2 and 1/4 cups all-purpose flour
- 2 teaspoons baking powder
- 1/2 teaspoon baking soda
- 1/2 teaspoon salt
- 1/2 cup (one stick) unsalted butter, softened to room temperature
- 1 and 1/2 cups granulated sugar
- 3 large eggs, room temperature
- 1 teaspoon vanilla extract
- 3/4 cup buttermilk, room temperature
- 1/4 cup sour cream, room temperature
For the Strawberry Cream Cheese Frosting
- 1 pound (16 ounces) cream cheese, softened to room temperature
- 1/2 cup (one stick) unsalted butter, softened to room temperature
- 3 to 4 cups powdered sugar, sifted
- 1/2 cup fresh strawberry puree (about 8 to 10 medium strawberries, blended smooth)
- 1 teaspoon vanilla extract
- Pinch of salt
For Assembly and Decoration
- 1 pound fresh strawberries, hulled and sliced
- 2 tablespoons granulated sugar (optional, for macerating berries)
- Fresh strawberry slices for garnish on top
Hailee’s Tips
Room temperature ingredients are non-negotiable here. I learned this the hard way when I tried to rush and used cold eggs straight from the fridge. The batter broke, the cake came out dense, and I was genuinely upset. Now I pull everything out about thirty minutes before I start baking. It makes such a difference.
Don’t skip the sour cream. I know it seems odd, but that little bit of tang keeps the cake incredibly moist and adds a subtle depth that makes people ask what your secret ingredient is. (It’s sour cream. Tell them it’s sour cream.)
Make your strawberry puree fresh. I blend fresh strawberries in a food processor until completely smooth, then strain it through a fine-mesh sieve to remove any seeds. If you use jarred puree or syrup, the frosting won’t taste as bright and fresh.
Optional Add-Ins and Variations
This is where you get to make the recipe your own. I love the classic version, but I also love playing around.
- Almond extract: Add 1/4 teaspoon to the cake batter for a subtle almond note that pairs beautifully with strawberry. Don’t overdo it or it’ll taste like maraschino cherries.
- Lemon zest: Add the zest of one lemon to the cake batter. The brightness is incredible with strawberry.
- Strawberry jam layer: Spread a thin layer of good-quality strawberry jam between the cake and frosting for extra strawberry flavor.
- Whipped cream frosting: If cream cheese frosting feels too heavy, mix the strawberry puree into whipped cream instead. It’s lighter and more delicate.
- White chocolate: Fold white chocolate chips into the frosting for a sweeter, creamier finish.
Step-by-Step Method
Preparing Your Pans and Oven
Preheat your oven to 350°F. I use two 8-inch round cake pans, and I always grease them generously with butter or baking spray, then line the bottoms with parchment paper. This is the step that prevents heartbreak. I’ve had cakes stick before, and it’s not a vibe.
Making the Dry Mix
Step 1: In a medium bowl, whisk together flour, baking powder, baking soda, and salt. Set aside. I do this by hand with a whisk because it’s faster than pulling out the stand mixer for this part, and honestly, it feels more intentional.
Creaming Butter and Sugar
Step 2: In a large bowl (or using a stand mixer), cream together the softened butter and sugar. Beat for about 2 to 3 minutes until the mixture is light, fluffy, and pale. This is important because you’re incorporating air into the batter, which helps the cake rise. When I do this by hand, my arm gets tired, which is why I sometimes use the mixer. No shame in that game.
Adding Eggs and Vanilla
Step 3: Add eggs one at a time, beating well after each addition. Then add the vanilla extract. The mixture should look smooth and creamy. If it looks slightly curdled, don’t panic. This sometimes happens, and it usually evens out once you add the dry ingredients.
Alternating Wet and Dry
Step 4: Here’s where I messed up the most when I was learning: you have to alternate adding the dry ingredients and the wet ingredients, starting and ending with dry. It prevents overmixing and keeps the batter tender.
Add about one-third of the dry mixture, mix until just combined. Then add half of the buttermilk mixture (I combine the buttermilk and sour cream in a measuring cup first), mix until just combined. Repeat: another third of dry, the rest of the wet, then the final third of dry. After each addition, mix on low speed just until combined. Do not overmix. This is when I usually switch to a spatula and fold gently by hand to make sure I’m not being too aggressive.
Baking
Step 5: Divide the batter evenly between your prepared pans. I use a kitchen scale to weigh the batter if I’m being precise, but honestly, eyeballing it usually works fine. Smooth the tops with a spatula.
Step 6: Bake for 28 to 32 minutes, until a toothpick inserted in the center comes out with just a few moist crumbs (not wet, but not completely dry). The tops should be golden and the cakes should spring back when you gently press them.
Step 7: Let the cakes cool in the pans for about 10 minutes, then turn them out onto wire racks to cool completely. This usually takes about an hour. Do not skip this step. Frosting a warm cake is a disaster.
Making the Frosting
Step 8: While the cakes cool, make your frosting. In a large bowl, beat together the softened cream cheese and butter until smooth and creamy, about 2 minutes. Scrape down the sides of the bowl frequently because cream cheese can hide in the corners.
Step 9: Add the strawberry puree and vanilla extract. Mix until combined. The frosting will look a little loose at this point, which is fine.
Step 10: Gradually add the powdered sugar, a cup at a time, beating well after each addition. I start with 3 cups and add more as needed until the frosting reaches a spreadable consistency. You want it thick enough to hold its shape but still soft enough to spread smoothly. Add a pinch of salt to balance the sweetness.
Assembly
Step 11: Once everything is cool, it’s time to assemble. Place one cake layer on your serving plate or cake board. I use a dollop of frosting under the cake to keep it from sliding around.
Step 12: Spread a layer of frosting on top of the first cake, then arrange sliced strawberries on top of the frosting. I usually toss the strawberries with a little sugar about 15 minutes before assembly so they release their juices—it makes the filling taste more like strawberry jam.
Step 13: Place the second cake layer on top and frost the top and sides. I do a crumb coat first (a thin layer of frosting to seal in crumbs), refrigerate for 15 minutes, then do a final layer of frosting. This keeps everything looking neat and professional.
Step 14: Garnish the top with fresh strawberry slices arranged however you like. I usually do a circle around the edge and maybe a few in the center.
Common Mistakes to Avoid
Using cold ingredients: I cannot stress this enough. Cold eggs, cold butter, and cold dairy will not combine properly, and your batter will be lumpy and sad. Take everything out of the fridge thirty minutes before you start.
Overmixing the batter: Once you add the dry ingredients, mix just until combined. Overmixing develops gluten, which makes the cake tough and dense. I know it’s tempting to keep mixing, but resist.
Frosting a warm cake: I’ve done this, and the frosting melts and slides off. Patience is your friend here. Let the cake cool completely.
Not sifting the powdered sugar: Lumps in your frosting are not cute. Sift it before you add it to the frosting mixture.
Using watery strawberry puree: If your strawberry puree is too wet, your frosting will be too soft. Strain it through a fine-mesh sieve to remove excess liquid.
My Tested Substitutions
Frozen strawberries: Thaw them completely and strain out excess liquid. They work great when fresh berries aren’t available, though the flavor is slightly less bright.
All-purpose flour alternatives: You can substitute up to 1/4 cup of the all-purpose flour with almond flour for a nuttier crumb. Don’t go higher than that or the cake gets too dense.
Dairy-free option: Use vegan butter and coconut cream instead of regular butter and cream cheese. The flavor won’t be identical, but it’s still delicious. Use unsweetened almond milk mixed with a tablespoon of lemon juice instead of buttermilk.
Gluten-free option: I’ve had success using a 1-to-1 gluten-free flour blend, but add an extra 1/4 teaspoon of xanthan gum if your blend doesn’t already contain it. The crumb is slightly different but still tender and moist.
How to Customize
One of my favorite things about this recipe is how adaptable it is. Make it your own.
Different berries: Try raspberry, blackberry, or a mix. The technique stays exactly the same.
Flavor pairings: Add a tablespoon of balsamic vinegar to the strawberry puree for a sophisticated twist. Or add a teaspoon of rose water for something floral and delicate.
Chocolate lover’s version: Make the cake layers chocolate instead of vanilla, and keep the strawberry frosting. It’s surprisingly good.
Smaller cake: Use 6-inch pans and halve all the ingredient quantities. You’ll have fewer layers, but it’s perfect for a smaller gathering.
Serving Ideas
This cake is beautiful on its own, but here are some ways I like to serve it:
- Plain with a cup of coffee or tea
- With a dollop of fresh whipped cream on the side
- With vanilla ice cream for a more indulgent dessert
- Sliced and served on a pretty cake stand at a party
- With a light dusting of powdered sugar on top for extra elegance
- Alongside fresh berries and a fruit compote
Meal Prep and Storage
Make-ahead option: You can bake the cake layers up to two days in advance. Wrap them individually in plastic wrap and store them at room temperature. Make the frosting the day you plan to assemble.
Storage: Keep the assembled cake covered in the refrigerator for up to three days. The frosting keeps everything moist, and honestly, the flavors meld beautifully overnight.
Freezing: You can freeze the unfrosted cake layers for up to a month. Wrap them tightly in plastic wrap and then foil. Thaw at room temperature before frosting.
Room temperature serving: I like to take the cake out of the fridge about thirty minutes before serving so the frosting softens slightly and the cake tastes fresher.
Nutritional Breakdown
This is per slice, assuming the cake is cut into 12 slices:
- Calories: approximately 420
- Protein: 6g
- Carbohydrates: 52g
- Fat: 21g
- Fiber: 1g
Keep in mind this is an estimate and can vary based on exact ingredient brands and how generously you frost the cake.
Final Thoughts
I hope this strawberry layer cake recipe becomes a favorite in your kitchen the way it has in mine. It’s the kind of cake that brings people together, that tastes like care, and that proves you don’t need fancy techniques or complicated ingredients to make something truly special.
The most important thing I’ve learned about baking is that perfection is boring. A cake with slightly uneven frosting tastes just as good as a magazine-worthy one, and the love you put into making it is always visible. So don’t stress if your layers aren’t perfectly level or your frosting isn’t flawless. Make it, share it, and enjoy it.
If you try this recipe, I’d genuinely