3-Ingredient Cherry Cream Cheese Pie
3-Ingredient Cherry Cream Cheese Pie
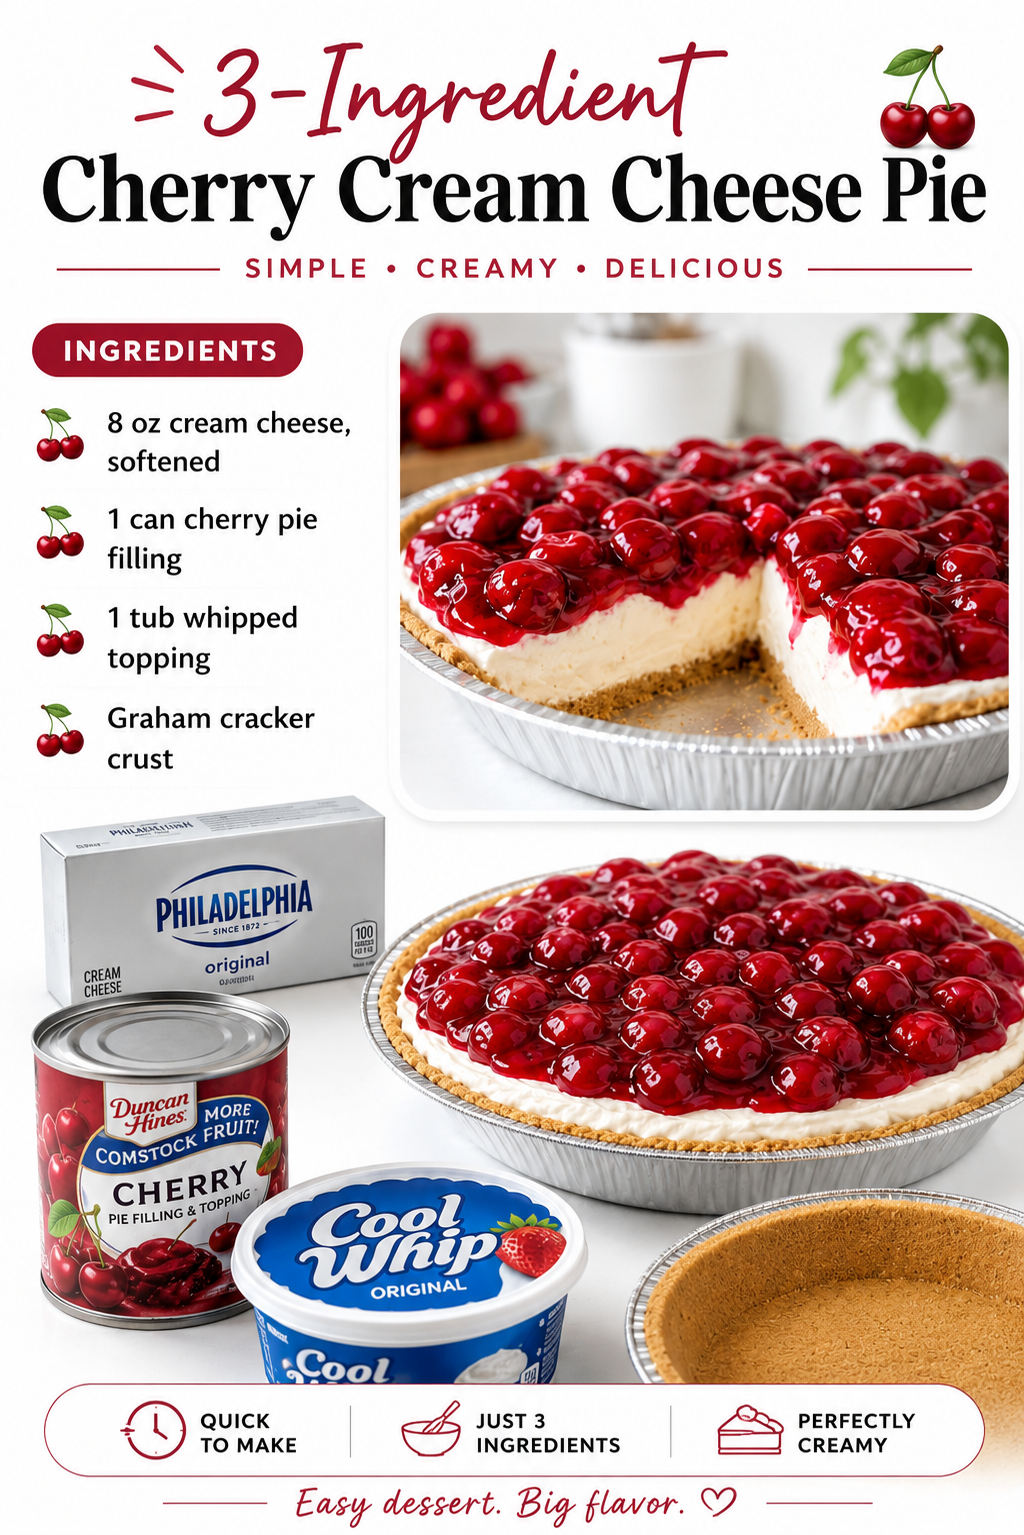
3-Ingredient Cherry Cream Cheese Pie: The Dessert That Saved My Week
I’m going to be honest with you right from the start: I made this pie on a Tuesday night when I was completely overwhelmed. My sister was coming over Thursday, I’d promised to bring dessert to a work thing Friday, and I had approximately zero energy to do anything complicated. So I stood in my kitchen, stared into my fridge, and basically asked myself, “What’s the absolute bare minimum I can do here that doesn’t involve a box mix?”
That’s how this 3-Ingredient Cherry Cream Cheese Pie happened. And let me tell you, it was one of those happy accidents that makes you feel like a culinary genius when really, you just got lucky and grabbed three things that happened to work beautifully together.
Here’s the thing about this recipe: it’s not trying to be fancy. It’s not pretending to be a five-star dessert. But it tastes like you spent hours on it, and honestly? That’s the best kind of recipe. It’s a simple cream cheese base, a buttery crust (which I’m using store-bought because I’m not a masochist), and a gorgeous cherry topping that looks like you actually know what you’re doing in the kitchen.
This pie works for literally anyone. You’re a beginner baker? Perfect. You’re someone who just wants something sweet without the fuss? Even better. You’re looking for a dessert that impresses people without making you lose your mind? This is your jam. I’ve made it for weeknight family dinners, potlucks, and those moments when someone texts you asking if you can bring something and you have three hours to figure it out.
If you’re looking for more simple, honest recipes like this one, follow me on HaileeRecipes on Pinterest. I share tons of real-life recipes that actually work with your actual life.
Why You’ll Love This Recipe
Let me break down why I’m genuinely obsessed with this dessert.
It’s actually three ingredients. Not “three main ingredients plus a bunch of other stuff.” Not “three ingredients if you don’t count the ones in the crust.” I mean, you literally need three things beyond the crust. That’s it. That’s the whole recipe.
It tastes way more complicated than it is. The cream cheese layer is silky and rich. The cherry topping is sweet and slightly tart. Together, they create this elegant dessert that makes people think you have your life together. (You may or may not have your life together, but they don’t need to know that.)
It comes together in minutes. We’re talking about fifteen to twenty minutes of actual hands-on time. The oven does the heavy lifting, and then you just let it chill. No standing over a stove, no complicated techniques, no stress.
It’s genuinely forgiving. This isn’t a temperamental soufflé or a fussy tart. It’s sturdy, reliable, and honestly pretty hard to mess up. I’ve made it a dozen times now, and I’ve never had it fail me.
Everyone actually eats it. I’ve served this to people who claim they don’t like sweets, people who are picky about texture, people who are suspicious of anything that looks too easy. They all come back for seconds. That’s the real test, right there.
Ingredients for 3-Ingredient Cherry Cream Cheese Pie
- One 9-inch pre-made pie crust (store-bought, and I’m not apologizing)
- 8 ounces cream cheese, softened to room temperature
- 1 can (21 ounces) cherry pie filling
- 1/4 cup powdered sugar (optional, but I always add it)
Hailee’s Tip: The cream cheese temperature matters more than you’d think. If it’s cold, it’ll be lumpy and hard to spread. Just leave it on the counter for thirty minutes before you start. Your future self will thank you.
Hailee’s Tip: I always go with the store-bought pie crust because it’s already par-baked, which means less chance of a soggy bottom. Life’s too short for soggy pie crust, you know?
Hailee’s Tip: The cherry pie filling is non-negotiable here. Yes, you could make your own filling from scratch, but that defeats the entire purpose of this recipe. We’re going for simple and delicious, not complicated and overthought.
Optional Add-Ins and Variations
Here’s where you can have a little fun with this recipe without making it complicated.
- Almond extract: Add 1/4 teaspoon to the cream cheese mixture. It gives everything a subtle, sophisticated flavor that makes people ask what your secret ingredient is.
- Vanilla extract: A teaspoon stirred into the cream cheese layer adds a little warmth and depth.
- Lemon zest: Just a tiny bit brightens up the whole thing. I’m talking one teaspoon, not more.
- Whipped cream topping: Serve each slice with a dollop. It’s not necessary, but it’s definitely not unwelcome.
- Graham cracker crust: If you want to skip the pre-made pie crust, use a graham cracker one instead. It’s still store-bought, still simple, and it pairs beautifully with the cherry and cream cheese.
Step-by-Step Method
Step 1: Preheat and prepare. Get your oven to 350 degrees Fahrenheit. Take that pie crust out of the box and let it sit in the pie pan while the oven heats up. Some people prick the bottom with a fork to prevent puffing, and honestly, I do that sometimes and sometimes I don’t. It’s not a dealbreaker either way.
Step 2: Make the cream cheese layer. In a medium bowl, beat together your softened cream cheese and powdered sugar until it’s smooth and creamy. This should take about two minutes with an electric mixer, or about five minutes if you’re doing it by hand (which I’ve done, and it’s fine, just a little more arm work). You want it completely smooth with no lumps. Take your time here.
Step 3: Spread it out. Pour that cream cheese mixture into your pie crust and spread it in an even layer. I use an offset spatula or the back of a spoon, and I just take a minute to make sure it’s relatively even. It doesn’t have to be perfect. Honestly, the cherry filling is going to cover most of it anyway.
What I messed up the first time: I didn’t spread the cream cheese all the way to the edges, so when it baked, there were these little gaps where the crust was visible. It still tasted great, but it looked a little sad. Now I make sure to go all the way to the edges.
Step 4: Bake the cream cheese layer. Pop that pie into the oven for about ten to twelve minutes. You’re not looking for it to be cooked through or anything. You just want it to set up slightly and warm through. It should still look a little soft when you take it out, and that’s exactly what you want.
Step 5: Add the cherry topping. Pull the pie out of the oven and let it cool for about five minutes. Then just pour that entire can of cherry pie filling right over the top. Don’t spread it around too much; just let it settle naturally over the cream cheese layer. It’s going to look absolutely gorgeous.
Step 6: Bake again. Put the whole thing back in the oven for another ten to fifteen minutes. You’re just heating the cherry filling through and letting everything set up together. The filling might bubble a little around the edges, and that’s totally normal.
Step 7: Cool completely. This is the hardest part because your house is going to smell amazing and you’re going to want to eat it immediately. But pull it out of the oven and let it cool on the counter for at least thirty minutes. Then move it to the fridge for at least two hours, preferably longer. I usually make mine in the morning and let it chill all day, or I make it the night before.
What I messed up the second time: I tried to slice it while it was still warm, and it was basically a mess. Warm pie is delicious, but it’s not sliceable. Cold pie is where it’s at. You’ll get clean slices that actually look presentable.
Common Mistakes to Avoid
Using cold cream cheese straight from the fridge. I know I mentioned this, but it’s important enough to mention again. Cold cream cheese won’t blend smoothly, and you’ll end up with a lumpy layer. Just let it sit on the counter for thirty minutes. Your future self will be so grateful.
Skipping the cooling time. I get it. You want pie now. But if you don’t let it chill properly, it won’t slice cleanly, and the whole thing will fall apart when you try to plate it. Patience is your friend here.
Over-spreading the cream cheese. You don’t need to work it too much. Just get it relatively even and move on. The more you mess with it, the more you’re incorporating air, and that can lead to weird texture issues.
Opening the oven door constantly. I see you. I want to check on things too. But every time you open that door, you’re letting heat out and potentially messing with how things bake. Trust the process. Fifteen minutes is not that long.
My Tested Substitutions
If you don’t have powdered sugar: Use regular granulated sugar instead. You’ll use the same amount, and it’ll work fine. It won’t be quite as smooth, but it’ll taste the same.
If you don’t have cream cheese: This is tricky because cream cheese is kind of the whole point. But in a pinch, I’ve used mascarpone, and it works beautifully. Use the same amount. It’ll be a little richer and a little less tangy, but it’s delicious.
If you don’t have cherry pie filling: Use any pie filling you like. Blueberry, apple, peach, strawberry—they all work. The beauty of this recipe is its flexibility. Just use the same amount as the cherry filling, and you’re good to go.
If you want a homemade crust: Go for it. Use your favorite pie crust recipe, or make a graham cracker crust. Just know that this will add time and complexity. The whole point of this recipe is that it’s simple, so if you’re going to make a homemade crust, at least make it something you’ve made before.
How to Customize
This recipe is honestly a blank canvas, and I love that about it.
If you like things sweeter, add an extra tablespoon or two of powdered sugar to the cream cheese layer. If you like things less sweet, use a little less. If you want a nuttier flavor, add some almond extract or even a tablespoon of almond butter to the cream cheese mixture. If you want it more citrusy, zest a lemon or lime right into the cream cheese layer.
You could also do a chocolate cream cheese layer by adding a couple tablespoons of cocoa powder and a bit more sugar to balance it out, then top it with cherry filling. That’s absolutely delicious, by the way. I’ve done it, and it’s like a fancy chocolate-covered cherry situation.
Or you could do a spiced cream cheese layer by adding cinnamon, nutmeg, and a tiny pinch of cloves. Then top it with the cherry filling. That’s more of a fall vibe, but it works any time of year.
Serving Ideas
Straight out of the fridge is honestly perfect. But here are some other ways I like to serve it.
- With a dollop of fresh whipped cream on top. This is my go-to fancy version.
- With a drizzle of chocolate sauce. Yeah, I know it sounds like a lot, but it’s actually amazing.
- With a scoop of vanilla ice cream on the side. The cold ice cream against the cold pie is just *chef’s kiss*.
- Completely plain, because honestly, it doesn’t need anything else.
- With a sprinkle of crushed graham crackers on top for a little texture contrast.
Meal Prep and Storage
This pie is actually great for meal prep because it keeps really well in the fridge.
In the fridge: Cover it loosely with plastic wrap or foil and keep it for up to four days. After that, the crust starts to get a little soft, but it’s still edible. It just loses that nice crispy quality.
In the freezer: You can freeze the whole pie for up to two months. Just wrap it well in plastic wrap and then foil. When you want to eat it, let it thaw in the fridge for a few hours. It’ll be fine.
Individual slices: If you want to freeze individual slices, cut the pie first, then wrap each slice separately in plastic wrap. That way you can just pull out one slice at a time.
Make-ahead: I love making this the night before I need it. It gives everything time to set up properly, and it’s one less thing to worry about the day of.
Nutritional Breakdown
Here’s the nutrition info per slice (assuming you cut the pie into eight slices):
- Calories: approximately 285
- Protein: 4g
- Carbohydrates: 32g
- Fat: 15g
- Fiber: 0g
- Sugar: 24g
Keep in mind that this is an estimate based on standard store-bought pie crust and filling. The exact numbers will vary depending on the brands you use. If you’re tracking macros closely, check the labels on your specific ingredients.
Final Thoughts
This 3-Ingredient Cherry Cream Cheese Pie has become one of my most-made desserts, and I think it’s because it represents something I really believe in: you don’t have to be complicated to be good. You don’t have to spend hours in the kitchen to impress people. Sometimes the best things are the simplest things.
I’ve made this pie on nights when I was exhausted and just needed something that worked. I’ve brought it to potlucks where people asked for the recipe. I’ve made it for my family on random Tuesdays just because I wanted something sweet. And every single time, it’s been exactly what I needed.
That’s the kind of recipe I think we all need more of. The kind that’s reliable, forgiving, and genuinely delicious without requiring you to have a culinary degree or spend your entire paycheck on ingredients. This is that recipe.
So go make this pie. Let it chill in your fridge. Slice into it when you’re ready. And then come back and tell me how it went. I genuinely love hearing what you all think about the recipes I share, and I’d love to know how yours turned out.
You’ve got this. It’s literally three ingredients. You’re going to do great.
—
Recipe Card
3-Ingredient Cherry Cream Cheese Pie
Ingredients
Method
- Preheat oven to 350 degrees Fahrenheit. Place pie crust in a 9-inch pie pan and let it sit while the oven heats.
- In a medium bowl, beat together softened cream cheese and powdered sugar until smooth and creamy, about 2 minutes.
- Spread the cream cheese mixture evenly into the pie crust, going all the way to the edges.
- Bake for 10 to 12 minutes until the cream cheese layer is set but still slightly soft.
- Remove from oven and let cool for 5 minutes. Pour the entire can of cherry pie filling over the cream cheese layer.
- Return to oven and bake for another 10 to 15 minutes until the filling is heated through and everything is set.
- Remove from oven and let cool on the counter for at least 30 minutes. Transfer to the refrigerator and chill for at least 2 hours before slicing.