Crispy Parmesan Zucchini Bites
Crispy Parmesan Zucchini Bites
Crispy Parmesan Zucchini Bites: A Recipe I Make Every Single Week
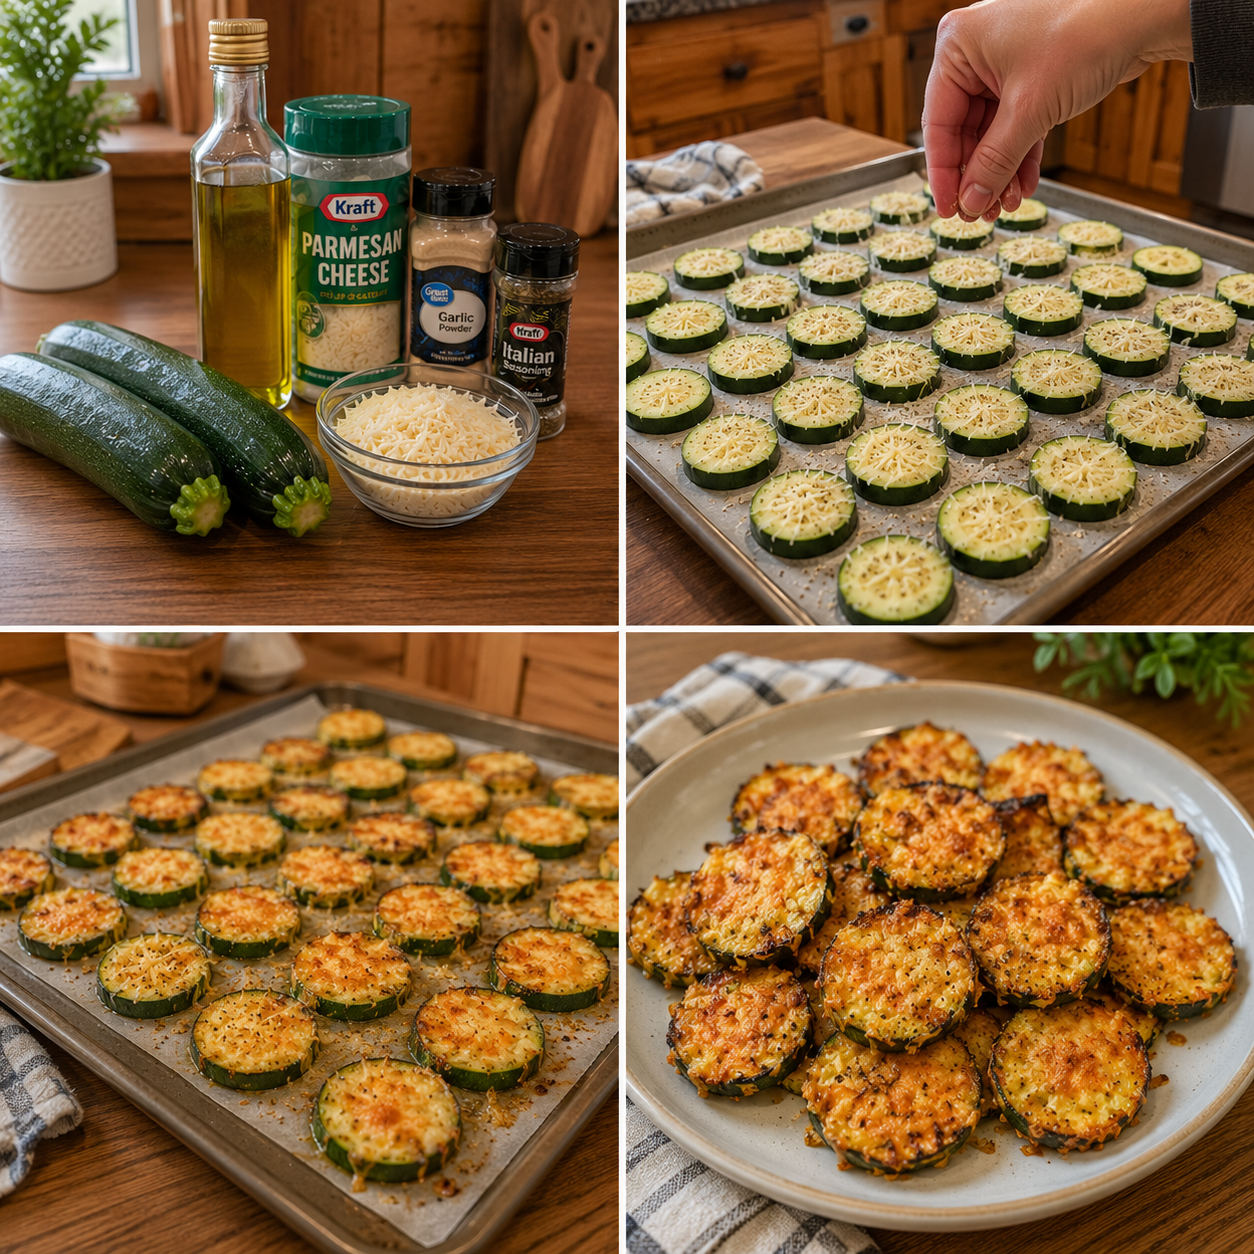
I’m going to be honest with you—I was not always a zucchini person. Growing up, I thought it was this bland, mushy vegetable that only appeared in sad summer casseroles at potlucks. Then one Tuesday night, I was standing in my kitchen with a surplus of zucchini from my neighbor’s garden, a craving for something crispy and salty, and absolutely no patience for a complicated dinner. I threw together what would become my obsession: Crispy Parmesan Zucchini Bites.
These little golden-brown sticks changed my life. Not in a dramatic way—but in that real, everyday way where you find yourself making something three times in one week because your family keeps asking for it, and suddenly you’re the person who actually gets excited about zucchini.
Here’s what makes these so special: they’re crunchy on the outside, tender on the inside, and absolutely loaded with that nutty, salty Parmesan flavor you crave. They take maybe 25 minutes from start to finish. They’re vegetarian, they’re gluten-free if you use the right coating, and they work as an appetizer, a side dish, or (let’s be real) a snack you eat standing at the counter at 10 p.m. They’re also a brilliant way to get people—especially kids—genuinely excited about eating vegetables. I’m talking about actual enthusiasm, not the resigned sigh you usually get.
Whether you’re meal prepping for the week, looking for a crowd-pleaser for game night, or just tired of the same old side dishes, these zucchini bites are going to become part of your regular rotation. I promise. If you love this kind of recipe, Follow me on HaileeRecipes on Pinterest for more simple, real-life cooking that actually works.
Why You’ll Love This Recipe
Let me break down what makes these so genuinely good:
- They’re actually crispy. Not soggy, not breaded-then-mushy. I’m talking about that satisfying crunch when you bite into one. It’s the little joy we all deserve.
- The flavor is bold. Between the Parmesan, garlic, and a pinch of red pepper flakes, these taste like something you’d order at a restaurant, not something you threw together on a Tuesday.
- They’re foolproof. I’ve made these with tired hands at the end of a long day, and they’ve still turned out golden and delicious. There’s very little that can go wrong here.
- They work for almost any diet. Vegetarian? Yes. Gluten-free? Yes, with a simple swap. Keto-friendly? Absolutely. Low-carb? You bet.
- Your kids will actually eat them. I know, I know—I was skeptical too. But there’s something about the crispy coating and the cheesy flavor that makes even reluctant vegetable eaters go back for seconds.
- They’re incredibly versatile. Serve them with marinara, ranch, garlic aioli, or just eat them plain. They work for lunch, dinner, snacks, or appetizers.
Ingredients
Here’s what you’ll need to make about 24 bites (enough for 4 people as a side, or 6 as an appetizer):
- 4 medium zucchini (about 2 pounds), sliced into sticks roughly 3 inches long and 1/2 inch thick
- 1 cup grated Parmesan cheese (the real stuff, not the green can—trust me on this)
- 1/2 cup panko breadcrumbs (or regular breadcrumbs; panko just gives a lighter crunch)
- 1/4 cup all-purpose flour (or cornstarch if you want them extra crispy)
- 2 large eggs
- 1 teaspoon garlic powder
- 1/2 teaspoon red pepper flakes (optional, but I never skip this)
- 1/2 teaspoon salt (adjust to taste—remember, Parmesan is already salty)
- 1/4 teaspoon black pepper
- Oil for frying (I use a mix of avocado oil and olive oil, but vegetable oil works fine)
Hailee’s Tip: The quality of your Parmesan really matters here. Fresh, finely grated Parmesan from the deli counter or a block you grate yourself tastes completely different from the pre-grated stuff. If you only have the pre-grated version, it’ll still work, but the flavor won’t be quite as rich. Do yourself a favor and grab a wedge—it’s worth it.
Hailee’s Tip: Don’t skip the panko. Regular breadcrumbs work, but panko gives you that restaurant-quality crunch that makes these truly special. It’s a small detail that makes a real difference.
Hailee’s Tip: Pat your zucchini dry before breading. This is the secret to crispy bites instead of steamed ones. I use a clean kitchen towel and just gently press each stick. Takes maybe two minutes and completely changes the outcome.
Optional Add-Ins and Variations
The base recipe is perfect as-is, but here are some fun ways to play with it:
- Italian seasoning variation: Add 1 teaspoon of Italian seasoning to your breading mix for an herbier flavor.
- Spicy kick: Increase the red pepper flakes to 1 teaspoon, or add 1/2 teaspoon of cayenne pepper.
- Everything bagel seasoning: Mix in 1 tablespoon of everything bagel seasoning with your Parmesan and breadcrumbs. It’s weird, it’s wonderful, and it works.
- Lemon zest: Add the zest of one lemon to your breading for brightness and a sophisticated twist.
- Cajun spice: Replace the garlic powder with Cajun seasoning for a completely different vibe.
- Herb-forward: Mix in 1 tablespoon of fresh or dried parsley, and 1/2 teaspoon of dried oregano.
Step-by-Step Method
Step 1: Prep your zucchini
Wash your zucchini and slice them into sticks about 3 inches long and 1/2 inch thick. You want them thick enough to hold up to frying without falling apart, but not so thick that they stay raw in the middle. I usually get about 6 sticks per medium zucchini. Pat them completely dry with a clean kitchen towel—this is non-negotiable if you want crispy results, not soggy ones.
Step 2: Set up your breading station
Get three shallow bowls ready. In the first, whisk together your eggs with a splash of water (maybe 1 tablespoon). In the second, combine your flour and salt and pepper. In the third, mix together your Parmesan, panko, garlic powder, red pepper flakes, and black pepper. This assembly-line approach makes the whole process faster and less messy.
Hailee’s Tip: I learned this the hard way—don’t skip the salt and pepper in the flour mixture. It seasons the zucchini from the inside out, and it makes a real difference.
Step 3: Bread your zucchini
Working with one stick at a time, coat it first in the flour mixture, shaking off any excess. Then dip it into the egg, and finally roll it in the Parmesan breadcrumb mixture, pressing gently so the coating sticks. Place each breaded stick on a plate. Don’t skip the pressing step—it helps the coating adhere and get extra crispy.
What I messed up: The first time I made these, I breaded them all at once and then let them sit for 20 minutes before frying. By the time I got to them, the coating had gotten soggy from the moisture in the zucchini. Now I bread them and fry them right away, or if I need to wait, I refrigerate them uncovered for up to 2 hours. The cold helps everything stay crispy.
Step 4: Heat your oil
Pour about 1/4 inch of oil into a large skillet over medium-high heat. Let it get hot—you want it around 350-375°F if you have a thermometer, or hot enough that a tiny piece of bread sizzles immediately when you drop it in. This usually takes about 5 minutes.
Step 5: Fry in batches
Working in batches so you don’t overcrowd the pan, carefully place your zucchini sticks into the hot oil. Fry for about 2-3 minutes per side until they’re golden brown and crispy. You want that deep golden color—it means the outside is crispy and the inside is tender. Don’t rush this. If the oil isn’t hot enough, they’ll absorb oil and become greasy instead of crispy.
What I messed up: I once tried to cook too many at once to save time. They steamed instead of fried, and I ended up with soft, oily zucchini bites that nobody wanted. Batch frying takes an extra few minutes, but it’s absolutely worth it.
Step 6: Drain and serve
As each batch finishes, transfer them to a paper towel-lined plate to drain. Sprinkle with a tiny pinch of fleur de sel or sea salt while they’re still hot—this adds a final touch of flavor and keeps them from tasting one-note. Serve them immediately while they’re still crispy, or let them cool to room temperature if you prefer.
Common Mistakes to Avoid
Soggy zucchini instead of crispy: This almost always comes down to two things: wet zucchini going into the oil, or oil that isn’t hot enough. Make sure you pat your zucchini completely dry, and make sure your oil is genuinely hot before you start frying. A thermometer takes the guesswork out of this.
Coating falling off: If your coating keeps sliding off, your zucchini is probably too wet, or you’re not pressing the breadcrumb mixture on firmly enough. Also, make sure you’re doing the flour step first—it helps the egg stick to the zucchini, and then the breadcrumbs stick to the egg.
Raw zucchini in the middle: This means your oil wasn’t hot enough, or you didn’t fry them long enough. Aim for a deep golden brown on the outside, which usually takes 2-3 minutes per side for properly sliced zucchini.
Too greasy: Again, this is usually an oil temperature issue. If your oil is too cool, the zucchini will absorb it instead of frying in it. Make sure it’s hot enough before you start, and don’t skip the paper towel draining step.
Bland flavor: Don’t be shy with the seasonings. Taste your breading mixture before you coat your zucchini. If it doesn’t taste flavorful on its own, it won’t be flavorful on the zucchini. Also, use real Parmesan, not the pre-grated stuff in the green can.
My Tested Substitutions
For gluten-free: Replace the all-purpose flour with cornstarch or a gluten-free flour blend. Cornstarch actually gives you an even crispier result, so I sometimes use it even when I’m not going gluten-free.
For lower carb or keto: Use almond flour instead of breadcrumbs, and replace the all-purpose flour with cornstarch. The result is still crispy and delicious, just slightly different in texture.
For dairy-free: This one’s trickier because Parmesan is kind of the star here. You can use a dairy-free Parmesan alternative, but honestly, it’s not quite the same. I’d recommend making a different recipe if dairy-free is a must for you.
For air fryer: Yes, you can make these in an air fryer, and they turn out great. Spray your breaded zucchini with cooking oil spray, arrange them in a single layer, and air fry at 400°F for about 10-12 minutes, shaking the basket halfway through. They won’t be quite as crispy as pan-fried, but they’re still delicious and way less oily.
For baking: If you want to avoid frying altogether, you can bake these. Arrange them on a greased baking sheet, spray them generously with cooking oil spray, and bake at 400°F for about 15-18 minutes until golden. Again, not quite as crispy as pan-fried, but still really good.
How to Customize
The beauty of this recipe is that it’s incredibly flexible. Here are some ways to make it your own:
- Different vegetables: This same breading works beautifully on eggplant slices, mushrooms, or even green tomatoes. The technique is the same; just adjust cooking time based on thickness.
- Different cheeses: Try mixing half Parmesan with half Asiago, or use a sharp cheddar for a completely different flavor profile.
- Spice level: Adjust the red pepper flakes to match your heat tolerance. I like mine with a little kick, but you can leave it out entirely if you prefer mild.
- Herbs: Fresh or dried herbs like basil, oregano, thyme, or even dill all work beautifully mixed into your breading.
Serving Ideas
These zucchini bites are incredibly versatile. Here are my favorite ways to serve them:
- With marinara sauce: The classic pairing. Warm marinara for dipping is restaurant-quality delicious.
- With garlic aioli: Mix mayo with minced garlic, lemon juice, and a pinch of salt. This is my personal favorite.
- With ranch: Sometimes you just want ranch, and that’s okay. These are perfect for it.
- With a yogurt-based dip: Mix Greek yogurt with fresh dill, lemon juice, and garlic for something lighter.
- Plain with fleur de sel: Honestly, they’re so good on their own that sometimes I don’t even bother with a dip.
- As a side dish: Serve them alongside roasted chicken or grilled fish instead of fries.
- In a salad: Chop them up and toss them into a green salad for crunch and protein.
- As an appetizer: Arrange them on a board with dips and serve at parties. They always disappear first.
Meal Prep and Storage
Make-ahead: You can bread your zucchini up to 24 hours in advance. Arrange them on a baking sheet, cover with plastic wrap, and refrigerate. Fry them right before serving for the best results.
Leftovers: These keep in an airtight container in the refrigerator for up to 3 days. They’re best eaten the day you make them while they’re still crispy, but they’re still tasty reheated. To reheat, pop them in a 350°F oven for about 5-7 minutes until they’re warm and crispy again. Don’t microwave them—you’ll end up with mushy zucchini, and nobody wants that.
Freezing: You can freeze uncooked breaded zucchini for up to 3 months. Freeze them on a baking sheet first, then transfer to a freezer bag. Fry them straight from frozen, adding just a minute or two to the cooking time.
Freezing cooked: Cooked zucchini bites freeze okay, but they lose some of their crispiness. If you do freeze them, reheat in a 400°F oven for about 8-10 minutes to restore as much crispiness as possible.
Nutritional Breakdown
Here’s what you’re looking at per serving (based on 24 bites, or 6 servings):
- Calories: approximately 180
- Protein: 7g
- Carbohydrates: 8g
- Fat: 13g
- Fiber: 1g
- Sodium: 420mg
Keep in mind that these numbers can vary