No Bake Pineapple Heaven Cheesecake
No Bake Pineapple Heaven Cheesecake
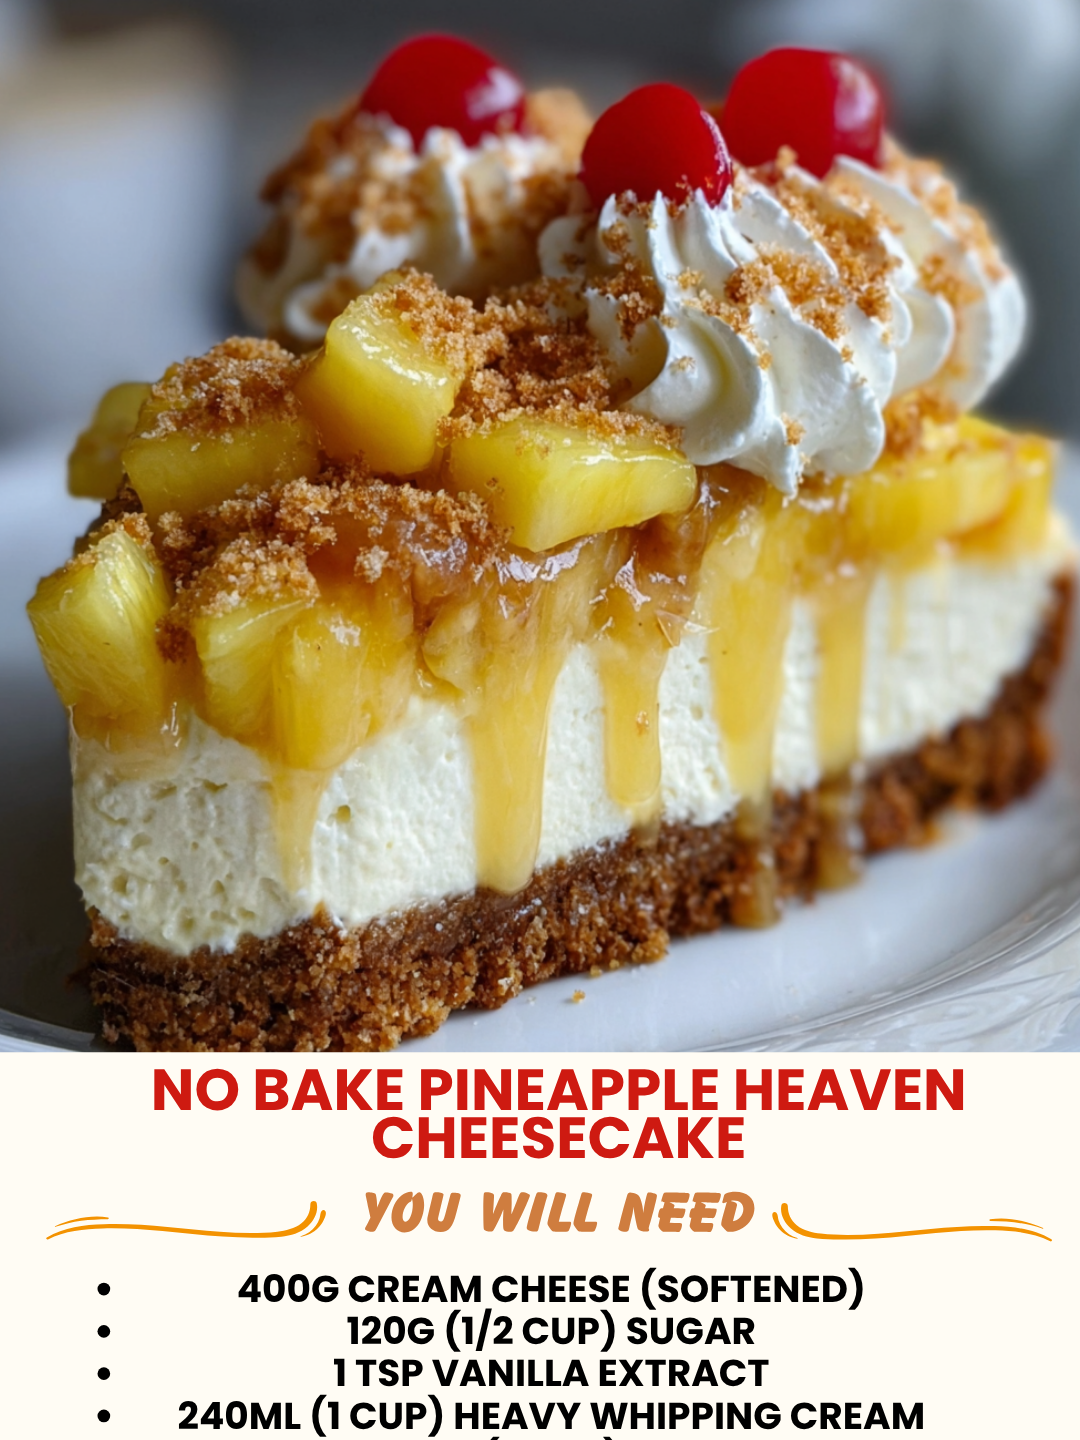
No Bake Pineapple Heaven Cheesecake: A Summer Dream That Actually Works
I’m going to be honest with you right from the start—I never thought I’d be the kind of person who could pull off a cheesecake without turning on the oven. My mom always made hers the traditional way, and I watched her stress over water baths and cracks like it was some kind of culinary battlefield. But then one sticky July afternoon, when the thought of heating up my kitchen felt genuinely criminal, I decided to experiment. What came out of that afternoon was this No Bake Pineapple Heaven Cheesecake, and I haven’t looked back since.
The thing about this recipe is that it tastes like you spent actual hours on it, but you really didn’t. There’s something almost magical about layering a buttery graham cracker crust with clouds of whipped cream, tangy cream cheese, and bright, tropical pineapple. It’s the kind of dessert that makes people think you’re secretly a pastry chef, when really you just mixed some things together and let your fridge do the work.
I created this recipe for anyone who loves cheesecake but dreads the fuss. Maybe you’re intimidated by baking. Maybe your kitchen is already packed with summer entertaining. Maybe you just want something that tastes incredible without the stress. This recipe checks all those boxes. It’s also perfect if you’re cooking for a crowd—it feeds about twelve people, travels beautifully, and honestly gets better as it sits in the fridge for a day or two. Follow me on HaileeRecipes on Pinterest for more recipes that don’t require you to stress or sweat.
Let me walk you through exactly how I make this, including the little tricks I’ve learned along the way and the mistakes I’ve definitely made so you don’t have to.
Why You’ll Love This Recipe
First, there’s zero oven time. That alone is worth celebrating in the summer months, but it’s also a lifesaver if your oven is already occupied or if you’re making this at a cabin or rental without great kitchen equipment.
Second, the texture is absolutely divine. You get that creamy, dense cheesecake layer that melts on your tongue, balanced with fluffy whipped cream that keeps it light. The pineapple isn’t just a topping—it’s baked into the filling itself, so every single bite tastes like vacation.
Third, it actually holds up beautifully. I’ve made this for potlucks, dinner parties, and casual family gatherings, and it travels well, stays stable at room temperature for a couple of hours, and looks gorgeous when you slice it.
And finally, it’s genuinely forgiving. Unlike a traditional baked cheesecake where one crack can feel like a personal failure, this one is super flexible. You can make it a day ahead, customize it to your taste, and even rescue it if something goes slightly sideways.
Ingredients for No Bake Pineapple Heaven Cheesecake
For the Crust
- 2 cups graham cracker crumbs (about 14 crackers)
- 6 tablespoons unsalted butter, melted
- 2 tablespoons granulated sugar
- Pinch of sea salt
For the Filling
- 16 ounces cream cheese, softened to room temperature
- 1 cup heavy whipping cream
- 3/4 cup granulated sugar
- 1 teaspoon vanilla extract
- 1 cup fresh pineapple, finely diced and drained (or canned pineapple in juice, well drained)
- 2 tablespoons pineapple juice (reserved from canned, or fresh if using fresh fruit)
For the Topping (Optional but Recommended)
- 1/2 cup heavy whipping cream
- 2 tablespoons powdered sugar
- Fresh pineapple chunks for garnish
- A few crushed graham crackers for texture
Hailee’s Tip: Room temperature cream cheese is non-negotiable here. I take mine out about 30 minutes before I start. Cold cream cheese will clump, and nobody wants that.
Hailee’s Tip: If you’re using canned pineapple, drain it really well. I put it in a fine-mesh strainer and press it gently with a paper towel. Extra moisture will make your filling too soft.
Hailee’s Tip: Graham cracker crumbs aren’t just for nostalgia—they provide structure and flavor. Don’t skip them or swap them for something too fine, or your crust will be mushy instead of satisfying.
Optional Add-Ins and Variations
I love this recipe as written, but I also love playing with it. Here are some tweaks I’ve tested and genuinely enjoyed.
- Coconut Twist: Add 1/2 cup shredded coconut to the crust and sprinkle more on top. It’s like a tropical vacation in cheesecake form.
- Ginger Kick: Stir in 1/2 teaspoon ground ginger to the filling. It brightens the pineapple beautifully.
- Rum Extract: If you want a more sophisticated flavor, add 1/4 teaspoon rum extract along with the vanilla. It’s subtle but lovely.
- Crushed Pineapple Swirl: Reserve some crushed pineapple and swirl it into the filling at the very end for a marbled effect.
- Brown Sugar Crust: Swap the white sugar in the crust for brown sugar for a deeper, more caramel-like flavor.
Step-by-Step Method
Step 1: Make the Crust
In a medium bowl, combine your graham cracker crumbs, melted butter, sugar, and salt. Stir until it looks like wet sand—you want every crumb coated but not soggy. Press this firmly into the bottom of a 9-inch springform pan, using the bottom of a measuring cup to really pack it down. You want a solid, even layer about 1/4 inch thick. This takes about two minutes and makes such a difference in the final texture.
Pop it in the freezer while you make the filling. This keeps it from getting soft when you add the creamy layer on top.
Step 2: Prepare Your Pineapple
If you’re using fresh pineapple, dice it finely and place it in a fine-mesh strainer over a bowl. Let it drain for about five minutes, pressing gently with a paper towel. This is crucial—excess moisture is the enemy of a stable cheesecake filling. If you’re using canned, drain it the same way.
Reserve 2 tablespoons of the pineapple juice. You’ll use this to brighten the filling and give it that authentic pineapple flavor.
Step 3: Whip the Cream
Pour your heavy whipping cream into a chilled bowl. I always put my bowl in the freezer for five minutes before I start—it helps the cream whip faster and more stably. Using an electric mixer on medium-high speed, whip the cream until stiff peaks form. This should take about three to four minutes. You want it thick enough to hold its shape, but not so long that it starts to turn grainy.
Transfer this to another bowl and set it aside. Don’t wash your mixer bowl yet—you’ll use it again.
Step 4: Beat the Cream Cheese and Sugar
In that same mixer bowl, combine your softened cream cheese and granulated sugar. Beat on medium speed for about two minutes until it’s light, fluffy, and completely smooth. Scrape down the sides as you go. This step is where the magic starts—you’re incorporating air, which keeps the filling from being too dense.
What I Messed Up: The first time I made this, I didn’t beat the cream cheese long enough, and the filling was grainy. Now I always go a full two minutes, and it makes a visible difference.
Step 5: Add Vanilla and Pineapple Juice
With the mixer still running on low speed, add your vanilla extract and the reserved pineapple juice. Mix until just combined. Don’t overmix at this point, or you’ll deflate all that lovely air you just incorporated.
Step 6: Fold in the Whipped Cream
This is where you need to be gentle. Using a rubber spatula, fold the whipped cream into the cream cheese mixture in two additions. Fold, don’t stir—use a gentle scooping motion from the bottom of the bowl up and over the top. You want to keep as much of that whipped cream fluffiness as possible. It should take about a minute total.
Step 7: Fold in the Pineapple
Gently fold in your drained pineapple. Do this carefully so you don’t break up the fruit too much. You want little pineapple chunks throughout, not pineapple juice.
Step 8: Assemble and Chill
Remove your crust from the freezer and pour the filling over it. Use a spatula to smooth the top, but don’t press down—you want to maintain that airy texture. Cover the pan loosely with plastic wrap and refrigerate for at least six hours, but ideally overnight. The longer it sits, the more the flavors meld and the more stable it becomes.
What I Messed Up: I once tried to serve this after only three hours, and while it was still delicious, it was a bit too soft to slice cleanly. Patience really does pay off here.
Step 9: Add the Topping (Optional)
About 30 minutes before serving, whip together the 1/2 cup heavy cream and powdered sugar until soft peaks form. Dollop or spread this on top of the cheesecake, then garnish with fresh pineapple chunks and a sprinkle of crushed graham crackers. This step is optional, but it makes it look restaurant-quality, and honestly, that’s half the fun.
Common Mistakes to Avoid
Using Cold Cream Cheese: This is the number one reason a no-bake cheesecake doesn’t turn out right. Cold cream cheese won’t blend smoothly, and you’ll end up with a lumpy filling. Let it sit on the counter for 30 minutes.
Not Draining the Pineapple Enough: Excess moisture will make your filling too soft and prevent it from setting properly. Take the extra two minutes to drain it really well.
Overmixing After Adding Whipped Cream: This deflates all your hard work. Fold gently, and stop as soon as everything is combined.
Not Chilling Long Enough: Six hours is the minimum, but overnight is genuinely better. The filling needs time to set and the flavors need time to marry.
Pressing the Crust Too Hard: A crust that’s packed down too tightly becomes dense and almost hard. Press firmly enough that it holds together, but not so hard that it’s compacted.
My Tested Substitutions
Dairy-Free Version: Use dairy-free cream cheese, coconut cream instead of heavy whipping cream, and a dairy-free butter for the crust. The texture won’t be exactly the same, but it’s surprisingly close and still delicious.
Lower Sugar: You can reduce the sugar in the filling to 1/2 cup if you prefer something less sweet. The pineapple is naturally sweet, so it still works beautifully.
Almond Flour Crust: For a grain-free option, mix almond flour with melted butter and a touch of honey. It won’t have quite the same crunch, but it’s a solid alternative.
Mascarpone Instead of Cream Cheese: If you want something extra rich and creamy, use half cream cheese and half mascarpone. It’s indulgent and absolutely worth trying.
Different Fruits: Mango, passion fruit, or even a mix of berries work beautifully here. Just make sure to drain them well and keep the juice amount at about 2 tablespoons.
How to Customize
This recipe is honestly a great canvas for your personal preferences. If you like things more fruity, increase the pineapple to 1.5 cups. If you prefer something creamier, add an extra 4 ounces of cream cheese. If you want more texture, add crushed macadamia nuts or toasted coconut to the filling.
You can also play with the crust. Some people love adding a tablespoon of honey to make it sweeter, or a pinch of cinnamon for warmth. I’ve even made it with digestive biscuits instead of graham crackers, and it was fantastic.
The beauty of a no-bake dessert is that you can really make it your own without worrying about messing up the chemistry of baking.
Serving Ideas
This cheesecake is stunning on its own, but here are some fun ways to serve it.
- Classic Slice: Just cut it into wedges and plate it. Sometimes simple is perfect.
- With a Drizzle: A light honey or caramel drizzle on the plate adds elegance without overpowering the pineapple.
- With Fresh Berries: Raspberries or blueberries alongside add a tartness that complements the tropical sweetness.
- With a Cookie: Serve a shortbread or butter cookie on the side for texture contrast.
- As a Parfait: Layer crumbled crust, filling, and whipped cream in a glass for a casual presentation.
- Mini Versions: Make it in individual mason jars or ramekins for a personal touch at a dinner party.
Meal Prep and Storage
This is where no-bake desserts really shine. You can make this up to three days ahead, which is perfect if you’re entertaining.
In the Refrigerator: Cover it loosely with plastic wrap and store it for up to three days. The filling stays creamy and the crust stays crispy at the bottom—honestly, it tastes better on day two or three than it does on day one.
In the Freezer: You can freeze the whole cheesecake for up to one month. Wrap it well in plastic wrap and then aluminum foil. Thaw it in the refrigerator overnight before serving. The texture is slightly different after freezing (a bit more icy), but it’s still delicious.
Individual Slices: If you want to portion it ahead, slice the cheesecake and wrap each slice individually in plastic wrap. These keep in the fridge for three days or freeze for up to a month.
Pro Tip: Use a hot, wet knife to slice cleanly. Wipe the blade between each cut, and you’ll get beautiful, neat slices every time.
Nutritional Breakdown
Here’s the nutritional information per serving (based on 12 servings, including the optional topping):
- Calories: 385
- Protein: 5g
- Carbohydrates: 38g
- Fat: 24g
- Fiber: 0.5g
- Sugar: 32g
Keep in mind that if you make substitutions, these numbers will change. Dairy-free versions will have slightly different macros, and reducing the sugar will obviously lower the carb and sugar content.
Final Thoughts
I genuinely love this No Bake Pineapple Heaven Cheesecake because it brings together everything I love about cooking: it’s simple enough that anyone can make it, it tastes like you spent way more effort than you actually did, and it makes people genuinely happy. There’s something special about serving a dessert that tastes like summer, especially when you made it without breaking a sweat.
The first time you make this, follow the recipe exactly as written. Then, the second time, make it your own. Add the coconut, try the ginger, experiment with different fruits. This recipe is forgiving and flexible, which means it can become your signature dessert—the one people actually ask you to bring to gatherings.
If you give this a try, I’d genuinely love to hear how it turns out for you. Did you add anything special? Did it become a family favorite? These are the things that make recipe developing so rewarding for me. Happy cooking, and I hope this cheesecake brings as much joy to your table as