Cinnamon Roll Cheesecake Chimichanga
Cinnamon Roll Cheesecake Chimichanga
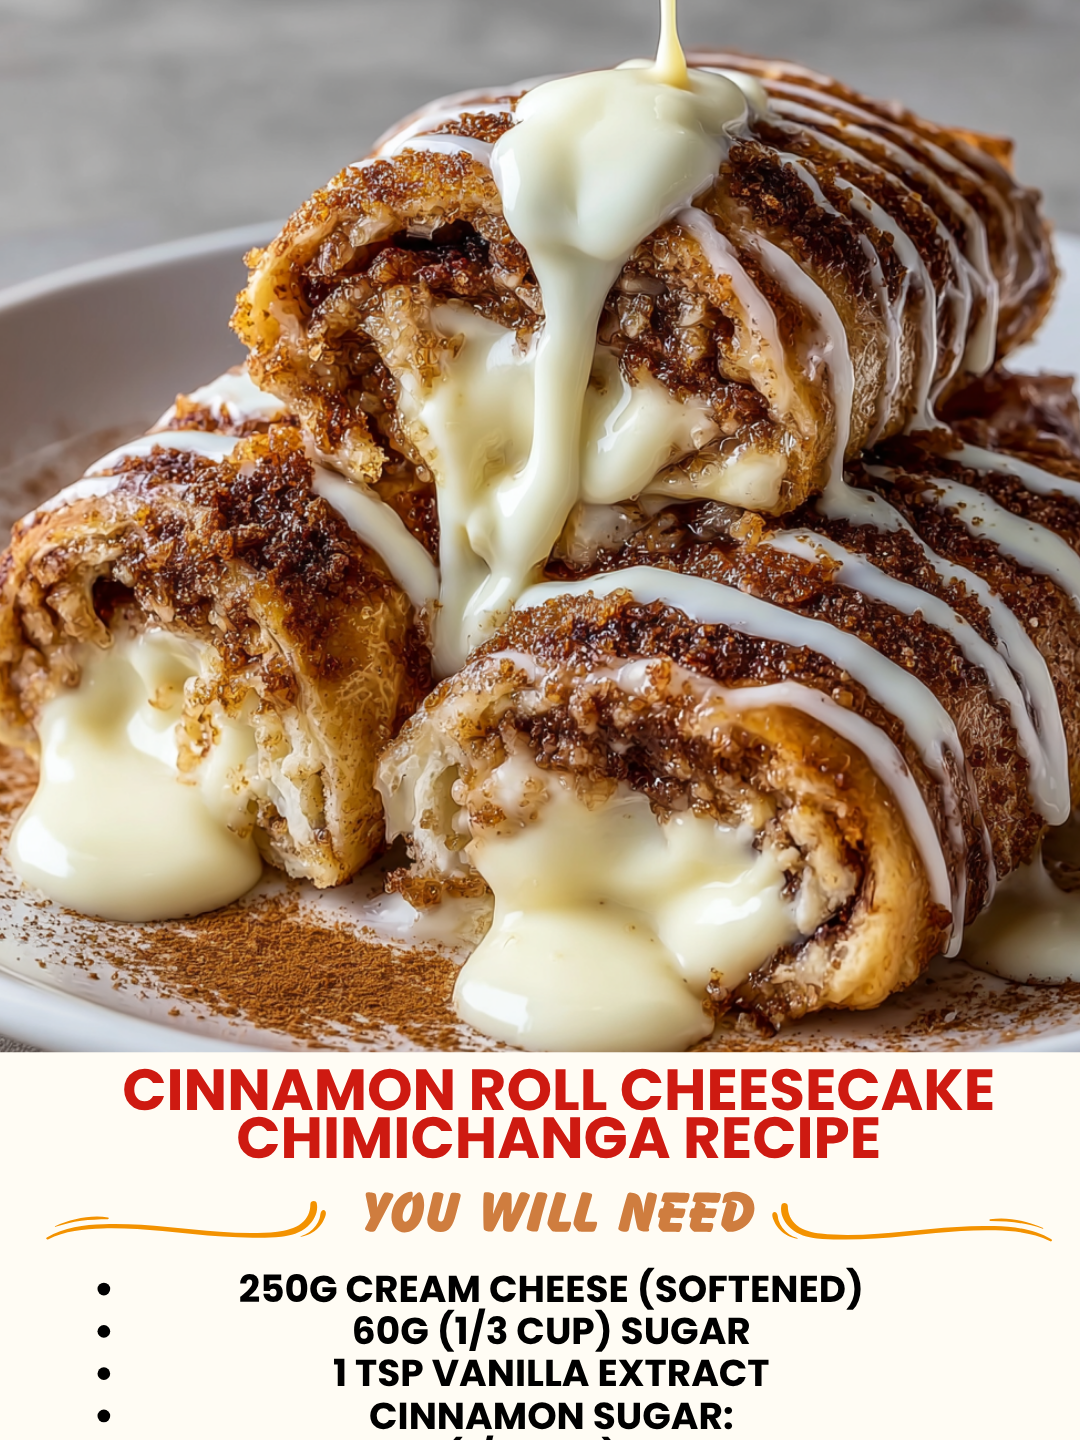
Cinnamon Roll Cheesecake Chimichanga: A Dessert That Shouldn’t Work (But Totally Does)
I’m going to be honest with you—when my friend Sarah texted me at 10 PM on a random Tuesday asking if I could “somehow combine cinnamon rolls, cheesecake, and crispy fried things into one dessert,” I thought she’d lost it. I was sitting on my couch in sweatpants, rewatching The Great British Bake Off for the hundredth time, and the last thing I wanted to do was validate what sounded like a sugar-fueled fever dream.
But then I actually thought about it. And I couldn’t stop thinking about it.
What if the warm, gooey sweetness of a cinnamon roll met the tangy richness of cheesecake, all wrapped up in a crispy-on-the-outside, tender-on-the-inside tortilla shell? What if you could eat it with your hands? What if it was actually incredible?
So I did what I always do when inspiration strikes at an unreasonable hour: I got up, raided my kitchen, and started experimenting. Three batches later, I had something that made me actually text Sarah back (at midnight, because I have no self-control). This Cinnamon Roll Cheesecake Chimichanga is legitimately one of my favorite desserts I’ve created in years. It’s indulgent without being pretentious, impressive without being complicated, and honestly? It’s the kind of thing that makes people think you’re way more talented in the kitchen than you actually are.
This recipe is for anyone who’s ever craved cinnamon rolls at 2 AM but didn’t want to wait for dough to rise. It’s for people who love cheesecake but want something you can actually pick up and eat. It’s for cozy nights when you want to feel a little fancy without leaving your kitchen. If you’re the type who loves playing with food combinations and isn’t afraid of a little culinary chaos, this one’s for you. Follow me on HaileeRecipes on Pinterest for more recipes that blur the lines between comfort food and dessert magic.
Why You’ll Love This Recipe
Let me break down exactly why this dessert is going to become your new obsession.
It’s actually manageable. Unlike traditional cinnamon rolls that require yeast, rising time, and patience I don’t have, these come together in under 30 minutes from start to finish. You’re using flour tortillas as your base, which means zero rising time and maximum efficiency.
You get multiple textures in one bite. There’s the crispy, golden exterior from frying. Then you hit that creamy cheesecake layer. Then the warm cinnamon-sugar filling. Then the soft tortilla inside. It’s like a textural adventure, and I’m here for it.
It’s genuinely impressive. I’ve made these for dinner parties, brought them to potlucks, and served them to my in-laws. Every single time, people ask for the recipe. There’s something about a homemade fried dessert that makes people think you’ve been to culinary school. You don’t have to tell them how easy it was.
You can customize it to death. Want to add cream cheese frosting? Do it. Prefer pecans in your filling? Go for it. Need it to be gluten-free? Totally doable. This recipe is forgiving and flexible, which is exactly how I like my desserts.
Ingredients
- 8 ounces cream cheese, softened to room temperature
- 1/4 cup granulated sugar
- 1/4 cup powdered sugar
- 1/2 teaspoon vanilla extract
- 1/4 teaspoon salt
- 3 tablespoons butter, melted
- 1/4 cup granulated sugar (for the cinnamon mixture)
- 2 teaspoons ground cinnamon
- 1/4 teaspoon nutmeg (optional but recommended)
- 6 large flour tortillas (burrito-size, about 10 inches)
- Oil for frying (vegetable or canola, about 2 cups)
- Powdered sugar for dusting (about 1/4 cup)
- Optional: cream cheese frosting, caramel drizzle, or maple glaze for serving
Hailee’s Tip: Room temperature cream cheese is non-negotiable here. Cold cream cheese will clump and refuse to spread evenly. Pull it out of the fridge 15 minutes before you start, and thank me later.
Hailee’s Tip: Don’t skip the nutmeg. I know it seems random, but it adds this subtle warmth that makes people say “what is that flavor?” in the best way possible.
Hailee’s Tip: I use Mission brand flour tortillas because they’re sturdy enough to hold everything without falling apart, but honestly, any good quality burrito-size tortilla will work. Just avoid the super thin ones—they’ll tear when you fry them.
Optional Add-Ins and Variations
This is where you get to play mad scientist with me.
- Chopped pecans or walnuts: Mix about 1/4 cup into the cinnamon-sugar filling for crunch and nuttiness.
- Raisins or dried cranberries: Soak them in hot water for 5 minutes first, then chop and add to the filling. They add chewiness and tartness.
- Cream cheese frosting: Mix 4 ounces softened cream cheese with 1/4 cup powdered sugar and 1/2 teaspoon vanilla. Drizzle it over the warm chimichangas. Your life will change.
- Caramel sauce: Homemade or store-bought, drizzled over top. It’s not necessary, but it’s also not not necessary, if you know what I mean.
- White chocolate chips: Add 1/4 cup to the cream cheese mixture for sweetness and richness.
- Brown sugar instead of granulated: Use it in the cinnamon mixture for deeper, molasses-y flavor.
Step-by-Step Method
Step 1: Make your cream cheese filling. In a medium bowl, combine your softened cream cheese, granulated sugar, powdered sugar, vanilla, and salt. Mix with an electric mixer or really good old-fashioned elbow grease until it’s smooth and fluffy. This should take about 2 minutes with a mixer. Don’t overmix—you’re not making whipped cream.
Step 2: Prepare your cinnamon-sugar mixture. In a small bowl, combine the granulated sugar, cinnamon, and nutmeg. Set it aside. This is going to be your flavor hero.
Step 3: Assemble your chimichangas. Lay out a flour tortilla on a clean surface. Spread about 2 tablespoons of the cream cheese mixture down the center, leaving about an inch on each end. Sprinkle about 1 tablespoon of the cinnamon-sugar mixture over the cream cheese. Now, fold in the sides of the tortilla about an inch, then roll it tightly away from you, like you’re making a burrito. The cream cheese will help seal it. Place it seam-side down on a plate. Repeat with the remaining tortillas.
What I messed up the first time: I overfilled them. I thought more filling equals more flavor, but all it did was make them explode in the oil and create a mess. Less is genuinely more here. Stick to about 2 tablespoons of cream cheese and 1 tablespoon of cinnamon sugar per chimichanga.
Step 4: Heat your oil. Pour your oil into a deep skillet or Dutch oven. You want it about 2 inches deep. Heat it to 350°F. If you don’t have a thermometer, test it with a tiny piece of tortilla—it should sizzle immediately and turn golden in about 30 seconds. Don’t skip the thermometer if you have one. Oil temperature is everything.
Step 5: Fry your chimichangas. Carefully place one chimichanga into the hot oil, seam-side down. Fry for about 1 to 2 minutes on the first side until it’s golden brown and crispy. Flip it gently with tongs and fry the other side for another minute or so until it’s equally golden. Remove it with a slotted spoon and place it on a paper towel-lined plate. Repeat with the remaining chimichangas. Work in batches—don’t overcrowd the pan.
What I messed up the second time: I didn’t let the oil come back to temperature between batches. The second batch was greasier and less crispy because the oil had cooled down. Give it 30 seconds to a minute between each chimichanga to reheat.
Step 6: Dust and serve. While they’re still warm, dust the chimichangas generously with powdered sugar. If you’re doing any glazes or frostings, now’s the time. Serve immediately while they’re still crispy on the outside and warm on the inside.
Common Mistakes to Avoid
Using cold cream cheese: I mentioned this already, but I’m saying it again because it matters. Cold cream cheese is lumpy and won’t spread. Warm it up.
Overfilling: I know it’s tempting, but resist. Overstuffed chimichangas leak, burst, and generally misbehave in the oil. Two tablespoons of filling is the sweet spot.
Not sealing the edges properly: When you roll them, make sure that seam is really tight and faces down when you fry. This keeps everything contained.
Oil that’s too hot or too cold: 350°F is the magic number. Too hot and the outside burns before the inside warms up. Too cold and you get greasy, soggy disasters.
Frying too many at once: The oil temperature drops significantly when you add cold food. Work in batches. Patience is your friend here.
Letting them sit too long before eating: These are best eaten within 5 minutes of frying. After that, they start losing their crispiness. Make them to order if possible, or at least fry them right before serving.
My Tested Substitutions
For the tortillas: You can use whole wheat tortillas if you prefer, but they’re a bit more fragile. Corn tortillas are too small and too delicate for this application. If you’re gluten-free, try gluten-free flour tortillas from your grocery store—they work surprisingly well.
For the cream cheese: Neufchâtel cheese (which has less fat than cream cheese) works, though the filling will be slightly less rich. Don’t try to use whipped cream cheese—it has air whipped into it and won’t hold up well.
For the oil: Use vegetable, canola, or peanut oil. Avoid olive oil (too low a smoke point) and coconut oil (will make them taste like coconut, which isn’t what we’re going for here).
For frying: If you really don’t want to deep fry, you can pan-fry them in about 1/4 inch of oil in a shallow skillet. They won’t be quite as puffy and crispy, but they’ll still be delicious. They’ll take about 2 minutes per side at 350°F.
For the powdered sugar topping: You can use cinnamon sugar instead for a double-cinnamon situation. Mix 2 tablespoons powdered sugar with 1/2 teaspoon cinnamon and dust away.
How to Customize
The beauty of this recipe is that it’s genuinely flexible. Here are some ways I like to play with it:
Go full dessert mode: Add 1/4 cup white chocolate chips to the cream cheese filling, then drizzle the finished chimichangas with melted white chocolate and a drizzle of caramel. Serve with vanilla ice cream.
Make it maple: Add 1/2 teaspoon maple extract to the cream cheese filling, and serve the chimichangas with warm maple syrup for dipping.
Spice it up: Add a pinch of cayenne pepper to the cinnamon-sugar mixture. It sounds weird, but it adds this incredible depth that people can’t quite identify.
Go nutty: Mix 1/4 cup finely chopped toasted pecans or walnuts into the cinnamon-sugar mixture. You can also add them to the cream cheese filling itself.
Make it boozy (for adults only): Add 1/2 teaspoon rum extract or bourbon to the cream cheese filling. It adds sophistication without making them taste like alcohol.
Serving Ideas
These are incredible on their own, but here’s how I like to serve them:
- With vanilla ice cream: The warm chimichanga against cold ice cream is honestly transcendent. The ice cream melts into all the crevices, and it’s magical.
- With a drizzle of caramel or chocolate sauce: Warm, crispy, and saucy. What’s not to love?
- With whipped cream and a sprinkle of cinnamon: Simple, elegant, and delicious.
- With a dusting of powdered sugar and a side of fresh berries: The tartness of the berries cuts through the richness beautifully.
- On their own: Sometimes the simplest presentation is the best one. Just dust them with powdered sugar and serve warm.
- With a warm cinnamon roll glaze: If you want to lean into the cinnamon roll aspect, make a simple glaze with 1 cup powdered sugar, 2 tablespoons milk, and 1/2 teaspoon vanilla. Drizzle it over warm chimichangas.
Meal Prep and Storage
Can you make them ahead? Yes and no. You can assemble them completely up to 4 hours ahead of time. Wrap them loosely in plastic wrap and refrigerate until you’re ready to fry. This actually makes them easier to handle because the filling sets up a bit. Just fry them straight from the fridge—don’t thaw them.
Can you freeze them? Absolutely. Assemble them, place them on a baking sheet, and freeze until solid (about 2 hours). Then transfer them to a freezer bag and freeze for up to 3 months. Fry them straight from frozen, adding an extra minute or so to the cooking time.
Leftovers: I rarely have leftovers because these are best eaten fresh and warm. But if you do, store them in an airtight container in the fridge for up to 2 days. Reheat them in a 350°F oven for about 5 minutes to restore some crispiness. Don’t microwave them—they’ll get soggy.
Can you make the filling ahead? Yes. Make it up to 2 days ahead and store it in an airtight container in the fridge. Let it come to room temperature for about 15 minutes before assembling the chimichangas.
Nutritional Breakdown
Per serving (makes 6 chimichangas, so this is per chimichanga):
- Calories: approximately 420
- Protein: 7g
- Carbohydrates: 38g
- Fat: 26g
- Fiber: 1g
- Sugar: 18g
These are definitely indulgent, so I don’t recommend eating them every day. But as an occasional treat? They’re absolutely worth it. The cream cheese provides some protein, and the whole thing is genuinely satisfying, so you probably won’t want more than one anyway.
Final Thoughts
I still can’t believe this recipe came from a random text message at 10 PM. It’s become one of those recipes I make when I want to impress people without actually working that hard. It’s when I want to feel fancy but also comfortable. It’s when I want something that tastes like dessert but feels like a little adventure.
The Cinnamon Roll Cheesecake Chimichanga is proof that sometimes the best ideas come from just throwing things at the wall and seeing what sticks. It’s proof that you don’t need complicated techniques or fancy equipment to make something genuinely delicious. And it’s proof that sometimes your couch-based brainstorming sessions are exactly what the world needs.
I hope you make these. I hope you love them. I hope you text your friends about them