No Bake Candies 4 Ways
No Bake Candies 4 Ways
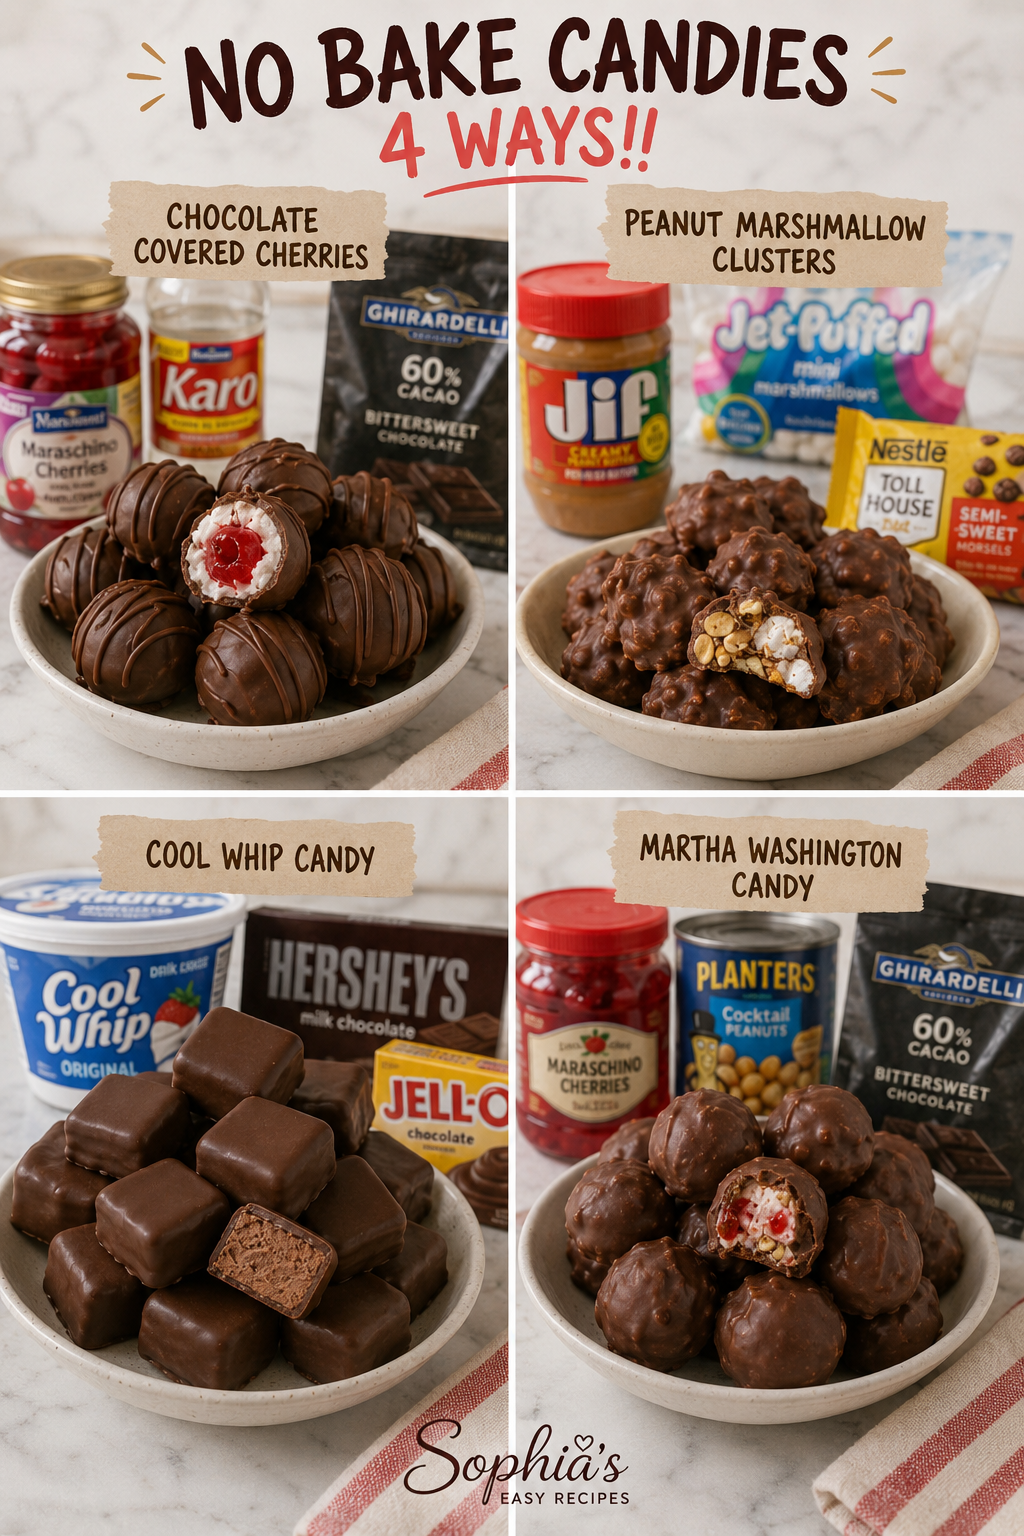
When the craving for something sweet hits but you don’t want to turn on the oven, no bake candies are my absolute go-to solution. I’m sharing four of my favorite recipes today—Chocolate Covered Cherries, Peanut Marshmallow Clusters, Cool Whip Candy, and Martha Washington Candy—because they’re the kind of treats that taste like you spent hours in the kitchen when really, you just spent minutes mixing and chilling. These are the recipes I make when I need a quick gift, a last-minute dessert, or just a little something to satisfy that sweet tooth without any fuss.
What I love most about these no bake candies is how foolproof they are. Seriously, if you can measure ingredients and use a spoon, you can make them. They’re perfect for busy weeknights, holiday parties, or anytime you want homemade candy without the heat and stress. Each recipe comes together so easily that you might find yourself making them more often than you’d expect, and honestly, that’s a good problem to have.
I’ve been collecting and perfecting these recipes for years, and they’ve become my go-to when I need something reliable and delicious. If you love finding quick kitchen wins like I do, Follow me on HaileeRecipes on Pinterest for more recipes that don’t require a lot of time or ingredients. Now let’s dive into these sweet, simple treats that are about to become your new favorites.
1. Chocolate Covered Cherries
These elegant chocolate covered cherries deliver a sophisticated burst of fruity flavor wrapped in rich dark chocolate. The combination of tart cherries and smooth chocolate creates a perfectly balanced treat with a jewel-like appearance that makes them ideal for holiday platters, dinner party desserts, or elegant gift-giving. This no-bake candy requires just a few quality ingredients and minimal effort, making it an impressive option even for novice candy makers. The cherries stay plump and juicy while the chocolate shell provides a satisfying snap, creating a delightful contrast in texture that keeps people reaching for just one more.
Why You’ll Love It
- Requires no cooking or special equipment, just a microwave and your hands.
- Looks fancy and sophisticated but takes less than 30 minutes from start to finish.
- Uses just a handful of ingredients you likely already have in your pantry.
Ingredients
- 2 cups fresh or frozen cherries with stems
- 8 ounces dark chocolate, chopped
- 2 tablespoons coconut oil or butter
- 1 tablespoon maraschino liqueur or cherry juice, optional
- Pinch of sea salt
- Parchment paper
- 2 ounces white chocolate for drizzle, optional
How To Make It
- Pat the cherries dry completely with paper towels, leaving stems intact. Any moisture will cause the chocolate to seize.
- Microwave the dark chocolate and coconut oil together in 30-second intervals, stirring between each, until completely melted and smooth, about 90 seconds total.
- Stir in the liqueur or cherry juice if using, and add a pinch of sea salt to enhance the chocolate flavor.
- Line a baking sheet with parchment paper. Holding each cherry by the stem, dip it into the melted chocolate, allowing excess to drip back into the bowl, then place on the parchment.
- Refrigerate the dipped cherries for 15 to 20 minutes until the chocolate is set and firm to the touch.
- If desired, melt the white chocolate and drizzle it decoratively over the set dark chocolate using a fork or squeeze bottle.
- Return to the refrigerator for an additional 10 minutes to set completely.
Variations And Substitutions
Experiment with milk chocolate or white chocolate instead of dark chocolate for different flavor profiles. Substitute the coconut oil with butter if you prefer, though coconut oil creates a slightly thinner coating. Add a tiny pinch of cayenne pepper or espresso powder to the melted chocolate for subtle depth. If fresh cherries aren’t available, use high-quality jarred cherries, drained and patted dry. For a boozy version, add a splash of bourbon or brandy instead of the maraschino liqueur.
Make-Ahead, Storage, And Serving Tips
These candies can be made up to 5 days ahead and stored in an airtight container in the refrigerator. Keep them in a cool spot away from direct sunlight to prevent the chocolate from blooming or softening. Serve them chilled straight from the refrigerator for the best texture and appearance. If the chocolate cracks when dipping, your mixture may be too thick; gently reheat it with a bit more coconut oil. For gift-giving, place them in paper liners inside a decorative box and store in a cool location until ready to present.
2. Peanut Marshmallow Clusters
Peanut Marshmallow Clusters deliver a delightful combination of sweet, salty, and nutty flavors in every bite. These no-bake treats feature pillowy marshmallows studded with roasted peanuts and held together with melted chocolate, creating a satisfying contrast between chewy and crunchy textures. Perfect for holiday gift-giving, party platters, or satisfying an afternoon sweet craving, these clusters come together in minutes without requiring any oven time. They’re ideal when you want homemade candy that looks impressive but demands minimal effort.
Why You’ll Love It
- Ready in under 15 minutes with just five simple steps.
- Requires only basic pantry ingredients and no special equipment.
- Makes an impressive homemade gift that tastes far better than store-bought versions.
Ingredients
- 2 cups milk chocolate chips
- 1 tablespoon coconut oil or vegetable shortening
- 2 cups roasted salted peanuts
- 3 cups mini marshmallows
- 1 teaspoon vanilla extract
- Pinch of sea salt
- Parchment paper for lining
How To Make It
- Line a large baking sheet with parchment paper and set aside.
- Combine chocolate chips and coconut oil in a microwave-safe bowl, then microwave in 30-second intervals, stirring between each, until completely melted and smooth.
- Stir vanilla extract and sea salt into the melted chocolate until well combined.
- Fold the roasted peanuts and mini marshmallows into the chocolate mixture, working quickly to coat everything evenly before the chocolate begins to set.
- Drop spoonfuls of the mixture onto the prepared parchment paper, spacing them about 2 inches apart.
- Allow clusters to set at room temperature for 30 to 45 minutes, or refrigerate for 15 minutes for faster setting.
Variations And Substitutions
Swap milk chocolate for dark chocolate or white chocolate based on preference. Replace regular peanuts with almonds, cashews, or pecans for different flavor profiles. Add a teaspoon of peanut butter powder to the chocolate mixture for intensified peanut flavor. For a festive twist, use holiday-colored marshmallows or drizzle finished clusters with contrasting chocolate.
Make-Ahead, Storage, And Serving Tips
Store clusters in an airtight container at room temperature for up to one week, or refrigerate for extended freshness up to two weeks. Layer clusters between parchment paper to prevent sticking. For gift-giving, arrange in decorative boxes or cellophane bags tied with ribbon. If marshmallows begin softening, refrigerate before serving. Avoid storing in warm areas, as the chocolate coating may become tacky.
3. Cool Whip Candy
Cool Whip Candy is a delightfully light and fluffy confection that melts on your tongue with a cloud-like texture. This no-bake treat combines whipped topping with sweetened condensed milk and chocolate coating for an elegant candy that tastes far more complicated than it actually is. With its smooth, creamy center and crisp chocolate shell, it’s perfect for holiday platters, gift boxes, or whenever you need an impressive dessert that requires zero baking skills. The airy texture makes it feel indulgent without being overly heavy, making it an ideal choice for those who prefer delicate sweets over dense fudge.
Why You’ll Love It
- Requires just five basic ingredients and no special equipment beyond a mixing bowl.
- Ready to serve in under 30 minutes, including chilling time.
- The light, mousse-like filling contrasts beautifully with the chocolate coating for textural interest.
Ingredients
- 8 ounces Cool Whip, thawed
- 1 can (14 ounces) sweetened condensed milk
- 1 teaspoon vanilla extract
- 2 cups semi-sweet chocolate chips
- 2 tablespoons coconut oil or shortening
- Pinch of sea salt for topping (optional)
How To Make It
- In a large mixing bowl, gently fold together the thawed Cool Whip, sweetened condensed milk, and vanilla extract until well combined and no streaks remain.
- Line a baking sheet with parchment paper and drop rounded teaspoons of the mixture onto the prepared sheet, spacing them about an inch apart.
- Freeze the candies for at least 2 hours, or until completely firm and solid to the touch.
- In a microwave-safe bowl, combine the chocolate chips and coconut oil, heating in 30-second intervals while stirring until smooth and pourable.
- Working quickly, use a fork to dip each frozen candy into the melted chocolate, allowing excess to drip back into the bowl.
- Place the dipped candies back on the parchment-lined sheet and immediately sprinkle with sea salt if desired.
- Refrigerate until the chocolate coating is completely set, about 15 to 20 minutes.
Variations And Substitutions
Swap semi-sweet chocolate for dark chocolate, milk chocolate, or white chocolate depending on your preference. Add a quarter teaspoon of peppermint extract or almond extract to the filling for festive flavor variations. For a crunchy element, fold in finely chopped nuts, sprinkles, or crushed candy canes before freezing. You can also dust the dipped candies with cocoa powder, crushed freeze-dried berries, or edible glitter before the chocolate sets.
Make-Ahead, Storage, And Serving Tips
Store finished candies in an airtight container in the refrigerator for up to two weeks, or freeze for up to one month. You can prepare the filling mixture and freeze the undipped candies for several days in advance, then dip them with chocolate when ready to serve. Keep candies cool until serving time, as they soften at room temperature. If your chocolate becomes too thick while dipping, gently reheat it in the microwave for 10-second intervals. For gift-giving, layer finished candies between parchment paper in a decorative box.
4. Martha Washington Candy
Martha Washington Candy is a classic no-bake treat featuring a creamy coconut center enrobed in rich dark chocolate. These bite-sized confections deliver a perfect balance of sweet, nutty coconut flavor with a smooth, melt-in-your-mouth texture that contrasts beautifully with the chocolate shell. Named after the first lady, this vintage candy is ideal for holiday gift boxes, special occasions, or whenever you want an elegant homemade sweet. It works wonderfully because the simple combination of just a few quality ingredients creates an impressive-looking candy that tastes far more complicated than it actually is to make.
Why You’ll Love It
- Completely no-bake and requires no special equipment beyond a microwave or double boiler.
- Looks elegant and professional, making it perfect for gifting or serving at parties.
- Uses pantry staples to create a vintage candy that tastes like it came from a specialty confectioner.
Ingredients
- 2 cups shredded sweetened coconut
- 1 cup powdered sugar
- 4 tablespoons butter, softened
- 1 teaspoon vanilla extract
- Pinch of salt
- 8 ounces dark chocolate, chopped
- 1 tablespoon coconut oil or shortening
- Toothpicks for dipping
How To Make It
- Combine shredded coconut, powdered sugar, softened butter, vanilla extract, and salt in a bowl. Mix until the mixture is well combined and holds together when pressed.
- Roll the coconut mixture into small balls, about the size of a walnut. Place them on a parchment-lined baking sheet and refrigerate for at least 30 minutes until firm.
- Melt the chopped dark chocolate with coconut oil in a microwave-safe bowl in 30-second intervals, stirring between each interval until smooth. Alternatively, use a double boiler over gently simmering water.
- Insert a toothpick into the top of each coconut ball. Dip each ball into the melted chocolate, coating it completely and allowing excess to drip off.
- Return the chocolate-coated candies to the parchment-lined baking sheet, placing them chocolate-side down to create a flat base.
- Refrigerate the finished candies for 15 to 20 minutes until the chocolate is completely set.
- Remove toothpicks carefully and serve at room temperature or slightly chilled.
Variations And Substitutions
Customize these candies by using milk chocolate or white chocolate instead of dark chocolate for a sweeter version. Add a teaspoon of almond extract or peppermint extract to the coconut mixture for different flavor profiles. For a boozy variation, replace some of the vanilla with rum or bourbon extract. You can also dip the candies in chocolate and then sprinkle with chopped nuts, sea salt, or cocoa powder while the chocolate is still wet for added texture and visual appeal.
Make-Ahead, Storage, And Serving Tips
Prepare the coconut centers up to two days in advance and store them in the refrigerator before dipping in chocolate. Finished candies keep in an airtight container in the refrigerator for up to two weeks or in the freezer for up to one month. For the best presentation, serve them at cool room temperature or slightly chilled. If the chocolate coating cracks when dipping, the melted chocolate may be too hot; allow it to cool for a minute before continuing. If candies stick to your fingers during rolling, chill your hands or wear food-grade gloves.
Final Thoughts
No-bake candies are a wonderful way to satisfy your sweet tooth without heating up the kitchen. Whether you’re looking for something quick to make during a busy week or a fun project to enjoy with family, these four recipes offer something for everyone. From rich and fudgy to bright and fruity, you now have the tools to create homemade treats that rival anything store-bought.
If you’re new to making candy at home, we recommend starting with whichever recipe calls for your favorite ingredient. Pick one that excites you, gather your supplies, and give it a try. You might be surprised at how simple and rewarding the process is, and we’re confident you’ll be making these again and again.
No Bake Candies 4 Ways
Ingredients
Method
- Chocolate Covered Cherries: Drain maraschino cherries and pat dry with paper towels.
- Chocolate Covered Cherries: Melt chocolate chips with coconut oil, dip each cherry, and place on parchment paper to set.
- Peanut Marshmallow Clusters: Melt chocolate chips and butter together in a double boiler or microwave.
- Peanut Marshmallow Clusters: Fold marshmallows and peanuts into melted chocolate, drop spoonfuls onto parchment paper, and refrigerate until firm.
- Cool Whip Candy: Beat cream cheese until smooth, fold in Cool Whip and powdered sugar with vanilla extract.
- Cool Whip Candy: Roll mixture into balls, dip in melted chocolate, and chill until set.
- Martha Washington Candy: Mix powdered sugar, butter, and condensed milk until firm, roll into balls.
- Martha Washington Candy: Melt chocolate chips, dip balls, and place on parchment paper to harden.
Notes
Peanut Marshmallow Clusters Tips: Keep refrigerated and consume within 10 days. Use roasted peanuts for best flavor.
Cool Whip Candy Tips: Freeze for longer storage up to 1 month. Allow to thaw slightly before serving.
Martha Washington Candy Tips: These are traditional holiday candies that store well in the refrigerator for up to 3 weeks.