Strawberry & Pineapple Dessert Cups
Strawberry & Pineapple Dessert Cups
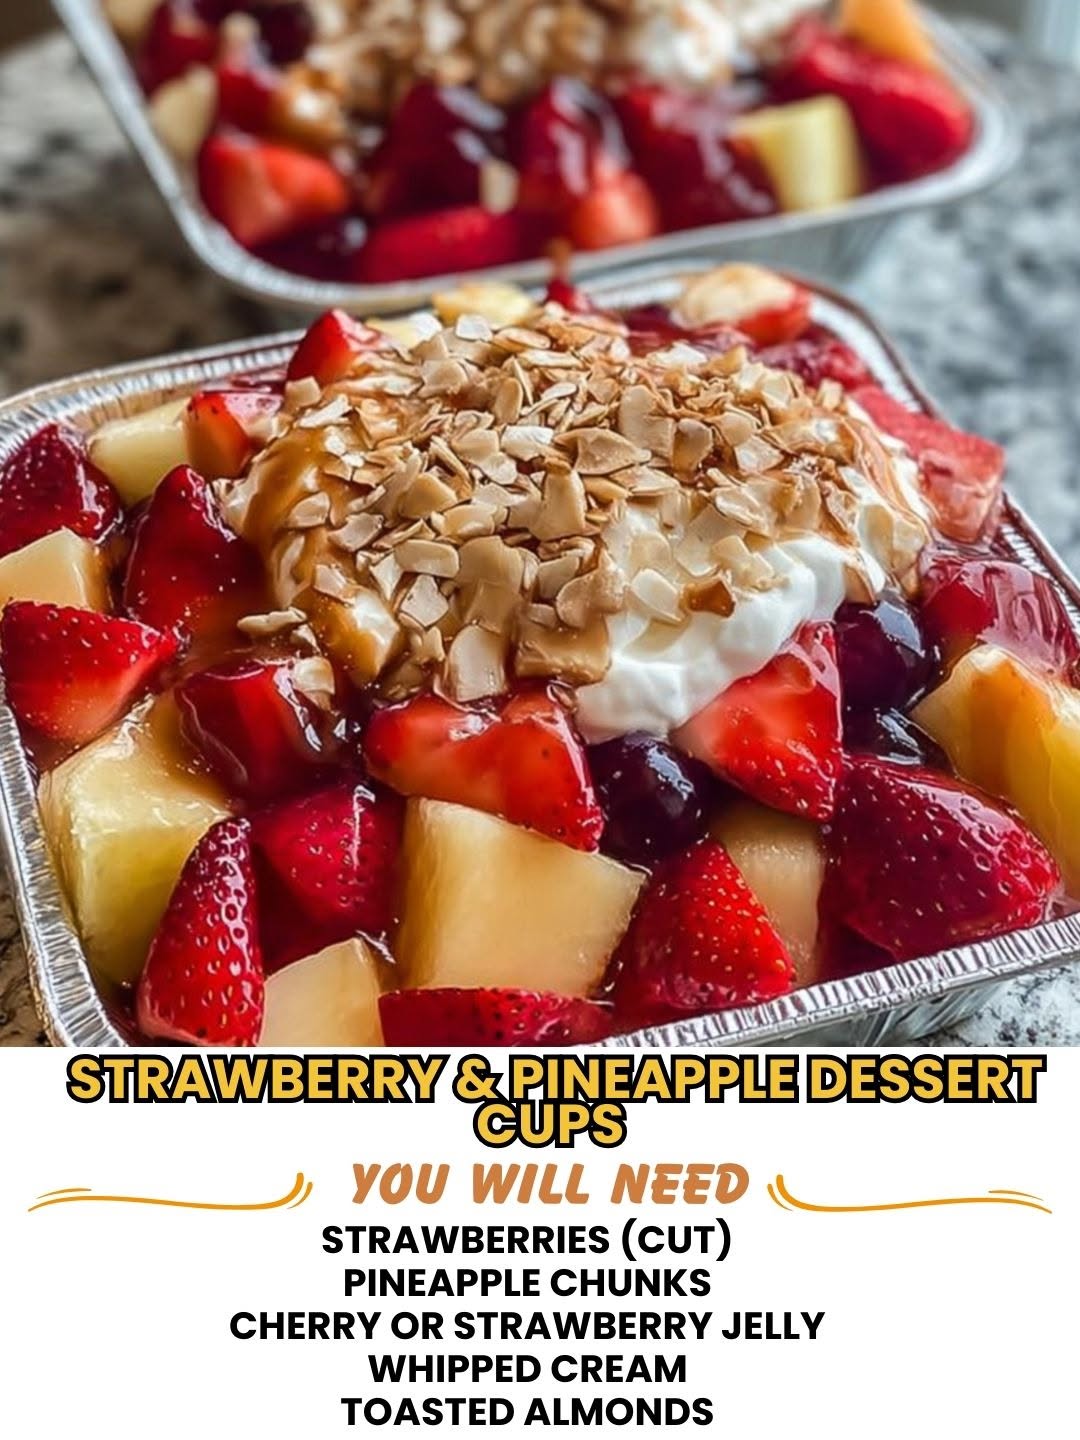
Strawberry & Pineapple Dessert Cups: A Fresh, No-Bake Love Letter
Last summer, I was sitting on my back porch on one of those sticky-hot evenings where even thinking about turning on the oven felt like a personal betrayal. My partner came home with a container of the most beautiful fresh strawberries and a ripe pineapple, and honestly? I had no idea what to do with them besides eat them straight from the cutting board like some kind of hungry raccoon.
But then I remembered this dessert my grandmother used to make—nothing fancy, just layers of fruit and cream in little cups—and I thought, why not give it a modern spin? What started as me throwing things together in my kitchen turned into the Strawberry & Pineapple Dessert Cups that I now make at least twice a month. It’s become my go-to when I want something that feels special but doesn’t require me to break a sweat or stress about timing.
These dessert cups are honestly perfect for anyone who loves fresh fruit, wants a no-bake option, or needs something that looks way more impressive than the effort you actually put in. They’re great for meal prepping, bringing to potlucks, or just having ready in your fridge for those 3 p.m. moments when you need something sweet and refreshing. I make them for my family, my friends, and honestly, mostly for myself when I’m craving something that tastes like summer in a cup.
If you’re looking for a dessert that’s actually doable on a weeknight and doesn’t require you to be a pastry chef, you’ve come to the right place. And if you want more recipes like this, follow me on HaileeRecipes on Pinterest where I share all my favorite cozy kitchen moments.
Why You’ll Love This Recipe
Let me be real with you: this recipe checks every single box. It’s no-bake, which means your kitchen stays cool and your stress levels stay low. It’s naturally gluten-free if that matters to you (and I’ll get into swaps if it does). The whole thing comes together in about fifteen minutes of actual hands-on time, and then you just let the fridge do the work.
The flavor combination is where the magic happens, though. Strawberries bring this bright, slightly tart sweetness, and pineapple adds this tropical zing that makes your mouth feel alive. When you layer that with a creamy vanilla component and maybe some buttery crumble on top, you get this textural contrast that keeps things interesting. It’s not heavy. It’s not overly sweet. It’s just… right.
Plus, these dessert cups are genuinely customizable. You can make them as simple or as fancy as your mood demands. Some days I keep them super minimal. Other times I’m adding whipped cream, toasted coconut, or a drizzle of honey. The base recipe is your friend here—it’s flexible enough to work with whatever you’ve got on hand.
Ingredients
- 1 pound fresh strawberries, hulled and halved (about 3 cups)
- 1 fresh pineapple, peeled, cored, and cut into chunks (about 3 cups), or one 20-ounce can of pineapple chunks, drained
- 1 cup heavy whipping cream
- 1/4 cup powdered sugar
- 1 teaspoon vanilla extract
- 1/2 cup Greek yogurt (full-fat works best here)
- 1/2 cup granola or crushed shortbread cookies
- 2 tablespoons honey (optional, for drizzling)
- Pinch of sea salt
Hailee’s Tip: If you’re using fresh pineapple, buy it a day or two before you plan to make this. It’ll be sweeter and easier to cut. Fresh is always my preference, but canned works beautifully too—just make sure you drain it well so you don’t end up with watery cups.
Hailee’s Tip: Don’t skip the Greek yogurt. I know it might seem like an odd addition, but it adds this subtle tang that balances the sweetness and keeps things from tasting like pure sugar. Trust me on this one.
Hailee’s Tip: Powdered sugar dissolves into the cream more smoothly than granulated sugar. If you only have regular sugar on hand, use a food processor to pulse it finer, or just use a little less and taste as you go.
Optional Add-Ins and Variations
This is where you get to play. Here are my favorite things to throw into these cups depending on what I’m feeling:
- Coconut flakes (toasted is even better) for that tropical vibe
- Lime zest stirred into the cream for brightness
- A splash of rum or coconut rum if you’re making these for adults only
- Chia seeds for a little nutrition boost and texture
- Lemon curd swirled into the cream layer
- Almond slices instead of granola for a different crunch
- Mint leaves for garnish (they look pretty and taste fresh)
Step-by-Step Method
Step 1: Prep Your Fruit
Wash and hull your strawberries, then cut them in half. If some are really big, quarter them. You want them roughly the same size so they look intentional in the cup. If you’re using fresh pineapple, cut off the top and bottom, stand it upright, and slice the skin off in vertical strips. Then cut it in half lengthwise, remove the core (I use a small knife or paring knife for this), and cut into chunks. If you’re using canned, just drain it really well in a colander.
What I Messed Up: The first time I made these, I didn’t drain my canned pineapple well enough and ended up with soggy, watery cups by the next day. Now I actually press the pineapple gently with paper towels after draining. Game changer.
Step 2: Make the Cream Layer
Pour your heavy cream into a bowl and whip it with an electric mixer or whisk until soft peaks form. You want it fluffy but not butter-like. This usually takes about 2-3 minutes with an electric mixer. Gently fold in the powdered sugar, vanilla extract, Greek yogurt, and a pinch of sea salt. The mixture should be thick, creamy, and slightly tangy-smelling. Taste it. If it needs more sweetness, add a tiny bit more powdered sugar.
What I Messed Up: I once overwhipped the cream and ended up with something that looked like cottage cheese. Don’t do that. Stop when you see soft peaks. If it happens, you can fold in a couple tablespoons of milk to loosen it back up.
Step 3: Assemble Your Cups
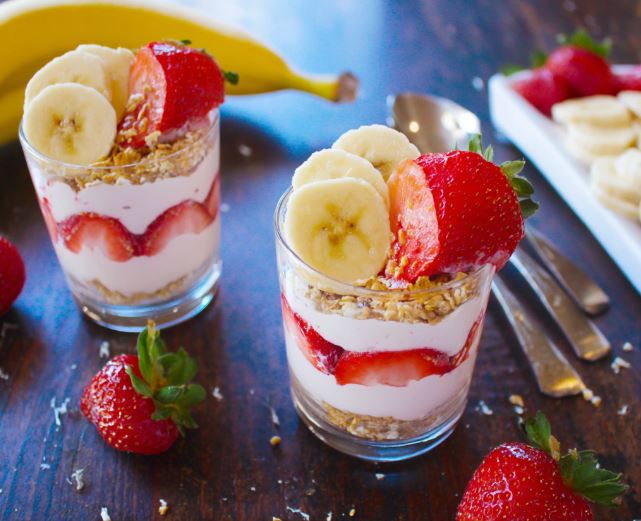
I use clear glasses or small mason jars so you can see all the pretty layers. Start with a small spoonful of the cream mixture at the bottom of each cup. Then add a layer of strawberries and pineapple mixed together. Spoon more cream on top. Add another layer of fruit. Top with a final dollop of cream. Sprinkle your granola or crushed cookies on top. If you’re using honey, drizzle it now.
What I Messed Up: I used to make these in opaque cups, and honestly, half the appeal is seeing those gorgeous layers. Switch to clear glasses if you can. It makes such a difference.
Step 4: Chill and Serve
Pop these in the fridge for at least 30 minutes before serving. This gives the flavors time to meld and the cream to set up a bit. They’re best eaten within 24 hours, but I’ll be honest—they’re still great for 2-3 days if you keep the granola separate and add it right before eating.
Common Mistakes to Avoid
Watery Fruit: If your strawberries or pineapple release too much liquid, your whole dessert gets soggy. Make sure your fruit is as dry as possible before layering. I pat mine with paper towels.
Overwhipped Cream: I mention this above, but it’s worth repeating. Stop whipping when you see soft peaks. The moment you think you might be done, you probably are.
Too Much Granola on Top: I know it’s tempting to pile it on, but if you add too much granola, it gets soggy from the cream and loses its crunch. A light sprinkle is all you need.
Not Enough Seasoning: Don’t skip the sea salt and vanilla. They’re small additions that make a huge difference in how balanced the dessert tastes.
Adding Granola Too Early: If you’re prepping these ahead, keep the granola separate and add it right before serving. Trust me on this.
My Tested Substitutions
For the Heavy Cream: You can use whipped coconut cream if you’re dairy-free. It works beautifully and adds a subtle coconut flavor. Just make sure you’re using full-fat coconut cream from a can, not coconut milk.
For the Greek Yogurt: Regular full-fat yogurt works fine, though it’ll be slightly less tangy. You could also use mascarpone if you want something richer.
For the Granola: Crushed shortbread cookies, toasted nuts, or even crushed graham crackers all work. I’ve even used crushed amaretti cookies for a slightly different flavor profile.
For Fresh Fruit: Honestly, any combination of fresh fruit works here. Raspberries, blueberries, peaches, or mangoes are all amazing. The ratio doesn’t have to be exact—use what you love and what’s in season.
For the Powdered Sugar: If you want to reduce sugar, use a bit less and taste as you go. You could also use honey instead, though you’ll need to adjust the amount since it’s sweeter than sugar.
How to Customize
The beauty of these dessert cups is that they’re endlessly customizable. Here’s how I think about it:
Going Tropical: Add coconut flakes, a splash of rum, and maybe some macadamia nuts. Use mostly pineapple with just a few strawberries for color.
Going Fancy: Use lemon curd, add candied lemon peel, and top with crushed shortbread instead of granola. Maybe add a tiny sprig of fresh mint.
Going Simple: Just fruit, cream, and a light sprinkle of granola. Sometimes simple is best.
Going Indulgent: Add a layer of chocolate mousse or chocolate ganache between the fruit and cream. Use chocolate granola on top.
Serving Ideas
I serve these cups in so many different ways depending on the occasion. For a casual family dinner, I make them in small mason jars and let everyone grab one from the fridge. For a dinner party, I use my nicest clear glasses and add a fancy garnish like candied fruit or a fresh mint leaf. They’re perfect for brunch—make them the night before and just add the granola in the morning. I’ve also brought them to potlucks in individual jars, and they’re always a hit because they’re portable and look impressive.
They’re also great for meal prepping if you’re the type who likes to have dessert ready to go. Make a batch on Sunday, keep the granola separate, and you’ve got dessert sorted for the week.
Meal Prep and Storage
These dessert cups keep well in the fridge for up to three days, though they’re best within 24 hours. Here’s my strategy:
Assemble the cups without the granola topping and store them covered in the fridge. Add the granola right before you eat them so it stays crunchy. If you want to prep the components separately, you can do that too—just store the fruit in one container, the cream in another, and the granola in a third. Assemble when you’re ready to eat.
These don’t freeze well because the texture of the cream gets weird, so just make them fresh or within a couple days of eating.
Nutritional Breakdown
Per serving (makes 4 servings):
- Calories: approximately 285
- Protein: 4g
- Carbohydrates: 32g
- Fat: 16g
- Fiber: 2g
These numbers are approximate and will vary based on the specific ingredients you use and portion sizes. If you’re tracking macros, feel free to adjust based on your granola choice and how much cream you use.
Final Thoughts
Honestly, these Strawberry & Pineapple Dessert Cups have become one of my favorite things to make when I want something that feels special without being complicated. There’s something really satisfying about layering fresh fruit and cream in a pretty cup and knowing that you made something delicious in about fifteen minutes.
I love that they’re flexible enough to work with whatever fruit you have on hand, whatever cream situation you’re dealing with, and whatever mood you’re in. Some days they’re simple and pure. Other days they’re dressed up with extra toppings and garnishes. Either way, they’re always a win.
I hope you make these soon and that they become a regular thing in your kitchen too. Let me know how they turn out—I genuinely love hearing from people who try my recipes. And if you want more ideas for fresh, no-fuss desserts, keep following along with what I’m creating. There’s always something good happening in my kitchen.
Happy cooking, friend.
—
Recipe Card
Strawberry & Pineapple Dessert Cups
Ingredients
Method
- Wash and hull strawberries, then cut them in half. If using fresh pineapple, peel, core, and cut into chunks. If using canned, drain well and pat dry with paper towels. Pour heavy cream into a bowl and whip with an electric mixer until soft peaks form (about 2-3 minutes). Gently fold in powdered sugar, vanilla extract, Greek yogurt, and sea salt. In clear glasses or small jars, layer: small spoonful of cream, layer of mixed strawberries and pineapple, more cream, another layer of fruit, final dollop of cream. Sprinkle granola or crushed cookies on top. Drizzle with honey if desired. Refrigerate for at least 30 minutes before serving. Best enjoyed within 24 hours.