Chocolate Meringue Pie Recipe
Chocolate Meringue Pie Recipe
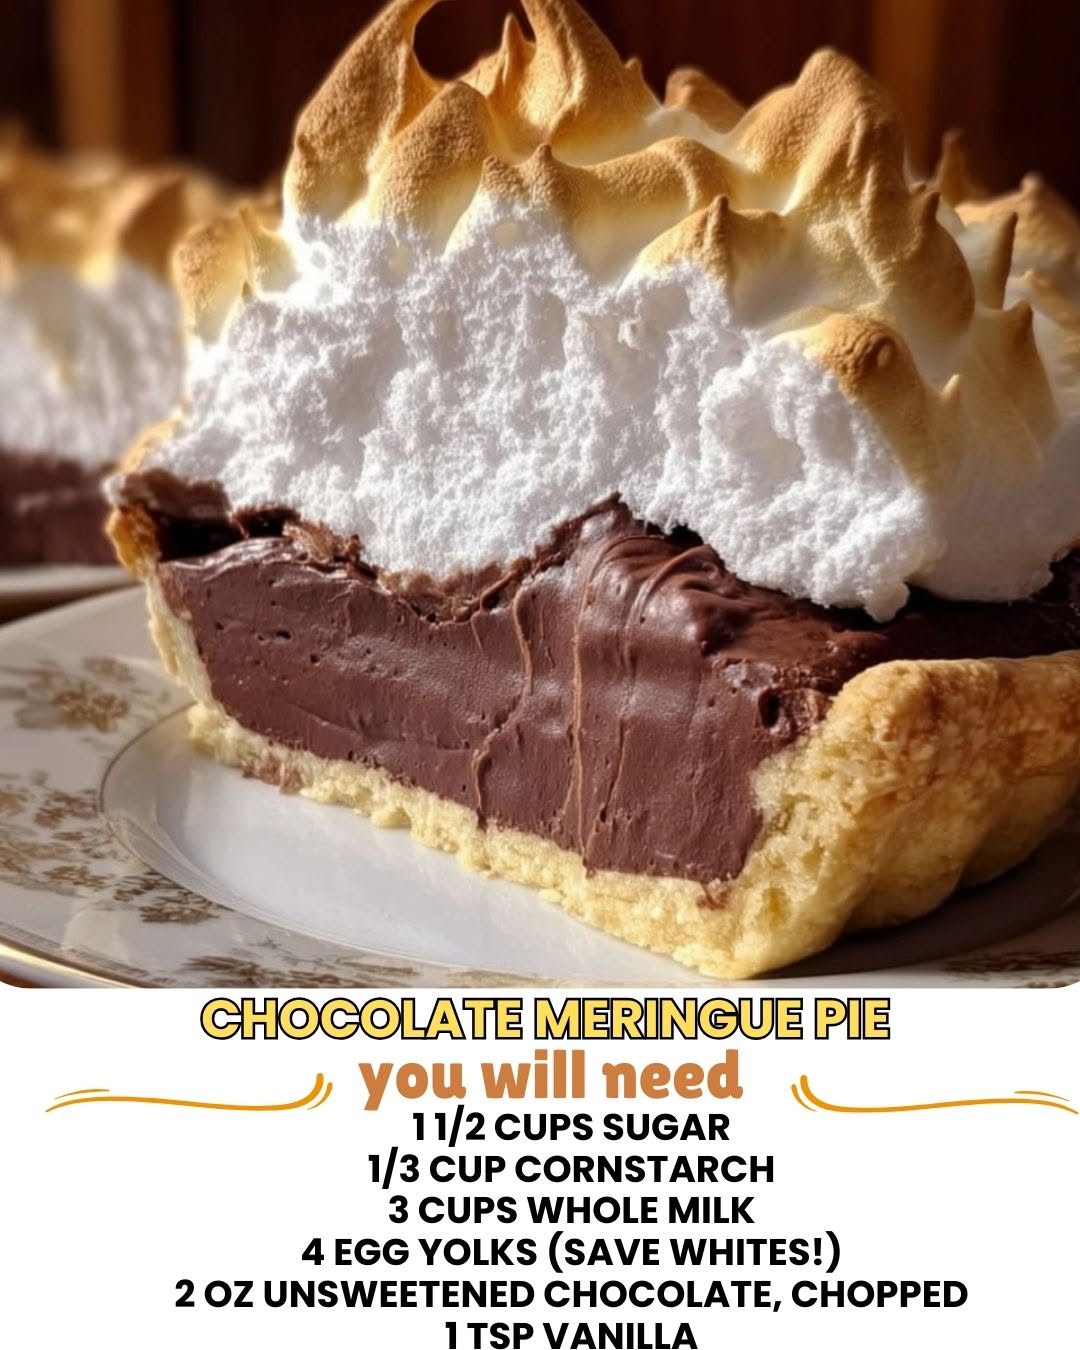
Chocolate Meringue Pie Recipe: A Showstopper That Actually Works
I have a confession: I was terrified of meringue. For years, I’d watch my grandmother whip egg whites into those glossy peaks and think, “There’s no way I’m pulling that off.” Then one rainy Saturday, I decided to stop being scared and just try it. And you know what? I made the most stunning chocolate meringue pie recipe I’d ever seen, and honestly, it wasn’t even that hard.
This chocolate meringue pie recipe has become my go-to when I want to impress people without spending all day in the kitchen. There’s something magical about bringing a pie to the table with those golden-brown meringue peaks catching the light, and then cutting into that silky chocolate filling. Your guests will lose their minds. The best part? Most of the work is straightforward, and I’m going to walk you through every single step so you feel confident the whole way.
This recipe is for anyone who loves chocolate, anyone who’s ever wanted to try meringue but felt intimidated, and anyone who just wants to feel like a total kitchen wizard. If that’s you, keep reading. I’ve tested this a hundred different ways, messed up plenty of times, and I’m here to make sure you don’t have to.
If you love this kind of recipe, follow me on HaileeRecipes on Pinterest for more cozy desserts and comfort food that actually tastes as good as it looks.
Why You’ll Love This Recipe
Let me be real with you: this chocolate meringue pie recipe checks every box. You get a buttery, crispy crust, a dense, fudgy chocolate filling that’s rich without being overwhelming, and a cloud of sweet meringue on top that’s crispy on the outside and marshmallowy on the inside.
The filling is made with real chocolate and cocoa powder, so it tastes like actual chocolate, not that waxy artificial stuff. The meringue is stable and doesn’t weep (that’s the watery liquid that sometimes pools under the peaks—we’re avoiding that). And the whole thing comes together in about an hour and a half, most of which is baking time where you can just sit and relax.
Plus, it’s a dessert that makes you look like you’ve got your life together. People will assume you spent three hours on this, and you can just smile mysteriously and not correct them.
Ingredients
- For the crust: 1 pre-made pie crust (or homemade if you’re feeling ambitious)
- For the filling: 1 cup granulated sugar
- For the filling: 1/3 cup unsweetened cocoa powder
- For the filling: 1/4 cup cornstarch
- For the filling: 1/4 teaspoon salt
- For the filling: 2 cups whole milk
- For the filling: 4 ounces semi-sweet or dark chocolate, chopped
- For the filling: 3 tablespoons unsalted butter
- For the filling: 2 teaspoons vanilla extract
- For the meringue: 3 large egg whites (room temperature—this matters)
- For the meringue: 1/4 teaspoon cream of tartar
- For the meringue: 6 tablespoons granulated sugar
- For the meringue: 1/2 teaspoon vanilla extract
Hailee’s Tip: Use room temperature egg whites for meringue. Cold eggs won’t whip up properly. I usually set mine on the counter for 15 minutes while I’m making the filling.
Hailee’s Tip: Don’t skip the cream of tartar. It stabilizes the meringue and helps prevent it from breaking down. You can find it in the spice aisle.
Hailee’s Tip: If you’re using a homemade crust, make sure it’s pre-baked and cooled before you add the filling. A soggy bottom crust is nobody’s friend.
Optional Add-Ins and Variations
This chocolate meringue pie recipe is honestly perfect as written, but I love playing with it too. Here are some ways to make it your own:
- Espresso chocolate version: Add 1 tablespoon of instant espresso powder to the cocoa mixture. It deepens the chocolate flavor without making it taste like coffee.
- Salted caramel drizzle: Drizzle some salted caramel over the chocolate filling before adding the meringue. Trust me on this.
- Mint chocolate: Add 1/2 teaspoon peppermint extract to the filling. It’s like eating a fancy thin mint.
- Boozy version: Stir 1 tablespoon of Kahlúa or rum into the filling after you remove it from heat. Adults love this.
- Extra chocolate: Use 5 ounces of chocolate instead of 4 if you’re a chocolate extremist like me.
Step-by-Step Method
Step 1: Preheat and prep. Get your oven to 350°F. If your pie crust isn’t already in a pie dish, get it there now. If it’s homemade, make sure it’s been pre-baked and cooled.
Step 2: Make the filling base. In a medium saucepan, whisk together the sugar, cocoa powder, cornstarch, and salt. This is important—do it slowly so you don’t get cocoa clouds everywhere. I learned that the hard way. Once it’s combined, pour in the milk slowly while whisking constantly. You want a smooth mixture with no lumps.
Step 3: Cook the filling. Put the saucepan over medium heat and stir constantly. This takes about 8 to 10 minutes. You’ll feel it thicken as you go. Once it reaches a gentle boil and looks like thick chocolate pudding, remove it from heat.
What I messed up: I used to walk away from this step, and the bottom would scorch. Stay there. Stir the whole time. It’s not boring, it’s meditative.
Step 4: Add chocolate and butter. Stir in the chopped chocolate, butter, and vanilla extract until everything is melted and silky. Taste it if you want—this filling is delicious.
Step 5: Pour into crust. Pour the filling into your pie crust. Smooth the top with a spatula. Let it cool for about 10 minutes while you make the meringue.
Step 6: Make the meringue. In a clean bowl (seriously, it has to be clean or the eggs won’t whip), add your room temperature egg whites and cream of tartar. Using an electric mixer, beat on medium-high speed until soft peaks form. This takes about 2 minutes. Soft peaks mean the peaks flop over when you lift the beaters.
Step 7: Add sugar to meringue. Gradually add the 6 tablespoons of sugar, one tablespoon at a time, beating for about 30 seconds between additions. This takes patience, but it’s worth it. Once all the sugar is in and you’ve beaten it for another minute or so, add the vanilla extract. You’re looking for stiff, glossy peaks now. When you lift the beaters, the peaks should stand straight up.
What I messed up: I used to dump all the sugar in at once. It doesn’t dissolve properly, and you end up with grainy meringue. Slow and steady wins the race here.
Step 8: Top the pie. Spread the meringue over the hot filling, making sure it touches the edges of the crust all the way around. This prevents it from shrinking. You can make it smooth or create little peaks with the back of a spoon—whatever makes you happy.
Step 9: Bake. Bake for 10 to 12 minutes, until the meringue is golden brown on the peaks. Don’t overbake or it’ll get tough and start to separate.
Step 10: Cool completely. This is the hardest part because it smells amazing and you want to eat it immediately. Let it cool on the counter for at least 2 hours, then refrigerate for at least 3 hours. I know, I know. But this allows the filling to set properly and the meringue to firm up. Cutting into a warm pie is a disaster.
Common Mistakes to Avoid
Weeping meringue: This is when liquid pools under the meringue. It happens when you don’t spread the meringue all the way to the edges of the crust, or when you overbake it. Make sure the meringue touches the crust everywhere, and pull it out at exactly 10 to 12 minutes.
Meringue that won’t whip: Your egg whites are probably cold or your bowl has a speck of yolk in it. Even a tiny bit of yolk will prevent whipping. Start over with clean equipment and room temperature eggs.
Grainy meringue: You added all the sugar at once instead of gradually. Next time, add it slowly and beat between additions.
Soggy crust: Pre-bake your crust if it’s homemade, or use a store-bought one that’s already baked. Don’t skip this step.
Runny filling: You didn’t cook it long enough. It needs to reach a gentle boil to thicken properly. If you catch this before pouring it into the crust, just put it back on the heat for another minute or two.
My Tested Substitutions
Egg white substitute: If you’re concerned about raw eggs or have allergies, use pasteurized egg whites. They whip up just as well. Look for them in the refrigerated section near the regular eggs.
Cocoa powder: Use natural cocoa powder, not Dutch-processed. They’re different, and Dutch-processed is darker and more intense. Natural cocoa is what you want here.
Chocolate: Any semi-sweet or dark chocolate works. I’ve used chocolate chips, chopped bars, and even melted chocolate. Just make sure it’s real chocolate, not chocolate-flavored coating.
Milk: Whole milk works best, but I’ve used 2% in a pinch. Don’t use skim—the filling won’t be as rich and creamy.
Butter: Unsalted is best so you can control the salt level, but salted butter works if that’s what you have. Just reduce the salt in the filling slightly.
How to Customize
Want to make this chocolate meringue pie recipe your own? Here’s how:
- Different crust: Use a graham cracker crust, a chocolate crust, or even a homemade pie dough. They all work beautifully.
- Flavor profile: Add a pinch of cinnamon or cayenne to the filling for depth. Add almond extract instead of vanilla for something different.
- Texture: Sprinkle chopped nuts, chocolate shavings, or crushed cookies on top of the meringue before baking.
- Sweetness level: If you like things less sweet, reduce the sugar in the filling by 2 tablespoons.
Serving Ideas
Serve this pie at room temperature or chilled—both are delicious. A slice pairs beautifully with a cup of coffee, a glass of cold milk, or even a glass of red wine if you’re feeling fancy.
Top individual slices with whipped cream, a drizzle of chocolate sauce, or a sprinkle of sea salt. Serve it alongside fresh berries for a pop of color and freshness. Or just eat it plain, because honestly, it doesn’t need anything else.
Meal Prep and Storage
This pie keeps beautifully in the refrigerator for up to 3 days. Cover it loosely with plastic wrap or aluminum foil—don’t seal it too tight or the meringue will get soggy.
You can make the filling a day ahead and keep it in an airtight container. Make the meringue and assemble the pie the day you want to serve it for the best texture.
This pie doesn’t freeze well, so I’d recommend making it fresh. But honestly, it’s so easy that making it fresh is not a hardship.
Nutritional Breakdown
Per serving (based on 8 servings):
- Calories: 385
- Protein: 4g
- Carbohydrates: 52g
- Fat: 18g
- Fiber: 2g
- Sugar: 42g
Keep in mind this is an estimate and can vary based on your specific ingredients and crust.
Final Thoughts
I’m so glad you’re here, and I’m excited for you to make this chocolate meringue pie recipe. Honestly, the first time I made it, I couldn’t believe how well it turned out. I kept waiting for something to go wrong, and it just… didn’t. That’s the thing about this pie—it’s forgiving, it’s stunning, and it tastes like you spent way more time on it than you actually did.
Meringue doesn’t have to be scary. You’ve got this. And if something goes a little sideways, you’ve still got a delicious chocolate pie. That’s a win in my book.
Let me know how it goes. I’d love to hear about it.
—
Chocolate Meringue Pie Recipe
Ingredients
Method
- Preheat oven to 350°F. Place pie crust in pie dish.
- In a medium saucepan, whisk together sugar, cocoa powder, cornstarch, and salt.
- Slowly pour in milk while whisking constantly until smooth.
- Place saucepan over medium heat and stir constantly for 8 to 10 minutes until mixture thickens and reaches a gentle boil.
- Remove from heat and stir in chopped chocolate, butter, and 2 teaspoons vanilla extract until melted and smooth.
- Pour filling into pie crust and smooth the top. Let cool for 10 minutes.
- In a clean bowl, beat egg whites and cream of tartar on medium-high speed until soft peaks form.
- Gradually add 6 tablespoons sugar, one tablespoon at a time, beating for 30 seconds between additions.
- Add 1/2 teaspoon vanilla extract and beat until stiff, glossy peaks form.
- Spread meringue over hot filling, making sure it touches the crust edges all the way around. Create peaks as desired.
- Bake for 10 to 12 minutes until meringue is golden brown on the peaks.
- Cool on counter for at least 2 hours, then refrigerate for at least 3 hours before serving.