Banana Chocolate Chip Bread
Banana Chocolate Chip Bread
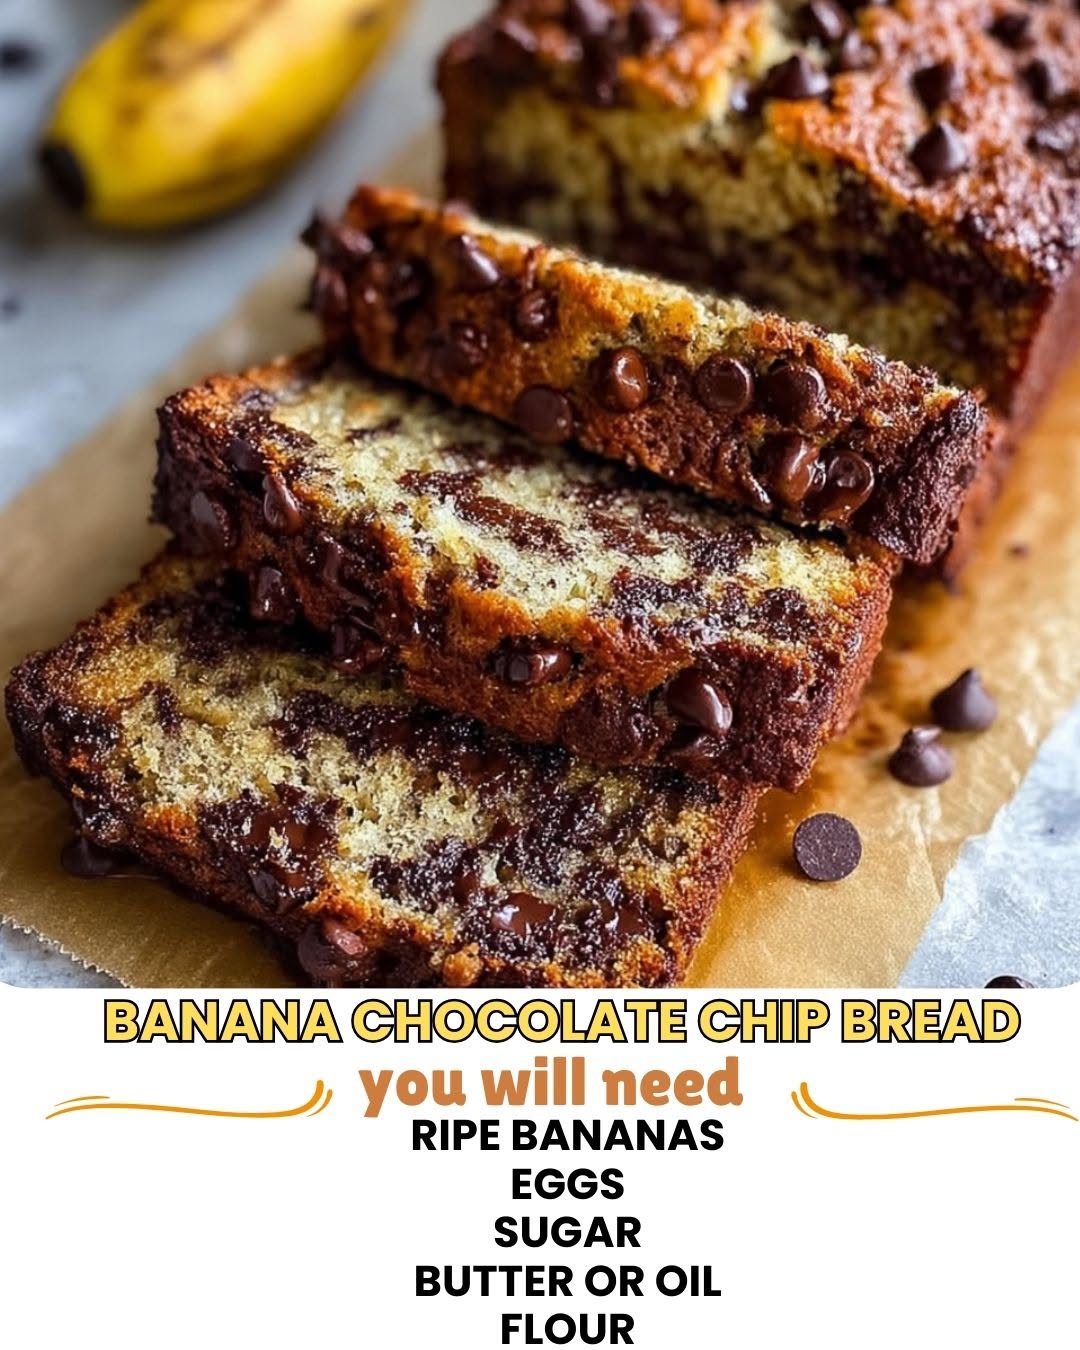
Banana Chocolate Chip Bread: A Cozy Kitchen Classic
I have this memory of standing in my mom’s kitchen on a rainy Sunday afternoon, watching her pull a golden loaf of banana chocolate chip bread from the oven. The smell was absolutely intoxicating—warm bananas, melting chocolate, a hint of vanilla. I was maybe eight years old, and I genuinely thought she’d performed actual magic. She let me break off a corner while it was still warm, and the chocolate chips were still soft enough to stretch. I remember thinking: this is what comfort feels like.
Fast forward about twenty years, and I’m still chasing that exact feeling. I’ve baked this recipe probably a hundred times now—when I’m stressed, when I have overripe bananas sitting on my counter judging me, when I want to give someone a gift that actually tastes like love. And I’ve learned a lot along the way. I’ve had dense loaves, dry loaves, loaves where the chocolate chips all sank to the bottom like they were staging a protest. But I’ve also perfected the version that actually delivers on that cozy promise.
Here’s what I love about banana chocolate chip bread: it’s foolproof enough for a beginner, but rewarding enough to keep you coming back. It’s the kind of recipe that makes your kitchen smell incredible without requiring you to be a pastry chef. It’s breakfast, it’s dessert, it’s the thing you bring to a potluck and people actually ask for the recipe. It’s also a lifesaver when you have those sad, spotty bananas that are past their prime for eating fresh. This bread is the answer to that problem.
Whether you’re a seasoned baker or someone who’s intimidated by the thought of measuring flour, I’m going to walk you through exactly how I make this. No mysterious steps, no fancy equipment, just honest-to-goodness banana chocolate chip bread that tastes like someone really cares about you. Follow me on HaileeRecipes on Pinterest for more cozy recipes like this one.
Why You’ll Love This Recipe
Let me be real with you: there are a lot of banana bread recipes out there. So why this one? Because I’ve tested it about a million times, and I know exactly what works.
- It’s actually moist. I use both oil and butter, plus a secret ingredient (sour cream) that keeps this bread tender without being gummy. I’ve had too many dry banana breads in my life, and I’m not about that.
- The chocolate is distributed evenly. I coat the chips in a tiny bit of flour before folding them in. This keeps them from all sinking to the bottom like they’re trying to escape.
- It doesn’t require fancy ingredients. You probably have everything in your kitchen right now. No almond flour, no weird extracts, no pressure.
- It comes together in about fifteen minutes of actual work. The oven does the heavy lifting.
- It freezes beautifully. Make a double batch and thank yourself later.
- It tastes even better the next day. The flavors settle and deepen. It’s one of those rare recipes that improves with time.
Ingredients
- 3 ripe bananas (about 1 cup mashed, roughly 350 grams)
- 1/2 cup unsalted butter, melted
- 1/3 cup neutral oil (vegetable or canola)
- 3/4 cup granulated sugar
- 2 large eggs, room temperature
- 1/3 cup sour cream or Greek yogurt
- 1 teaspoon vanilla extract
- 1 3/4 cups all-purpose flour
- 1 teaspoon baking soda
- 1/2 teaspoon salt
- 1 1/2 cups chocolate chips (semi-sweet or dark, whatever you prefer)
- 1 tablespoon all-purpose flour (for coating chips)
Hailee’s Tip: Use bananas that are really ripe—almost too ripe. They should have brown spots and be pretty soft. This is when they’re sweetest and easiest to mash. If your bananas are still a bit firm, you can microwave them for 30 seconds to soften them up.
Hailee’s Tip: Room temperature eggs mix into the batter more smoothly and create a better crumb. If you forget, just set your eggs in warm water for five minutes before cracking them.
Hailee’s Tip: Don’t skip the sour cream. I know it sounds odd in a sweet bread, but it adds moisture and a subtle tang that makes the banana flavor pop. If you don’t have sour cream, Greek yogurt works perfectly.
Optional Add-Ins and Variations
This is where you get to make the bread your own. I always say a good base recipe is like a blank canvas.
- Nuts: Walnuts or pecans are classic. Toast them lightly first for extra flavor. Use about 1/2 to 3/4 cup.
- Spices: A pinch of cinnamon (1/2 teaspoon) or nutmeg (1/4 teaspoon) adds warmth and depth.
- Sea salt: A sprinkle of fleur de sel on top before baking brings out the chocolate flavor.
- Espresso powder: Just 1/2 teaspoon makes the chocolate taste more intense and sophisticated.
- Coconut: Shredded unsweetened coconut (1/3 cup) is a fun addition if you’re feeling tropical.
- Brown butter: If you’re feeling fancy, brown your butter before adding it. It adds a nutty, complex flavor.
Step-by-Step Method
Step 1: Prep your pan and preheat. Preheat your oven to 350°F. Grease a standard 9×5-inch loaf pan really well with butter or cooking spray, or line it with parchment paper. I prefer parchment because it makes removal so much easier, and there’s zero chance of sticking.
Step 2: Mash those bananas. Peel your bananas and put them in a large mixing bowl. Mash them with a fork until they’re mostly smooth. You want some small chunks—this isn’t baby food. You’re aiming for roughly 1 cup of mashed banana.
Step 3: Mix the wet ingredients. Pour in your melted butter and oil. Add the sugar and stir until it’s combined and looks a bit sandy. This is where the sweetness comes from, so don’t skip this step. Then add your eggs one at a time, stirring well after each one. Add the sour cream and vanilla. Stir until everything is smooth and incorporated. This should take about two minutes of actual stirring.
What I Messed Up: I used to add all the eggs at once, and sometimes they wouldn’t incorporate smoothly. Adding them one at a time is a tiny extra step that makes a big difference.
Step 4: Combine dry ingredients. In a separate bowl, whisk together your flour, baking soda, and salt. I always whisk these together instead of just mixing them because it aerates the flour and helps distribute the leavening evenly. This is a small thing, but it matters.
Step 5: Combine wet and dry. Pour your dry ingredients into your wet ingredients. Fold them together gently with a spatula or wooden spoon. Don’t overmix. You want a batter that’s just combined—it’s okay if there are a few tiny flour streaks. Overmixing develops gluten, which makes the bread tough. We don’t want tough.
What I Messed Up: I used to beat this mixture like I was trying to win a boxing match. The bread came out dense and kind of sad. Gentle folding is your friend here.
Step 6: Coat and fold in the chocolate chips. Put your chocolate chips in a small bowl and sprinkle the tablespoon of flour over them. Toss them around until they’re lightly coated. This flour coating prevents them from sinking to the bottom. Then fold them into your batter gently.
Step 7: Pour and bake. Pour your batter into your prepared pan. Smooth the top with a spatula. Bake at 350°F for 55 to 65 minutes. The bread is done when a toothpick inserted into the center comes out with just a few moist crumbs—not completely clean, but not wet batter either. If the top is browning too quickly, you can tent it loosely with foil for the last 15 minutes.
Step 8: Cool properly. Let the bread cool in the pan for 15 minutes. Then turn it out onto a wire rack to cool completely. I know it’s tempting to cut into it right away, but letting it cool prevents it from falling apart and allows the crumb to set up properly.
Common Mistakes to Avoid
Using underripe bananas. If your bananas aren’t sweet enough, your bread won’t be either. There’s no amount of sugar that can fix the flavor of an underripe banana. Wait for those brown spots.
Overmixing the batter. This is the number one reason banana bread comes out dense. Mix just until combined. A few lumps are fine. Seriously.
Not coating the chocolate chips. If you skip this step, you’ll end up with a bread that has chocolate chips only on the bottom. It’s disappointing. The flour coating is magic.
Opening the oven door too early. I know the smell is incredible, but opening that door before 50 minutes have passed can cause the bread to sink in the middle. Resist the urge.
Baking in a dark pan. Dark pans conduct heat faster, which can cause the outside to brown too much before the inside is done. If you only have a dark pan, reduce the oven temperature by 25 degrees.
My Tested Substitutions
For the oil: You can use melted coconut oil instead of vegetable oil. It adds a subtle coconut flavor that’s lovely with chocolate. Use the same amount.
For the sour cream: Greek yogurt, regular yogurt, or even buttermilk work beautifully. Use the same amount. If using buttermilk, you might need to add an extra tablespoon of flour because it’s thinner.
For the chocolate chips: Use whatever chocolate you love. Dark chocolate is more sophisticated. Milk chocolate is more classic. White chocolate is fun if you’re feeling adventurous (though it’s not technically chocolate). You can also use chopped chocolate instead of chips.
For the all-purpose flour: You can substitute up to 1/4 cup with whole wheat flour for a nuttier flavor and more fiber. Any more than that and the bread gets dense. You can also use cake flour for a more tender crumb, but use slightly less because it’s more finely milled.
For the sugar: You can use brown sugar instead of white sugar for a deeper, more molasses-forward flavor. Use the same amount. The bread will be slightly more moist.
How to Customize
Make this recipe yours. Here’s how:
More chocolate lover? Use 2 cups of chocolate chips instead of 1.5. You can also drizzle melted chocolate over the top after it cools.
Want it less sweet? Reduce the sugar to 1/2 cup. The bread will be less sweet but still delicious. The bananas provide natural sweetness.
Prefer a denser, more cake-like crumb? Add an extra egg. This creates a richer, more substantial texture.
Want it more bread-like and less cake-like? Reduce the sugar to 1/2 cup and add an extra tablespoon of flour.
Making it for someone with nut allergies? Just skip the nuts. The bread is perfect on its own.
Serving Ideas
Banana chocolate chip bread is incredibly versatile. Here are my favorite ways to serve it:
- Warm with butter: Slice it while it’s still slightly warm and spread with softened butter. The butter melts into the bread and it’s absolutely heavenly.
- With morning coffee: It’s the perfect breakfast or brunch item. Pairs beautifully with black coffee or a latte.
- Toasted with cream cheese: Toast a slice and spread it with cream cheese. It’s like a breakfast sandwich, but better.
- As dessert: Serve it with a scoop of vanilla ice cream and you’ve got a simple, elegant dessert.
- With tea: Afternoon tea with a slice of banana chocolate chip bread is peak coziness.
- Crumbled over yogurt: Break up day-old bread and layer it with yogurt and granola for a parfait.
Meal Prep and Storage
Room temperature storage: Keep your cooled bread wrapped tightly in plastic wrap or in an airtight container at room temperature. It stays fresh and moist for about three days.
Refrigerator storage: If you want it to last longer, wrap it well and refrigerate for up to a week. The cold actually helps preserve it.
Freezing: This is where banana chocolate chip bread really shines. Wrap the cooled loaf tightly in plastic wrap, then in foil, and freeze for up to three months. Thaw at room temperature for about an hour, or slice it while frozen and toast the slices.
Freezing individual slices: I like to slice my bread before freezing. Wrap each slice individually in plastic wrap, then put them all in a freezer bag. Then you can grab one slice at a time and toast it. It’s perfect for those mornings when you want just one slice with your coffee.
Make-ahead tip: You can prepare the batter up to 24 hours ahead. Cover it and refrigerate, then pour it into your pan and bake as directed. The chocolate chips might absorb a tiny bit of moisture, but it’s honestly not noticeable.
Nutritional Breakdown
Here’s what you’re getting in each serving (this recipe makes about 10 slices):
- Calories: approximately 340
- Protein: 4g
- Carbohydrates: 45g
- Fat: 17g
- Fiber: 2g
Keep in mind that this is a treat, not a health food. But the bananas do provide potassium and fiber, and at least you know exactly what’s in it because you made it yourself.
Final Thoughts
I’ve shared this banana chocolate chip bread recipe with friends, family, coworkers, and basically anyone who’s willing to eat it. Every single time, someone asks for the recipe. And every single time, I’m so happy to share it because I know they’re going to have the same experience I did—that moment when they pull it from the oven and the whole kitchen smells like comfort.
Baking doesn’t have to be complicated or intimidating. Sometimes the best recipes are the simplest ones, made with ingredients you probably already have, and baked with a little bit of care and attention. This is one of those recipes. It’s forgiving, it’s delicious, and it makes your home smell incredible.
I hope you make this. I hope it becomes a staple in your kitchen like it has in mine. And I hope that someday, someone you love will walk into your kitchen while it’s baking and have that same magical feeling I did all those years ago in my mom’s kitchen.
Happy baking, friend. I can’t wait to hear how it turns out.
—
Banana Chocolate Chip Bread
Ingredients
Method
- Step 1: Prep your pan and preheat. Preheat your oven to 350°F. Grease a standard 9x5-inch loaf pan really well with butter or cooking spray, or line it with parchment paper. I prefer parchment because it makes removal so much easier, and there's zero chance of sticking. Step 2: Mash those bananas. Peel your bananas and put them in a large mixing bowl. Mash them with a fork until they're mostly smooth. You want some small chunks—this isn't baby food. You're aiming for roughly 1 cup of mashed banana. Step 3: Mix the wet ingredients. Pour in your melted butter and oil. Add the sugar and stir until it's combined and looks a bit sandy. This is where the sweetness comes from, so don't skip this step. Then add your eggs one at a time, stirring well after each one. Add the sour cream and vanilla. Stir until everything is smooth and incorporated. This should take about two minutes of actual stirring. What I Messed Up: I used to add all the eggs at once, and sometimes they wouldn't incorporate smoothly. Adding them one at a time is a tiny extra step that makes a big difference. Step 4: Combine dry ingredients. In a separate bowl, whisk together your flour, baking soda, and salt. I always whisk these together instead of just mixing them because it aerates the flour and helps distribute the leavening evenly. This is a small thing, but it matters. Step 5: Combine wet and dry. Pour your dry ingredients into your wet ingredients. Fold them together gently with a spatula or wooden spoon. Don't overmix. You want a batter that's just combined—it's okay if there are a few tiny flour streaks. Overmixing develops gluten, which makes the bread tough. We don't want tough. What I Messed Up: I used to beat this mixture like I was trying to win a boxing match. The bread came out dense and kind of sad. Gentle folding is your friend here. Step 6: Coat and fold in the chocolate chips. Put your chocolate chips in a small bowl and sprinkle the tablespoon of flour over them. Toss them around until they're lightly coated. This flour coating prevents them from sinking to the bottom. Then fold them into your batter gently. Step 7: Pour and bake. Pour your batter into your prepared pan. Smooth the top with a spatula. Bake at 350°F for 55 to 65 minutes. The bread is done when a toothpick inserted into the center comes out with just a few moist crumbs—not completely clean, but not wet batter either. If the top is browning too quickly, you can tent it loosely with foil for the last 15 minutes. Step 8: Cool properly. Let the bread cool in the pan for 15 minutes. Then turn it out onto a wire rack to cool completely. I know it's tempting to cut into it right away, but letting it cool prevents it from falling apart and allows the crumb to set up properly.