S’mores Cookie Bars
S'mores Cookie Bars
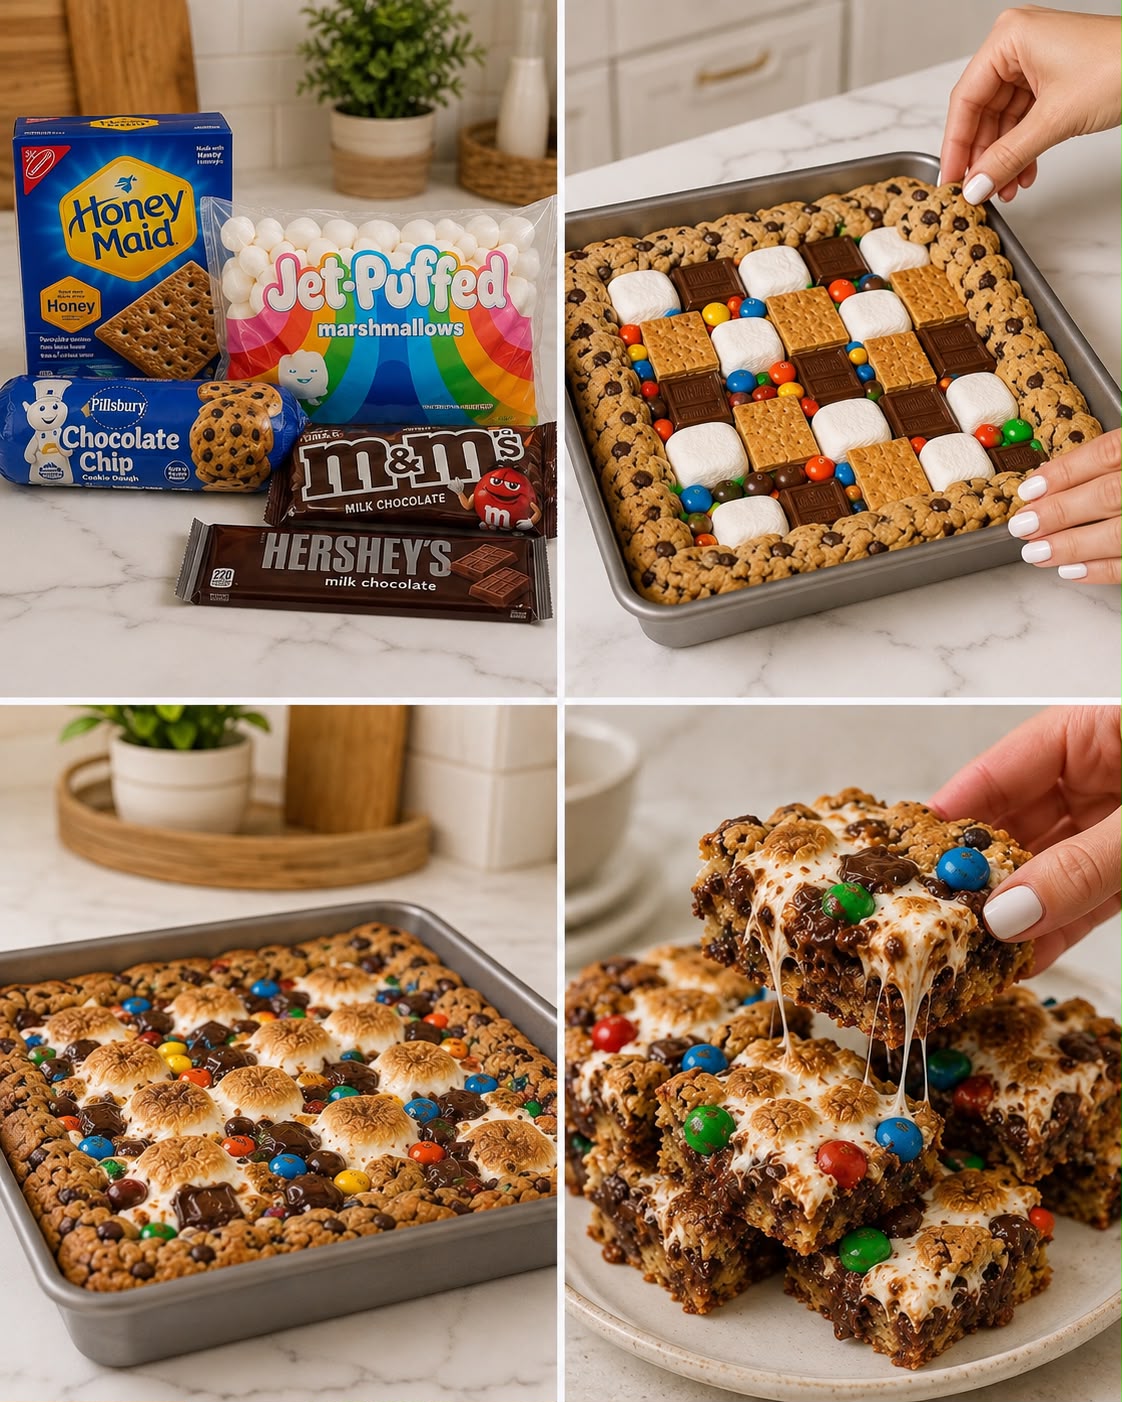
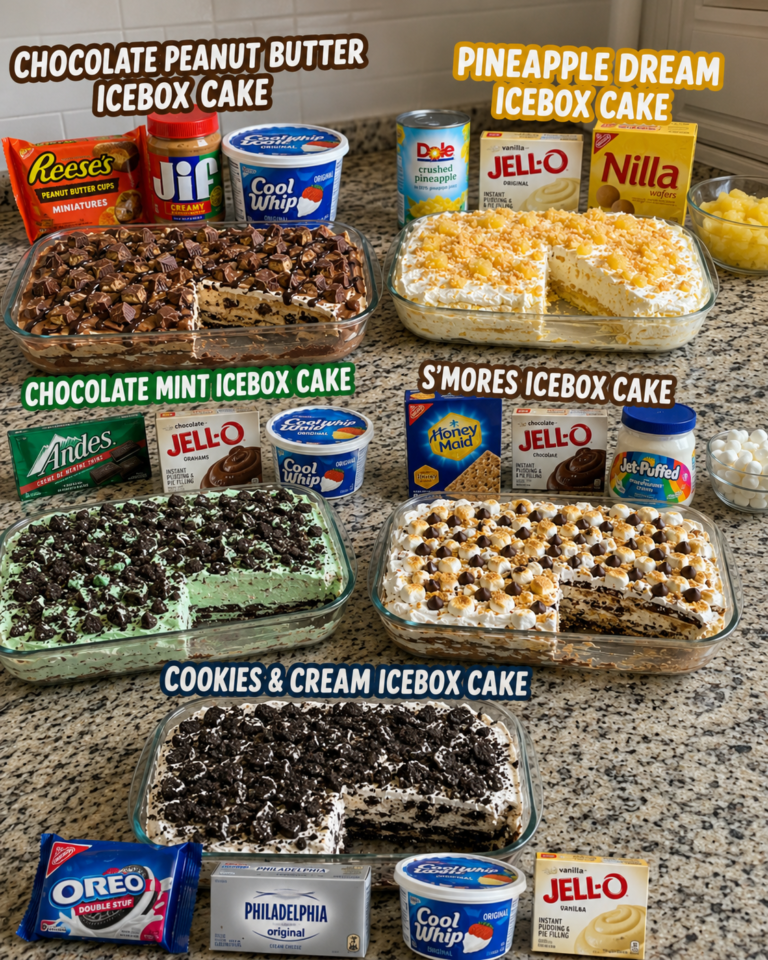
If you are looking for a dessert that captures the nostalgic essence of a campfire treat without leaving your kitchen, these S’mores Cookie Bars are the ideal solution. This dessert combines the chewy, buttery texture of chocolate chip cookie dough with the gooey sweetness of toasted marshmallows and rich milk chocolate. The result is a dense, indulgent bar that offers a perfect balance of textures: a soft, cake-like base, a creamy middle layer, and a crunchy, colorful topping. These bars are particularly useful for potlucks, holiday gatherings, or when you need a quick, crowd-pleasing sweet treat that requires minimal effort to prepare. By using ready-made cookie dough, the recipe eliminates the need for creaming butter and sugar, making it accessible for bakers of all skill levels while still delivering a homemade taste. The layers meld together during baking to create a unified flavor profile that feels both familiar and exciting.
Follow Hailee Recipes on Pinterest for more easy-to-follow desserts and family-friendly ideas.
Why This Recipe Works
The success of this dessert lies in its strategic use of pre-made components to achieve complex flavors with minimal labor. Traditional s’mores require roasting marshmallows over an open flame, which can be unpredictable and messy. This baked version replicates that toasted effect by placing marshmallows directly into the hot oven, where they puff up and develop a golden-brown crust without the risk of burning. Using Pillsbury Chocolate Chip Cookie Dough as the base ensures a consistent texture every time; the dough provides a sturdy yet tender foundation that holds the weight of the toppings without becoming soggy. The inclusion of M&M’s Milk Chocolate candies adds a delightful crunch and bursts of color, while the Hershey’s milk chocolate squares melt into the warm bars, creating pockets of intense chocolate flavor. This method simplifies the assembly process significantly, allowing the baker to focus on the final presentation rather than measuring dry ingredients or mixing wet ones from scratch.
Ingredients
To make these bars, you will need a specific set of core ingredients that work together to create the signature s’mores experience. The quantities below are calibrated for a standard 9×13 inch baking pan, ensuring the bars are thick enough to hold their shape but not so tall that the center remains undercooked.
- Honey Maid Graham Cracker Crumbs: You will need approximately 1 ½ cups of fine crumbs. If you do not have pre-crushed graham crackers, you can crush whole sheets in a food processor or place them in a sealed bag and crush them with a rolling pin until they resemble coarse sand.
- Jet-Puffed Marshmallows: A full 10-ounce bag (about 40 large marshmallows) is required to cover the surface of the cookie dough evenly. These should be standard size marshmallows to ensure they toast uniformly.
- Pillsbury Chocolate Chip Cookie Dough: One standard tube (16.5 ounces) of refrigerated chocolate chip cookie dough serves as the primary base. Ensure the dough is at room temperature before spreading it to make it easier to handle.
- M&M’s Milk Chocolate Candies: One 10.5-ounce bag is needed for the topping. These add the necessary snap and visual appeal to the finished product.
- Hershey’s Milk Chocolate Bars: Two standard 1.55-ounce bars, broken into pieces, are essential for the chocolate layer. Breaking them by hand allows for irregular chunks that melt beautifully into the warm dough.
How To Make S’mores Cookie Bars
- Prepare the Pan and Oven: Preheat your oven to 350°F (175°C). Line a 9×13 inch baking pan with aluminum foil, leaving an overhang on two opposite sides for easy removal later. Lightly grease the foil with cooking spray or butter to prevent sticking. This step is crucial for ensuring the bars can be lifted out cleanly once cooled.
- Create the Base Layer: Open the tube of Pillsbury Chocolate Chip Cookie Dough. Press the dough firmly and evenly into the bottom of the prepared pan. Use your fingers or the back of a spoon to spread it to the edges, creating a uniform layer about half an inch thick. Do not press too hard, or the bars may become dense; aim for a gentle, even distribution.
- Add the Chocolate Layers: Break the two Hershey’s Milk Chocolate bars into small, bite-sized pieces. Scatter these pieces evenly over the raw cookie dough. Next, take the M&M’s Milk Chocolate candies and sprinkle them generously over the chocolate squares. The combination of melted chocolate and candy-coated chocolates will create a rich, multi-textured filling.
- Top with Marshmallows: Arrange the Jet-Puffed marshmallows in a single, tight layer over the chocolate and candy mixture. You want to cover the entire surface completely, leaving no gaps where the cookie dough might burn. Gently press them down just enough so they adhere to the chocolate layer, but do not flatten them entirely, as they need room to expand in the oven.
- Bake Until Golden: Place the pan in the center rack of the preheated oven. Bake for 20 to 25 minutes. Watch closely toward the end of the baking time; the marshmallows should be puffed and lightly golden brown on top, and the edges of the cookie dough should be set. Avoid overbaking, as the marshmallows can turn dark and bitter if left too long.
- Cool Completely: Remove the pan from the oven and place it on a wire cooling rack. Allow the bars to cool completely in the pan, which usually takes about one hour. This resting period is vital because the chocolate and marshmallow layers are extremely molten when fresh out of the oven and will not hold their shape if cut immediately.
Doneness And Troubleshooting
Determining when the bars are perfectly baked relies on visual cues rather than a timer alone. The most important indicator is the color of the marshmallows. They should transition from white to a soft, toasted tan. If they remain stark white, the bars likely need another two to three minutes. Conversely, if they are deep brown, they have been overbaked. The edges of the cookie dough should also look set and slightly pulled away from the sides of the pan. If the center looks overly liquid or jiggles excessively when you gently shake the pan, give it a few more minutes. However, remember that the residual heat will continue to cook the center slightly after removal, so it is better to err on the side of slightly underdone than overdone.
A common issue is uneven toasting. If your oven has hot spots, you may notice some marshmallows browning faster than others. Rotating the pan halfway through the baking time can help mitigate this. Another potential problem is the marshmallows sliding off the chocolate layer. This usually happens if the chocolate hasn’t started to melt enough to act as glue. Ensuring the chocolate pieces are distributed evenly and pressing the marshmallows down slightly before baking helps anchor them in place.
Substitutions And Variations
While the original recipe relies on specific brand-name items for consistency, there are ways to adapt this dish to suit different dietary needs or preferences. For those who prefer a gluten-free option, you can substitute the Honey Maid graham cracker crumbs with a certified gluten-free graham cracker brand or a gluten-free oat flour blend. Note that the texture may be slightly different, as gluten-free flours often lack the binding properties of wheat-based products.
If you wish to vary the chocolate flavor, you can swap the milk chocolate bars for semi-sweet or dark chocolate squares. This will reduce the overall sweetness and provide a richer, more sophisticated chocolate taste that balances the sugary marshmallows. Similarly, swapping the M&M’s for peanut M&M’s or pretzel M&M’s introduces new flavor profiles, such as saltiness or nuttiness, which can elevate the dessert. For a dairy-free version, seek out dairy-free chocolate bars and marshmallows, though be aware that the melting properties of dairy-free chocolate can differ, potentially resulting in a less smooth texture.
Serving Suggestions
These bars are best served at room temperature, where the textures are most distinct. Once cooled, lift the entire block out of the pan using the foil overhang and place it on a cutting board. Use a sharp knife dipped in hot water and wiped dry between cuts to get clean slices. Dusting the tops with a little powdered sugar or sea salt flakes just before serving can enhance the visual appeal and add a touch of elegance. They pair wonderfully with a cold glass of milk, a cup of coffee, or a scoop of vanilla ice cream for a deconstructed s’mores sundae effect. Because the bars are dense and sweet, they are best enjoyed in smaller portions, perhaps cut into 24 squares for a party setting.
Storage And Reheating
Proper storage is key to maintaining the freshness of these bars. Once completely cooled, store them in an airtight container at room temperature for up to three days. Place a sheet of parchment paper between layers if you need to stack them to prevent the marshmallows from sticking together. If you live in a very humid environment, storing them in the refrigerator is recommended to prevent the chocolate from blooming or the marshmallows from becoming sticky, though this may firm up the cookie dough slightly.
For longer storage, you can freeze the bars. Wrap individual bars tightly in plastic wrap and then place them in a freezer-safe bag or container. They can be frozen for up to two months. To serve, thaw them overnight in the refrigerator or at room temperature. If you prefer warm bars, you can microwave a single serving for 10 to 15 seconds to soften the chocolate and marshmallow, but be careful not to overheat, as the marshmallows can become rubbery. Always check the internal temperature if reheating multiple bars to ensure they are warmed through safely.
This recipe offers a reliable way to enjoy the classic flavors of s’mores year-round, regardless of the weather outside. By following these steps and respecting the timing, you will produce a delicious dessert that is sure to be a favorite among friends and family.
S'mores Cookie Bars
Ingredients
Method
- Preheat oven to 350°F (175°C) and line a 9x13 inch pan with foil.
- Press the cookie dough evenly into the bottom of the prepared pan.
- Scatter broken chocolate bars and M&M's over the dough.
- Top with a single layer of marshmallows.
- Bake for 20-25 minutes until marshmallows are golden.
- Cool completely before slicing.